Pioneer DJM-300S Operating Instructions
Pioneer DJM-300S Manual
 |
View all Pioneer DJM-300S manuals
Add to My Manuals
Save this manual to your list of manuals |
Pioneer DJM-300S manual content summary:
- Pioneer DJM-300S | Operating Instructions - Page 1
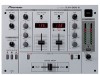
DJ MIXER TABLE DE MIXAGE DJM-300 DJM-300-S Operating Instructions Mode d'emploi English Français Thank you for buying this Pioneer product. Please read through these operating instructions so you will know how to operate your model properly. After you have finished reading the instructions, put - Pioneer DJM-300S | Operating Instructions - Page 2
SERVICEABLE PARTS INSIDE. REFER SERVICING TO QUALIFIED SERVICE PERSONNEL. The exclamation point within an equilateral triangle is intended to alert the user to the presence of important operating and maintenance (servicing) instructions of the mast and supporting structure, grounding of the - Pioneer DJM-300S | Operating Instructions - Page 3
to comply with the limits for a Class B digital device, pursuant to Part 15 of the FCC Rules. These limits are designed to provide reasonable protection energy and, if not installed and used in accordance with the instructions, may cause harmful interference to radio communications. However, there is - Pioneer DJM-300S | Operating Instructions - Page 4
of Input Equipment 6 2. Connection of Outputs 7 NAME AND FUNCTION OF PARTS 8 MEASURING BPM 12 USING THE FADER START FUNCTION 14 Starting the Cross Fader 14 Starting the Channel fader 14 TROUBLESHOOTING 16 SPECIFICATIONS 18 TABLE DES MATIERES PRECAUTIONS CONCERNANT LA MANIPULATION - Pioneer DJM-300S | Operating Instructions - Page 5
CHECKING ACCESSORIES • Operating instructions CONTROLE DES ACCESSOIRES • Mode d'emploi FEATURES which is selected using the cross fader switch. (This function can be used only when the Pioneer CD player CDJ-500 series is connected.) Allocation Monitor Enables channel inputs and master outputs to - Pioneer DJM-300S | Operating Instructions - Page 6
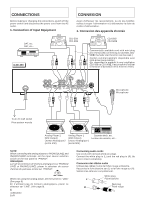
la fiche du cordon d'alimentation. 1. Connexion des appareils d'entrée DAT, etc. DAT, etc... CD2 CDJ-500/ CDJ-500 CD1 CDJ-500/ CDJ-500 DJM-300 L R L R L R Commercially available cord with mini plug (no resistor) (By connecting to CDJ-500, CDJ500 , the fader start function can be used.) Cordon - Pioneer DJM-300S | Operating Instructions - Page 7
CONNECTIONS 2. Connection of Outputs Headphone Casque d'écoute CONNEXION 2. Connexion des sorties DJM-300 Stereo Amplifier Amplificateur Stereo Cassette Deck (For recording) Lecteur de Cassettes (Pour les enregistrements) R L L R L L L L SIGNAL L L GND R 1 MASTER OUT R 2 LINE R PHONO - Pioneer DJM-300S | Operating Instructions - Page 8
NAME AND FUNCTION OF PARTS Control panel 2 and 3 shows the rear view, while 9 shows the frontale. 3 SIGNAL GND 4 5 4A 4B MIC MIC LEVEL TRIM CH-1 INPUT SELECTOR PHONO 1 / LINE 1 DJ MIXER DJM-300 CH-2 INPUT SELECTOR PHONO 2 / LINE 2 TRIM POWER -∞ 0dB MIC EQ -∞ 0dB HI CD 1 AUTO BPM - Pioneer DJM-300S | Operating Instructions - Page 9
NAME AND FUNCTION OF PARTS 2 Rear Panel Input Source Selection Switch Used for selecting the device connected to PHONO 1/LINE 1 and PHONO 2/LINE 2 input terminals. PHONO: Analog player (MM output) - Pioneer DJM-300S | Operating Instructions - Page 10
NAME AND FUNCTION OF PARTS 4B Channel Fader Volume Used for adjusting the volume of CH1 to CH2. 5 Power Supply Switch (POWER) Turns ON/OFF the power of this unit. - Pioneer DJM-300S | Operating Instructions - Page 11
NAME AND FUNCTION OF PARTS 7B Cross Fader Switch (CH./CROSS) CH.: Select when mixing sounds using the channel fader volume. (Direct mix.) When the fader start switch is ON, - Pioneer DJM-300S | Operating Instructions - Page 12
calculates, using a computer, the original BPM of the song required by DJs and displays it digitally. This allows the BPM to now be checked not comme par le passé, mais également visuellement, ce qui offre la possibilité de mixer plus rapidement et plus aisément des mélodies de tempos différents. Le - Pioneer DJM-300S | Operating Instructions - Page 13
USING THE EFFECT FUNCTION 3 Adjust the play tempo (speed) using the player of CH1 and CH2 (Eg. CD player). UTILISATION DE LA FONCTION D'EFFET 3 Régler le tempo de lecture (la vitesse) en utilisant le lecteur CH1 et CH2 (Lecteur CD par exemple). Display when BPM of CH1 (126) and BPM of CH2 (126) - Pioneer DJM-300S | Operating Instructions - Page 14
Commande par curseur de volume croisé Fader Start Play By increasing the mixer fader control, the pause of the player will be released and the to the cue point (back cue), sampler playing can also be performed. (DJM-300 fader start play can be performed even when combined with CDJ-500 and CDJ- - Pioneer DJM-300S | Operating Instructions - Page 15
USING THE FADER START FUNCTION Starting the Cross Fader 1 Set the cross fader switch to CROSS. 2 Turn on the fader start switch (CH-1 or CH-2) of the channel connected to the player to be controlled. 3 Move the cross fader fully to the opposite side of the channel to be started. (In the example, - Pioneer DJM-300S | Operating Instructions - Page 16
If the trouble cannot be rectified even after exercising the checks listed below, ask your nearest PIONEER authorized service center or inserted, the unit will not work correctly. NOTES: • Do not touch the internal parts of the unit or put your hand inside the unit, as this may cause injuries - Pioneer DJM-300S | Operating Instructions - Page 17
autres appareils électriques utilisés en méme temps. Si le problème ne peut pas être résolu, s'adresser au centre de service ou au concessionnaire PIONEER le plus proche. Symptôme Cause L'alimentation électrique • Le câble d'alimentation n'est pas branché. ne s'enclenche pas. Remède • Raccordez - Pioneer DJM-300S | Operating Instructions - Page 18
to +35 °C (41ºF to 95ºF) Operating humidity 5 % to 85 % External dimensions ..... 308 (W) × 220 (D) × 107.4 (H) mm (12-1/8 (W) x 8-11/16 (D) x 4-1/4 (H) in.) Weight 3.5 kg (7 lb 12 oz) Accessories • Operating instructions 1 NOTE: Specifications and the design are subject to possible modifications - Pioneer DJM-300S | Operating Instructions - Page 19
de fonctionnement 5°C ~ +35°C Degré d'humidité en fonctionnement 5% ~ 85% Dimensions extérieures .. 308 (L) × 220 (P) × 107,4 (H) mm Poids 3,5 pour y apporter des améliorations. Publication de Pioneer Electronic Corporation. © 1996 Pioneer Electronic Corporation. Tous droits de reproduction et de - Pioneer DJM-300S | Operating Instructions - Page 20
locate the nearest Pioneer Authorized Independent Service Company, or if you wish to purchase replacement parts, operating instructions, service manuals, or accessories, vous communiquer avec le Service de Clientèle de Pioneer: Pioneer électroniques du Canada, Inc. 300 Allstate Parkway Markham, ON
-
 1
1 -
 2
2 -
 3
3 -
 4
4 -
 5
5 -
 6
6 -
 7
7 -
8
-
9
-
10
-
11
-
12
-
13
-
14
-
15
-
16
-
17
-
18
-
19
-
20
 |
 |
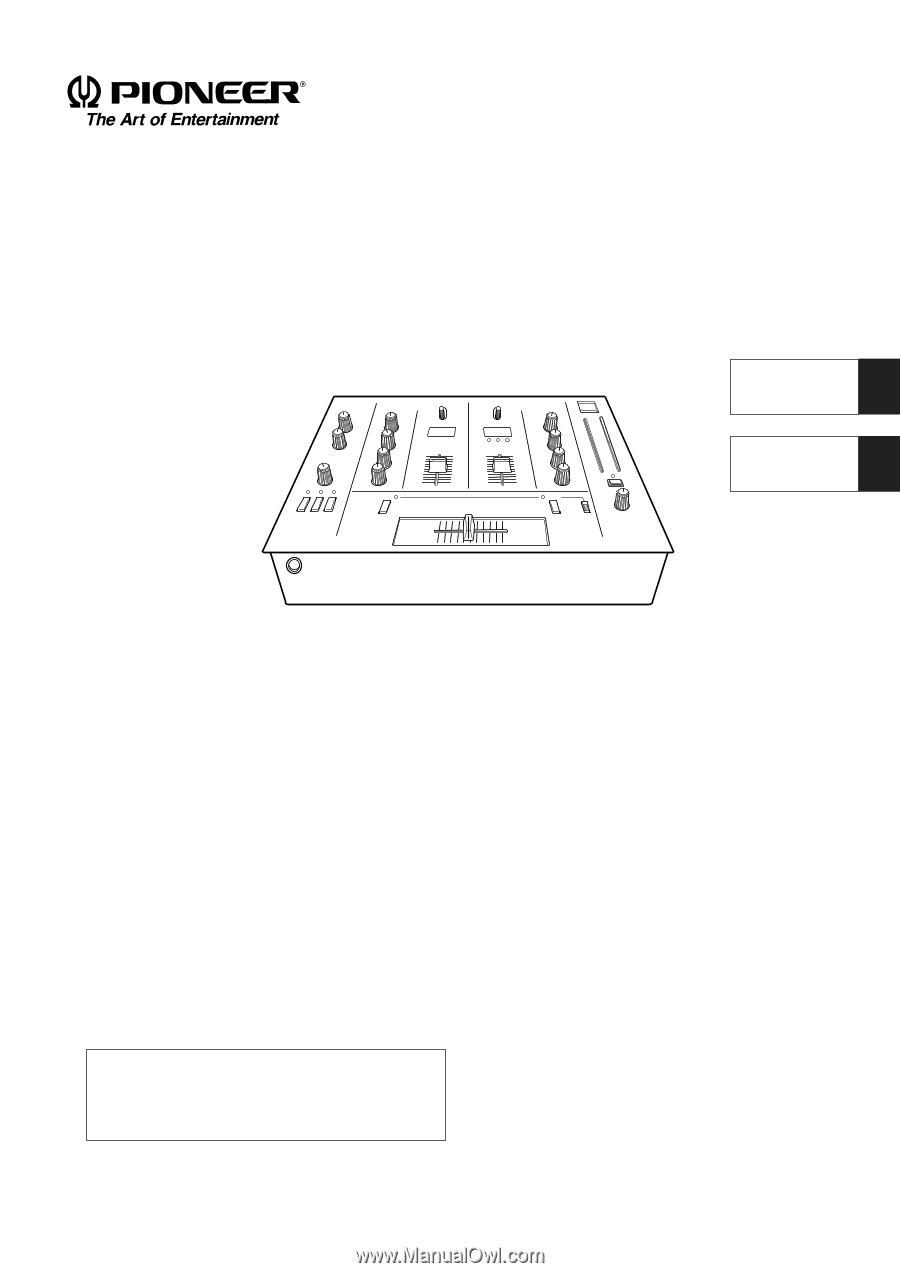
Operating Instructions
Mode d'emploi
DJ MIXER
TABLE DE MIXAGE
English
Français
Thank you for buying this Pioneer product.
Please read through these operating instructions so you
will know how to operate your model properly.
After you have finished reading the instructions, put them
away in a safe place for future reference.
Nous vous remercions pour cet achat d'un produit PIO-
NEER.
Nous vous demandons de lire soigneusement ce mode
d'emploi; vous serez ainsi à même de faire correctement
fonctionner l'appareil.
Après avoir bien lu le mode d'emploi, le ranger dans un
endroit sûr pour pouvoir s'y référer ultérieurement.
WARNING:
TO PREVENT FIRE OR SHOCK HAZARD, DO
NOT EXPOSE THIS APPLIANCE TO RAIN OR MOISTURE.
CAUTION:
TO PREVENT ELECTRIC SHOCK DO NOT
USE THIS (POLARIZED) PLUG WITH AN EXTENSION CORD,
RECEPTACLE OR OTHER OUTLET UNLESS THE BLADES
CAN BE FULLY INSERTED TO PREVENT BLADE EXPOSURE.
IMPORTANT NOTICE
The serial number for this equipment is located on the
rear panel. Please write this serial number on your en-
closed warranty card and keep it in a secure area. This is
for your security.
CAUTION:
This product satisfies FCC regulations when
shielded cables and connectors are used to connect the unit to
other equipment. To prevent electromagnetic interference with
electric appliances such as radios and televisions, use shielded
cables and connectors for connections.
ATTENTION:
AFIN DE PREVENIR TOURS RISQUES DE
CHOC ELECTRIQUE OU DE DEBUT D'ENCENDIE, NE PAS EXPO-
SER CET APPAREIL A L'HUMIDITE OU A LA PLUIE.
ATTENTION:
POUR PREVENIR LES CHOCS
ELECTRIQUES NE PAS UTILISER CETTE FICHE POLARISEE
AVEC UN PROLONGATEUR, UNE PRISE DE COURANT OU
UNE AUTRE SORTIE DE COURANT, SAUF SI LES LAMES
PEUVENT ETRE INSEREES A FOND SANS EN LAISSER
AUCUNE PARTIE A DECOUVERT.
REMARQUE IMPORTANTE
Le numéro de série de cet appareil est inscrit sur le
panneau arrière. Veuillez noter ce numéro sur la carte de
garantie qui accompagne le lecteur et conserver celle-ci
en lieu sûr. Cette précaution peut être utile en cas de vol.
DJM-300
DJM-300-S