Pioneer DJM-900SRT Owners Manual - Page 25
Checking the latest information on the, driver software - serato dj mixer
 |
View all Pioneer DJM-900SRT manuals
Add to My Manuals
Save this manual to your list of manuals |
Page 25 highlights
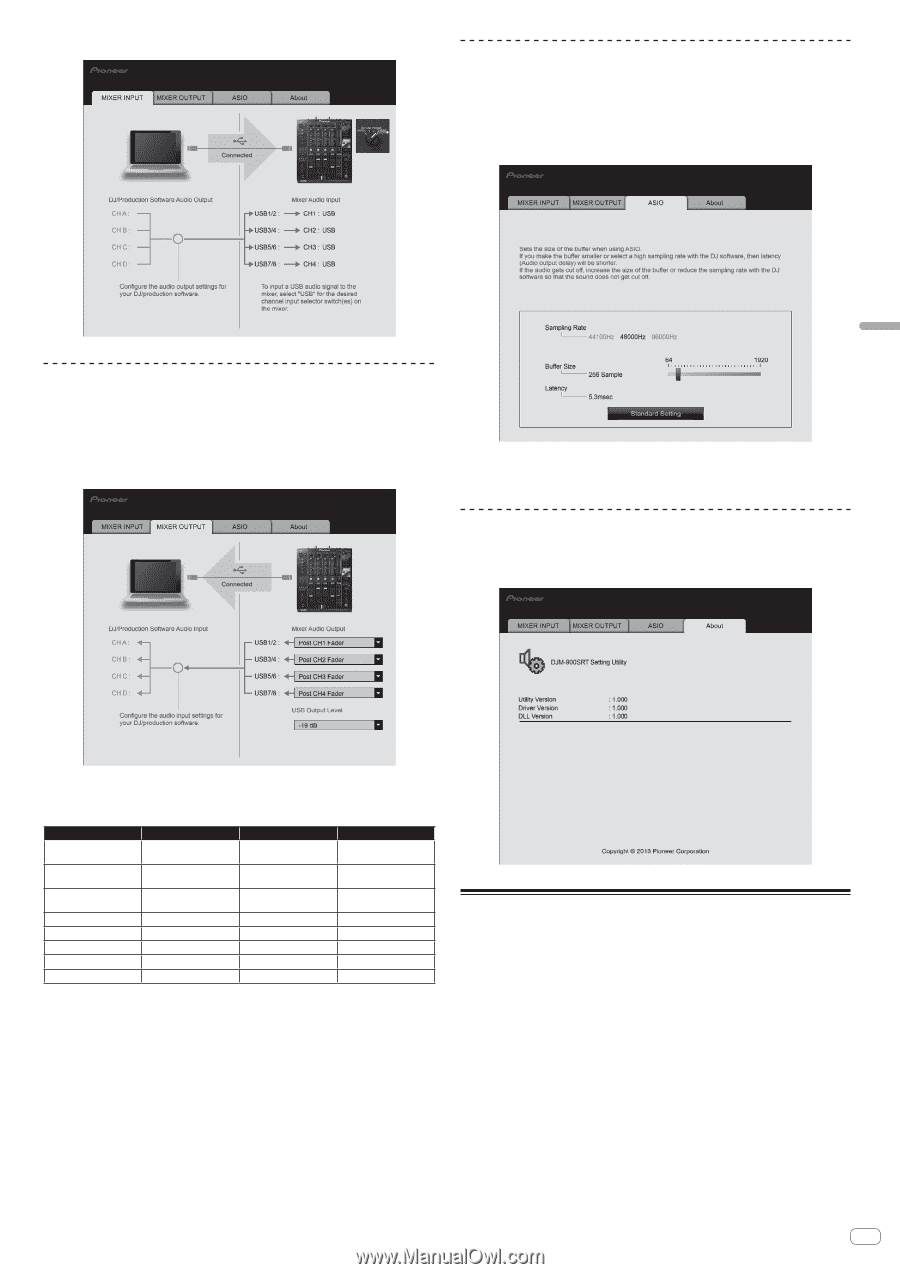
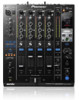
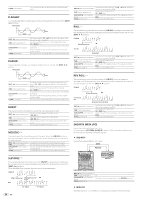
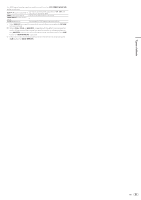
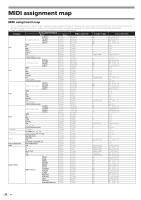
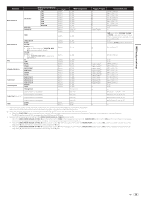
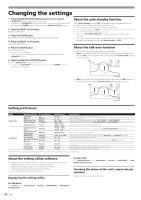
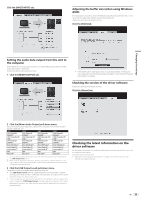
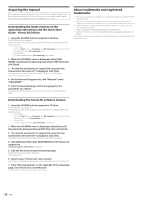
Click the [MIXER INPUT] tab. Adjusting the buffer size (when using Windows ASIO) If an application using this unit as the default audio device (DJ software, etc.) is running, quit that application before adjusting the buffer size. Display the setting utility before starting. Click the [ASIO] tab. Changing the settings Setting the audio data output from this unit to the computer When Serato DJ is running and using this unit as the default audio device, set the audio data output in Serato DJ. Display the setting utility before starting. 1 Click the [MIXER OUTPUT] tab. ! If the buffer size is made large, drops in audio data (breaks in the sound) occur less easily, but the time lag due to the delay in the transfer of the audio data (latency) increases. Checking the version of the driver software Display the setting utility before starting. Click the [About] tab. 2 Click the [Mixer Audio Output] pull-down menu. Select and set the audio data to be output to the computer from the flow of audio signals inside this unit. CH1 CH1 Timecode PHONO1 CH1 Timecode CD/ LINE1 CH1 Timecode DIGITAL1 Post CH1 Fader2 Cross Fader A2 Cross Fader B2 CH2 CH2 Timecode PHONO1 CH2 Timecode CD/ LINE1 CH2 Timecode DIGITAL1 Post CH2 Fader2 Cross Fader A2 Cross Fader B2 CH3 CH3 Timecode PHONO1 CH3 Timecode CD/ LINE1 CH3 Timecode DIGITAL1 Post CH3 Fader2 Cross Fader A2 Cross Fader B2 CH4 CH4 Timecode PHONO1 CH4 Timecode CD/ LINE1 CH4 Timecode DIGITAL1 Post CH4 Fader2 Cross Fader A2 Cross Fader B2 MIC REC OUT2 MIC REC OUT2 MIC REC OUT2 MIC REC OUT2 1 The audio data is output with the same volume at which it is input to this unit, regardless of the [USB Output Level] setting. 2 When using for applications other than recording, pay attention to the DJ application's settings so that no audio loops are generated. If audio loops are generated, sound may be input or output at unintended volumes. 3 Click the [USB Output Level] pull-down menu. Adjust the volume of the audio data output from this unit. ! The [USB Output Level] setting is applied equally to all audio data. However, when 1 on the table at step 2 is selected, the audio data is output with the same volume at which it is input to this unit. ! If not enough volume can be achieved with the DJ software's volume adjustment alone, change the [USB Output Level] setting to adjust the volume of the audio data output from this unit. Note that the sound will be distorted if the volume is raised too high. Checking the latest information on the driver software For the latest information on the driver software for exclusive use with this unit, visit our website shown below. http://pioneerdj.com/support/ ! Operation cannot be guaranteed when multiple units of this mixer are con- nected to a single computer. En 25
-
 1
1 -
2
-
3
-
4
-
5
-
6
-
7
-
8
-
9
-
10
-
11
-
12
-
13
-
14
-
15
-
16
-
17
-
18
-
19
-
 20
20 -
 21
21 -
 22
22 -
 23
23 -
 24
24 -
 25
25 -
 26
26 -
 27
27 -
 28
28 -
 29
29 -
 30
30 -
31
-
32
 |
 |