Pioneer FM903XM Installation Manual - Page 4
Installation
 |
UPC - 012562566009
View all Pioneer FM903XM manuals
Add to My Manuals
Save this manual to your list of manuals |
Page 4 highlights
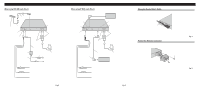
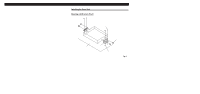
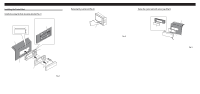
Installation Installing the Control Unit Installation using the flush mounting bracket (Fig. 7) 124 - 126 mm Fit the flush mounting bracket into the opening in the dashboard, raise the claws of the bracket with a flatbladed screwdriver, and secure the bracket in place. 44 - 46 mm Dashboard Flush mounting bracket Removing the control unit (Fig. 8) Insert the release plate that comes with the unit as shown in the illustration. Pull it towards you. Fig. 8 Open the installation hole. Holder Screws Fig. 7 Fasten the control unit with velcro tape (Fig. 9) Velcro tape (Rough surface) Dashboard Velcro tape (Soft surface) Fig. 9 Note: • Thoroughly wipe off the surface before affixing the velcro tape. • Obviously, it is very dangerous if the cord gets tangled in the steering wheel, so install the cord so that it cannot get in the way.
-
 1
1 -
 2
2 -
 3
3 -
 4
4
 |
 |
