Poulan PLN1510 User Manual - Page 8
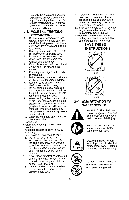
Caution
 |
View all Poulan PLN1510 manuals
Add to My Manuals
Save this manual to your list of manuals |
Page 8 highlights
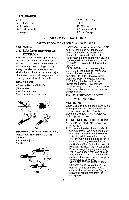
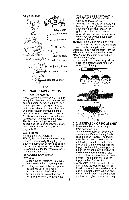
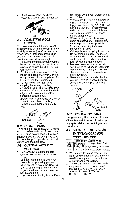
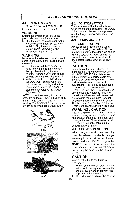
Guide Bar Bolts /11 Saw Chain ionamiti qt+.6,15.wirsveoys,...9.1.4 --Guide Bar 0 Drive SprocketO, . Adjusting Hole Guide Bar Nuts Adjusting Plate ^--Adjusting Screw chain.Turning the screw COUNTER- CLOCKWISE LOOSENS THE CHAIN on the guide bar. 3. After adjustment and while wearing heavy duty work gloves, move the saw chain back and forth on the guide bar to be sure the chain moves freely and Is in proper mesh with sprocket.Do not move chain with bare hands. NOTE:IF the chain is difficult to rotate or If it binds on the guide bar, too much tension has been applied and must be adjusted.To decrease tension, turn the adjustment screw counterclockwise slowly.Move the chain back and forth until it moves freely. 4. Holding the nose in upper position, securely tighten the bar retaining nuts (70 inch lbs.) Sprocket Support ftr lA 3-4A 3-5A 3-5. SAW CHAIN TENSION ADJUSTMENT Proper tension of the saw chain is extr- Se emely important and must be checked before starting, as well as during, any 3-5B cutting operation. Taking the time to make needed adjustments to the saw chain will result in improved culling ,00 performance and prolonged chain life. NOTE: A new chain and bar will need readjustment after as few as 5 cuts. This is normal during the break-in period, and the interval between future adjustments will lengthen quickly (Figure 3-5A). 3-5C 3-6. ASSEMBLY OF POLE SAW 1. Make sure the unit is unplugged from power source. CAUTION If a chain is TOO LOOSE or TOO TIGHT, the bar chain and saw bearings will wear more rapidly.Study Figure 3-5A for information concerning correct cold tension (A), correct warm tension (B), and as a guide for when saw chain needs adjustment (C). TO ADJUST SAW CHAIN 2. Slip handle bracket (A) over chain saw handle (B) from the right side (See Fig.3-6A).NOTE: The trigger must be depressed before the bra- cket will go onto the handle. Push the lock-off button and depress the trigger. While holding the trigger in, place the trigger support portion of the bracket under the trigger and slide the bracket onto the chain saw TENSION: 1. Loosen the bar retaining nuts (O) so they are hand tight. (See Fig.3-5B) 2. Holding the nose of the bar up, use the screwdriver or scrench if provided in your User's Kit to turn the guide bar adjustment screw (E) (Fig.3-5C) clockwise to tighten the handle. The bracket will keep the trigger In the "ON"position. 3. Align holes in pole bracket with holes in handle bracket. Install Phillips head screws with lock washers through pole bracket from left side and thread into thewelcl nuts on the handle bracket.Tighten screws securely. 8
-
 1
1 -
2
-
 3
3 -
 4
4 -
 5
5 -
 6
6 -
 7
7 -
 8
8 -
 9
9 -
 10
10 -
 11
11 -
 12
12 -
 13
13 -
14
-
15
-
16
 |
 |
