ProForm 385 Csx Bike English Manual - Page 6
two M8 x 70mm Button Bolts 54, two M8 Split
 |
View all ProForm 385 Csx Bike manuals
Add to My Manuals
Save this manual to your list of manuals |
Page 6 highlights
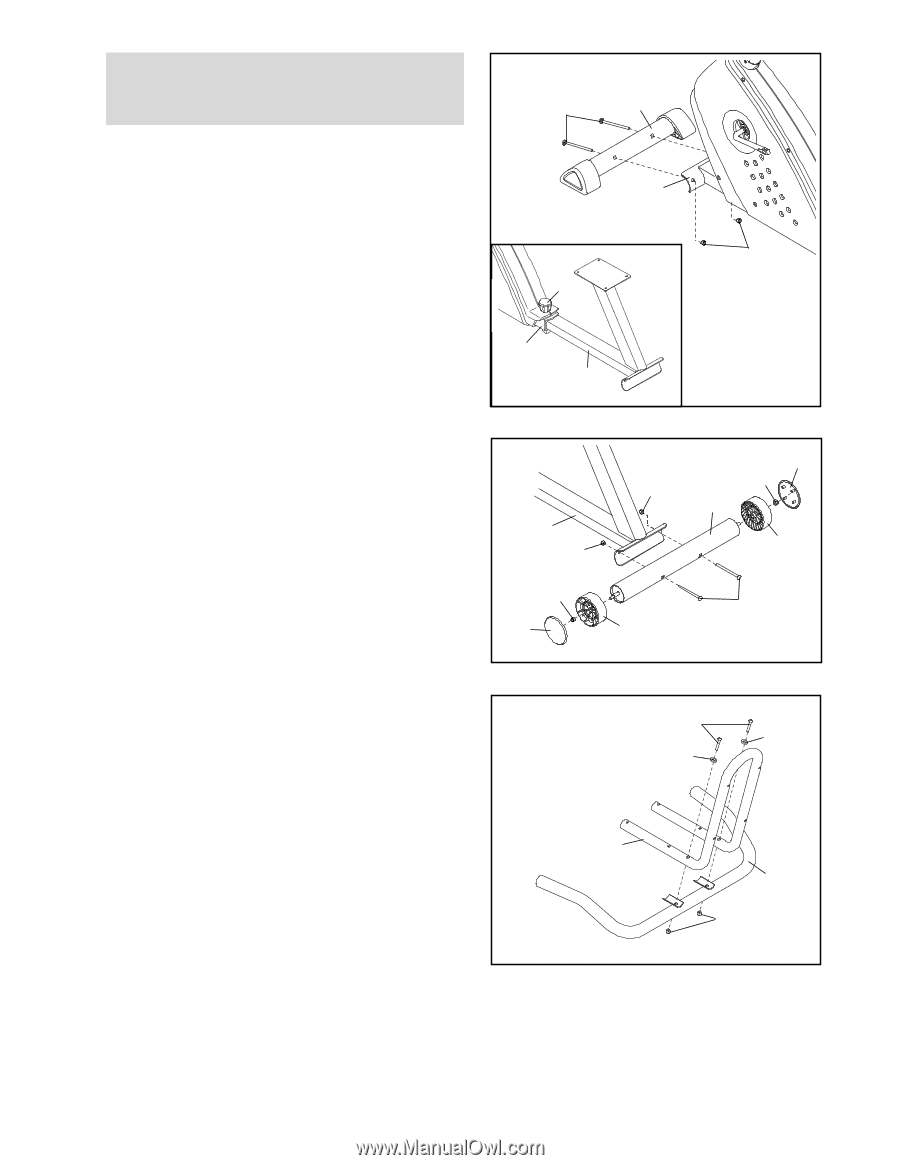
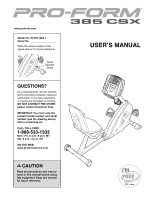
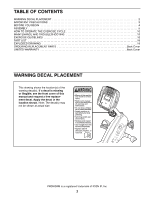
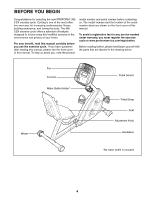
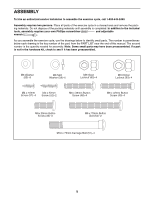
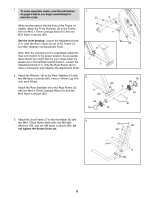
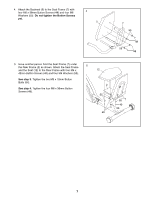
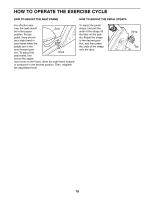
1. To make assembly easier, read the information 1 on page 5 before you begin assembling the exercise cycle. 51 3 While another person lifts the front of the Frame (1) slightly, attach the Front Stabilizer (3) to the Frame with two M10 x 75mm Carriage Bolts (51) and two M10 Nylon Locknuts (63). See the inset drawing. Loosen the Adjustment Knob (17), slide the Rear Frame (2) out of the Frame (1), and then retighten the Adjustment Knob. Note: After the exercise cycle is assembled, adjust the Seat (not shown) to the proper position. As you pedal, there should be a slight bend in your knees when the pedals are in the farthest forward position. Loosen the Adjustment Knob (17), slide the Rear Frame (2) forward or backward, and retighten the Adjustment Knob. 2. Attach the Wheels (18) to the Rear Stabilizer (4) with two M8 Nylon Locknuts (60). Press a Wheel Cap (19) onto each Wheel. Attach the Rear Stabilizer (4) to the Rear Frame (2) with two M10 x 75mm Carriage Bolts (51) and two M10 Nylon Locknuts (63). 1 17 1 2 2 2 63 60 19 63 18 63 19 60 4 18 51 3. Attach the Seat Frame (7) to the Handlebar (6) with two M8 x 70mm Button Bolts (54), two M8 Split 3 Washers (59), and two M8 Nylon Locknuts (60). Do not tighten the Button Bolts yet. 54 59 59 7 6 60 6
-
 1
1 -
 2
2 -
 3
3 -
 4
4 -
 5
5 -
 6
6 -
 7
7 -
 8
8 -
 9
9 -
 10
10 -
 11
11 -
 12
12 -
13
-
14
-
15
-
16
-
17
-
18
-
19
-
20
 |
 |