ProForm 585ex Treadmill Canadian English Manual - Page 13
Unplug The Power Cord - performance
 |
View all ProForm 585ex Treadmill manuals
Add to My Manuals
Save this manual to your list of manuals |
Page 13 highlights
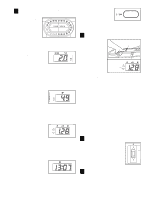
PROBLEM: The walking belt slows when walked on SOLUTION: a. Use only a CUL-listed surge suppressor, rated at 15 amps, with a 1mm2 (14-gauge) cord of 1,5 m (5 ft.) or less in length. b. If the walking belt is overtightened, treadmill performance may decrease and the walking belt may become damaged. Remove the key and UNPLUG THE POWER CORD. Using the allen wrench, turn both rear roller adjustment bolts counterclockwise, 1/4 of a turn. When the walking belt is properly tightened, you should be able to lift each side of the walking belt 7 to 10 cm (3 to 4 in.) off the walking platform. Be careful to keep the walking belt centred. Plug in the power cord, insert the key and run the treadmill for a few minutes. Repeat until the walking belt is properly tightened. b 7-10 cm Rear Roller Adjustment Bolts c. If the walking belt still slows when walked on, please call our Customer Service Department. PROBLEM: The walking belt is off-centre or slips when walked on SOLUTION: a. If the walking belt has shifted to the left, first re- a move the key and UNPLUG THE POWER CORD. Using the allen wrench, turn the left rear roller bolt clockwise 1/2 of a turn. Be careful not to overtighten the walking belt. If the walking belt has shifted to the right, turn the left rear roller bolt counterclockwise 1/2 of a turn. Plug in the power cord, insert the key and run the treadmill for a few minutes. Repeat until the walking belt is centered. b. If the walking belt slips when walked on, first remove b the key and UNPLUG THE POWER CORD. Using the allen wrench, turn both rear roller adjustment bolts clockwise, 1/4 of a turn. When the walking belt is correctly tightened, you should be able to lift each side of the walking belt 7-10 cm (3-4 in.) off the walking platform. Be careful to keep the walking belt centred. Plug in the power cord, insert the key and carefully walk on the treadmill for a few minutes. Repeat until the walking belt is properly tightened. 13
-
 1
1 -
2
-
3
-
4
-
5
-
6
-
7
-
 8
8 -
 9
9 -
 10
10 -
 11
11 -
 12
12 -
 13
13 -
 14
14 -
 15
15 -
 16
16 -
 17
17 -
 18
18 -
19
 |
 |
