ProForm 7.5c Owners Manual - Page 6
Adjustment, Operation
 |
View all ProForm 7.5c manuals
Add to My Manuals
Save this manual to your list of manuals |
Page 6 highlights
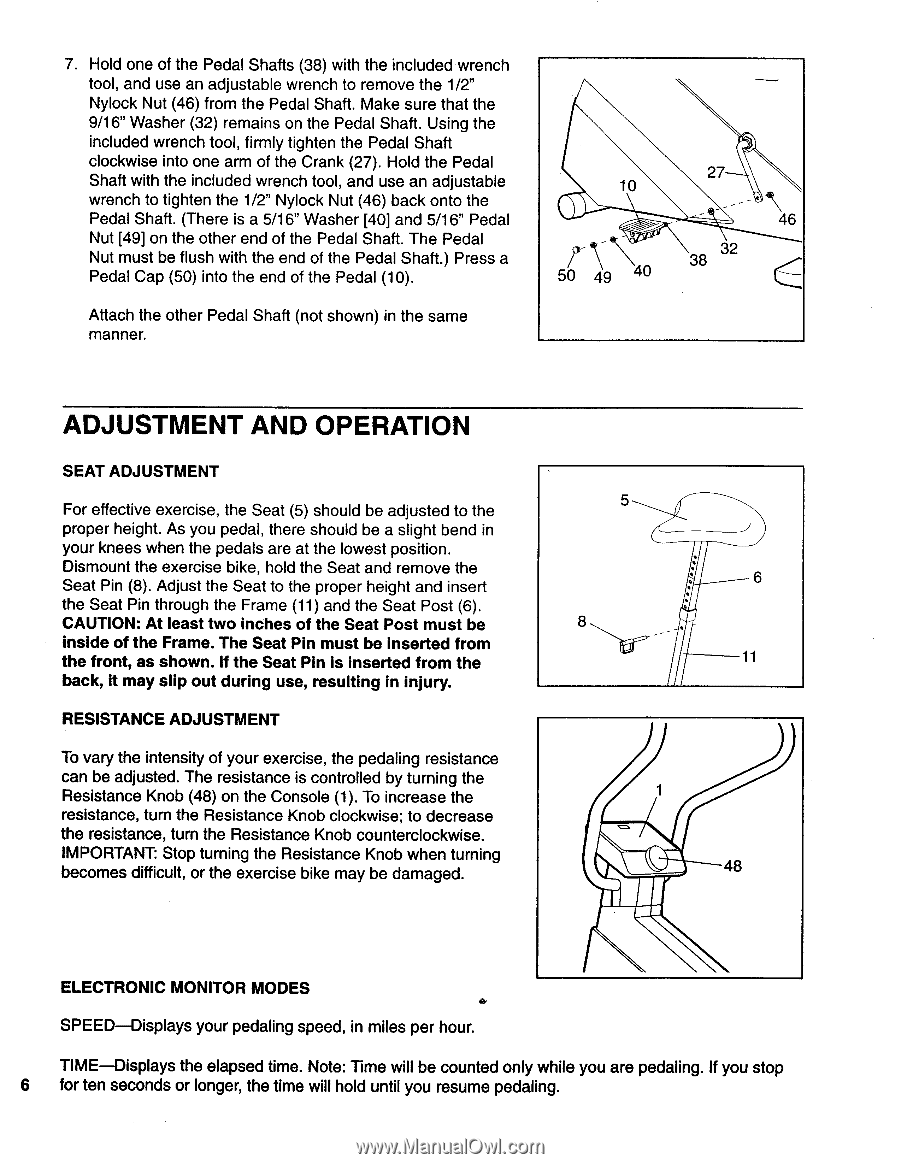
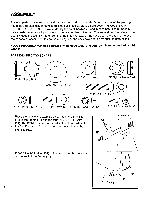
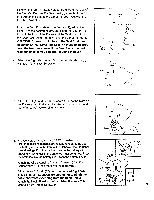
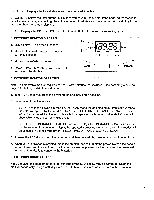
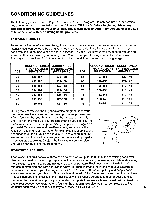
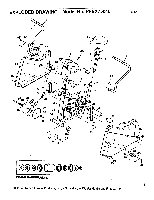
7. Hold one of the Pedal Shafts (38) with the included wrench tool, and use an adjustable wrench to remove the 1/2" Nylock Nut (46) from the Pedal Shaft. Make sure that the 9/16" Washer (32) remains on the Pedal Shaft. Using the included wrench tool, firmly tighten the Pedal Shaft clockwise into one arm of the Crank (27). Hold the Pedal Shaft with the included wrench tool, and use an adjustable wrench to tighten the 1/2" Nylock Nut (46) back onto the Pedal Shaft. (There is a 5/16" Washer [40] and 5/16" Pedal Nut [49] on the other end of the Pedal Shaft. The Pedal Nut must be flush with the end of the Pedal Shaft.) Press a Pedal Cap (50) into the end of the Pedal (10). Attach the other Pedal Shaft (not shown) in the same manner. 27 10 46 50 49 4._n 3 2 38 ADJUSTMENT AND OPERATION SEAT ADJUSTMENT For effective exercise, the Seat (5) should be adjusted to the proper height. As you pedal, there should be a slight bend in your knees when the pedals are at the lowest position. Dismount the exercise bike, hold the Seat and remove the Seat Pin (8). Adjust the Seat to the proper height and insert the Seat Pin through the Frame (11) and the Seat Post (6). CAUTION: At least two inches of the Seat Post must be inside of the Frame. The Seat Pin must be inserted from the front, as shown. If the Seat Pin is inserted from the back, it may slip out during use, resulting in injury. RESISTANCE ADJUSTMENT To vary the intensity of your exercise, the pedaling resistance can be adjusted. The resistance is controlled by turning the Resistance Knob (48) on the Console (1). To increase the resistance, turn the Resistance Knob clockwise; to decrease the resistance, turn the Resistance Knob counterclockwise. IMPORTANT: Stop turning the Resistance Knob when turning becomes difficult, or the exercise bike may be damaged. 5 8 6 11 48 ELECTRONIC MONITOR MODES SPEED-Displays your pedaling speed, in miles per hour. TIME-Displays the elapsed time. Note: Time will be counted only while you are pedaling. If you stop 6 for ten seconds or longer, the time will hold until you resume pedaling.
-
 1
1 -
 2
2 -
 3
3 -
 4
4 -
 5
5 -
 6
6 -
 7
7 -
 8
8 -
 9
9 -
 10
10 -
 11
11 -
 12
12
 |
 |