ProForm Zt6 Treadmill English Manual
ProForm Zt6 Treadmill Manual
 |
View all ProForm Zt6 Treadmill manuals
Add to My Manuals
Save this manual to your list of manuals |
ProForm Zt6 Treadmill manual content summary:
- ProForm Zt6 Treadmill | English Manual - Page 1
For service at any time, go to www.proformservice.com. Or call 1-888-533-1333 Mon.–-Fri. 6 a.m.–-6 p.m. MT Sat. 8 a.m.–-4 p.m. MT Please do not contact the store. CAUTION Read all precautions and instructions in this manual before using this equipment. Keep this manual for future reference. USER - ProForm Zt6 Treadmill | English Manual - Page 2
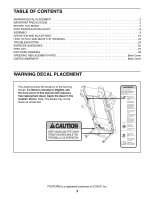
IMPORTANT PRECAUTIONS 3 BEFORE YOU BEGIN 7 PART IDENTIFICATION CHART 8 ASSEMBLY 9 OPERATION AND ADJUSTMENT 16 HOW TO FOLD AND MOVE THE TREADMILL 23 TROUBLESHOOTING 24 EXERCISE GUIDELINES 26 PART LIST 27 EXPLODED DRAWING 28 ORDERING REPLACEMENT PARTS Back Cover LIMITED WARRANTY Back Cover - ProForm Zt6 Treadmill | English Manual - Page 3
in this manual and all warnings on your treadmill before using your treadmill. ICON assumes no responsibility for personal injury or property damage sus- tained by or through the use of this product. 1. It is the responsibility of the owner to ensure that all users of this treadmill are adequately - ProForm Zt6 Treadmill | English Manual - Page 4
before clean- ing the treadmill, and before performing the maintenance and adjustment procedures described in this manual. Never remove the motor hood unless instructed to do so by an authorized service representative. Servicing other than the procedures in this manual should be performed by - ProForm Zt6 Treadmill | English Manual - Page 5
5 - ProForm Zt6 Treadmill | English Manual - Page 6
STANDARD SERVICE PLANS all 6 - ProForm Zt6 Treadmill | English Manual - Page 7
Thank you for selecting the new PROFORM® ZT6 treadmill. The ZT6 treadmill provides an impressive selection of features designed to make your workouts at home more effective and enjoyable. For your benefit, read this manual carefully before you use the treadmill. If you have questions after reading - ProForm Zt6 Treadmill | English Manual - Page 8
the drawings below to identify small parts used for assembly. The number in parentheses below each drawing is the key number of the part, from the PART LIST near the end of this manual. The number following the key number is the quantity used for assembly. Note: If a part is not in the hardware kit - ProForm Zt6 Treadmill | English Manual - Page 9
treadmill, wipe it off with a soft cloth and a mild, non-abrasive cleaner. •• Left parts are marked “"L”" or “"Left”" and right parts are marked “"R”" or “"Right.”" •• To identify small parts, see page 8. •• Assembly requires the following tools: the included hex keys of this manual) and register - ProForm Zt6 Treadmill | English Manual - Page 10
3. Identify the Left Upright (75). Have a second person hold the Left Upright near the Base (80). 3 See the inset drawing. Tie the wire tie in the Left Upright (75) securely around the end of the Upright Wire (70). Then, insert the Upright Wire into the lower end of the Left Upright as you pull - ProForm Zt6 Treadmill | English Manual - Page 11
5. Identify the Left and Right Base Covers (73, 74). 5 Slide the Left and Right Base Covers (73, 74) onto the Left and Right Uprights (75, 76) as shown. 75 76 74 73 6. Identify the Left Handrail (71). If there is a wire in the Left Handrail, remove and discard it. Hold the Left Handrail (71) - ProForm Zt6 Treadmill | English Manual - Page 12
Console Frame (87) into the Handrails (71, 72). Be careful not to pinch the Upright 8 Wire (70). Attach the Console Frame with four 1/4" x 1" Screws (10); start all four Screws, and then tighten them. Firmly tighten the four 3/8" x 3 1/2" Screws (9). 70 10 87 10 9 71 9 72 12 - ProForm Zt6 Treadmill | English Manual - Page 13
(71, 72). Make sure that no wires are pinched. Insert the excess Upright Wire (70) into the Left Handrail. Attach the console assembly to the brackets on the Handrails (71, 72) with two 5/16" x 1" Screws (7) and two 5/16" Star Washers (8). Start both Screws, and then tighten them. 10 Console - ProForm Zt6 Treadmill | English Manual - Page 14
four #8 x 3/4" Screws (6). See step 4. Tighten the six 3/8" x 4" Screws (4). 11 Console Assembly 34 6 12. Orient the Left and Right Trays (45, 85) as shown, and attach each Tray with four #8 x 3/4" 12 Screws (6). Start all of the Screws before tightening them; be careful not to overtighten - ProForm Zt6 Treadmill | English Manual - Page 15
tightened before you use the treadmill. If there are sheets of plastic on the treadmill decals, remove the plastic. To protect the floor or carpet, place a mat under the treadmill. Note: Extra parts may be included. Keep the included hex key in a secure place; the hex key is used to adjust the - ProForm Zt6 Treadmill | English Manual - Page 16
it is functioning properly. Failure to use a properly functioning surge suppressor could result in damage to the control system of the treadmill and serious injury to users. nominal 120-volt circuit capable of carrying 15 or more amps. To avoid overloading the circuit, do not plug other electrical - ProForm Zt6 Treadmill | English Manual - Page 17
array of features designed to make your workouts more effective and enjoyable. When the manual mode of the console is selected, you can change the speed and incline of the treadmill with the touch of a button. As you exercise, the console will display instant exercise feedback. You can even measure - ProForm Zt6 Treadmill | English Manual - Page 18
the reset position, the demo mode is turned on. To turn off the demo mode, hold down the Stop button for a few seconds. If the displays remain lit, see THE INFORMATION MODE on page 22 to turn off the demo mode. Next, stand on the foot rails of the treadmill. Find the Key clip - ProForm Zt6 Treadmill | English Manual - Page 19
treadmill •• The number of vertical feet you have climbed •• The speed of the walking belt •• Your heart rate (see step 6) •• The matrix To reset the displays, press the Stop button, remove the key, and then reinsert the key prole of the speed settings of the workout. The My Trail tab will show a - ProForm Zt6 Treadmill | English Manual - Page 20
of the workout. 3. Start the workout. The workout will continue in this way until the last segment of the prole ashes in the display and the various factors such as your weight. In addition, if you manually change the speed or incline of the treadmill during the workout, the number of calories - ProForm Zt6 Treadmill | English Manual - Page 21
. Press the increase and decrease buttons next to the Enter button to select a user. To stop the workout at any time, press the Stop button. The time will begin to ash in the display. To resume the workout, press the Start button or the Speed increase button. The walking belt will begin to move at - ProForm Zt6 Treadmill | English Manual - Page 22
be used if the treadmill is displayed in a store. While the demo mode is turned on, the console will function normally when you plug in the power cord, press the power switch into the reset position, and insert the key into the console. However, when you remove the key, the displays will remain lit - ProForm Zt6 Treadmill | English Manual - Page 23
HOW TO FOLD AND MOVE THE TREADMILL HOW TO FOLD THE TREADMILL To avoid damaging the treadmill, adjust the incline to the lowest position before you fold the treadmill. Then, remove the key and unplug the power cord. CAUTION: You must be able to safely lift 45 lbs. (20 kg) to raise, lower, or move - ProForm Zt6 Treadmill | English Manual - Page 24
, the switch has tripped. To reset the power switch, wait for ve minutes and then press the switch back in. d. If the treadmill still will not run, please see the front cover of this manual. SYMPTOM: The console displays remain lit when you remove the key from the console a. The console features - ProForm Zt6 Treadmill | English Manual - Page 25
in. Idler Roller Screws c. Your treadmill features a walking belt coated with high-performance lubricant. IMPORTANT: Never apply silicone spray or other substances to the walking belt or the walking platform unless instructed to do so by an authorized service representative. Such substances may - ProForm Zt6 Treadmill | English Manual - Page 26
health problems. WORKOUT GUIDELINES Warming Up—-Start workouts each week, with at least one day of rest between workouts. After a few months of regular exercise, you may complete up to five workouts each week, if desired. Remember, the key to success is to make exercise a regular and enjoyable part - ProForm Zt6 Treadmill | English Manual - Page 27
Walking Belt Belt Guide Rubber Spacer Drive Roller/Pulley Left Speaker Grill Left Tray Drive Motor Belt Drive Motor Key No. Qty User’'s Manual Note: Specifications are subject to change without notice. For information about ordering replacement parts, see the back cover of this manual. *These parts - ProForm Zt6 Treadmill | English Manual - Page 28
EXPLODED DRAWING A 19 93 36 19 36 38 19 25 19 19 56 14 29 53 19 46 1 16 37 42 27 48 28 41 19 19 24 29 43 23 19 93 19 40 36 19 36 39 24 19 25 19 50 14 19 19 19 29 51 47 48 27 32 16 49 42 28 29 19 41 3 12 28 Model No. PFTL59813.0 R0313A 52 19 3 12 - ProForm Zt6 Treadmill | English Manual - Page 29
EXPLODED DRAWING B 6 Model No. PFTL59813.0 R0313A 6 6 58 57 21 59 17 21 58 20 21 17 60 20 22 21 55 1 61 18 6 6 6 6 68 6 63 62 18 6 64 18 65 66 6 6 6 67 1 29 - ProForm Zt6 Treadmill | English Manual - Page 30
EXPLODED DRAWING C Model No. PFTL59813.0 R0313A 9 5 10 71 8 69 7 70 75 54 31 89 6 6 6 6 9 5 6 6 10 72 4 69 8 73 2 81 77 3 79 33 15 5 77 78 1 67 35 79 33 80 81 3 7 76 15 77 78 35 79 33 74 77 2 79 33 30 5 4 5 4 - ProForm Zt6 Treadmill | English Manual - Page 31
EXPLODED DRAWING D 6 84 6 6 90 6 Model No. PFTL59813.0 R0313A 86 91 45 6 6 19 6 6 6 87 83 26 6 11 6 13 11 11 6 34 13 6 11 6 34 6 11 11 82 6 6 6 88 66 6 44 92 6 11 6 85 30 6 6 31 - ProForm Zt6 Treadmill | English Manual - Page 32
(see the front cover of this manual) •• the key number and description of the replacement part(s) (see the PART LIST and the EXPLODED DRAWING near the end of this manual) LIMITED WARRANTY IMPORTANT: To protect your fitness equipment with an extended service plan, see page 6. ICON Health & Fitness
-
 1
1 -
 2
2 -
 3
3 -
 4
4 -
 5
5 -
 6
6 -
 7
7 -
8
-
9
-
10
-
11
-
12
-
13
-
14
-
15
-
16
-
17
-
18
-
19
-
20
-
21
-
22
-
23
-
24
-
25
-
26
-
27
-
28
-
29
-
30
-
31
-
32
 |
 |

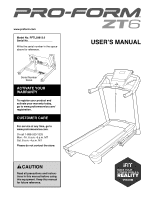
USER°S MANUAL
CAUTION
Read all precautions and instruc-
tions in this manual before using
this equipment. Keep this manual
for future reference.
Model No. PFTL59813.0
Serial No.
Write the serial number in the space
above for reference.
www.proform.com
Serial Number
Decal
To register your product and
activate your warranty today,
go to www.proformservice.com/
registration.
For service at any time, go to
www.proformservice.com.
Or call 1-888-533-1333
Mon.°Fri. 6 a.m.°6 p.m. MT
Sat. 8 a.m.°4 p.m. MT
Please do not contact the store.
ACTIVATE YOUR
WARRANTY
CUSTOMER CARE