Pyle PLTS76DU User Manual
Pyle PLTS76DU Manual
 |
View all Pyle PLTS76DU manuals
Add to My Manuals
Save this manual to your list of manuals |
Pyle PLTS76DU manual content summary:
- Pyle PLTS76DU | User Manual - Page 1
PLTS76DU 7'' Single DIN In-Dash Detachable Motorized Touch Screen TFT/LCD Monitor w/ Digital Video/CD/MP3/MP4/USB/SD/AM-FM-RDS Player USER MANUAL - Pyle PLTS76DU | User Manual - Page 2
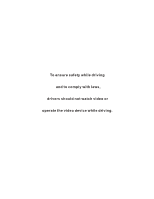
To ensure safety while driving and to comply with laws, drivers should not watch video or operate the video device while driving. - Pyle PLTS76DU | User Manual - Page 3
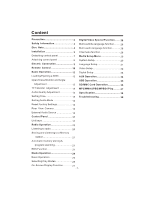
Information 3 Disc Note 4 Installation 5 Detaching control panel 7 Attaching control panel 8 Electric Connection 9 Remote Control 10 Basic Operation 13 Loading/Ejecting a DISC 13 Open/Close Monitor and Angle Adjustment 13 TFT Monitor Adjustment 14 Audio Quality Adjustment 15 Setting Time - Pyle PLTS76DU | User Manual - Page 4
YOU FOR PURCHASING THIS CAR DIGITAL VIDEO PLAYER . Before operating the unit, read this manual thoroughly and keep it handy for future reference . To avoid injury or accident , read the following precautions before installing and operating the unit . ON INSTALLATION DO NOT install any receiver in - Pyle PLTS76DU | User Manual - Page 5
SURE TO OPERATE THE DIGITAL VIDEO PLAYER CORRECTLY AS INSTRUCTED. USE OF CONTROLS OR ADJUSTMENTS OR PERFORMANCE OF PROCEDURES OTHER THAN THOSE SPECIFIED HEREIN MAY RESULT IN HAZARDOUS RADIATION EXPOSURE.DO NOT OPEN COVERS AND DO NOT REPAIR YOURSELF. REFER SERVICING - Pyle PLTS76DU | User Manual - Page 6
supported by this player Digital Digital Video Video VCD VCD Audio and Video Disc size 12 cm Audio and Video Disc size 12 cm unusable) depending on your handle it and conditions in the usage environment. Note these scratches are not an indication of any problem with the player 3.Near car heaters - Pyle PLTS76DU | User Manual - Page 7
NOTES: Choose the mounting location where the unit will not interfere with the normal driving function of the driver. Before finally installing the unit, connect the wiring temporarily and make sure it is all connected up properly and the unit and the system work properly. Use only the parts - Pyle PLTS76DU | User Manual - Page 8
Installation Installating the unit DASH BOARD HEX NUT SPRING WASHER PLAIN WASHER TAPPING SCREW SCREWDRIVER METAL MOUNTING STRAP CONSOLE SLIDE BRACKET HOUSING HEX BOLT TABS KEY PLATE - Pyle PLTS76DU | User Manual - Page 9
How To Remove And Install The Front Panel When detaching or attaching the control panel, be careful not to damage the connectors on the back of the control panel and - Pyle PLTS76DU | User Manual - Page 10
Installation ATTACHING CONTROL PANEL 1). First, insert the left side of the front panel into the main unit(SEE 1 ). (Note: the "Hollow " point on the front panel - Pyle PLTS76DU | User Manual - Page 11
INPUT YELLOW SUBWOOFER GREY VIDEO IN YELLOW FRONT RCA RED R VIDEO OUT YELLOW FRONT RCA WHITE L RADIO ANTENNA JACK ISO CONNECTOR IGNITION SWITCH(B+) MEMORY BACK-UP(B+) GROUND(B-) RED YELLOW BLACK CHOKE BOX PINK BROWN BLUE (B+)12V REAR CAMERA SWITCH (B-)PARKING BRAKE AUTO ANTENNA FRONT LCH - Pyle PLTS76DU | User Manual - Page 12
Remote 20 1 21 23 9 12 27 26 25 Ref # Button Function 1 CLK Press it briefly to view the clock time . 2 MODE Press it to select a desired work source. Press once to pause opens the AUDIO setup menu for making changes to the way the soundtrack is reproduced. In Digital Video Disc Playback - Pyle PLTS76DU | User Manual - Page 13
Remote Control Ref Press this button briefly to display the root level directory of a SubWoofer Digital Video disc. Press and hold this button to turn on or off the ( where playback stopped. Press this button to turn off the audio. Press again to restore the 17 MUTE sound to its prior volume level. - Pyle PLTS76DU | User Manual - Page 14
illustrated (See 3 ). 3.Insert the battery holder. Push in the holder to the original position(See 4 ). Using the Remote Control Face the remote control towards the player front face IR mark (remote control signal receiver). Operation angle: About 30 degree in each the direction of the front of the - Pyle PLTS76DU | User Manual - Page 15
front pane to turn the device on . 2. Insert the disc with printed side facing up into the disc slot (1) . 3. The player starts playback the disc automatically . 1 2 FIG.2 Adjusting the viewing angle . When the monitor does not move, you press button on the panel to turn the monitor upward or - Pyle PLTS76DU | User Manual - Page 16
Basic Operation When the monitor turns downward to a certain angle, it will draw in . Touch the "SET" ICON on touch screen to enter the setting mode, the message will display like following : FIG.6 TFT Monitor Adjustment In Radio mode, touch the" RADIO " icon or In media mode , touch the range to - Pyle PLTS76DU | User Manual - Page 17
COLOR mode, you can select the color among of "Auto, Blue, Red, Pink " . When you select the "AUTO" item, the player will change the panel color illumination automatically . AUDIO QUALITY ADJUSTMENT In Radio mode, touch the screen of the " RADIO " ICON to enter the home menu, touch the " SET " ICON - Pyle PLTS76DU | User Manual - Page 18
the image.) EXTERNAL AUDIO SOURCE On the front panel of the unit , there is an AUX IN jack, to connect analogue replay devices. Use this jack to replay sound of other replay equipment such as Digital Video players, computers, etc. Via the loudspeakers. 1). Please following the diagram below, connect - Pyle PLTS76DU | User Manual - Page 19
Control Panel UNIT KEYS OPEN VOL- VOL+ PUSH SEL IR USB IN AUX IN 1 2 18 12 13 14 15 MODE /CH1~6 TA/AF MU/PTY BND 11 10 9 8 7 345 6 16 17 1. OPEN or BUTTON To slide the monitor out and stand it up or into the monitor slot, press this button; To adjust the angle of the monitor, long press - Pyle PLTS76DU | User Manual - Page 20
|>| button can automatically search down or up for an available station beginning from the current frequency; Briefly pressing |>| button can manually search down or up for a your desired station beginning from the current frequency. In media mode, pressing |>| button can play - Pyle PLTS76DU | User Manual - Page 21
Control Panel Follow the instructions below: -Store in Memory > Select the frequency band > Press repeatedly the button to select the desired memory key . > Select the station > Keep the desired memory - Pyle PLTS76DU | User Manual - Page 22
RADIO mode: 87.50 FM1 MHZ DX ST USER Start Searching For a Station Manual Search During Radio mode, briefly touch " " to increase frequency by one step setting EUR FREQ and power off the unit Press ST/MO button on the remote and then power on again. control to select the MONO or STEREO mode - Pyle PLTS76DU | User Manual - Page 23
Touch Screen Operation Storing and Listening to a Memory station Setting Memory 87.50 FM1 MHZ DX ST USER 1 88.50 2 90.00 3 98.00 4 106.00 5 103.00 6 80.50 With this system, a total of 30 stations can be stored in the memory of six buttons. Each band stores up to six preset stations. The - Pyle PLTS76DU | User Manual - Page 24
Touch Screen Operation ADJUSTABLE ITEMS: REGION SET Touch to switch the REGION function ON and OFF . PI SET Touch to change between PI MUTE and PI SOUND . REG FUNCTION at certain times some stations divide up their programs into regional programs with varying content . REG ON : the message "REG ON" - Pyle PLTS76DU | User Manual - Page 25
the program type besides the stations name, some FM stations also transmit information on the type of program. This information can be displayed by your car radio . Examples of such types of program are : SPORT NEWS POP WEATHER ...... -23- - Pyle PLTS76DU | User Manual - Page 26
. The message will display as below : (When Parking Brake supplied .) To skip the previous track To search the Video mode, touch to TITLE PBC display the title menu. In VCD mode, touch to switch PBC ON and PBC OFF. To show/hide the Subtitle (depending on the used media) To change the AUDIO - Pyle PLTS76DU | User Manual - Page 27
Disc playback, touch the "RPT, RDM, INT " range to select the different playing mode . 1). REPEAT FUNCTION FOR Digital Video : Touch the screen of the "RPT" range (or press the REPEAT button on the remote control) to select REPEAT mode as follows : CHAPT ER REP EAT ON TI TL E REP EAT ON REP - Pyle PLTS76DU | User Manual - Page 28
the following message : Digital Video TT 01/01 CH 03/31 0:01:44 Note: when select the INRO Mode, this player to start to play the 4). TOP FUNCTION ForDigital Video/ VCD/CD/MP3: In the state of Digital Video/VCD/CD/ MP3 disc playing, press the 1/TOP button on the remote control to select the - Pyle PLTS76DU | User Manual - Page 29
is a camera figure for some models. C.Touch or Press OSD for third time: Digital Video TT 01/01CH 04/31 C -0:01:32 2.Example for VCD/SVCD/CD: A.Touch or and VCD. NOTE: For CD(audio) Disc, touch OSD button is not available . D.Touch or Press OSD for fourth time: Digital Video TT 01/01CH 04/31 T - Pyle PLTS76DU | User Manual - Page 30
while the disc is playing, you can switch between "PBC ON"and "PBC off" mode. 2. Multi-Audio Language Function For Digital Video: During Digital Video playback , touch the AUDIO section on touch screen (or press the AUDIO on the remote .) Each time the button is pressed or touch , number of the - Pyle PLTS76DU | User Manual - Page 31
the remote control . SYSTEM SETUP SYSTEM SETUP TV SYSTEM SCREEN SAVER TV TYPE PASSWORD RATING DEFAULT EXIT NTSC PAL AUTO TV TYPE SETUP This player is (1) (2) (3) (4) (1). System Settings (2). Language Settings (3). Video Settings (4). Digital Settings TV SYSTEM SCREEN SAVER TV TYPE PASSWORD - Pyle PLTS76DU | User Manual - Page 32
Control menu below . The factory default password is 0000. You will be asked for the current password. Key in "0000" and then press "ENTER" on remote control to confirm . you have the opportunity to change it and enter your new password . Then when you enter the Parental Control menu, you can - Pyle PLTS76DU | User Manual - Page 33
Touch Screen Operation SYSTEM SETUP TV SYSTEM SCREEN SAVER TV TYPE PASSWORD RATING DEFAULT EXIT RESTORE LANGUAGE SETUP OSD LANGUAGE AUDIO LANG SUBTITLE LANG MENU LANG ENGLISH GERMAN SPANISH FRENCH PORTUGUESE ITALIAN RUSSIAN EXIT DEFAULTS Selecting the DEFAULT item and confirming RESTORE will - Pyle PLTS76DU | User Manual - Page 34
Touch Screen Operation LANGUAGE SETUP OSD LANGUAGE AUDIO LANG SUBTITLE LANG MENU LANG ENGLISH GERMAN SPANISH FRENCH PORTUGUESE ITALIAN RUSSIAN EXIT VIDEO SETUP BRIGHTNESS 12 CONTRAST 10 8 HUE 6 SATURATION 4 SHARPNESS 2 0 EXIT DISC MENU LANGUAGE SETUP Select the preferred DISC MENU - Pyle PLTS76DU | User Manual - Page 35
SETUP BRIGHTNESS 12 CONTRAST 10 8 HUE 6 SATURATION 4 SHARPNESS 2 0 EXIT SATURATION- the saturation of the video signal (the vividness of the color) all above can be adjusted to your tasters . DIGITAL SETUP DIGITAL SETUP DYNAMIC RANGE FULL 6/8 4/8 2/8 OFF EXIT DYNAMIC RANGE - Pyle PLTS76DU | User Manual - Page 36
follow the diagram below to connect analogue replay devices(only for the Audio connect, if you want to connect the Video, please plug the RCA Ground Right Left Note: the unit is only support the 3.5 mm A/V Jack Pin Assignment shown as the diagram . 2). In any mode, press the "MOD" - Pyle PLTS76DU | User Manual - Page 37
diagram below, connect your USB device to the front panel USB port . If it is properly connected, the device will be mounted and start playing automatically. USB IN Changing From DISC to USB Playback Mode If the disc present in the player ENTER to begin playback (or viewing, in the case of JPEG - Pyle PLTS76DU | User Manual - Page 38
The unit can support playback MP3/WMA/ slot with label side facing upward . Note: the mini card slot for GPS only. Press in till heard a "CLICK" REMOVING THE SD OR MMC File Playback Operation All the SD or MMC memory car playback operation function is same as the operation on CD/MP3/WMA . Please - Pyle PLTS76DU | User Manual - Page 39
JPEG/MPEG4 PLAY The unit is support MP3/WMA/JPEG/MPEG4 . When a disc is inserted into player, the following picture will appear touch screen to skip a track ahead or back. 3. Press the or button on the remote control to skip a track ahead or back. FAST FORWARD/FAST BACKWARD 1. Touch briefly the - Pyle PLTS76DU | User Manual - Page 40
Discs Played: Audio Signal Output: Characteristics: 12V DC (11V-15V) Less than10 A Compositive video 1.0Vp-p 75 (1)DIGITAL-VIDEO Disc 5"(12 40 dBu TFT Monitor: Monitor Screen Size: Color System: 7 Inch Wide NTSC/PAL NOTE: Specifications and design are subject to modification, without notice, due - Pyle PLTS76DU | User Manual - Page 41
Troubleshooting Before going through the check list, check wiring connection. If any of the problems persist after check list has been made, consult your nearest service dealer. SYMPTOM CAUSE SOLUTION No power The car ignition switch is not on The fuse is blown If the power supply is properly - Pyle PLTS76DU | User Manual - Page 42
-
 1
1 -
 2
2 -
 3
3 -
 4
4 -
 5
5 -
 6
6 -
 7
7 -
8
-
9
-
10
-
11
-
12
-
13
-
14
-
15
-
16
-
17
-
18
-
19
-
20
-
21
-
22
-
23
-
24
-
25
-
26
-
27
-
28
-
29
-
30
-
31
-
32
-
33
-
34
-
35
-
36
-
37
-
38
-
39
-
40
-
41
-
42
 |
 |