RCA 25450RE3 User Guide
RCA 25450RE3 - Business Phone Cordless Base Station Manual
 |
UPC - 044319501155
View all RCA 25450RE3 manuals
Add to My Manuals
Save this manual to your list of manuals |
RCA 25450RE3 manual content summary:
- RCA 25450RE3 | User Guide - Page 1
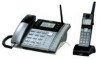
TM 4 Line Multi-Handset Office System User's Guide Please read this manual before operating this product for the first time. Model 25450 - RCA 25450RE3 | User Guide - Page 2
telephone cord and modular plug is provided with this product. It is designed to be connected to a compatible modular jack that is also compliant. See installation instructions for details. Notes • This equipment may not be used on coin service provided by the telephone company. • Party lines - RCA 25450RE3 | User Guide - Page 3
the instructions, may off and on, the user is encouraged to try to for additional Problems." This booklet is available from the U.S. Government Printing Office, Washington, D.C. 20402. Please specify stock number 004-000-00345-4 when ordering copies. Hearing Aid Compatibility This telephone system - RCA 25450RE3 | User Guide - Page 4
YOU OF "DANgEROUS vOLTAgE" INSIDE ThE PRODUCT. CAUTION: TO REDUCE ThE RISK OF ELECTRIC ShOCK, DO NOT REMOvE COvER (OR BACK). NO USER SERvICEABLE PARTS INSIDE. REFER SERvICINg TO qUALIFIED SERvICE PERSONNEL. ThE ExCLAMATION POINT WIThIN ThE TRIANgLE IS A WARNINg SIgN ALERTINg YOU OF IMPORTANT - RCA 25450RE3 | User Guide - Page 5
you the flexibility to add remote handset phones anywhere there is an A/C electrical outlet. The RCA 25450 Telephone System functions like a PBX office system. Calls are handled in a way that offer similar privacy. The RCA 25450 is ready to go out of the box. This user guide will cover the basics to - RCA 25450RE3 | User Guide - Page 6
(Base Unit 11 Parts Checklist (Cordless Handset 12 Phone Installation (Base Unit 13 Base Unit Location 13 Installing Backup Battery 13 Installing Handset 13 Installing the AC Adaptor 14 Connecting the Telephone Line Cords 14 Two 2-line Jacks 15 Four 1-line Jacks 15 Cordless Handset - RCA 25450RE3 | User Guide - Page 7
Waiting...30 Extension Groups 30 Using Your RCA 25450 Phone System 31 Making a Call...31 Making a Call (Base Unit 31 Redial (Base Unit 33 Making a Call (Cordless Handset 34 Receiving a Call (Base Unit 37 Call Waiting...38 Ending a Call (Base Unit 38 Switching Between Audio Modes 39 Putting - RCA 25450RE3 | User Guide - Page 8
98 Phone Settings 101 Dialing Prefix 101 Area Codes...102 Contrast (Base Unit 104 Set Time (Base Unit 104 Do Not Disturb (DND) (Base Unit 105 Auto or Manual Line Selection Settings (Cordless Handset 106 Reset System (Base Unit 108 Headset and Belt Clip Operation 109 Replacing the Batteries - RCA 25450RE3 | User Guide - Page 9
low temperature. • Avoid dusty locations. • Avoid other cordless telephones or personal computers. CAUTION: Always disconnect all phone cords from the Base Unit before battery installation or replacement. INSTALLATION NOTE: Some cordless telephones operate at frequencies that may cause or receive - RCA 25450RE3 | User Guide - Page 10
Connections and Setup Telephone Jack Requirements To use this phone, the user will need either two RJ14 (two line) or four RJ11 (one line) modular jacks in order to supply this unit with 4 phone lines. The modular jacks which may look like the one shown here. If you don't have a modular jack, call - RCA 25450RE3 | User Guide - Page 11
Charger/AC Adapter Connections and Setup Parts Checklist (Base Unit) Make sure your package includes the following items: Handset Cord Handset Battery Pack Base Battery Compartment Cover Line Cords (4) 11 - RCA 25450RE3 | User Guide - Page 12
Connections and Setup Parts Checklist (Cordless Handset) Make sure your package includes the following items: REDIAL MENU Belt Clip Base Charging Cradle Cordless Handset Charger/AC Adapter Battery Compartment Cover Battery Pack 12 Charging Cradle Bracket - RCA 25450RE3 | User Guide - Page 13
to use the telephone for more than 30 days, remove the batteries because they can leak and damage the unit. Installing Handset Connect one end of the Handset cord to the Handset and the other end to the Handset jack located on the left side of the Base Unit. Use only supplied RCA 25450 Handset. 13 - RCA 25450RE3 | User Guide - Page 14
end of the Base Unit AC adaptor (7.5VDC) into a standard AC electrical power outlet, plug the other end into the "Power 7.5VDC " jack on the back of the Base Unit. Connecting the Telephone Line Cords Two 2-line Wall Jacks (Type RJ-14) 1. Plug one end of a straight telephone line cord into the jack - RCA 25450RE3 | User Guide - Page 15
Two 2-line Jacks (Using 4-Wire Line Cords Supplied) Connections and Setup Four 1-line Jacks L4/Data L4/L3 L2 L2/L1 Line 3 Line 4 Line 1 Line 2 L4/Data L4/L3 L2 L2/L1 Line Line 43 Line Line 21 15 - RCA 25450RE3 | User Guide - Page 16
Installation Installing the Charging Cradle and AC Adaptor Plug the transformer end of the AC Adaptor into a standard AC electric power outlet, plug the other end into the "Power 5.5VDC In" jack on the back of the Charging Cradle. Installing the Cordless Handset Battery 1. Locate the back cover and - RCA 25450RE3 | User Guide - Page 17
the Cordless Handset Cordless Handsets purchased separately must be registered with the Base Unit before using. If the Cordless Handset was purchased with the Base Unit as a system, it has already been registered. Refer to the Settings and Adjustments section in this User's Guide for instructions on - RCA 25450RE3 | User Guide - Page 18
Features Auto Attendant DND Exit Base Unit Layout LCD Display Auto Att Lines Voice Mail Lines Voice Mail Soft Button Soft Button Store Intercom Memory Buttons Dial Buttons Line Buttons Handset Keypad Headset Speaker Mute Navigation Button Volume + - / Directory-DIR / Caller-ID Page - RCA 25450RE3 | User Guide - Page 19
Scrolling Available by Using Navigation Button Base Unit Features LCD Display The Display shows several functions and menu items of the phone system. The first line of the display can show the Auto Attendant and Voice mail ON/OFF indicators and backup battery status, or Caller ID, date and - RCA 25450RE3 | User Guide - Page 20
red) Line Dedicate The line dedicate function allows an extension (Base Unit or Cordless Handset) to be dedicated to a line. Dial Button Pressing the Dial button accesses an available telephone line and dials the number on the display. This allows users to pre-dial a number or review Caller ID - RCA 25450RE3 | User Guide - Page 21
/Receiver, Headset, or Speakerphone during a call so the person on the line cannot hear you. Page Button Pages all Cordless Handsets. Each Cordless Handset can be paged individually using a Memory Button. Flash Button Sends a signal to a phone line to retrieve a dial tone after you end a call, or to - RCA 25450RE3 | User Guide - Page 22
can be used for one-touch paging to a Cordless Handset, or as Speed Dial buttons for external phone numbers. Store Button Press to store speed dial numbers Cordless Handsets will need to be re-registered if the Base Unit is reset. Auto Attendant Button Auto Attendant is an automated call answering - RCA 25450RE3 | User Guide - Page 23
call function allows a caller from the Base Unit or a Cordless Handset to add a third person to a call. The call must include at least one outside line. Second Incoming Call Alerts you of a new call from a different line by a tone when you are on the phone. Allows you to toggle between calls - RCA 25450RE3 | User Guide - Page 24
tone. NOTE: The call waiting tone is audible only to the extension that is on the line. No other extension will hear the tone or can answer the call. Cordless Handset Features LCD Display (Cordless Handset) The LCD display has a LED (Light Emitting Diode) for backlighting. The LED dims after 10 - RCA 25450RE3 | User Guide - Page 25
Cordless Handset Layout Cordless Handset Receiver LCD display Soft Button Exit Talk Navigation Button (Volume + -/Directory/Caller ID) Keypad Intercom Voice Mail Microphone Antenna Voice Mail Indicator Soft Button Speaker End/Power Flash Features Speakerphone 25 - RCA 25450RE3 | User Guide - Page 26
Features Cordless Handset Charging Cradle Contacts 26 - RCA 25450RE3 | User Guide - Page 27
, and to register Cordless Handsets. Redial Soft Button Allows you to dial the last ten (10) numbers called. You can use the Navigation Button 5 or 6 arrows to scroll through the last 10 numbers. Pre-Dialing Allows you to enter a phone number before accessing a telephone line by pressing the Talk - RCA 25450RE3 | User Guide - Page 28
supports a standard 2.5 mm headset plug. Mute Available through the soft button. During a call, allows you to temporar- ily turn off the microphone on the Cordless Handset, headset, or speakerphone so the person on the line cannot hear you. Flash Button Press to send a signal to a phone line - RCA 25450RE3 | User Guide - Page 29
call function allows a caller from the Base Unit or a Cordless Handset to add a third person to a call. The call must include at least one outside line. Second Incoming Call Alerts you of a new call from a different line by a tone when you are on the phone. Allows you to toggle between calls - RCA 25450RE3 | User Guide - Page 30
the same time as one group. The first Handset user to answer receives the call. There are four group ID numbers (91-94) available for Cordless Handset users. NOTE: The Base Unit always belongs to all groups For example, if several Cordless Handset users in a sales department decide to be called as - RCA 25450RE3 | User Guide - Page 31
Using Your RCA 25450 Phone System Using Your RCA 25450 Phone System Your RCA 25450 Phone System comes ready to use. This section details the basic operation of the Base Unit and Cordless Handset, including instructions on making, receiving and ending a call, call waiting, switching between audio - RCA 25450RE3 | User Guide - Page 32
Your RCA 25450 Phone System Manual Line Selection Dial (Base Unit) The manual line-selection function allows you to choose a phone line to make a call. 1. Press a Line button (1-4). NOTE: To cancel at any time, press the Speaker button or return the Handset to the Cradle. 2. If the phone line - RCA 25450RE3 | User Guide - Page 33
menu, the dialing prefix will be inserted before the phone number entered. 5. Before the auto or manual line-selection dial is made, an incoming call takes priority and will cancel the pre-dialing. Redial (Base Unit) The redial function allows the user to dial a number from the last 10 numbers - RCA 25450RE3 | User Guide - Page 34
keypad (0-9, *, #). 4. If the Cordless Handset can not establish a connection to the Base Unit after 15 seconds, it will show "No connection". If all usable phone lines are not available, it will show "No line is available". If there are usable phone lines available but all system resources are in - RCA 25450RE3 | User Guide - Page 35
Handset) The manual line-selection dial function allows the user to choose a phone line to make a call. 1. Press the Talk or Speaker button. It will show "Connecting ..." NOTE: To cancel dialing at any time, press the End button. 2. If the Cordless Handset can not establish a connection to the Base - RCA 25450RE3 | User Guide - Page 36
, the dialing prefix will be inserted before the phone number entered. 5. Before the auto or manual line-selection dial is made, an incoming call takes priority and will cancel the pre-dialing. Redial (Cordless Handset) The redial function allows the user to dial a number from the last 10 numbers - RCA 25450RE3 | User Guide - Page 37
RCA 25450 Phone System 4. Before the auto or manual line-selection dial is made, an incoming call takes priority and will cancel the redial. To Delete a Number from the Redial Log (Cordless Handset (Base Unit) 1. The Base Unit will ring when there is an incoming call for it. The corresponding Line - RCA 25450RE3 | User Guide - Page 38
Using Your RCA 25450 Phone System Receiving a Call (Cordless Handset) 1. The Cordless Handset will ring and/or vibrate when a call is received. The display will show "Incoming call from line (1-4)", then Caller ID information if available. "Private" or "Unknown" may show on the display if the - RCA 25450RE3 | User Guide - Page 39
Phone System Ending a Call (Cordless Handset) To end a receiver call, a headset call or a speakerphone call, press the End button or place the Cordless Handset in charging cradle. Switching Between Audio Modes During a call, you can switch among the following audio modes: handset call (Base user to - RCA 25450RE3 | User Guide - Page 40
Using Your RCA 25450 Phone System When a call is on hold, the extension that put the call on hold will remind the user with 3 short beeps button to scroll to the desired line to unhold. 6. Press soft button. NOTE: The Cordless Handset must be within the Base Unit's coverage area to resume a - RCA 25450RE3 | User Guide - Page 41
Using Your RCA 25450 Phone System Base Unit 1. To mute the call, press the Mute button. Mute is effective only for the current call. 2. To unmute the call, press the Mute button again. Cordless Handset 1. To mute the call, press the current call. soft button. Mute is effective only for the 2. - RCA 25450RE3 | User Guide - Page 42
RCA 25450 Phone System 5. Press the soft button. 6. Press 5 or 6 on the Navigation button to locate the "Enable" option. 7. Press the soft button. 8. Enter or edit a phone a Call to Another Extension The Call Transfer function allows the user to move a call from one extension to another. There - RCA 25450RE3 | User Guide - Page 43
Using Your RCA 25450 Phone System Base Unit 1. To make an announced call transfer, press the soft , or extension group using the keypad (0-9, *, #). The Cordless Handset will page the selected extension(s). 5. If the paging is not answered for 30 seconds, the call transfer will be cancelled, and - RCA 25450RE3 | User Guide - Page 44
Using Your RCA 25450 Phone System Unannounced Call Transfer Unannounced call transfer allows the user to transfer the call without talking to the person who will receive the transfer. If an unannounced call transfer is not answered, the call will be handled by Auto Attendant if it is turned on. The - RCA 25450RE3 | User Guide - Page 45
Using Your RCA 25450 Phone System Intercom Calls Intercom calls allow extensions to communicate with each other internally. They can be made to a single extension, group, or the Base Unit can page all extensions. There are two types of intercom calls between Cordless Handsets: one is normal intercom - RCA 25450RE3 | User Guide - Page 46
Your RCA 25450 Phone System Cordless Handset 1. Press the Intercom button followed by a two-digit Cordless Handset ID (01-16) or an Extension Group ID (91-94); 2. If it is a Base Unit assisted intercom call and system resources are busy, the display will show "System busy". Otherwise, the handset - RCA 25450RE3 | User Guide - Page 47
the End button or place the Cordless Handset in charging cradle. Ignore and Override an Incoming Line or Intercom Call Base Unit (Making an Outbound Line Call) During an incoming or intercom call ring, the user can ignore the call and make an outbound telephone call. 1. Press the soft button - RCA 25450RE3 | User Guide - Page 48
to page a specific extension or press the Page button to page all extensions. 5. If the page is answered, this becomes an intercom call. Cordless Handset (Making an Outbound Line Call) During an incoming or intercom call ring, the user can ignore the call and make an outbound telephone call - RCA 25450RE3 | User Guide - Page 49
Using Your RCA 25450 Phone System Cordless Handset (Making an Outbound Intercom Call) During an incoming or intercom call ring, the user can ignore the call and make an outbound intercom call. 1. Press the soft button. 2. Press 5 or 6 on the Navigation button until "Intercom" appears on the - RCA 25450RE3 | User Guide - Page 50
Base Unit and every Cordless Handset connected to the system has its own voice mailbox. Each Cordless Handset has a mailbox number that is the same as it's ID/extension number. The Base Unit has the mailbox number "00". The system the display will prompt the user to select number of rings before the - RCA 25450RE3 | User Guide - Page 51
password using the Base Unit. This feature is useful if an extension password has become unknown. NOTE: The user must know the system. The administrator password will default to "7221" after a reset. See "Settings and Adjustments, Base Unit Setup, Administrator Password" for instructions - RCA 25450RE3 | User Guide - Page 52
confirm, press the soft button. 7. To cancel, press the soft button. 8. The system will return to the voice mail option screen. Voice Mail Box Management Options (Base Unit) VM box management allows users to change their extension password and customize their mailbox greeting. Change Extension - RCA 25450RE3 | User Guide - Page 53
match, a confirmation tone will sound. The password is now changed and the system will return to the VM box option screen. 14. If the passwords do not enter." Re-enter password or press the soft button to exit. Play Greeting (Base Unit) 1. Press the Voice Mail button. 2. "Access VM" appears on - RCA 25450RE3 | User Guide - Page 54
will play the greeting. To stop playing the greeting, press the soft button. 12. The system will return to the VM box option screen. Record Greeting (Base Unit) 1. Press the Voice Mail button. 2. Press 5 or 6 on the Navigation button to scroll through the options until "Access VM" appears on - RCA 25450RE3 | User Guide - Page 55
recording. Start recording your greeting. When you are finished, press the soft button. 12. The system will playback the recorded greeting and then return to the VM box option screen. Delete Greeting (Base Unit) 1. Press the Voice Mail button. 2. Press 5 or 6 on the Navigation button to scroll - RCA 25450RE3 | User Guide - Page 56
"Delete greeting" appears on the display. 10. Press the soft button. 11. The display will prompt the user to confirm, "Delete greeting?" 12. To confirm, press the soft button. If the system is using the default greeting, it cannot be deleted. The display will show "Default greeting can not be - RCA 25450RE3 | User Guide - Page 57
Cordless Handset) VM box management allows the user to manage their extension password and customize their mailbox greeting. Change Extension Password (Cordless Handset) 1. Press the Voice Mail button. 2. Enter your two-digit handset password is now changed and the system will return to the VM box - RCA 25450RE3 | User Guide - Page 58
. When you are finished, press the soft button. 8. The system plays the message recorded and returns to the VM box option screen. Delete Greeting (Cordless Handset) 1. Press the Voice Mail button. 2. Enter your two-digit Cordless Handset ID followed by your four-digit extension password when - RCA 25450RE3 | User Guide - Page 59
the user to confirm, "Delete greeting?" 8. To confirm, press the soft button. If the system is calling from an offsite location, wait until the phone answers then press the "i" (star) key to password were entered correctly, the voice prompt will instruct, "Press one to listen to new messages, - RCA 25450RE3 | User Guide - Page 60
previous menu. Access Voice Mail (Base Unit) Several options are available when accessing voice mail through the Base Unit including play new, play old accessed by 2 users at a time. Only 1 user can access a mailbox at a time. If voice mail is not available, the display shows "System busy". 5. - RCA 25450RE3 | User Guide - Page 61
View Caller ID View CID Delete New Message Transfer Message Transfer Voice Mail the display will show "Invalid password" and return to the voice mail menu after 5 seconds. 7. "Play new" appears near the bottom on the display. If there are new messages, press the soft button. 8. The first new - RCA 25450RE3 | User Guide - Page 62
soft button to return to the new message option screen. Play Old Messages (Base Unit) 1. Press the Voice Mail button. 2. "Access VM" appears on be accessed by 2 users at a time. Only 1 user can access a mailbox at a time. If voice mail is not available, the display shows "System busy". 5. Enter - RCA 25450RE3 | User Guide - Page 63
View Caller ID View CID Delete Old Message Transfer Message Transfer Voice Mail 8. Press the soft button. 9. The first old message will play. To replay the message from the beginning, press 3on the Navigation button. 10. Press 4on the Navigation button to move to the next old message. If there - RCA 25450RE3 | User Guide - Page 64
Voice Mail button. The display will show "Connecting..." while the Cordless Handset contacts the voice mail system. If the connection fails, the display will show "No connection". 2. Voice mail can only be accessed by 2 users at a time. Only 1 user can access a mailbox at a time. If voice mail is - RCA 25450RE3 | User Guide - Page 65
Delete New Message View Caller ID View CID Transfer Message Transfer Voice Mail 8. The first new message will play. Press4on the Navigation button to move to the next new message. If there are no more new messages, the display will remain on the last new message until it times out and returns to - RCA 25450RE3 | User Guide - Page 66
) 1. Press the Voice Mail button. The display will show "Connecting..." while the Cordless Handset contacts the voice mail system. If the connection fails, the display will show "No connection". 2. Voice mail can only be accessed by 2 users at a time. If voice mail is in use, the display will show - RCA 25450RE3 | User Guide - Page 67
soft button to return to the "Play old" display. Access VM (Offsite Location) Voice mail can be accessed from an offsite location using a touch tone phone. To access voice mail remotely the auto attendant must be on. The voice prompts may differ if the - RCA 25450RE3 | User Guide - Page 68
The auto attendant will answer the call. The extension and password were entered correctly, the voice prompt will instruct, "Press one to listen to new messages, press two to and then return to the message menu. 7. If there are additional messages, the voice prompt will say, "Press two for next - RCA 25450RE3 | User Guide - Page 69
the previous menu, press the "#" key. Directory The directory stores up to one 100 names and numbers. Names can have up to 16 characters. Phone number entries can have up to 25 digits and spaces. Navigate Directory 1. To enter the directory, press 3on the Navigation button. 2. The directory will - RCA 25450RE3 | User Guide - Page 70
Directory NOTE: To erase a letter on the display, press 3 or 4 on the Navigation button to move the cursor to the immediate right of the letter then press the soft button. 5. To save the name, press the soft button. 6. Enter the number when prompted by the display using the keypad. 7. To save - RCA 25450RE3 | User Guide - Page 71
6 on the Navigation button to scroll through the options until "View number" appears on the display. 5. Press the soft button. 6. The display will show the phone number. 71 - RCA 25450RE3 | User Guide - Page 72
the tools that make the RCA 25450 a complete phone system. These functions include auto attendant, speed dial, conference calls, second incoming call, group setting (Cordless Handset), and call log. Auto Attendant (Base Unit) Auto Attendant is an automated call answering feature that uses default - RCA 25450RE3 | User Guide - Page 73
TURN AA on/off Advanced Functions of Your RCA 25450 Phone System 2. If the caller enters a valid extension, the call will ring the extension. If the call is not answered after 30 seconds, the auto attendant prompts the caller with a custom out-going message, or "The extension you've entered is - RCA 25450RE3 | User Guide - Page 74
RCA 25450 Phone System 6. Press the soft button. 7. The display will show "Line (1-4) AA is off" if auto attendant has been turned off on the phone line. If auto attendant is on, the display will show "Line button. 8. A long beep will sound. The user will record their message when the beep ends. - RCA 25450RE3 | User Guide - Page 75
Advanced Functions of Your RCA 25450 Phone System Play Outgoing Message (OGM) The saved outgoing messages can be reviewed using the play OGM function. 1. On the Base Unit, press the Auto Att button. 2. Press 5 or 6 on the Navigation button until "Configure AA" appears on the display. 3. Press - RCA 25450RE3 | User Guide - Page 76
Advanced Functions of Your RCA 25450 Phone System 6. Press the soft button. 7. Select a phone line (1-4) by pressing 5 or 6 on the steps. Record a Hold Message Record a Hold message allows the user to create a message from the Base Unit to be played while a caller is on hold. 1. Press - RCA 25450RE3 | User Guide - Page 77
Play message Advanced Functions of Your RCA 25450 Phone System 4. Press 5 or 6 on the Navigation button to scroll through be reviewed using the play message function. 1. On the Base Unit, press the soft button. 2. Press 5 or 6 on the Navigation button to scroll through the options until "System - RCA 25450RE3 | User Guide - Page 78
of Your RCA 25450 Phone System 7. 6 on the Navigation button to scroll through the options until "System setting" appears on the display. 3. Press the soft button. option menu. to return Speed Dial (Base Unit) The Base Unit can save displayed telephone numbers as Speed Dial numbers to one - RCA 25450RE3 | User Guide - Page 79
the Base Unit or a Cordless Handset to add a third person to a call. The call must include at least one outside line. Conference calls between three extensions (handsets or Base Unit) are not supported. Three-way conference calls between an extension/Base Unit and two outside phone lines require - RCA 25450RE3 | User Guide - Page 80
of Your RCA 25450 Phone System 3. Enter the two-digit Cordless Handset ID or press one of the 16 one-touch Memory buttons to page a Cordless Handset. 4. After the Cordless Handset answers, press the soft button. 5. The display will show "Select line to conference" and list all lines on hold - RCA 25450RE3 | User Guide - Page 81
Advanced Functions of Your RCA 25450 Phone System Add Phone Line From Base Unit 1. Press the Hold button to place the current call on hold. 2. To add a phone line, lift the handset, press the Speaker button, or select an available Line (1-4) button and enter a phone number, or press 3 or 4 on the - RCA 25450RE3 | User Guide - Page 82
Your RCA 25450 Phone System 7. Alert) 1. On the Base Unit, press the soft button. 2. Press 5 or 6 on the Navigation button to locate "Phone settings". 3. Press the to use the headset, or press a Line (1-4) button shown on the display. 3. The handset receiver may be lifted and used once one of - RCA 25450RE3 | User Guide - Page 83
of Your RCA 25450 Phone System Using Cordless handset for Second Incoming Cordless Handset) The Extension Group Setting feature allows a group of Cordless Handsets to be called at the same time. The first handset to answer receives the call. For the Group setting to function, cordless handsets - RCA 25450RE3 | User Guide - Page 84
Advanced Functions of Your RCA 25450 Phone System 6. The display will show a list of group(s) to which the Cordless Handset subscribes. The default list is empty. 7. Press the soft button to enter the submenu with "Subscribe" and "Unsubscribe" options. 8. To add a group, press 5 or 6 on - RCA 25450RE3 | User Guide - Page 85
only be dialed when the phone is in standby or on hold. 1. From a Cordless Handset, press the Talk or Speaker button. 2. From the Base Unit, press the Dial, Speaker, Headset, an idle Line button, or pick up the handset. Modify Logged Numbers The displayed Caller ID telephone number (in most cases - RCA 25450RE3 | User Guide - Page 86
Advanced Functions of Your RCA 25450 Phone System Save displayed Caller ID Information into the Directory 1. To save displayed Caller ID information into the directory, press the soft button. 2. Press 5 or 6 on the - RCA 25450RE3 | User Guide - Page 87
Handset(s) are purchased as a system. Most of these functions are accessed by pressing the soft button on the Base Unit or Cordless Handset. NOTE: Some settings listed below are described in other sections of this User's Guide. Base Unit Sound Ring volume Ring tone Key volume Key tone Phone - RCA 25450RE3 | User Guide - Page 88
Base Unit Setup Flash Time Flash time is the amount of time the phone needs to switch between lines. The flash time function allows the user to adjust the length of time (100 ms-1000 ms selectable, with 600 ms as the default). The flash time requirements may vary by country and service "System - RCA 25450RE3 | User Guide - Page 89
the password to verify. 11. If both passwords match, the new password will be saved and the system will return to the system setting menu. Line Dedicate (Base Unit) The line dedicate function allows a phone line to be dedicated to a single extension. Auto attendant must be turned off to change - RCA 25450RE3 | User Guide - Page 90
you will dedicate the line. Enter that extension number. 10. Press the soft button. Press the the previous menu. soft button to return to Sound (Base Unit) The phone's volumes and tones can be adjusted to the user's preferences including: Speakerphone, Corded Handset, and Headset volumes. 90 - RCA 25450RE3 | User Guide - Page 91
Base Unit) Adjust the voice volume of the person you are listening to on the line by pressing 5 or 6 on the Navigation button. There are 6 levels of volume. The selected volume will remain in effect for future phone menu system. Adjust by pressing 5 or 6 on the Navigation button 1. The Base Unit - RCA 25450RE3 | User Guide - Page 92
To accept the volume setting, press the soft button. Ring Tone (Base Unit) The ring tone can be changed using the menu system. There are four different ring tones. The selected ring tone will remain in effect for future phone calls until changed. 1. Press the soft button. 2. "Sound" appears on - RCA 25450RE3 | User Guide - Page 93
display, press the soft button. Key Tone (Base Unit) The key tone can be changed using the menu system. There are four different key tones with key tone 1 the default. The selected key tone will remain in effect for future phone calls until - RCA 25450RE3 | User Guide - Page 94
Cordless Handset (Base Unit and Cordless Handset) Cordless handsets must be registered with the Base Unit before use. If the Cordless Handset was purchased with the Base Unit as a system, the Cordless Handset has already been registered. The ID will be displayed when the Cordless Handset is powered - RCA 25450RE3 | User Guide - Page 95
on the first line of the Cordless Handset display. 14. Repeat the steps for each Cordless Handset to be registered. Deregister Cordless Handset (Base Unit and Cordless Handset) You will program the Base Unit and the Cordless Handset to complete the procedure. NOTE: Cordless Handsets must be - RCA 25450RE3 | User Guide - Page 96
to standby. 13. Repeat the steps for each Cordless Handset to be deregistered. Clear Cordless Handset ID (Base Unit) The Clear HS ID function clears an assigned Cordless Handset ID from the Base Unit. This is useful if a Cordless Handset has been lost or replaced. Even if an ID is deregistered by - RCA 25450RE3 | User Guide - Page 97
"Registration" submenu. Next Cordless Handset ID (Base Unit) The Next HS ID function allows you to use the Base Unit to assign a specific ID to the next Cordless Handset requesting registration. NOTE: If the Next Cordless Handset ID function is not used, then the system automatically assigns the - RCA 25450RE3 | User Guide - Page 98
Handset) The phone's volumes and tones can be adjusted to the user's preferences including: Cordless Handset Receiver, Speakerphone, and Headset volumes. Receiver, Speakerphone, or Headset Voice Volume (Cordless Handset) Adjust the voice volume of the person you are listening to on the line - RCA 25450RE3 | User Guide - Page 99
accept the volume setting, press the soft button. Ring Tone (Cordless Handset) The ring tone can be changed using the menu system. There are 4 different ring tones. The selected ring tone will remain in effect for future phone calls until changed. 1. Press the soft button. 2. "Sound" appears on - RCA 25450RE3 | User Guide - Page 100
button. Key Tone (Cordless Handset) The key tone can be changed using the menu system. There are four different key tones with key tone 1 the default. The selected key tone will remain in effect for future phone - RCA 25450RE3 | User Guide - Page 101
Settings Dialing Prefix When turned on, the dialing prefix allows the user to enter or store up to 14 digits before calling a phone number. This function is useful when using credit and calling cards or phone services requiring access numbers. Turn On Dialing Prefix 1. Press the soft button - RCA 25450RE3 | User Guide - Page 102
prefix. Edit Local Area Code (LAC) 1. Press the soft button. 2. Press 5 or 6 on the Navigation button to scroll through the options until "Phone setting" appears on the display. 3. Press the soft button. 4. Press 5 or 6 on the Navigation button to scroll through the options until "Area codes - RCA 25450RE3 | User Guide - Page 103
Edit Regional Area Code (RAC) Setting Regional Area Codes helps the system determine the number format to display when a Caller ID record is Press 5 or 6 on the Navigation button to scroll through the options until "Phone setting" appears on the display. 3. Press the soft button. 4. Press 5 - RCA 25450RE3 | User Guide - Page 104
the options to the desired contrast. 7. Press the soft button. Set Time (Base Unit) After the initial setting, the time and date are automatically updated through Caller ID information received from the local phone service provider. 1. Press the soft button. 2. Press 5 or 6 on the Navigation - RCA 25450RE3 | User Guide - Page 105
Do Not Disturb function. Base Unit 1. Press the DND button to turn off the ringer. Press the DND button again to turn on the ringer. The DND button flashes when DND is on. "DND enabled" also flashes on the display. 2. To turn off the ringer from the menu system, press the soft - RCA 25450RE3 | User Guide - Page 106
or Manual Line Selection Settings (Cordless Handset) The Cordless Handset can be set to Auto Line Selection or Manual Line Selection. Auto Line Selection mode allows the user to dial a phone number without first choosing a line. An available line is automatically selected. Manual Line Selection - RCA 25450RE3 | User Guide - Page 107
Settings and Adjustment Manual Line Selection Setting 1. Press the soft button on the Cordless Handset. 2. Press 5 or 6 on the Navigation button to scroll through the options until "Phone setting" appears on the display. 3. Press the soft button. 4. Press 5 or 6 on the Navigation button to - RCA 25450RE3 | User Guide - Page 108
settings/parameters will be changed after a reset: • System Security ID-a new one will be randomly selected. • Cordless Handset registration table-no Cordless Handset is registered • Base unit Call Log • Base unit CID records • Base unit Directory • Call forwarding numbers for all extensions - RCA 25450RE3 | User Guide - Page 109
Headset jack Settings and Adjustment Headset and Belt Clip Operation Connecting an Optional Headset to the Cordless Handset 1. Connect the headset (optional) to the HEADSET jack as shown. The handset receiver and microphone are disabled when the headset is connected. 2. Adjust the headset to rest - RCA 25450RE3 | User Guide - Page 110
and Adjustment Replacing the Batteries Cordless Handset Battery 1. Make sure the telephone is OFF (not in Talk mode) before you replace the battery. 2. Remove the back cover. 3. Disconnect the cord attached to the battery pack from the jack inside the battery compartment and remove the battery pack - RCA 25450RE3 | User Guide - Page 111
of this type, toxic materials could be released which can cause injury. • To reduce the risk of fire or personal injury, use only the battery listed in the User's Guide. • Keep batteries out of the reach of children. • Remove batteries if storing the Base Unit or Cordless Handset over 30 days. 111 - RCA 25450RE3 | User Guide - Page 112
16 memory locations. Prompt telling you to enter the telephone number for one of the 16 memory locations. Caller information has been interrupted during transmission or the phone line is excessively noisy. Indicates call or calls have not been reviewed. Indicates no CID records have been stored. NO - RCA 25450RE3 | User Guide - Page 113
call is from an area not serviced by Caller ID or CALLER/NUMBER the information was not sent. Sound Signals Signal Single short beep Meaning Successful key entry Single long beep Successful operation Triple short beep Power ON (Cordless Handset) Unsucessful key entry A long warbling tone - RCA 25450RE3 | User Guide - Page 114
electrical outlet. • Make sure the telephone line cord is connected to the base and the wall jack. • Disconnect the base from the wall jack and connect another phone to the same jack. If there is no dial tone in the second phone, the problem might be your wiring or local service. • The handset - RCA 25450RE3 | User Guide - Page 115
MENU system. • You may have too many extension phones on your line. Try unplugging some phones. • See solutions for "No dial tone." You experience static, noise, or fading in and out • Handset or headset may be out of range. Move closer to the base. • Relocate the base. • Charge the battery. • Make - RCA 25450RE3 | User Guide - Page 116
Troubleshooting Tips General Product Care To keep your telephone in good working order, follow these guidelines: • Avoid putting the phone near heating appliances and devices that generate electrical noise (for example, motors or fluorescent lighting). • DO NOT expose to direct sunlight or moisture. - RCA 25450RE3 | User Guide - Page 117
Troubleshooting in accordance with the instructions, may cause harmful interference turning the equipment off and on, the user is encouraged to try to correct the interference /television technician for additional suggestions. Also, Resolve Radio/TV Interference Problems." This booklet is available - RCA 25450RE3 | User Guide - Page 118
by ATLINKS USA, Inc. could void the user's authority to operate this product. For instructions on how to obtain service, refer to the warranty included in this guide or call customer service at 1-800-511-3180. Or refer inquiries to: Thomson Inc. Manager, Consumer Relations P O Box 1976 Indianapolis - RCA 25450RE3 | User Guide - Page 119
does not cover: • Customer instruction. (Your Owner's Manual provides information regarding operating instructions and user controls. Any additional information, should be obtained from your dealer.) • Installation and setup service adjustments. • Batteries. • Damage from misuse or neglect - RCA 25450RE3 | User Guide - Page 120
in any way increase the scope of this warranty. • Repair or replacement as provided under this warranty is the exclusive remedy of the consumer. This warranty gives you specific legal rights, and you also may have other rights that vary from state to state. If you purchased your product outside the - RCA 25450RE3 | User Guide - Page 121
Outline of Wall Mount Assembly TOP 1-3/4" Mounting Template Wall Mount Template for Cordless Handset Wall Mounting Bracket Template for Cordless Handset 121 - RCA 25450RE3 | User Guide - Page 122
This page is intentionally blank 122 - RCA 25450RE3 | User Guide - Page 123
Base Replacement battery (NiMH for Cordless Handset) 5-2699 Accessory Information DESCRIPTION AC power adaptor (for Base Unit) AC power adaptor (for Cordless Handset) Belt clip (for Cordless Handset) Replacement battery (NiMH for Base Unit) Replacement battery (NiMH for Cordless Handset) MODEL - RCA 25450RE3 | User Guide - Page 124
web site at www.rca.com Please do not send any products to the Indianapolis address listed in this manual or on the carton. This will only add delays in service for your product. Thomson Inc. 101 West 103rd Street Indianapolis, IN 46290 ©2006 Thomson Inc. Trademark(s)® Registered Marca(s) Registrada
-
 1
1 -
 2
2 -
 3
3 -
 4
4 -
 5
5 -
 6
6 -
 7
7 -
8
-
9
-
10
-
11
-
12
-
13
-
14
-
15
-
16
-
17
-
18
-
19
-
20
-
21
-
22
-
23
-
24
-
25
-
26
-
27
-
28
-
29
-
30
-
31
-
32
-
33
-
34
-
35
-
36
-
37
-
38
-
39
-
40
-
41
-
42
-
43
-
44
-
45
-
46
-
47
-
48
-
49
-
50
-
51
-
52
-
53
-
54
-
55
-
56
-
57
-
58
-
59
-
60
-
61
-
62
-
63
-
64
-
65
-
66
-
67
-
68
-
69
-
70
-
71
-
72
-
73
-
74
-
75
-
76
-
77
-
78
-
79
-
80
-
81
-
82
-
83
-
84
-
85
-
86
-
87
-
88
-
89
-
90
-
91
-
92
-
93
-
94
-
95
-
96
-
97
-
98
-
99
-
100
-
101
-
102
-
103
-
104
-
105
-
106
-
107
-
108
-
109
-
110
-
111
-
112
-
113
-
114
-
115
-
116
-
117
-
118
-
119
-
120
-
121
-
122
-
123
-
124
 |
 |

4 Line
Multi-Handset Office System
User’s Guide
Please read this manual before
operating this product for the first time.
Model 25450
TM