RCA M61WH185 User Manual
RCA M61WH185 Manual
 |
View all RCA M61WH185 manuals
Add to My Manuals
Save this manual to your list of manuals |
RCA M61WH185 manual content summary:
- RCA M61WH185 | User Manual - Page 1
HDTV User's Guide Changing Entertainment. Again. Find Inside: • The DLP Experience ... page 1 • Connections page 7 • Remote page 27 • Features page 37 • Menus page 47 • FAQs page 62 • Troubleshooting ......... page 63 rca.com/television - RCA M61WH185 | User Manual - Page 2
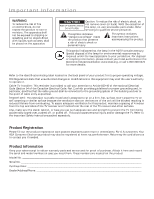
product may also be registered at www.rca.com/television. Returning the card allows us to contact you if needed. Product Information Keep your sales receipt to obtain warranty parts and service and for proof of purchase. Attach it here and record the serial and model numbers in case you need them - RCA M61WH185 | User Manual - Page 3
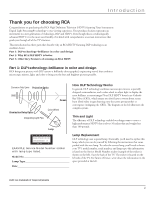
user-friendly of its kind-with comprehensive on-screen instructions that guide you through all of the TV's features. This introduction has three parts that describe why an RCA HDTV featuring DLP technology is an excellent choice: Part 1: DLP technology-brilliance in color and design Part 2: Why RCA - RCA M61WH185 | User Manual - Page 4
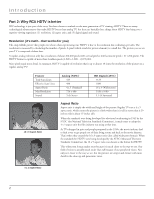
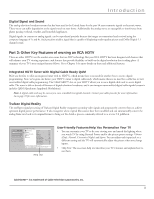
Introduction Part 2: Why RCA HDTV is better DLP technology is just part of the story. You have chosen to embark on the next generation of TV viewing-HDTV. There are many technological advancements that make HDTV better than analog TV, but there are basically three things about HDTV that bring you a - RCA M61WH185 | User Manual - Page 5
picture and Dolby Digital 5.1 channel sound. Part 3: Other Key Features of owning an RCA HDTV There are other HDTV's on the market-even some that use DLP technology. But your RCA HDTV has been designed with features that will enhance your TV viewing experience, and features that provide flexibility - RCA M61WH185 | User Manual - Page 6
This page left intentionally blank. - RCA M61WH185 | User Manual - Page 7
Up Digital Cable Television Service 10 Choose Your Connection 11 Y Pb Pr (Component Video) Connection 12 Audio/Video Connection 14 HDMI Connection ...16 Advanced Audio Connection Information 18 Plug in the TV ...19 Put Batteries in the Remote 19 Turn on the TV...19 Use the Remote Control to - RCA M61WH185 | User Manual - Page 8
Options ...60 Chapter 5: Other Information Frequently Asked Questions (FAQs 62 Troubleshooting ...63 Lamp Replacement Information 67 V-Chip Rating Explanations 68 US V-Chip Rating System 68 Canadian V-Chip Rating System 68 HDTV Specifications...70 Limited Warranty ...72 Care and Cleaning...73 - RCA M61WH185 | User Manual - Page 9
on the TV • Use the Remote Control to Complete the Assisted Setup • Complete the Assisted Setup • What To Expect • Next Steps • Explanation of Jacks • The Front of Your TV Changing Entertainment. Again. Graphics contained within this publication are for representation only. rca.com/television 7 - RCA M61WH185 | User Manual - Page 10
operator is required to view encrypted digital programming. Certain advanced and interactive digital cable services such as video-on-demand, a cable operator's enhanced program guide and data-enhanced television services may require the use of a set-top box. For more information, call your local - RCA M61WH185 | User Manual - Page 11
part of connecting your TV is to get the picture, also known as a signal. The back panel of your TV /SVGA/XGA FIXED/VARIABLE AUDIO OUTPUT WIRED REMOTE CONTROL (IR) ANTENNA INPUT L DIGITAL you determine what type of antenna you need, go to rca.com. • When you get to the Channel Search screen - RCA M61WH185 | User Manual - Page 12
cable services, including premium and HDTV cable service details, availability, restrictions, and pricing television services. See below for information on setting up digital cable television services for your TV more information. If problems persist, contact your press MENU on the remote to access the - RCA M61WH185 | User Manual - Page 13
Your Connection There are several ways to connect your HDTV, depending on the components you want to connect Audio pages 14-15 pages 16-17 Connecting an optional audio receiver: After you connect your TV (choose an option above), go to page 18 for general information about connecting an audio/ - RCA M61WH185 | User Manual - Page 14
INPUT 2 INPUT 3 INPUT 4 COMPONENT/COMPOSITE COMPOSITE SVGA INPUT AUDIO VGA/SVGA/XGA Y/VIDEO L VIDEO FIXED/VARIABLE AUDIO OUTPUT WIRED REMOTE CONTROL (IR) ANTENNA INPUT PB R L S-VIDEO R L DIGITAL AUDIO CABLE HDMI 1 INPUT HDMI 2 INPUT OUTPUT For Factory INPUT use only - RCA M61WH185 | User Manual - Page 15
CH GUIDE FORMAT MENU MUTE INFO SUB CH CLEAR INPUT ANT•CABLE REVERSE PLAY FORWARD SUBCHANNEL SKIP REVERSE PLAY FORWARD INPUT button RECORD STOP PAUSE RECORD STOP PAUSE CC PRESETS SOUND Use these buttons to view the picture of the device connected to the TV. Your remote model varies - RCA M61WH185 | User Manual - Page 16
/COMPOSITE COMPOSITE SVGA INPUT AUDIO VGA/SVGA/XGA Y/VIDEO L VIDEO Y/VIDEO L VIDEO FIXED/VARIABLE AUDIO OUTPUT WIRED REMOTE CONTROL (IR) ANTENNA INPUT P B R L P R S-VIDEO R P B R L P R S-VIDEO R L DIGITAL AUDIO CABLE HDMI 1 INPUT HDMI 2 INPUT OUTPUT For Factory INPUT - RCA M61WH185 | User Manual - Page 17
are color GUIDE FORMAT MENU MUTE INFO SUB CH CLEAR INPUT ANT•CABLE REVERSE PLAY FORWARD SUBCHANNEL SKIP REVERSE PLAY FORWARD INPUT button RECORD STOP PAUSE RECORD STOP PAUSE CC PRESETS SOUND Use these buttons to view the picture of the device connected to the TV. Your remote model - RCA M61WH185 | User Manual - Page 18
AUDIO VGA/SVGA/XGA FIXED/VARIABLE AUDIO OUTPUT WIRED REMOTE CONTROL (IR) ANTENNA INPUT L DIGITAL AUDIO CABLE /DVI adapter Red White Audio cables are color coded- Red= right audio; white= left Interface (DVI), the jack on the back of your TV is also compatible with devices that have a DVI jack - RCA M61WH185 | User Manual - Page 19
CH GUIDE FORMAT MENU MUTE INFO SUB CH CLEAR INPUT ANT•CABLE REVERSE PLAY FORWARD SUBCHANNEL SKIP REVERSE PLAY FORWARD INPUT button RECORD STOP PAUSE RECORD STOP PAUSE CC PRESETS SOUND Use these buttons to view the picture of the device you've connected to the TV (your remote model - RCA M61WH185 | User Manual - Page 20
the options or refer to the user's manual of each device that you are connecting to get the best results. • Use your TV's internal speakers (good sound). TV's internal speakers, connect to an audio receiver using audio cables to the TV's AUDIO OUTPUT jacks. Red White Audio cables are color coded- - RCA M61WH185 | User Manual - Page 21
the polarities inside the remote. • Replace the cover. TV MENU CLEAR Use these buttons during the Assisted Setup Tip To access the initial setup menus at a later time, press MENU, choose Setup Options, then Assisted Setup. Turn on the TV Press TV on the remote, or press the Power button on the - RCA M61WH185 | User Manual - Page 22
Setup menu. For more detailed instructions, refer to Chapter 4 of the User's Guide. If a cable box is connected to your TV's CABLE INPUT, or the power saving feature. Select to enable or disable Quick Startup. Decide which option is best for you. Enabling Quick Startup allows you to turn on the TV - RCA M61WH185 | User Manual - Page 23
16x9 Normal 1080i HDTV 12:00 PM - 1:00 PM Changing Channels Depending upon the type of signals you have connected to your HDTV, you might you're ready to watch TV. This might be a good time to program your remote control. The remote control that came with this TV can be programmed to operate - RCA M61WH185 | User Manual - Page 24
on the back of the TV. When connecting cables, be use a digital cable television card to receive digital cable services, including premium and HDTV cable channels, without the PR) video maintains the video signal as three separate parts through these three jacks. To ensure maximum picture quality - RCA M61WH185 | User Manual - Page 25
between devices. The audio/video jacks are often color coded (yellow for video, red for right audio, color (chrominance, also called chroma) part of the signal is separated from the black and white (luminance) part connect a device to your TV. HDMI 1 and 2 INPUTS (some TV models only have one HDMI - RCA M61WH185 | User Manual - Page 26
OUTPUT (OPTICAL) ANTENNA INPUT CABLE INPUT WIRED REMOTE CONTROL (IR) (available on some models) This jack is for connecting a wired remote control system, which is primarily for professional installers. If you're using the remote that was included with your TV, don't plug anything into this jack or - RCA M61WH185 | User Manual - Page 27
system, it moves the highlight right to items and adjusts menu controls. (Power button and indicator) Turns the TV on and off. The indicator lights when TV is on. Your HDTV's lamp has a cool-down period when the TV is turned off, and a warm up period when the TV is turned on. If you try to turn the - RCA M61WH185 | User Manual - Page 28
This page left intentionally blank. - RCA M61WH185 | User Manual - Page 29
Programming the Remote to Operate Other Devices • How To Use the Remote After You've Programmed It • Volume Punchthrough Feature • Using the INPUT Button • Remote Code List Changing Entertainment. Again. Graphics contained within this publication are for representation only. rca.com/television 27 - RCA M61WH185 | User Manual - Page 30
PAUSE SUBCHANNEL SKIP REVERSE PLAY FORWARD Remote model R401A1 RECORD STOP PAUSE CC PRESETS SOUND Remote model R602A1 The TV models covered in this User's Guide come with one of the two remotes shown. Tip To turn off most RCA devices that are connected to the TV, press ON•OFF twice within - RCA M61WH185 | User Manual - Page 31
of Operation on page 32 for more details). VCR (only available on remote R602A1) Places the remote in VCR mode. If Auto Tuning is enabled, turns on the TV and tunes to the VCR Video Input Channel for RCA devices. This button lights when you press a valid button in VCR mode (see Modes of Operation - RCA M61WH185 | User Manual - Page 32
to operate your television, it's already programmed to operate some RCA devices. A second and third RCA TV can be programmed to any device button, except the TV button. Notes: The TV button can't be programmed on this remote to control any device; it controls only this TV. The remote may not be - RCA M61WH185 | User Manual - Page 33
the device doesn't turn off, repeat these steps until you've tested all codes for your device's brand or try to run a manual code search. Using Manual Code Search Note: Before using manual code search, you must use Direct Entry first. This lets the remote know which type of device to begin searching - RCA M61WH185 | User Manual - Page 34
compatible with all brands and models of devices. Modes of Operation The button corresponding to the mode the remote is in lights up when you press any button that works in that mode. For example, if you're in TV mode and you press the VOL+ button, the TV button lights up. This tells you that - RCA M61WH185 | User Manual - Page 35
using the remote that came with your TV, you must first press Remote Code List Note: The codes are programmable to any of the device buttons (SAT•CABLE, VCR, DVD, AUDIO, or AUX) on the remote. Audio Codes 867 868 875 878 879 RCA 717 726 772 781 795 471 COGECO 511 COLOR VOICE 472 473 COMCAST - RCA M61WH185 | User Manual - Page 36
Remote Control OAK 476 489 PACE 532 PANASONIC 460 508 PARAGON 486 488 PHILIPS 471 479 485 490 491 492 PHILIPS-MAGNAVOX 505 534 PIONEER 478 506 493 494 PULSAR 486 RADIO SHACK 505 534 525 RCA 409 890 PROSONIC 926 RADIO SHACK 449 453 919 920 RCA 409 430 449 453 920 890 REGENT 931 REOC 451 - RCA M61WH185 | User Manual - Page 37
ECHOSTAR 655 647 EXPRESSVU 647 655 FORTEC STAR 569 555 556 HUGHES NETWORK 621 580 RCA 653 PHILIPS 621 PROSCAN 653 SAMSUNG 583 SONY 657 659 ULTIMATE TV 653 659 ZENITH 656 Home Theatre in a Box Where the code is listed as [### ###] the first is for the DVD and the second is for - RCA M61WH185 | User Manual - Page 38
Using the Remote Control GO-VIDEO 354 375 407 426 455 971 239 ....... 245 268 342 354 361 363 248 251 254 274 292 300 337 RADIX 245 RANDEX 245 RCA [225] 245 [308] 309 311 312 313 314 315 316 335 342 354 369 228 278 292 229 310 232 232 376 377 279 368 243 Web TV JVC 612 SONY 585 36 Chapter 2 - RCA M61WH185 | User Manual - Page 39
• About the Channel Banner • Digital or Analog TV Channels • Parental Controls • How V-Chip Works for the USA and Canada • Auto Tuning Feature • Future Downloadable Ratings Changing Entertainment. Again. Graphics contained within this publication are for representation only. rca.com/television 37 - RCA M61WH185 | User Manual - Page 40
a channel. 12:30 AM The time when the TV shuts off if the Sleep Timer is activated in the Time menu. 00:30 Displays the the resolution of the TV; and HDTV (High Definition Television), SDTV (Standard Definition Television) or EDTV (Enhanced Definition Television). For more information - RCA M61WH185 | User Manual - Page 41
number (e.g., Ch 21). D 6-1 DNLJ English MPAA - Not Rated Cable Input 16x9 Normal 1080i HDTV 12:00 PM - 1:00 PM Direct Tuning to a Channel 1. Make sure the remote is in TV mode by pressing TV on the remote control. 2. Enter the primary channel number. This number appears in the primary channel - RCA M61WH185 | User Manual - Page 42
forget your password, simultaneously press and hold the MENU/OK button on the front panel and VOL- button on the remote for three seconds. This resets the password only and unlocks the TV; all other settings in Parental Controls are not changed. How V-Chip Works for the USA and Canada V-Chip reads - RCA M61WH185 | User Manual - Page 43
Chip TV Rating. 6. Once you get to the V-Chip TV Rating screen, use the arrow buttons and OK on your remote to change the status of a TV program and associated content. The Viewable (V) settings are coded in green, and the Blocked (B) settings are coded in red. Rating Status Field Lets you select - RCA M61WH185 | User Manual - Page 44
higher, then you could block out all programming TV-PG and above containing adult language. To block program content: 1. Determine the lowest level of content you don't want the child to watch. 2. Use the up and down arrow buttons on the remote to highlight the age-based ratings that correspond with - RCA M61WH185 | User Manual - Page 45
provide content themes or age-based ratings. You must remember to lock the TV as described above for rating limits to take effect. To view content . To access the V-Chip Movie Rating menu: 1. Press MENU on the remote control (the Main Menu appears). 2. Select Channel Setup. Enter your password if - RCA M61WH185 | User Manual - Page 46
blocked and the TV is locked, only the remote or keyboard will control the TV. Note: If power to the TV is lost for a prolonged time (for example, due to a power outage) the buttons become unblocked. Two lines of help text will appear in this area to explain the feature and instruct the user on how - RCA M61WH185 | User Manual - Page 47
this area to explain the feature and instruct the user on how to use it. Cable Channel List menu. 0 Go Back 1 Lock TV 2 Channel Search 3 Cable Channel List is pressed on the remote control. VCR Front Input AUDIO (Audio Receiver/Amp) Not Connected VCR2 Not Connected RCA SAT2 Not Connected DVD - RCA M61WH185 | User Manual - Page 48
button. HDMI 1, HDMI 2 (some TV models only have one HDMI Input) Device is connected to an HDMI jack on the back of the TV and you want the TV to tune to this input when you press the corresponding button. Future Downloadable Ratings Your TV is equipped to support a downloadable rating system. It is - RCA M61WH185 | User Manual - Page 49
Chapter 4: Using the TV's Menu System Chapter Overview: • Menus, On-Screen Help, and Control Panels • Picture Menu • Audio Menu • Channel Setup Menu • Setup Options Menu Changing Entertainment. Again. Graphics contained within this publication are for representation only. rca.com/television 47 - RCA M61WH185 | User Manual - Page 50
is pressed on the remote control. VCR Front Input AUDIO (Audio Receiver/Amp) Not Connected VCR2 Not Connected RCA SAT2 Not Connected DVD the currently highlighted item. Controls Controls let you adjust the default settings of your TV. You can choose a setting, enter a number, or adjust a level - RCA M61WH185 | User Manual - Page 51
at: + - 12:00 pm Turn TV Off at: + - 1:15 pm Numeric Entries Numeric entry fields are used to enter numbers, passwords, and time values. The number buttons on the remote and the arrow, channel up/down, volume up/down, and MENU/ OK buttons on the front panel can be used to enter - RCA M61WH185 | User Manual - Page 52
the TV's input Color Tint Brightness Sharpness Auto Flesh Tone Color the remote of lighting lighting, choose Remote R602A1 Only) works with Picture Presets. Go to the Remote light and dark areas of the picture. Color The richness of the color remote control to select the slider. 3. Press the up and - RCA M61WH185 | User Manual - Page 53
change channels, the TV will change formats for you. Notes: The format of some video cannot be changed. The FORMAT button on the remote lets you change screens that let you enhance picture performance: •Auto Flesh Tone •Color Temperature •Video Noise Filter •Green Enhance •Detail Enhance •Contrast - RCA M61WH185 | User Manual - Page 54
Using the TV's Menu System Contrast Enhance Makes the picture appear brighter by deepening the black parts of the picture. This also setting. Turns Film 3:2 Pulldown on when needed. • On Used in circumstances when the TV is to be used solely with film-based sources. • Off Use this setting if - RCA M61WH185 | User Manual - Page 55
Using the TV's Menu System 0 Go Back 1 Picture Menu 2 Audio Menu 3 Channel Setup 4 Audio Menu The Audio menu lets you adjust audio output. To access the Audio menu, press MENU on the remote, and then select Audio from the main menu. The following audio items can be adjusted: Sound Preset Mode, - RCA M61WH185 | User Manual - Page 56
area to explain the feature and instruct the user on how to use it. speakers or headphones. If your model has SRS TruSurround XT and (digital TV) programs. If the Audio Lang./ Mode icon ( ) in the banner lights, it up and down arrow buttons on your remote control. Press OK to hear that language - RCA M61WH185 | User Manual - Page 57
a program, the SAP icon in the channel banner will light up. A change in this screen is applied to all inputs by the TV. Use Fixed Output when connecting to an audio receiver or amplifier with its own remote control for PCM (Pulse Code Modulation) The TV sends all signals through the Digital Audio Output - RCA M61WH185 | User Manual - Page 58
adjust an antenna if you have one connected to your TV. Channel Setup Menu The Channel Setup menu lets you fi instruct the user on how to use it. Tip You can still add a channel that was not found by Channel Search. Clear any on-screen menus, and tune to it by using the number buttons on the remote - RCA M61WH185 | User Manual - Page 59
code. Then use the RCA SAT2 option in the auto tuning menu to set auto tuning. Startup Channel You can select the tuner and channel or input that your TV tunes to each time the TV is turned on by plugging it back in. Diagnostic Info Displays channel and cable information for TV and cable service - RCA M61WH185 | User Manual - Page 60
Note: CC1 and Text 1 are the primary caption and text services. Press 5 or 6 to point to an option, then on the screen. HDMI and SVGA inputs aren't supported by Closed Captioning (CC); try the device's and the TV's sound is muted. (To mute the sound, press the MUTE button on the remote control and - RCA M61WH185 | User Manual - Page 61
Color allows you to choose the font color: White, Black, Red, Green, Blue, Yellow, Magenta, and Cyan. Background Color allows you to choose the background color is correct. Note: If you enter the time manually, you must remember to set your TV's time when the time changes to Daylight Saving Time - RCA M61WH185 | User Manual - Page 62
of the device buttons (e.g. SAT•CABLE, DVD, etc.) using the TV2 code 162. Select the TV2 option in that TV's Remote Setup menu. If you have a third RCA TV, program a device button using the TV3 code 163. Select the TV3 option in that TV's Remote Setup menu. Go to Chapter 2 for more information on - RCA M61WH185 | User Manual - Page 63
• Troubleshooting • Lamp Replacement Information • V-Chip Rating Explanations • HDTV Specifications • Limited Warranty • Care and Cleaning • FCC Information • Index Changing Entertainment. Again. Graphics contained within this publication are for representation only. rca.com/television 61 - RCA M61WH185 | User Manual - Page 64
to the button corresponding with the device you have connected to your TV. Go to page 30 for information on programming your remote. Why do I have sound, but no picture when I turn on my TV? There is a lamp inside the TV which needs approximately one minute to reach full brightness. You'll hear - RCA M61WH185 | User Manual - Page 65
the following troubleshooting list. TV Problems TV won't turn on • Press the TV button or ON/OFF button while remote is in TV mode and there's a source of power to the outlet or outlet strip. • Make sure the TV is plugged in. • You might have tried to turn on the TV during the lamp cool-down - RCA M61WH185 | User Manual - Page 66
Receiver's manual. Blank screen • Make sure you have connected the device to the TV correctly. • Make sure the device connected to the TV is on the front of the TV is blinking for one minute, the lamp inside of your TV may need to be changed. Refer to the Power indicator is blinking or flashing - RCA M61WH185 | User Manual - Page 67
Go to page 50 for more instructions. • Press instructions. Problems with HDMI Connection • trouble sending video information to the TV. Re-connect your device. Reset the power by unplugging the power remote is not in TV Mode. Press the TV button so the remote operates the TV. • Maybe batteries in remote - RCA M61WH185 | User Manual - Page 68
the wall outlet, power strip, etc. Keep your TV unplugged for about 5 minutes. Then plug the TV back in, turn on the TV, and see if the problem is fixed. If the problem remains, then please visit www.rca.com/television for updated FAQs or contact RCA Customer Support at the support number provided in - RCA M61WH185 | User Manual - Page 69
on the Service Model Number sticker (example of the sticker is shown at left). Face the back of the TV. The sticker is located on the right side of the TV (see picture below for sticker location). • Follow the replacement instructions that come packed with the new lamp. Service Model Number Sticker - RCA M61WH185 | User Manual - Page 70
dialogue (D) or situations (S), no strong language (L), and little or no violence (V). TV-Y7 (Directed to Children 7 years and older) Designed for children ages 7 fically for children, it is understood younger viewers may be part of the audience. Violence Guidelines: Will contain very little violence - RCA M61WH185 | User Manual - Page 71
as the preferred, acceptable, or only way to resolve conflict or encourage children to imitate dangerous acts which they may see on television. Any realistic depictions of violence will be infrequent, discreet, of low intensity and will show the consequences of the acts. Other Content Guidelines - RCA M61WH185 | User Manual - Page 72
Engine Type DLP Light Engine Picture Screen Pitch Screen .155mm Scan Rate Converter Yes Vertical Viewing Angle (Alpha V 20˚ Horizontal Resolution (Picture Width 1280 Horizontal Viewing Angle (Alpha H 80 Wide Band Video Amplifier Yes Sound Audio Power (Watts) Front Speakers 10 Watts/Channel - RCA M61WH185 | User Manual - Page 73
Digital Front Button Block Yes Commercial Skip Yes (available on certain models). Parental Control with USA & Canada V-Chip Yes Picture Reset RF HDMI/DVI Input (with Audio Input menu selection 1-2 (depending on the model) Digital Audio Output (Optical 1 Fixed or Variable Audio Outputs 1 set, - RCA M61WH185 | User Manual - Page 74
the labor charges to repair your unit. Pay an Authorized Service Center for the new, or at our option, refurbished replacement parts, light engine, and lamp assembly required to repair your unit. What your warranty does not cover: • Customer instruction. (Your Owner's Manual describes how to install - RCA M61WH185 | User Manual - Page 75
OF THIS WARRANTY. • REPAIR OR REPLACEMENT AS PROVIDED UNDER THIS service calls are the sole responsibility of the purchaser. Care and Cleaning CAUTION: Turn OFF your TV before cleaning. You can clean the TV television reception, which can be determined by turning the equipment off and on, the user - RCA M61WH185 | User Manual - Page 76
Power 25 PRESETS 29 Problems 63 RECORD 29 REVERSE 29 SAT•CABLE 29 SKIP 29 SOUND 29 STOP 29 SUB CH 29 TV Remote 33 Satellite/DTV Receivers ..........35 VCR Codes 35 Web TV 36 Color 50 Color button 28 GUIDE button 28 H HDMI 23 HDMI 1, HDMI 2 46 HDMI Connection Problems 65 HDTV Specifi - RCA M61WH185 | User Manual - Page 77
Wired Remote Control ...........24 L Lamp Power menu 60 Replacement 67 Language Menu 60 Light blinking 25 M Main Menu 48 Manual Code 50 Translucency 60 Troubleshooting 63 Tuning Capability 70 Turn on the TV 19 TV Front 25 Lock/Unlock 40 Long to turn on 62 Watching 21 TV button 29 TV - RCA M61WH185 | User Manual - Page 78
Program Block...........44 USA 40 Movie Rating Limit 43 Rating Limit Screen 41 TV Ratings 41 VCR Button 29 VCR Codes List 35 Vertical Position 52 Vibrant picture setting 50 Video 70 Videogame picture setting ..........50 VOL - or VOL + Button 29 Volume Maximum 55 up/down buttons 25 - RCA M61WH185 | User Manual - Page 79
This page left blank intentionally. - RCA M61WH185 | User Manual - Page 80
the RCA website at www.rca.com/television Please do not send any products to the Indianapolis address listed in this manual or on the carton. This will only add delays in service for your product. TTE Technology, Inc. 101 West 103rd Street Indianapolis, IN 46290 ©2006 TTE Technology, Inc. RCA and
-
 1
1 -
 2
2 -
 3
3 -
 4
4 -
 5
5 -
 6
6 -
 7
7 -
8
-
9
-
10
-
11
-
12
-
13
-
14
-
15
-
16
-
17
-
18
-
19
-
20
-
21
-
22
-
23
-
24
-
25
-
26
-
27
-
28
-
29
-
30
-
31
-
32
-
33
-
34
-
35
-
36
-
37
-
38
-
39
-
40
-
41
-
42
-
43
-
44
-
45
-
46
-
47
-
48
-
49
-
50
-
51
-
52
-
53
-
54
-
55
-
56
-
57
-
58
-
59
-
60
-
61
-
62
-
63
-
64
-
65
-
66
-
67
-
68
-
69
-
70
-
71
-
72
-
73
-
74
-
75
-
76
-
77
-
78
-
79
-
80
 |
 |
rca.com/television
Changing Entertainment. Again.
Find Inside:
•
The DLP Experience
...
page 1
•
Connections
.................
page 7
•
Remote
..........................
page 27
•
Features
........................
page 37
•
Menus
............................
page 47
•
FAQs
...............................
page 62
•
Troubleshooting
.........
page 63
HDTV User’s Guide