RCA l26wd26d User Guide & Warranty
RCA l26wd26d - LCD HDTV w/ DVD Player Manual
 |
UPC - 846042060417
View all RCA l26wd26d manuals
Add to My Manuals
Save this manual to your list of manuals |
RCA l26wd26d manual content summary:
- RCA l26wd26d | User Guide & Warranty - Page 1
(Model L26WD26D shown) reality: reproduced. LCD Users Guide Connections page 7 Menus page 29 Remote page 17 FAQs page 36 Playing Discs ........ page 19 Warranty page 42 - RCA l26wd26d | User Guide & Warranty - Page 2
COVERS AND DO NOT REPAIR YOURSELF. REFER SERVICING TO QUALIFIED PERSONNEL. WARNING The TV is unstable if it is not properly attached to the base or mounted to the wall. Please follow the base or wall mounting instructions provided in the User's Guide to ensure your safety. CLASS 1 LASER PRODUCT - RCA l26wd26d | User Guide & Warranty - Page 3
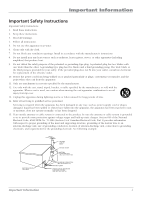
54 of Canadian Electrical Code, Part 1) provides information with respect to proper grounding of the mast and supporting structure, grounding of the lead-in wire to an antenna-discharge unit, size of grounding conductors, location of antenna-discharge unit, connection to grounding electrodes, and - RCA l26wd26d | User Guide & Warranty - Page 4
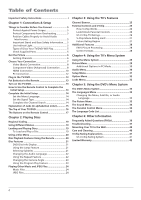
TV/DVD Will Play 5 Check Supplied Parts 5 Get the Picture 6 Getting Channels 6 Choose Your Connection 7 Video (Basic) Connection 8 Component Video (Advanced) Connection .......... 8 HDMI Connection 10 PC Connection 12 Plug in the TV/DVD 13 Put Batteries in the Remote 13 Turn on the TV/DVD - RCA l26wd26d | User Guide & Warranty - Page 5
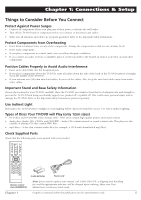
before you plug any of their power cords into the wall outlet. • Turn off the TV/DVD and/or component before you connect or disconnect any cables. • Make sure all antennas and cables are properly grounded. Refer to the Important Safety Instructions. Protect Components from Overheating • Don't block - RCA l26wd26d | User Guide & Warranty - Page 6
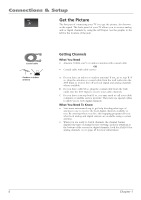
Picture The first part of connecting your TV is to get the picture, also known as the signal. The back panel of your TV allows you to receive analog and/or digital the channel banner displays the type of channel you're viewing. Look for DIGITAL at the bottom of the screen for digital channels; look - RCA l26wd26d | User Guide & Warranty - Page 7
RCA product, please visit www.rca.com/customersupport. There are several ways to connect your TV. Please use the following chart to determine which connection is best for you. Proceed to the appropriate page and connect your TV. Jacks Used Cables Needed Go to... VIDEO L AUDIO R (MONO) Video - RCA l26wd26d | User Guide & Warranty - Page 8
cable to get a picture. Go to page 6 for instructions. VIDEO L AUDIO R (MONO) 23 OUTPUT VIDEO L AUDIO R S-VIDEO INPUT COMPONENT VIDEO L AUDIO R Y Pb Pr VIDEO L AUDIO R S-VIDEO Component Video (Advanced) Connection This is an example of a connection using the Component Video jacks. Go to - RCA l26wd26d | User Guide & Warranty - Page 9
are color coded- Yellow= video; Red= right audio; white= left audio Green Blue Red Component Video cables (Y Pb Pr) are color codedGreen, Blue and Red Red White Audio cables are color coded- Red= right audio; white= left audio POWER button POWER DISPLAY TV/DVD VOL 1 23 4 7 SETUP/ TV MENU 56 - RCA l26wd26d | User Guide & Warranty - Page 10
This is an example of a connection using the HDMI jack. *Don't forget: If necessary, connect antenna or cable to get a picture. Go to page 6 for instructions. PC/HDMI AUDIO HDMI A Device with HDMI Y Pb Pr Video Out R L Audio Out HDMI Out C OR B DVI Out L R Audio Out Device - RCA l26wd26d | User Guide & Warranty - Page 11
audio left/right cable. Connect the mini-pin end to the PC/HDMI AUDIO jack on the back of the TV/DVD and the other end to the R and L jacks on the back of the device. 3.5 mm stereo mini pin to Audio left/right POWER button POWER DISPLAY TV/DVD VOL 1 23 4 7 SETUP/ TV MENU 56 89 SLEEP 0 CH - RCA l26wd26d | User Guide & Warranty - Page 12
PC. Note: The maximum resolution is 1360 x 768. Be sure to set your PC to the correct monitor output setting. Viewing the PC 1. Plug in the TV and the PC, if they aren't already plugged in. 2. Turn on the TV and the PC. 3. Press the INPUT SELECT button on the remote control and select PC from - RCA l26wd26d | User Guide & Warranty - Page 13
Connections & Setup Plug in the TV/DVD Plug the end of the power cord into the back of the TV/DVD. Plug the other end into a grounded wall outlet. Insert the plug completely into the outlet. Do not plug into an outlet controlled by a light switch. Put Batteries in the Remote • Remove the battery - RCA l26wd26d | User Guide & Warranty - Page 14
TV allows the TV's features to work properly. You need to set up a few things first before using your TV/DVD. Set the Menu Language Press the SETUP/TV MENU button on the remote connected Cable to digital channels, and digital sub channels. Once the search is complete, the TV tunes to a channel. 14 Chapter - RCA l26wd26d | User Guide & Warranty - Page 15
inputs. The left audio connector is usually white. • R AUDIO Provides right audio connection when using the component video inputs. The right audio connector is usually red. DIGITAL AUDIO OUTPUT (Coaxial) Use a digital coaxial cable to connect your TV to a compatible audio receiver for the best - RCA l26wd26d | User Guide & Warranty - Page 16
p Scans up through the channel list. In the menu system, acts like the up arrow button on the remote control and adjusts menu controls. MENU Brings up the Main menu. In the menu system, it selects highlighted items. INPUT Displays the input list. POWER Turns the TV/DVD on and off. 16 Chapter 1 - RCA l26wd26d | User Guide & Warranty - Page 17
DVD mode, displays the play mode options. POWER Turns the TV and DVD on or off. QUICK VIEW/ZOOM In TV mode, returns you to the previous channel; in DVD mode, zooms the picture. REPEAT A-B In DVD mode, sets the Repeat A-B option and turns it off. RETURN Removes the DVD Main menu. SCREEN SIZE Displays - RCA l26wd26d | User Guide & Warranty - Page 18
Connections & Setup SLEEP Sets the TV to turn off after a set time. The time increases in 10 minute increments and goes up to 2 hours. SLOW In DVD mode, plays a disc in forward or backward slow motion. STOP In DVD mode, stops a disc. SUBTITLE In DVD mode, displays the available subtitles. TOP MENU - RCA l26wd26d | User Guide & Warranty - Page 19
while you are playing a disc. It's turned on and off with the DISPLAY button on the remote. • The DVD's menu system - The DVD's menu system is accessed only when a disc isn't playing. Press the STOP button and then press the SETUP/TV MENU button. A feature will only work if the disc was programmed - RCA l26wd26d | User Guide & Warranty - Page 20
access the disc menu, while the disc is loaded, press the DVD MENU button. The content and operation of disc menus vary from disc to disc. Disc Playback Features Using the Remote You can use the remote control to activate disc playback features. Playback features aren't usually available during the - RCA l26wd26d | User Guide & Warranty - Page 21
To see the Info Display, press the DISPLAY button on the remote while a disc is playing. The Info Display appears across the top of the screen. To make the Info Display disappear from the screen, press DISPLAY on the remote. DVD Disc Info Display Disc Operation Time Display Total Time Title - RCA l26wd26d | User Guide & Warranty - Page 22
playing, press the PLAY MODE button on the remote. 2. Repeatedly press the ENTER button to select Chapter or Title. Press PLAY to make the screen disappear. 3. The selected repeat option will loop repeatedly until you turn Repeat off. Repeat is turned off by completing the steps above, and selecting - RCA l26wd26d | User Guide & Warranty - Page 23
ANGLE button on the remote. The number of angles available are displayed. For example, if there are 3 different angles, the display will read 1/3. This means This is done from the DVD's main menu. To change the playback of a CD: 1. Make sure the folder selection menu is on-screen- press the TOP MENU - RCA l26wd26d | User Guide & Warranty - Page 24
. The main advantage of the mp3 format is the ability to store CD-quality music tracks that are user-friendly and compressed on a personal computer. mp3 (MPEG-3, which stands for Motion Picture Experts Group-Layer 3), meaning the third layer of information is a format used to compress digital audio - RCA l26wd26d | User Guide & Warranty - Page 25
indicators that might appear when you press the DISPLAY button on the remote. This display is called the Channel Banner. The following list describes the items on the Channel Banner screen (left to right and top to bottom). 100-15 BEV DIGITAL TV-14 D CABLE ENGLISH SLEEP TIMER OFF Program - RCA l26wd26d | User Guide & Warranty - Page 26
you do not lock parental controls, none of the settings for V-Chip will take effect. If you forget your password, you can reset it. Turn the volume all the way down using the top panel VOL- button on the TV. Continue holding the button and press the 0 number button on the remote at the same time - RCA l26wd26d | User Guide & Warranty - Page 27
rating whose content theme you want to change and press DISPLAY. 3. Press the down arrow button to move the highlight To keep some on and turn others OFF, highlight the themes you want turn off and then press for TV programs. These ratings let you define additional parameters for parental controls. - RCA l26wd26d | User Guide & Warranty - Page 28
. Go to page 29 to adjust picture settings. Screen Formats Screen format is the way the picture is displayed on your TV. Press the SCREEN SIZE button on your remote and select a screen size. You will only be able to select the available formats. Most digital video is sent in a 16/9 format which - RCA l26wd26d | User Guide & Warranty - Page 29
Picture Menu The PICTURE menu ( ) contains menus and controls to configure how the picture looks. The Picture menu options apply to the video for the main TV and video input selections. All picture options can be applied to each input- VIDEO1, VIDEO2, COMPONENT, HDMI, HDMI 2 (only available for model - RCA l26wd26d | User Guide & Warranty - Page 30
picture. WXGA Input Turn this option ON in order to fill the screen in PC mode. Reset Restores PC Settings menu to the default settings. Audio Menu The AUDIO menu ( ) lets you adjust the audio output. To access the Audio menu, press MENU on the remote, and then select the Audio icon from the Main - RCA l26wd26d | User Guide & Warranty - Page 31
remote, and then select the Setup icon from the Main Menu. Language Allows you to change the language of the menu system. TV/Cable Choose the type of signal you have connected for displaying captioning the digital closedcaption text: Auto, Black, White, digital, the Digital CC style settings will - RCA l26wd26d | User Guide & Warranty - Page 32
scan player, for example). Select Video if you think film mode is causing distortions to your picture. Aspect Turning this feature on allows the TV to take a 480i signal and display it in a fuller format on the TV. Signal Meter Displays the signal strength of the currently tuned to digital channel - RCA l26wd26d | User Guide & Warranty - Page 33
choose another language and enter a code from the code list on page 35. TV Screen : 16:9 Display : On Picture Mode : Auto JPEG Interval : Off The Picture Menu The Picture menu contains the settings that affect how disc content looks on your TV/DVD. TV Screen The TV Screen menu adjusts the way - RCA l26wd26d | User Guide & Warranty - Page 34
choose which type of digital audio is output from the DIGITAL AUDIO OUTPUT jack. Choose PCM if you connected a PCM receiver. Choose Bitstream if you connected a Dolby 5.1 or Dolby 3.1 receiver. The Parental Control Menu When you enter Parental Control on the DVD's main menu you will need to enter - RCA l26wd26d | User Guide & Warranty - Page 35
Using the DVD's Menu System The Language Code List Enter the appropriate code number for the Menu, Subtitle, and Audio DVD language menu options. Language Name Code Language Name Code Language N ame C ode Language Name Code Abkhazian 1112 Fiji 1620 Lingala 2224 Singhalese 2919 Afar 1111 - RCA l26wd26d | User Guide & Warranty - Page 36
. DIGITAL is displayed for a digital channel. Why are there bars on my screen and can I get rid of them? Most digital video is sent in a 16/9 format which does fill your screen, but sometimes is sent in 4/3 which does not fill your screen. It depends on how the station or device connected to your TV - RCA l26wd26d | User Guide & Warranty - Page 37
system and to instruct you in its operation. For details about this service, call 1-888-206-3359. For additional assistance while using your RCA product, please visit www.rca.com/customersupport. DVD Problems Player won't work • Reset the TV/DVD by unplugging the AC power cord and plugging it - RCA l26wd26d | User Guide & Warranty - Page 38
in again. TV Problems TV won't turn on • Make sure the TV/DVD is plugged in. • Check the wall receptacle (or extension cord) to make sure it is "live" by plugging in something else. • Something might be wrong with your remote control. Press the POWER button on the TV/DVD. If the TV turns on, check - RCA l26wd26d | User Guide & Warranty - Page 39
power cord from the wall outlet, power strip, etc. Keep your TV unplugged for about 5 minutes. Then plug the TV back in, turn on the TV, and see if the problem is fixed. If the problem remains, then please visit www.rca.com/television for updated FAQs or contact RCA Customer Support at the support - RCA l26wd26d | User Guide & Warranty - Page 40
affect normal operation of this player. If this occurs, turn the TV/DVD off and on again with the POWER button, or disconnect and then reconnect the AC power cord to the AC power outlet. The TV/DVD will operate normally. • Be sure to remove the disc and turn off the TV/DVD after use. Formation of - RCA l26wd26d | User Guide & Warranty - Page 41
Information Cleaning Discs • Dirty discs can cause reduced video and audio performance. Always keep discs clean by wiping which may cause damage to the disc surface. V-Chip Rating Explanations US V-Chip Rating System TV-MA (Mature Audience Only) Specifically designed to be viewed by adults and may be - RCA l26wd26d | User Guide & Warranty - Page 42
option, we will either supply new or refurbished parts to an Authorized RCA Service Center for them to repair your television or replace your television with a new or refurbished unit. After 90 days, labor charges will be at your expense for screen sizes 32" and smaller. How you get service: • Call - RCA l26wd26d | User Guide & Warranty - Page 43
Other Information • REPAIR OR REPLACEMENT AS PROVIDED UNDER THIS WARRANTY IS THE EXCLUSIVE REMEDY OF THE • This warranty does not apply. See your dealer for warranty information. Service calls which do not involve defective materials or workmanship are not covered by this warranty. Costs of - RCA l26wd26d | User Guide & Warranty - Page 44
experienced radio/TV technician for help. This Class B digital apparatus complies with Canadian ICES-003. Visit the RCA website at www.rca.com/television Please do not send any products to the Indianapolis address listed in this manual or on the carton. This will only add delays in service for your
-
 1
1 -
 2
2 -
 3
3 -
 4
4 -
 5
5 -
 6
6 -
 7
7 -
8
-
9
-
10
-
11
-
12
-
13
-
14
-
15
-
16
-
17
-
18
-
19
-
20
-
21
-
22
-
23
-
24
-
25
-
26
-
27
-
28
-
29
-
30
-
31
-
32
-
33
-
34
-
35
-
36
-
37
-
38
-
39
-
40
-
41
-
42
-
43
-
44
 |
 |
reality: reproduced.
reality: reproduced.
LCD Users Guide
Connections
............
page 7
Remote
............
page 17
Playing Discs
........
page 19
Menus
....................
page 29
FAQs
...............
page 36
Warranty
...............
page 42
(Model L26WD26D shown)