RCA rd1060 User Guide - Page 6
Before You Begin - driver
 |
UPC - 044319102253
View all RCA rd1060 manuals
Add to My Manuals
Save this manual to your list of manuals |
Page 6 highlights
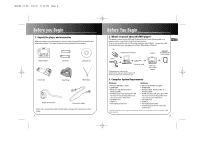
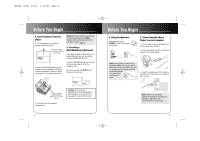
RD1060 IB-EN 1/4/02 6:18 PM Page 10 Before You Begin 4. Insert batteries into the player A. To insert batteries, lift open the battery compartment door. Push the battery compartment door up to open EJECT B. Insert 2 "AAA"(LR03) batteries with polarities corresponding to indications on the compartment. (Refer to "More information" for battery precautions.) Note: Refer to the power level indicator on display for battery level. Replace with new batteries when the indicator is empty. 5. Inserting a MultiMediaCard (Optional) The player has built-in flash memory. To extend the playtime, you can use the optional MultiMediaCard slot. A. Insert a MultiMediaCard into the card slot when the player is off as the diagram shows: B. To remove card, slide EJECT in the direction of the arrow. +- -+ EJECT Pull the ribbon underneath the batteries to remove them C. Close the door to the battery compartment Caution: Do not remove MultiMedia Card during playback or when power is on. It may result in damages to the unit and the card. 3 Before You Begin 6. Using Headphones Insert phone jack into PHONES on the side of player for listening. PHONES 7. Connecting the k@zoo Player to your Computer 1. Lift the rubber cover on the player and turn it away from the socket. 2. Insert the smaller end of the connection cable into the socket tightly. Note: Have a Blast- Just Not in Your Eardrums. Make sure you turn down the volume on the unit before you put on headphones. Increase the volume to the desired level only after headphones are in place. 2 1 3. Insert the opposite end of the connecting cable to the USB socket on the back of the computer. 3 Note: Refer to the Software Instruction manual for procedures in setting up USB drivers and transferring files to the player. 4
-
 1
1 -
 2
2 -
 3
3 -
 4
4 -
 5
5 -
 6
6 -
 7
7 -
 8
8 -
 9
9 -
 10
10
 |
 |
