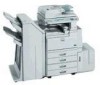
Ricoh 3045 User Instructions
Ricoh 3045 - Aficio B/W Laser Manual
 |
View all Ricoh 3045 manuals
Add to My Manuals
Save this manual to your list of manuals |
Ricoh 3045 manual content summary:
- Ricoh 3045 | User Instructions - Page 1
Transmission Features 5 Reception Features 6 Fax via Computer 7 Simplifying the Operation 8 Facsimile Features 9 Administrator Setting 10 Solving Operation Problems 11 Appendix Read this manual carefully before you use this machine and keep it handy for future reference. For safe and correct use - Ricoh 3045 | User Instructions - Page 2
machine refer to the inch version. Important Contents of this manual are subject to change without prior notice. In no event will the company be liable for direct, indirect, special, incidental, or consequential damages as a result of handling or operating the machine. Trademarks Microsoft®, Windows - Ricoh 3045 | User Instructions - Page 3
Settings (such as Tray Paper Settings), Document Server functions, and troubleshooting. Refer to this manual for Address Book procedures such as registering fax numbers, e-mail addresses, and user codes. ❖ Security Reference This manual is for administrators of this machine. It describes security - Ricoh 3045 | User Instructions - Page 4
Reference (PDF file - CD-ROM 1) Describes operations, functions, and troubleshooting for the machine's scanner function. ❖ Manuals for DeskTopBinder Lite DeskTopBinder Lite is a utility included on the CD-ROM labeled "Scanner Driver and Document Management Utility". • DeskTopBinder Lite Setup Guide - Ricoh 3045 | User Instructions - Page 5
21 Changing Other Options 22 Changing the Transmission Time 22 Changing the SMTP Server Setting 23 Printing a File ...24 Resending a File 25 Printing a List of Files in Memory (Print TX File List 26 3. Communication Information Printing the Journal 27 Journal ...29 Checking the Transmission - Ricoh 3045 | User Instructions - Page 6
47 Advanced Features 49 SUB Code ...49 SID Code ...50 SEP Code ...50 PWD Code...52 Transfer Request ...52 With transfer requests set in the System Settings menu 55 On Hook Dial ...57 Manual Dial ...59 Changing the Line Port 60 Sub Transmission Mode 62 Book Fax ...62 Two-Sided Transmission - Ricoh 3045 | User Instructions - Page 7
Tray for Lines 106 Tray Shift...106 6. Fax via Computer Sending Fax Documents from Computers 107 Before Use ...108 Installing the Software 108 Auto run program 108 Installing individual applications 109 Applications Stored on the CD-ROM 109 LAN-Fax Driver...109 Address Book ...110 LAN-Fax - Ricoh 3045 | User Instructions - Page 8
Setting LAN-Fax Driver Properties 110 Setting print properties 110 Making Settings for Option Configuration 111 Basic Transmission 112 Specifying options 115 Confirming transmission results by e-mail 117 LAN-Fax Result Report 118 Printing and Saving 118 Editing Address Book 118 Editing Fax - Ricoh 3045 | User Instructions - Page 9
Parameters 171 Printing the User Parameter List 172 Special Senders to Treat Differently 172 Authorized Reception 173 Forwarding...174 Reception File Print Quantity 174 Print 2 Sided ...174 Memory Lock ...175 Paper Tray...175 Programming/Changing Special Senders 175 Programming Initial Set Up - Ricoh 3045 | User Instructions - Page 10
Operation Problems If an Error Report Is Printed 201 Turning Off the Main Power / In the Event of Power Failure 202 If an Error Occurs While Using Internet Fax 203 Error Mail Notification 203 Error Report (E-Mail 203 Server-Generated Error E-mail 203 11.Appendix Connecting the Machine to - Ricoh 3045 | User Instructions - Page 11
damage that does not involve personal injury if you misuse the machine without following the instructions under this symbol. Be sure to read the instructions, all of which are included in "Safety Information", General Settings Guide. * The statements above are notes for your safety. Important If - Ricoh 3045 | User Instructions - Page 12
Names of Major Functions This machine's major functions are referred to in this manual as follows: • Internet Fax (by specifying an e-mail address) → Internet Fax • Internet Fax (by specifying an IP address) → IP-Fax 2 - Ricoh 3045 | User Instructions - Page 13
Transmission Mode Sending at a Specific Time (Send Later) Using this function, you can instruct the machine to delay transmission of your fax document until a specified later time. This allows you to take advantage of off-peak telephone charges without having to be by the machine at the time. If - Ricoh 3045 | User Instructions - Page 14
], and then try again. ❒ To cancel Send Later, press [Cancel]. The display returns to that of step C. E Press [OK]. The standby display appears. Note ❒ To check the settings, press [Transmission Mode]. F Specify a destination, and then press the {Start} key. Note ❒ You can cancel the transmission - Ricoh 3045 | User Instructions - Page 15
lists, and report. p.34 "Scan Settings", Facsimile Reference B Press [Transmission Mode]. Preparation Before using this function, you must register senders in the destination list and specify the User Name as [Sender]. See "Fax Destination", General Settings Guide. Note ❒ If user - Ricoh 3045 | User Instructions - Page 16
by e-mail, and the Communication Result Report printed by the machine. You can set whether to use both of these together in User Parameters. See p.167 "User Parameters" (switch 10, bit 6). A Select [Yes] or [No] for the Email TX Results function. Printing on the Receiver's Sheet If you enable this - Ricoh 3045 | User Instructions - Page 17
C. Note ❒ The selected sender's name ap- pears above [Sender Settings]. The sender name is displayed in up to 14 characters, followed by an ellipsis (. . . ). H Press [OK]. The standby display appears. Note ❒ To check the settings, press [Transmission Mode]. I Specify the destination, and then press - Ricoh 3045 | User Instructions - Page 18
p.34 "Scan Settings", Facsimile Reference B Press [Transmission Mode]. Limitation ❒ This function is not available with Immediate Transmission. If this function is selected, the machine automatically switches to Memory Transmission. Note ❒ If there is already - Ricoh 3045 | User Instructions - Page 19
: ❖ Default ID It is not necessary to enter an ID when transmitting. The other party can print the document by entering the Confidential ID programmed in their machine. Reference p.15 "Placing Originals", Facsimile Reference p.34 "Scan Settings", Facsimile Reference - Ricoh 3045 | User Instructions - Page 20
press the {Start} key. A Check that [Default ID] is select- ed, and then press [OK]. Note 1 ❒ You can cancel the transmission Note setup for Confidential Transmission. ❒ To cancel step C. E Press [OK]. The standby display appears. Note ❒ To check the settings, press [Trans- mission Mode]. 10 - Ricoh 3045 | User Instructions - Page 21
Fax. Note ❒ Free Polling and Default ID Transmission allow only one file to be stored in memory. ❒ ID Override Polling Transmission allows a file to be stored in memory for each ID; you can store up to 400 files by changing IDs. ❒ You can set whether a Polling Transmission file is deleted in User - Ricoh 3045 | User Instructions - Page 22
then select the scan settings you require. Reference p.15 "Placing Originals", Facsimile Reference p.34 "Scan Settings", Facsimile Reference B Press [Transmission Mode]. Free Polling Transmission A Check that [Free Polling TX] is selected. Default ID Transmission - Ricoh 3045 | User Instructions - Page 23
check the settings, press [Transmission Mode]. H Press the {Start} key. Limitation ❒ This report is not printed if the User Parameters are set to allow Note ❒ You can cancel the transmission the stored originals to be repeatedly sent (Save). See p.167 "User Parameters" (switch 11, bit 7). setup - Ricoh 3045 | User Instructions - Page 24
fax machine supports Polling Transmissions and the SEP function, and also has stored IDs, you can still perform Polling Reception. See p.50 "SEP Code". ❒ This function is not available with Internet Fax. Note ❒ To receive a document sent by Default step A. See p.145 "General Settings/Adjustment". - Ricoh 3045 | User Instructions - Page 25
Polling Recep- tion]. B Specify a 4-digit ID using the 1 number keys and [A], [B], [C], [D], [E], and [F], and then press [OK]. Default ID/Free Polling Reception A Check that [Default ID / Free Polling RX] is selected, and then press [OK]. Note ❒ To cancel Polling Reception, press [Cancel - Ricoh 3045 | User Instructions - Page 26
Parameters. See p.167 "Us- Report er Parameters" (switch 04, bit 4). ❒ You can display a sender name with 1 This report is printed after Polling Re- ception is set up. the User Parameters. See p.167 "User Parameters" (switch 04, bit 5). Note ❒ You can turn this function on or off with the - Ricoh 3045 | User Instructions - Page 27
the {Start} key (after scanning originals), you can check and edit the destination or settings of Memory Transmission. You can also cancel a transmission, change the settings of a transmission, print a stored file, print a list of stored files, and resend a file which the machine failed to transmit - Ricoh 3045 | User Instructions - Page 28
and Canceling Transmission Files Displaying Confirmation of Transmission A Press [Change / Stop TX File]. 2 B Press [Check / Change Settings]. C Select a file to check. Note ❒ If multiple destinations were spec- ified, only the destination selected first appears. ❒ If multiple destinations were - Ricoh 3045 | User Instructions - Page 29
. All the scanned data is deleted finishes while you are carrying out this procedure, transmission cannot be canceled. ❒ If multiple destinations were specified, only one destination number appears. To display all destinations, A Press [Change / Stop TX File]. press [Check / Change Settings - Ricoh 3045 | User Instructions - Page 30
destination for a transmission, the transmission is canceled. A Press [Change / Stop TX File]. B Press [Check / Change Settings]. Note ❒ Pressing switches the des- tination between fax number, Internet Fax address and IP-Fax address. E Press [Clear] to delete the destina- tion. C Select - Ricoh 3045 | User Instructions - Page 31
cannot be added us- ing a destination list. A Press [Change / Stop TX File]. D Press [Add]. Adding a Destination 2 B Press [Check / Change Settings]. Note ❒ Pressing switches the des- tination between fax number, Internet Fax address and IP-Fax address. E Specify the destination using the - Ricoh 3045 | User Instructions - Page 32
Checking and Canceling Transmission Files Changing Other Options Changing the Transmission Time E Press [Change TX Time]. 2 You can change the transmission time specified with Send Later. See p.3 "Send- ing at a Specific [Check / Change Settings]. C Select the file for which you want to change - Ricoh 3045 | User Instructions - Page 33
for whether or not to bypass the SMTP server. See p.70 "Bypassing the SMTP Server", Facsimile Reference . 2 A Press [Change / Stop TX File]. E Press [SMTP]. B Press [Check / Change Settings]. F Select [Yes] or [No], and then press [Exit]. C Select a file whose SMTP server - Ricoh 3045 | User Instructions - Page 34
not yet sent, use this procedure to print it out. C Select the file you want to print. 2 Note ❒ Confidential Transmission files are displayed, but cannot be printed. ❒ You can also print files that have not been successfully transmitted. A Press [Change / Stop TX File]. Note ❒ If multiple - Ricoh 3045 | User Instructions - Page 35
for either 24 or 72 hours depending on how you program this function. See p.167 "User Parameters" (switch 24, bit 1). A Press [Change / Stop TX File]. Note ❒ If multiple destinations were spec- ified, only the destination you specify first appears. ❒ If multiple destinations were specified, only - Ricoh 3045 | User Instructions - Page 36
Checking and Canceling Transmission Files Printing a List of Files in Memory (Print TX File List) C Print this list if you . the User Parameters. See p.167 "Us- er Parameters" (switch 04, bit 5). A Press [Change / Stop TX File]. B Press [Print List]. Note ❒ To cancel printing before press - Ricoh 3045 | User Instructions - Page 37
after every 50 communications (receptions and transmissions). You can also print a copy of the Journal at any time by using the following procedure. If the machine is equipped with the optional extra G3 interface unit, you can print the Journal of each line type. Important ❒ The contents of - Ricoh 3045 | User Instructions - Page 38
File No. A Select [Print per File No.]. B Enter a 4-digit file number. Note ❒ Press [Cancel] if the user is not registered. The display returns to that of step C. ❒ Press [Clear] to return to the previous screen if a wrong user name is selected. C Press [OK] after checking the user name shown on - Ricoh 3045 | User Instructions - Page 39
) was not programmed. • If neither name nor fax number was programmed by the other end, an entered fax number or a name programmed in a destination list is shown for transmissions. Note ❒ To prioritize a fax number or name programmed in the destination list, contact your service representative. 29 - Ricoh 3045 | User Instructions - Page 40
If the optional extra G3 interface unit is installed, "G3-1", "G32", or "G3-3" appears. • For Internet Fax transmissions and receptions After , and "T" for outgoing e-mail or "R" for incoming e-mail, the communication mode appears in alphabetical letters or symbols. Outgoing email set for Reception - Ricoh 3045 | User Instructions - Page 41
Header information of the receiver. The e-mail address and name programmed in the destination list appears in the "To" field of the sent Internet Fax document. For a transmission from a computer, "-- LANFax -->" is shown. ❒ Depending on security settings, the destination may appear as *. D Press - Ricoh 3045 | User Instructions - Page 42
Status) C You can browse a part of the Journal on the display. Check the reception results. Note ❒ Only the reception result of the last 200 communications (receptions 3 and transmissions) are shown. ❒ You can view received fax documents and their lists, using a network computer Web Image - Ricoh 3045 | User Instructions - Page 43
Documents in Information Boxes". • sending to the Personal Box. See p.41 "Printing Personal Box Documents". ❒ If you made the machine save received documents on the hard disk, see "RX Print Standby File" on the display to check the number. D Press [Exit] twice. The standby display appears. 33 - Ricoh 3045 | User Instructions - Page 44
Deleting Received and Stored Documents (Print/Delete Stored RX File) The optional printer/scanner unit is required. You can print documents that are received and stored on the hard disk. You can also delete unwanted documents. Printing Received and Stored Documents 3 Use the following procedure - Ricoh 3045 | User Instructions - Page 45
procedure to delete documents stored on the hard disk. ❒ To cancel a deletion, press [No]. The display returns to that of step C. E Press [Exit] twice. The standby display appears. Note ❒ You cannot delete a document while another person is previewing or printing it using a Web Image Monitor or - Ricoh 3045 | User Instructions - Page 46
printed. To print the document you have to enter the Confidential ID Code. When your 3 machine ❒ This function is not available with Internet Fax. C Press [Print Confidential RX File]. Note ❒ If no Settings/Adjustment". The Confidential ID differs depending on the Sender's specifications. 36 - Ricoh 3045 | User Instructions - Page 47
]. The standby display appears. -If you cannot print confidential files even if the Confidential File (i) indicator is lit. The Confidential File indicator also lights if the machine received a document with a SUB Code. Check the Personal Boxes. Note ❒ Print from the Personal Box when a file is - Ricoh 3045 | User Instructions - Page 48
is a security function designed to prevent unauthorized users from reading your documents. If Memory Lock is switched on, all received documents are stored in memory and are not automatically printed. To print the documents, you have to enter the Memory Lock ID Code. When your machine has received - Ricoh 3045 | User Instructions - Page 49
keys, and then press the {Start} key. Printing a File Received with Memory Lock 3 Note ❒ If the Memory Lock ID does not match, the message "Specified code does not corre- spond to programmed Memory Lock ID." appears. Press [Exit] and retry after checking the Memory Lock ID. E Press [Exit]. The - Ricoh 3045 | User Instructions - Page 50
you specify. You can specify a fax number, email address or IP-Fax destination as • If a receiver is not assigned, you can print the received documents on this machine. See p.41 "Printing Personal Box Documents". the receiver. See p.182 "Program- ming/changing Personal Boxes" for details about - Ricoh 3045 | User Instructions - Page 51
, when the selected Personal Box password is set in advance. Note ❒ The password is programmed in "Administrator Tools". See p.182 "Programming/chang- ing Personal Boxes". A Enter the password, and then 3 press [OK]. B Press [Information]. C Press [Print Personal Box File]. D Select the - Ricoh 3045 | User Instructions - Page 52
to set up the machine as a Document Server. By scanning documents into Information Boxes, other parties can receive these documents whenever they request them. For details about the SEP Code, see p.181 "Box Settings". • You can check the contents of Information Boxes with "Store / Delete / Print - Ricoh 3045 | User Instructions - Page 53
Stamp (The optional ADF is required.) Reference p.15 "Placing Originals", Facsimile Reference When a password is required p.34 "Scan Settings", Facsimile Reference A Enter the password, and then press [OK]. E Press the {Start} key. The machine starts to scan the - Ricoh 3045 | User Instructions - Page 54
in an Information Box. A Press [Information]. When a password is required A Enter the password, and then press [OK]. 3 B Press [Store / Delete / Print Information Box File]. C Press [Print File]. D Select the box that contains the stored file you want to print. Note ❒ You cannot select a box that - Ricoh 3045 | User Instructions - Page 55
steps to delete a file stored in an Information Box. A Press [Information]. Information Boxes When a password is required A Enter the password, and then press [OK]. 3 B Press [Store / Delete / Print Information Box File]. C Press [Delete File]. D Select the box that contains the stored file you - Ricoh 3045 | User Instructions - Page 56
Communication Information 3 46 - Ricoh 3045 | User Instructions - Page 57
Manual Dial, no pause is needed. ❒ The Advanced Features function programmed in the destination list is unavailable. (Example) 01133-1-555333 Assume that 01133 is stored in a Destination key. A Place the original, and then select the scan settings LANFax Driver on the computer ❒ To redial a fax - Ricoh 3045 | User Instructions - Page 58
to. Note ❒ When the date and time the original was scanned appears as a key, select by pressing it. ❒ When you press [ProgDest], you can register a selected recipient in the destination list. See p.45 "Registering Entered Destinations to the Address Book", Facsimile Reference . 48 - Ricoh 3045 | User Instructions - Page 59
of digits in the ID matches the specification of the machine to which you are sending. ❒ You can store IDs in the destination list and Programs. See "Fax Destination", General Settings Guide. See p.129 "Registering and Changing Keystroke Programs". ❒ The SUB Code is printed on all reports. This is - Ricoh 3045 | User Instructions - Page 60
on the machine from which you are receiving. ❒ You can enter numbers, *, #, and spaces to program an ID. ❒ You can store IDs in the destination list and Programs. See "Fax Destination", General Settings Guide. See p.129 "Registering and Changing Keystroke Programs". ❒ The SEP Code is printed on all - Ricoh 3045 | User Instructions - Page 61
- tion or an IP-Fax destination. B Press [Adv. Features]. I Press [Transmission Mode]. J Press [Polling RX]. C Press [SEP Code]. D Press [RX SEP Code]. K Press [Default ID / Free Polling RX], and then press [OK]. 4 E Enter a SEP Code, and then press [OK]. "SEP Code" appears one line above - Ricoh 3045 | User Instructions - Page 62
*, #, and spaces as a password. ❒ You can store IDs in the destination The following diagram may make the concept clearer. list and Programs. See "Fax Desti- nation", General Settings Guide. See p.129 "Registering and Changing Keystroke Programs". ❒ The PWD Code is printed on all reports. This - Ricoh 3045 | User Instructions - Page 63
select any scan settings you require. Note ❒ When using a Transfer Request by e-mail, documents are sent at "Detail" resolution, even if you have specified "Super Fine". To send a document at "Super Fine", configure the Full Mode when registering the destinations in the Address Book. See p.61 - Ricoh 3045 | User Instructions - Page 64
. Reference p.15 "Placing Originals", Facsimile Reference p.34 "Scan Settings", Facsimile Reference B Specify a Transfer Station. Note ❒ Enter directly or use a destination list to specify the fax number, email address, or IP-Fax destination of the - Ricoh 3045 | User Instructions - Page 65
under Program/Change/Delete Transfer Request in the System Settings menu. See "Registering the Transfer Request", General Settings Guide. A Place the original, and then select the scan settings you require. Reference p.15 "Placing Originals", Facsimile Reference p.34 "Scan Settings - Ricoh 3045 | User Instructions - Page 66
-Setting Multistep Transfer Program a Transfer Station in a destination list. When receiving a Transfer Request that specifies the same Receiving Station as programmed in the destination list, this machine sends a Transfer Request to the programmed Transfer Station. This function allows fax - Ricoh 3045 | User Instructions - Page 67
. You can send a fax checking the connection. Limitation ❒ This function is not available for the optional extra G3 interface unit, Internet Fax and IP-Fax. Note ❒ This function is unavailable in some countries. ❒ If an Immediate TX Result Report (Immediate Transmission) is printed, On Hook Dial - Ricoh 3045 | User Instructions - Page 68
Other Transmission Features -External Telephone On Hook Dial If you have an external telephone on the fax machine, you can speak with the other party when you hear a voice. If you hear a voice before pressing the {Start} key, pick up the external telephone - Ricoh 3045 | User Instructions - Page 69
interface unit, Internet Fax and IP-Fax. 4 The machine immediately dials the destination. ❒ If Immediate TX Result Report (Immediate Transmission) is printed, the result of a transmission with Manual Dial is not mentioned in the report. A Place the original, and then select the scan settings you - Ricoh 3045 | User Instructions - Page 70
G3 interface unit, you can specify the line port home position from "Gen. Settings/ Adjust". See p.145 "Gen- take place simultaneously through three lines at once. The following list shows protocol combinations available for each line type. 4 eral Settings/Adjustment". ❒ When sending a fax, you - Ricoh 3045 | User Instructions - Page 71
A Press [Select Line]. B Select the line you want to use. When one optional extra G3 unit is installed. Note ❒ If you select "G3 Auto", the ma- chine will use any available line. This increases efficiency. C Press [Exit]. The standby display appears. Changing the Line Port 4 61 - Ricoh 3045 | User Instructions - Page 72
reduced when printed at the other end. Note ❒ You can have bound originals scanned as left or right page first. You can set which page (left or right) the machine scans first as default with the User Parameters. See p.167 "User Parameters" (switch 06, bit 6). ❒ When using the Internet Fax function - Ricoh 3045 | User Instructions - Page 73
Transmission) The optional ADF is required. Use this function to send two-sided originals. Note ❒ Originals placed on the exposure glass cannot be sent. The selected original size is shown above the highlighted [Book Fax]. ❒ The front and back of the scanned original will be printed in order - Ricoh 3045 | User Instructions - Page 74
you to omit step B. See p.145 "General Settings/Ad- justment". A Place the original in the ADF, and then select the scan settings you require. Reference p.15 "Placing Originals", Facsimile Reference p.34 "Scan Settings", Facsimile Reference B Press [Sub TX Mode - Ricoh 3045 | User Instructions - Page 75
"Copy is 4 inal]. not printed. See p.74 "Label Changing, want to send a cover letter as the and Deleting Standard Messages". first page. G Press [OK]. A Place the originals, and then select the scan settings you require. H Specify the destination, and then press the {Start} key. Reference - Ricoh 3045 | User Instructions - Page 76
. p.15 "Placing Originals", Facsimile Reference p.34 "Scan Settings", Facsimile Reference Note ❒ When you fax an Auto Document, start from step B. Preparation You need to register an Auto Document. See p.158 "Storing, Changing, and Deleting an Auto Document - Ricoh 3045 | User Instructions - Page 77
function is used for printing documents stored as Auto Documents. This function is very convenient as it can be used for checking the contents of stored files. A Press [Sub TX Mode]. C Press [Auto Document]. D Select an Auto Document file, and then press [OK]. 4 When you fax an Auto Document - Ricoh 3045 | User Instructions - Page 78
Parallel Memory Transmission • On Hook Dial • Manual Dial Note ❒ You can send only documents saved with the facsimile function in the Document Server. You cannot send documents saved in the copy, printer, or scanner function. ❒ You can specify and print multiple documents. You can specify a maximum - Ricoh 3045 | User Instructions - Page 79
date. Note ❒ To search by directly enter- ing a user name, press [Nonprogrammed Name], and then enter the user name. Partial matching is used when searching for a user name. See p.173 "Using Partial matching". Reference "Entering Text", General Settings Guide C Select the file to be sent. 69 - Ricoh 3045 | User Instructions - Page 80
original, and then select any scan settings you require. G Specify the destination, and then press the {Start} key. Printing stored documents Use this function to print documents stored in the Document Server. Note If the document does not have a password, proceed to step E. ❒ Only documents - Ricoh 3045 | User Instructions - Page 81
File]. C Select the document to be printed. Sub Transmission Mode Selecting a document from file list A Select the file. Note ❒ Press [UPrev.] or [TNext] to display the document to be sent. Specifying a document from the User Name A Select [Search by User Name]. 4 Note ❒ The documents stored using - Ricoh 3045 | User Instructions - Page 82
the file name A Press [Search by File Name]. E Press [Print File] or [Print 1st Page]. When [Print File] is pressed, the machine prints all the pages. When [Print 1st Page] is pressed, the machine prints only the first page. Limitation ❒ When [Print 1st Page] is selected, originals larger than A4 - Ricoh 3045 | User Instructions - Page 83
p.34 "Scan Settings", Facsimile 4 Reference B Press [Sub TX Mode]. Note ❒ Stamp only works when scanning from the ADF. ❒ When the stamp starts getting lighter, replace the cartridge. See "Replacing the Stamp Cartridge", General Settings Guide. ❒ If a page was - Ricoh 3045 | User Instructions - Page 84
your service representative. ❒ You can program fax header names using the Program Fax Information function. ❒ You can select whether or not dates, fax header names, file numbers, or page numbers are printed by changing their respective User Parameters. See p.167 "User Parameters" (switch 18, bit - Ricoh 3045 | User Instructions - Page 85
original is maintained and some parts of the image may be deleted when printed at the other end. 4 Note Default ID Transmission ❒ This function a Polling ID". Limitation ❒ This function is not available with Internet Fax. Note ❒ You can program one of the Quick Operation keys with operations - Ricoh 3045 | User Instructions - Page 86
Features> p.34 "Scan Settings", Facsimile Reference B Press [Sub TX Mode]. 4 C Select [Options]. D Select options to be set up. Note ❒ To close the option settings, pro- ceed to step E. ❒ To cancel the option settings, press [Cancel]. Programming the Fax Header Print A Press [On - Ricoh 3045 | User Instructions - Page 87
Programming the Default ID Transmission A Press [On] for Default ID TX. Note ❒ Press [Off] if you do not want to use ID transmission. E Press [OK] twice. F Specify the destination, and then press the {Start} key. Sub Transmission Mode 4 77 - Ricoh 3045 | User Instructions - Page 88
. See p.167 "User Parameters" (switch 07, bit 2). ❒ Standard Memory Transmission may be used instead of Parallel Memory Transmission depending on the optional equipment installed if there is not enough free memory left. ❒ If you use this function, the Memory Storage Report will not be printed. ❒ If - Ricoh 3045 | User Instructions - Page 89
or off with the User Parameters. See p.167 "User Parameters" (switch 14, bit 2). ❒ The originals to be transmitted at a specific time is sent at that time. ❒ If fax memory is overloaded, documents may not be sent in the order they were scanned. Dual Access The machine can scan other documents into - Ricoh 3045 | User Instructions - Page 90
is unavailable. See p.166 "ECM (Error Correction Mode)". Note ❒ A maximum of three simultaneous transmissions (including LAN) are possible. ❒ When using the optional extra G3 interface unit, if you set the line selection as "G3 Auto" beforehand, the machine will use whichever G3 line is not - Ricoh 3045 | User Instructions - Page 91
is not correct, your important Jour- ❒ Depending on security settings, the nal may be lost. Sent CSV files are Destination/Sender name may not not left on the fax machine. See appear. "File Transfer", Network Guide. Note ❒ If the administrator's address is wrong, you may not be able to acquire - Ricoh 3045 | User Instructions - Page 92
report on and off. See p.167 "User Parameters" (switch 03, bit 2). ❒ You can select whether to include part of the original image on the report. See p.167 "User Parameters" (switch 04, bit 7). ❒ Even if the machine is set up not to print this report, it is still printed if an original could not be - Ricoh 3045 | User Instructions - Page 93
is used for standard fax documents. Normally this machine receives documents by Immediate Reception. But Memory Reception is used when "Combine 2 originals", "Multi-copy Reception", "RX Reverse Printing" or "2 Sided Print" is set to "ON". See p.97 "Printing Options". If the Substitute Reception - Ricoh 3045 | User Instructions - Page 94
Origi- nals". • Multi-copy when set to multiple copies See p.99 "Multi-Copy Reception". • Reverse Order Printing See p.102 "Reverse Order Printing". • 2 sided printing See p.98 "Two-Sided Printing". Important ❒ About one hour after the machine is turned off, all fax documents stored in memory - Ricoh 3045 | User Instructions - Page 95
in the following list occurs, the machine receives all fax documents using Substitute Reception. Problems The machine is printing with a different function. The message "Following output tray is full. Remove paper." appears. M is lit. Causes Solutions The machine is busy print- The document is - Ricoh 3045 | User Instructions - Page 96
p.167 "User Parameters" (switch 05, bit 2,1). Problems Causes Solutions x is lit. Paper is jammed. Remove the jammed paper. See "xClearing Misfeeds", General Settings Guide. B is lit. All trays are out of paper. Add paper. See "BLoading Paper" , General Settings Guide. D is lit. Toner is - Ricoh 3045 | User Instructions - Page 97
must be between 00001 and 00100. • The End Receiver's fax number, e-mail address, or IP-Fax destination, must be programmed in the destination list of this machine (Transfer Station). Note ❒ You can receive Transfer Requests only when your machine has the capacity to store two or more destinations - Ricoh 3045 | User Instructions - Page 98
Parameters" (switch 04, bit 1). ❒ You can set whether a portion of the original image is printed on the report with the User Parameters. See p.167 "User Parameters" (switch 04, bit 7). ❒ "Unprogrammed" indicates that the document could not be sent because the end receiver's address is incorrect or - Ricoh 3045 | User Instructions - Page 99
request by e-mail) When this machine receives a transfer request by e-mail, the Transfer Result Report is sent by e-mail to the Requesting Party after completing all transmissions to the specified Transfer Stations. If the Administrator's email address is programmed, the Transfer Result Report - Ricoh 3045 | User Instructions - Page 100
❒ You can select whether the machine prints out the documents it forwards with User Parameters (switch 11, bit 6). For details, see p.167 "User Parameters". ❒ You can set whether or not the Folder Transfer Result Report is transmitted to the specified e-mail address if folders are programmed as the - Ricoh 3045 | User Instructions - Page 101
specified is an email address, the received document is routed to that destination as e-mail. In addition to SUB Codes, you can use the forward feature to send all received transmissions to a specific e-mail address. See p.162 "Forwarding". 5 AJA005S Preparation You must set the Personal Box - Ricoh 3045 | User Instructions - Page 102
Transfer Boxes and Receiving Stations must be set up in order to transfer received documents. See p.188 "Programming/changing Transfer Boxes". Note ❒ Transfer Results are not sent back to the Requesting Party. ❒ You can transfer data received from any fax machine, regardless of manufacturer. 5 92 - Ricoh 3045 | User Instructions - Page 103
. With SMTP reception, e-mail is received as soon as it is sent to the e-mail address set by the machine. You can route received e-mail to other Internet Fax machines as well. AJA006S 5 Preparation Set this machine beforehand using the MX record of the DNS server to enable SMTP reception. Also - Ricoh 3045 | User Instructions - Page 104
fax machines. It can also be routed to single or group destinations programmed in the destination list. 5 AJA007S Preparation Before routing e-mail received via SMTP, you first must set "SMTP RX File Delivery Settings" to "On". See p.148 "E-mail Settings". Limitation ❒ Depending on security settings - Ricoh 3045 | User Instructions - Page 105
to another fax machine by specifying the e-mail address as follows: ❖ Fax Number fax=destination fax number@host name of this machine. domain name Example: to transfer to fax number 212-123-4567, specify: [email protected] ❖ Single destination programmed in the destination list fax - Ricoh 3045 | User Instructions - Page 106
. Note ❒ You can set whether documents are printed as soon as they are received (Immediate Reception) with the User Parameters. See p.167 "User Parameters" (switch 14, bit 0). ❒ You can also have fax documents received by Memory Reception (Substitute Reception) printed after the machine is turned on - Ricoh 3045 | User Instructions - Page 107
Options Print Completion Beep When this function is turned on, the machine beeps to let you know when a received document is printed. Note ❒ You can alter the volume of the beep or turn it off completely (set the volume to the minimum level). See p.91 "Adjusting the Volume", Facsimile Reference - Ricoh 3045 | User Instructions - Page 108
results that can be achieved when receiv- ing with this machine. Two-Sided Printing You can have a received document printed on both sides of a sheet. You can turn this function on or off using Reception Settings. See p.147 "Reception Settings". ❒ This function works only when all pages are of the - Ricoh 3045 | User Instructions - Page 109
this printing option. Multi-Copy Reception If you switch this function on, multiple copies of each incoming fax document is printed. You can also select to have multiple copies made of documents from particular senders. See p.172 "Special Senders to Treat Differently". See p.147 "Reception Settings - Ricoh 3045 | User Instructions - Page 110
Features Image Rotation If you have set paper in the standard tray K, incoming fax documents are automatically rotated to fit onto the paper. Combine Two Originals When two documents of the same size and orientation are received consecutively, they are printed on a single sheet when you turn - Ricoh 3045 | User Instructions - Page 111
with the User Parameters. See p.167 "User Parameters" (switch 10, bit 1). ❒ This function uses Memory Reception. Page Separation and Length Reduction If the size of a received document is longer than the paper loaded in the machine, each page of the document can be split and printed on several - Ricoh 3045 | User Instructions - Page 112
than the paper in the tray, the machine usually prints it on two pages. If you turn this function on, the machine reduces the width and length User Parameters. See p.167 "User Parameters" (switch 10, bit 3). ❒ When this function is used, the printing quality may not be as good as usual. Reference - Ricoh 3045 | User Instructions - Page 113
you receive an Internet Fax document, the email address of the sender is printed. Reference p.83 "Initial Settings and Adjustments", Facsimile Reference Note ❒ You can turn this function on or off in the User Parameters. See p.167 "User Parameters" (switch 02, bit 3). If There Is - Ricoh 3045 | User Instructions - Page 114
1 to use when making copies, and yellow A4 paper into tray 2 to use when printing received faxes. You can then easily identify for which purpose paper has been output. You can perform this setting using System Settings. See "Tray Paper Settings", General Settings Guide. If you enable this function - Ricoh 3045 | User Instructions - Page 115
Special RX Function". Limitation ❒ When using this function, printed sheets cannot be delivered to the finisher output tray. Even if you specify the finisher output tray, sheets are delivered to the Internal Tray 1. See "General Features", General Settings Guide. Note ❒ You can load a maximum of 100 - Ricoh 3045 | User Instructions - Page 116
optional finisher is required. quired. When the optional finisher unit is se- You can specify the document feeding lected for fax output, you can use the tray for each port (telephone, Internet Tray Shift function whenever a fax or Fax, IP-Fax). For example, you can report is printed. specify - Ricoh 3045 | User Instructions - Page 117
printing out documents prepared on a computer for proof checking. • To use the LAN-Fax Driver, connect this machine to a LAN and make the necessary network settings, and then install the LAN-Fax Driver and the related utilities on your computer. AJA008S Important ❒ Errors occurring when the machine - Ricoh 3045 | User Instructions - Page 118
Setting Up", 6 Network Guide. Installing the Software You need to install a LAN-Fax Driver on your computer before using the LAN-Fax functions. The LAN-Fax Driver is on the CD-ROM included with the printer. Address Book and LAN-Fax Cover Sheet Editor are installed with the LAN-Fax Driver. Address - Ricoh 3045 | User Instructions - Page 119
machine into the CD-ROM drive of your computer. The installer launches automatical- CD-ROM This section provides information 6 ly, and the language selection win- about LAN-Fax Driver, Address Book, dow appears. and LAN-Fax Cover Sheet Editor. Note ❒ Depending on your operating system settings - Ricoh 3045 | User Instructions - Page 120
point to [Set- tings], and then click [Printers]. 6 Note ❒ Before beginning installation, exit all other applications. Note ❒ With Windows XP Professional or Windows Server 2003, select [Printers and Faxes] on the [Start] Address Book menu. ❒ With Windows XP Home Edi- Address Book helps you - Ricoh 3045 | User Instructions - Page 121
• Tray • Resolution • Gray scale not configured as instructed, LANFax functions may fail. ❒ When this machine is connected to a network, option configuration is automatically performed. For de- • Printing images of True Type tails, see LAN-Fax Driver's Help. fonts When using Windows NT 4.0 A Set - Ricoh 3045 | User Instructions - Page 122
entry Check this option to inhibit direct destination specification. ❒ When using SmartDeviceMonitor for Client, you cannot send documents to this machine using more than one LAN-Fax at the same time. A On the [File] menu, click [Print...]. B Select [LAN-Fax M7] in the [Name:] list. ❖ Enable - Ricoh 3045 | User Instructions - Page 123
C The machine's address is displayed in the [Device Address] field on the [Address Book] tab. On the [Specify Destination] tab, enter the registration number of the Destination key. D Click [Set as Destination]. The entered destination is added and appears in the [List of Destination:] box. Note ❒ - Ricoh 3045 | User Instructions - Page 124
select the [Do not use SMTP server] check box if you want to bypass the SMTP server. See p.70 "Bypassing the SMTP Server", Facsimile Reference . • If you selected [IP-Fax], select a protocol in the [Protocol:] list. E Click [Set as Destination]. The entered destination is added and - Ricoh 3045 | User Instructions - Page 125
❒ When you click [Send & Print], the fax is sent to the destination and your machine prints a copy of the document you sent. Specifying options You can specify the options in the following list. For details, see LAN-Fax Driver's Help. • Sending at a Specific Time • Print Sender Stamp • Attach Cover - Ricoh 3045 | User Instructions - Page 126
of file naming. To store the fax document on the Document Server A Select the [Send to Document Server] check box, and then enter a user name, file name, and password. Note ❒ If [Hard Disk Unit] is not select- ed in [Accessories] on the printer properties dialog box, you cannot select [Document - Ricoh 3045 | User Instructions - Page 127
is printed. See "File Transfer", Network Guide for the e-mail settings, and see p.118 "LAN-Fax Result Report" for the LAN-Fax Result Report. A Click the [E-mail Settings] tab. B Select the [Notify] check box under [E-mail TX results]. 6 C Enter the destination. When entering the e-mail address - Ricoh 3045 | User Instructions - Page 128
select the length of time the machine keeps document data in memory if print failed due to problems such as paper shortage or paper jams. See p.167 "User Parameters" (switch 20 , bit 2/3/4/5). A On the [File] menu, click [Print...]. B Select [LAN-Fax M7] in the [Name:] list, and then click [OK]. The - Ricoh 3045 | User Instructions - Page 129
program the contents of the Address Book of this machine to the destination list, select the [Use device address] check box, then enter the fax number, e-mail address, and IPFax address. The name and destination (Fax Number, Email Address or IP-Fax Ad- If you do not want to save the changes - Ricoh 3045 | User Instructions - Page 130
and changing the order of priority, if necessary): IP-Fax destination → Fax number → Mail address ❒ Depending on the machine type, you may not be able to use the machine when it is updating the Address Book using CSV files (retrieved using SmartDeviceMonitor for Admin) that contain user codes - Ricoh 3045 | User Instructions - Page 131
from [To:]. Note ❒ You can select [Use Address Book], [To Whom It May Concern], [Edit Names], or [(None)]. Selecting [Edit Names] allows you to enter company, department, and person names. F To print the date, select the [With a Date] check box. G Enter the sender information. Note ❒ You - Ricoh 3045 | User Instructions - Page 132
Computer LAN-Fax Operation Messages Message Causes and Solutions Cannot access the print- Check the network connection. er. Click [retry] to send Check that the power is turned on. the data again. The number of entries in Destinations exceed the limits. Up to 500 entries can be entered. - Ricoh 3045 | User Instructions - Page 133
", Network Guide A If you have programmed a user code, enter the code, and then press [OK]. A list of the received fax documents appears. Note ❒ If the programmed user code was deleted using the Address Book Management function under System Settings, a message indicating incorrect user code entry - Ricoh 3045 | User Instructions - Page 134
a Web browser. B Enter the machine's IP address in the [Address] field. C Click [Fax Received File] in the left pane. The list of received fax documents appears. D Click and select the check box be- side the fax document to be printed. Note Note ❒ To view a list of the fax documents, select the - Ricoh 3045 | User Instructions - Page 135
more information, see Help on the Web Image Monitor. C Click [Login], and then enter the Administrator's name and pass- word. G Click [OK]. D Click [Address Book] in the left pane. The display returns to that of step The Address Book is displayed. D. E Set the Internet Fax data format. 125 - Ricoh 3045 | User Instructions - Page 136
radio button to the left of the machine you want to modify, and then click [Change]. The [Change User] page appears. B Set the properties for Internet Fax data format other than the mode selection. E Click [OK] in the upper-right of the screen. The Address Book is displayed. Note ❒ To cancel the - Ricoh 3045 | User Instructions - Page 137
Delivering Files Received by Fax Delivering Files Received by Fax The optional printer/scanner unit is required. ScanRouter EX Professional (sold separately) is also required as a delivery server. DeskTopBinder Lite or DeskTopBinder Professional (sold separately) software must be installed on - Ricoh 3045 | User Instructions - Page 138
Fax via Computer 6 128 - Ricoh 3045 | User Instructions - Page 139
a program using Send Later with the fax number "0123456789" A Press {0}, {1}, {2}, {3}, {4}, {5}, {6}, {7}, {8}, {9} using the number keys. B Continue doing the Send Later setting until the standby screen appears when you press [OK]. Reference p.3 "Sending at a Specific Time (Send Later)" 129 - Ricoh 3045 | User Instructions - Page 140
machine of step E. Reference "Entering Text", General Settings Guide Registering a priority change. If you make a mistake, press [Do not Register] and return to step E. Limitation ❒ Destinations and polling transmission cannot be registered in program No.1 as Keystroke Programs. Note ❒ To store fax - Ricoh 3045 | User Instructions - Page 141
the {Program} key. Deleting a Program A Make sure that the machine is in fac- simile mode and the standby display is shown. Note ❒ If the standby display is not shown, press the {Facsimile} key. B Press the {Program} key. C Press [Change Name]. C Press [Delete]. 7 D Select the program number of - Ricoh 3045 | User Instructions - Page 142
to be cleared. ❒ If you have no programmed destinations or scan settings as programs, select the program number, and then enter the fax number of the destination and select the scan settings you require. A Make sure that the machine is in facsimile mode and the standby display is shown. E Press - Ricoh 3045 | User Instructions - Page 143
-T No.4 chart) in the 7 Reference Document Server, using the copy, "What You Can Do with This Machine", General Settings Guide facsimile, printer, and scanner functions. Important ❒ Data stored in the machine can be lost if there is an error on the machine's hard disk. The manufacturer is not - Ricoh 3045 | User Instructions - Page 144
and user names. See p.136 "Changing Stored Document Information". A Make sure that the machine is in facsimile mode and the standby display is shown. If the standby display is not shown, press the {Facsimile} key. B Place the original, and then select the scan settings you require. Reference - Ricoh 3045 | User Instructions - Page 145
[Password]. 7 Note ❒ Press the title key to switch between titles. ❒ To set a non-programmed user name, press [Non-programmed Name], and then enter the name. User names entered by pressing [Non-programmed Name] are not programmed into the user code. Reference "Entering Text", General Settings Guide - Ricoh 3045 | User Instructions - Page 146
the password again, and then press [#]. D Press [OK]. You can change the file name, user name, and password of stored documents. To change a stored step A. See p.145 "General Settings/Adjustment". A Press [Sub TX Mode]. 7 Note ❒ Press [Change] to enter a dif- ferent password. E Press [OK]. F - Ricoh 3045 | User Instructions - Page 147
programmed into the user code. Reference "Entering Text", General Settings Guide Changing the file name A Press [Change File Name]. B Press [Backspace] or [Delete All], and then re-enter the file name. 7 Changing a user name A Press [Change User Name]. B Press [Clear]. The user name is deleted - Ricoh 3045 | User Instructions - Page 148
operations for this function. Using the key allows you to omit step A. See p.145 "General Settings/Adjustment". A Press [Sub TX Mode]. D Press lower [Change]. E Enter the password again, and then press [#]. F Press [OK]. F Press [Exit]. 7 G Press [OK]. B Press [Select Stored File]. C Press - Ricoh 3045 | User Instructions - Page 149
be properly imported. For details about import settings, see Help for Web Image Monitor. Note ❒ When you send a document using the fax, if the registration number in the Address Book registered to the machine is specified, you can send the document to a fax number only. Documents cannot be sent even - Ricoh 3045 | User Instructions - Page 150
Simplifying the Operation Using a Web browser Fax documents saved in the Document Server can be viewed using a Web Image Monitor on a network computer. These fax documents can also be downloaded to the computer's hard disk. See p.123 "Viewing Fax Information Using a Web Browser". 7 140 - Ricoh 3045 | User Instructions - Page 151
you can quickly and easily find the desired User Tool. ❖ General Settings/Adjustment Description Reference Default Transmission Mode and scan set- p.145 "General Settings/Adjustment" tings. When the power is turned on, settings specified here are selected: • Memory / Immed. Transmission Switch - Ricoh 3045 | User Instructions - Page 152
"Specifying Tray for Lines" • Checkered Mark p.97 "Checkered Mark" • Center Mark p.97 "Center Mark" • Print Reception Time p.98 "Reception Time" ❖ E-mail Settings Description • Internet Fax Settings • Max. E-mail Size 8 • SMTP RX File Delivery Settings ❖ IP-Fax Settings Reference p.148 - Ricoh 3045 | User Instructions - Page 153
List ❖ Administrator Tools Description Reference • Program / Change / Delete Standard Message p.155 "Administrator Setting" • Store / Change / Delete Auto Document • Program / Change / Delete Scan Size • Print File Setting • Stored RX File User Setting • Menu Protection Settings • Folder - Ricoh 3045 | User Instructions - Page 154
C Select the item that you want to change. The corresponding setting display Note appears. ❒ The machine allows you to change the facsimile defaults in a mode that is not the facsimile mode. Af- Reference p.141 "Function List" ter changing the defaults, select facsimile mode again. This section - Ricoh 3045 | User Instructions - Page 155
Transmission • Text / Photo • At Reception • Photo ❖ Auto Image Density • At Dialing • At Printing 8 Use this function to prioritize automatic Image Density for scanning your originals. ❖ Program Fax Information See p.83 "Initial Settings and Adjustments", Facsimile Reference - Ricoh 3045 | User Instructions - Page 156
for specifying a • Print Memory Lock time for transmission when call charges are low. See p.3 "Sending at a Specific Time (Send Later)". Manual E-mail RX • 5 minutes (when the Internet Fax is set to • 10 minutes ON.) • TX Status Report (Transmission Status Report) • Sender Settings - Ricoh 3045 | User Instructions - Page 157
User Tools (Facsimile Features) A Select the Quick Operation Key you want to program. B Select the function you want to program to the Quick Operation Key . ❖ RX File Print Qty (Reception File Print Quantity) Specify the number of copies to be printed for each fax document received. • 1 to 10 set - Ricoh 3045 | User Instructions - Page 158
each line (telephone, Internet Fax, IP-Fax). • On • Off A Select [On] to select a paper tray. Note ❒ If you select [Off], the received fax is delivered to a default tray. B Select the line type. ❖ Checkered Mark Specify whether or not a checkered mark is to be printed on the first page of received - Ricoh 3045 | User Instructions - Page 159
User Tools (Facsimile Features) When an authorized e-mail address is set, e-mail received from addresses that do not match the authorized address is discarded, and an error message is returned to the SMTP server. The authorized e-mail address is compared with the addresses of email originators - Ricoh 3045 | User Instructions - Page 160
number of the gatekeeper. For details, see p.151 "Configuring the H.323 gatekeeper". • Gatekeeper Address (Main) • Gatekeeper Address (Sub) • Own Fax No. ❖ SIP Settings Set the SIP server's IP address and SIP user name. For details, see p.151 "Configuring the SIP server". • Proxy Server Addr. (Main - Ricoh 3045 | User Instructions - Page 161
Note ❒ If you select "On" using the User Parameters, you can use the SIP server. See p.167 "User Parameters"(switch 34, bit 1). A Press [SIP Settings]. B Press [Change] for each property. B Press [Change] for each property. C Enter the IP address and alias telephone number and press [OK]. The - Ricoh 3045 | User Instructions - Page 162
IP address and SIP user name, and then press [OK]. The screen returns to that of step B. D Press [Change] for [Prefix]. D Press [OK]. E Enter the Prefix using the number keys, and then press [OK]. Registering or changing a gateway A Press [Program / Change / Delete Gate- way]. 8 B Check that - Ricoh 3045 | User Instructions - Page 163
F Select a protocol. Accessing User Tools (Facsimile Features) Deleting a gateway A Press [Program / Change / Delete Gate- way]. G Press [Change] for Gateway Address. B Press [Delete], and then select a gateway to delete. H Enter the gateway address, and then press [OK]. The screen returns to - Ricoh 3045 | User Instructions - Page 164
Facsimile Features 8 154 - Ricoh 3045 | User Instructions - Page 165
9. Administrator Setting Administrator Tools List You can program, change, or delete standard messages and auto documents. You can also set the line type for the machine connection, program various IDs (including a Polling ID), fax destinations, and many other items. In addition, you can check the - Ricoh 3045 | User Instructions - Page 166
whether received documents are saved on the hard disk to be printed later or printed immediately without being saved. p.195 "Storing or Printing Received Documents" Stored RX File User Setting Set the password to view re- p.197 "Setting a User for ceived and stored documents Viewing Received - Ricoh 3045 | User Instructions - Page 167
Stan- dard Message]. Programming or changing standard messages A Check [Program / Change] is selected. B Program or change the message. Select the message you want to program or change. C Enter a new message. Reference "Entering Text", General Settings Guide D Press [OK]. Note ❒ To program - Ricoh 3045 | User Instructions - Page 168
the appropriate procedure depending on what you want to perform. Note ❒ If there are stored files, the file names are shown. Storing a file A Check [Program / Change] is se- lected. B Select [*Not Stored]. C Enter a file name, and then press [OK]. Reference "Entering Text",General Settings Guide - Ricoh 3045 | User Instructions - Page 169
Document. A Press the {User Tools/Counter} key. Reference "Entering Text", General Settings Guide Proceed to step H. F Place the original, and then select any scan settings you require. B Press [Facsimile Features]. 9 C Press [Administrator Tools]. D Press [Store / Change / Delete Auto Doc - Ricoh 3045 | User Instructions - Page 170
Press the {User Tools/Counter} key. The standby display appears. B Press [Facsimile Features]. C Press [Administrator Tools]. D Press [Program / Change / Delete Scan Size]. E Select [Program Size 1] or [Program Size 2]. Programming, Changing and Deleting a Scan Size When you select a scan size to - Ricoh 3045 | User Instructions - Page 171
A Press the {User Tools/Counter} key. B Press [Facsimile Features]. C Press [Administrator Tools]. D Press [Program / Change / Delete Scan Size]. E Press [Delete], and then select [Pro- gram Size 1] or [Program Size 2]. Note ❒ The displayed vertical size differs depending on the selected unit. When - Ricoh 3045 | User Instructions - Page 172
printed on the machine, and sent to a specified End Receiver. This is useful if, for example, you are visiting another office and would like a copy of your documents to be sent to that office. You can also specify a "folder" as the forwarding destination. Preparation To use this function, set - Ricoh 3045 | User Instructions - Page 173
Using Administrator Settings Note ❒ A fax number, e-mail address, IPFax destination, and folder can be set as the forwarding destination. ❒ Even when [On] is selected for "Forwarding" in "Reception Settings", if [Off] is selected for the forwarding destination in this function, only printing is - Ricoh 3045 | User Instructions - Page 174
of the display to switch the destination between fax number, email address, IP-Fax destination, and folder. C Press [Administrator Tools]. D Press [Forwarding]. E Press [Off], and then press [OK]. ❒ Set a folder destination in Address Book Management under Ad- ministrator Tools in the System - Ricoh 3045 | User Instructions - Page 175
whether or not to print a Forwarding Mark in the User Parameters. See p.167 "User Parameters" (switch 02, bit 0). ❒ This function is not available when memory forwarding is performed to a folder destination. Limitation ❒ This function is not available with Internet Fax. Note ❒ To store incoming - Ricoh 3045 | User Instructions - Page 176
Administrator Setting ECM (Error Correction Mode) If part of a transmission fails because of a line problem, the lost data is automatically resent. For this function to work, the other machine must have ECM. You can turn this function on or off through the following procedure. Limitation ❒ This - Ricoh 3045 | User Instructions - Page 177
Using Administrator Settings User Parameters User Parameters allow you to customize various settings to suit your needs. To change function settings, set the User Parameter Switches. ❖ Switches and Bits Each User Parameter has a set of switches, and each of the switches consist of eight bits, - Ricoh 3045 | User Instructions - Page 178
during service call) Not possible (Reception off) 2, 1 Substitute the reception when the machine cannot print (because paper is jammed, all paper trays have run out of paper, toner is empty, or all paper trays are out of order) 00: Enabled unconditionally (Free) 01: Enabled when Own Name/Own Fax - Ricoh 3045 | User Instructions - Page 179
Sort Journal by line type Off On 20 0 Automatic printing of the Off On LAN-Fax Result Report. 9 5, 4, 3, 2 Reprinting time of stored documents in memory that could not be print- ed using LAN-Fax Driver 0000: 0 minutes / 0001: 1 minute / 0010: 2 minutes / 0011: 3 minutes / 0100: 4 minutes - Ricoh 3045 | User Instructions - Page 180
Administrator Setting Switch Bit Item 0 1 21 0 Print results of sending Re- Off (print only On ception Notice Request mes- when an error oc- sage curs) 1 Respond to e-mail reception Off On acknowledgment request 3 File format for files forward- TIFF PDF ed to folder destinations - Ricoh 3045 | User Instructions - Page 181
or that other settings be made beforehand. F Select the bit number you want to change. Important ❒ It is recommended that you print and keep a User Parameter list when you program or change a User Parameter. See p.172 "Printing the User Parameter List". ❒ Do not change any bit switches other than - Ricoh 3045 | User Instructions - Page 182
Memory Lock B Press [Facsimile Features]. • Paper Tray C Press [Administrator Tools]. Use the Own Name or Own Fax Number to program your senders. If the sender D Press [Print List] next to "Parameter Setting". E Press the {Start} key. has a machine of the same manufacturer, program an Own Name - Ricoh 3045 | User Instructions - Page 183
sender list. See p.27 "Printing the Journal". See p.181 "Printing the Special Sender List". ❒ To use Forwarding, Print 2 Sided, or Paper Tray with Internet Fax reception, program the sender's email address. ❒ If you select "Off" for the Special Sender function in "Initial Set Up", the settings will - Ricoh 3045 | User Instructions - Page 184
using the Address Book Management function under System Settings. See "Registering Folders", General Settings Guide. ❒ If you have specified a folder for forwarding, you can specify the file format used for forwarding. See p.167 "User Parameters" (switch 21, bit 3). Reception File Print Quantity - Ricoh 3045 | User Instructions - Page 185
from the paper in the specified tray, the machine prints it after splitting it or minimizing its size. See p.101 "Page Separation and Length Reduction". ❒ Selection of the bypass tray enables you to specify the paper size in "Scan Area". Programming/Changing Special Senders Preparation You must - Ricoh 3045 | User Instructions - Page 186
Administrator Setting G Enter a destination name, and then press [OK]. Enter a destination name using Own Name or Own Fax Number. Reference "Entering Text", General Settings Guide H Press [Full Agreement] or [Partial Agree- ment]. I Select the item you want to program. Authorized RX (Authorized - Ricoh 3045 | User Instructions - Page 187
display to switch the destination between fax number, email address, IP-Fax destination, and folder. ❒ Set folder destinations using the Address Book Management function under System Settings. See "Registering Folders", General Settings Guide. ❒ When a folder is specified as the forward destination - Ricoh 3045 | User Instructions - Page 188
Sender. You can also specify the Bypass Tray Paper Size. A Press the {User Tools/Counter} key. B Press [Facsimile Features]. C Press [Administrator Tools]. D Press [Program Special Sender]. E Press [Initial Set Up]. Paper Tray 9 A Select [Paper Tray]. B Select the tray you want to use, and then - Ricoh 3045 | User Instructions - Page 189
an example. Using Administrator Settings Programming Bypass Tray Paper Size A Press [Bypass Tray Paper Size]. You can machine recognizes the pa- per size automatically. • The machine will detect 9 the paper size for the by- pass tray as the short edge of the paper is inserted into the machine - Ricoh 3045 | User Instructions - Page 190
tween "mm" and "inch". If you enter a length and change Use this function to program "Initial the units by pressing [mm] or Set Up" of a Special Sender. The By- [inch], it is converted auto- pass Tray Paper Size can also be spec- matically (fractions are round- ified. ed off). F Enter the - Ricoh 3045 | User Instructions - Page 191
Press [Exit]. H Press the {User Tools/Counter} key. The standby display appears. Printing the Special Sender List A Press the {User Tools/Counter} key. • Information Box • Transfer Box Reference For details about how to set up these functions: • p.182 "Programming/chang- ing Personal Boxes" • p.185 - Ricoh 3045 | User Instructions - Page 192
to be used as an alternative destination. See p.167 "User Parameters" (switch 32, bit 0). Reference p.40 "Personal Boxes" A Press the {User Tools/Counter} key. B Press [Facsimile Features]. C Press [Administrator Tools]. D Press [Box Setting]. E Check that [Program / Change] is se- lected. - Ricoh 3045 | User Instructions - Page 193
Administrator Settings Programming a password A Press [Password]. B Enter a password, and then press [OK]. Note ❒ To change a box already programmed, press it and proceed to step I. G Press [Personal Box]. H Enter a box name, and then press [OK]. Reference "Entering Text", General Settings Guide - Ricoh 3045 | User Instructions - Page 194
to switch the destination among fax number, Internet Fax address and IP-Fax address. K Press [OK]. L Press [Exit]. M Press the {User Tools/Counter} key. The standby display appears. B Press [Facsimile Features]. C Press [Administrator Tools]. D Press [Box Setting]. E Press [Delete], and then select - Ricoh 3045 | User Instructions - Page 195
20 characters long • SEP Code (required) Up to 20 characters long and can be composed of digits 0-9, "#", "*", and spaces (the first character cannot be a space). B Press [Facsimile Features]. C Press [Administrator Tools]. D Press [Box Setting]. E Check that [Program / Change] is se- lected. 185 - Ricoh 3045 | User Instructions - Page 196
, press [Clear] or the {Clear/Stop} key before pressing [OK], and then try again. L Re-enter the password, and then press [OK]. Reference "Entering Text", General Settings Guide I Enter the SEP Code. 9 Note ❒ If you make a mistake, press [Clear] or the {Clear/Stop} key be- fore pressing [OK - Ricoh 3045 | User Instructions - Page 197
the box, you cannot delete the box. A Press the {User Tools/Counter} key. With a programmed password A Enter a password using the number keys, and then press [OK]. B Press [Facsimile Features]. C Press [Administrator Tools]. D Press [Box Setting]. Note ❒ If you make a mistake, press [Clear] or - Ricoh 3045 | User Instructions - Page 198
Administrator Setting Programming/changing Transfer Boxes This function turns the machine into a fax relay station. Documents sent with a SUB Code that matches the SUB Code programmed as a Transfer Box are received, and then relayed to a programmed receiver. Since documents can be sent to multiple - Ricoh 3045 | User Instructions - Page 199
, bit 0). A Press the {User Tools/Counter} key. G Press [Transfer Box]. H Enter a Box name, and then press [OK]. Reference "Entering Text", General Settings Guide I Enter a SUB Code. B Press [Facsimile Features]. C Press [Administrator Tools]. D Press [Box Setting]. E Check that [Program / Change - Ricoh 3045 | User Instructions - Page 200
Administrator Setting Note ❒ You can change the display to the fax destination, Internet fax destination, and IPFax destination using the button on the right side of the display. C Re-enter the password, and then press [OK]. ❒ A reception station can also be registered as a group destination. In - Ricoh 3045 | User Instructions - Page 201
Boxes, and Transfer Boxes. A Press the {User Tools/Counter} key. With a programmed password A Enter apassword using the number keys, and then press [OK]. B Press [Facsimile Features]. C Press [Administrator Tools]. D Press [Print List] next to "Box Set- ting". E Press the {Start} key. After - Ricoh 3045 | User Instructions - Page 202
must program the number of the telephone line that is connected to their own machine. See p.52 "Transfer Request". Be sure to insert a pause after the area code. For example, if you are in the United States and your fax number is 12121234567, program the following: • 1212-1234567 You can program the - Ricoh 3045 | User Instructions - Page 203
the same ID as the one programmed on the sender's machine. Reference p.11 "Polling Transmission" p.14 "Polling Reception" p.52 "Transfer Request" p.76 "Selecting transmission options for a single transmission" A Press the {User Tools/Counter} key. Note ❒ A Confidential ID can be any B Press - Ricoh 3045 | User Instructions - Page 204
[Administrator Tools]. D Press [Program Memory Lock ID]. Selecting Dial/Push Phone Use this function to select a line type when the machine is connected to a G3 analog line. Dial and Push lines are available for selection. Note ❒ If the optional extra G3 interface unit is installed, settings for - Ricoh 3045 | User Instructions - Page 205
standby display appears. Storing or Printing Received Documents The optional printer/scanner unit is required. Specify whether received documents are to be saved on the hard disk or printed immediately without being saved. You can print stored documents repeatedly or download them as images to - Ricoh 3045 | User Instructions - Page 206
no more documents are saved on the hard disk. When this happens, the machine starts printing then overwriting old documents. ❒ You can specific e-mail address. To notify of reception, press [Notify Dest.] and select an e-mail address from the Internet Fax destinations programmed in the address book. - Ricoh 3045 | User Instructions - Page 207
]. The display returns to that of step D. 9 error may occur. ❒ If the programmed user code was F Press the Destination key of the deleted using the Address Book user you wish to specify, and then Management function under Sys- press [OK]. tem Settings, you cannot view re- ceived and saved - Ricoh 3045 | User Instructions - Page 208
user is de- leted from the destination list, a message "Deleted from Address Book" is displayed. Reenter the user. H Press the {User Tools/Counter} key. The standby display appears. Menu Protection Settings You can set up user access rights for functions that users other than administrators can set - Ricoh 3045 | User Instructions - Page 209
are sent from all senders or Special Senders, this report is sent to the e-mail address set as the destination for notification. Note ❒ To not send the Folder Transfer Result Report, press [Do not Email], and then press [OK]. Proceed to step H. ❒ To cancel the selection, press [Cancel]. The display - Ricoh 3045 | User Instructions - Page 210
Administrator Setting 9 200 - Ricoh 3045 | User Instructions - Page 211
Operation Problems If an Error Report Is Printed An Error Report is printed if a document cannot be successfully sent or received. Possible causes include a problem with the machine or noise on the telephone line. If an error occurs during transmission, resend the original. If an error occurs - Ricoh 3045 | User Instructions - Page 212
from the service station. printed as soon as the power is restored. This report can be used to identify lost files. If a memory stored for Memory Transmission was lost, re- If you want to use this function, change the User Parameter. See p.167 "User Parameters" (switch 25, bit 4). send it - Ricoh 3045 | User Instructions - Page 213
to the sender. Note ❒ You can select to send Error Mail Notification with User Parameters. See p.167 "User Parameters" (switch 21, bit 7). ❒ If Error Mail Notification cannot be sent, the Error Report (E-Mail) is printed by the machine. ❒ If an error occurs when an e-mail is received via SMTP, the - Ricoh 3045 | User Instructions - Page 214
Solving Operation Problems 10 204 - Ricoh 3045 | User Instructions - Page 215
States, you must program your phone number identifi- cation (your fax number) into your machine before you can connect the public phone system. See p.83 "Initial Settings and Adjustments", Facsimile Reference . ❒ Make sure the connector is the correct type before you start. ❖ Where - Ricoh 3045 | User Instructions - Page 216
Appendix Selecting the Line Type Select the line type to which the machine is connected. There are two types: tone and pulse dial. Note ❒ This function is not available in some areas. Select the line type using "Administrator Tools". See p.194 "Selecting Dial/Push Phone". 11 206 - Ricoh 3045 | User Instructions - Page 217
to a Telephone Line and Telephone Connecting the Optional Handset or an External Telephone You can connect the optional handset or an external telephone to the machine. You can use it for telephone calls. Note ❒ Some external telephones may not be connected or may suffer reduced func- tionality - Ricoh 3045 | User Instructions - Page 218
you to receive fax documents at high resolution (Fine or Super Fine). If you require this option, consult your service representative. See p.216 "Maximum Values". Handset You can make or receive calls by installing the optional handset and dialing manually. Reference p.59 "Manual Dial" Extra G3 - Ricoh 3045 | User Instructions - Page 219
Specifications Specifications ❖ Fax Transmission and Reception Standard Resolution Transmission time Data compression method Maximum original size Maximum scanning size Print character: optional expansion memory required), 16 × 15.4/mm·400 × 400 dpi (Super Fine character: optional expansion memory - Ricoh 3045 | User Instructions - Page 220
) *1 , 400 × 400 dpi (Super Fine character: optional) *1 Original size : Scanning width A3 *1 , B4 *1 , A4 Communication Protocols • Transmission SMTP, TCP/IP • Reception POP3, SMTP, IMAP4, TCP/IP E-mail format Single/Multi-part, MIME Conversion Attached file forms: TIFF-F (MH, MR *1 , MMR - Ricoh 3045 | User Instructions - Page 221
Specifications ❖ IP-Fax Transmission and Reception Network Scan line density Original size Maximum scanning size Transmission protocol Compatible machines IP-Fax transmission function IP-Fax reception function LAN: Local Area Network Ethernet/10base-T, 100base-TX, IEEE1394 (IP over 1394), IEEE802 - Ricoh 3045 | User Instructions - Page 222
to machines having the following specifications. Communication protocols E-mail format Data format • Transmission SMTP • Reception POP3, SMTP, IMAP4 • Format MIME, Base64 • Content-Type Image/tiff Multipart/mixed (text/plain, Image/tiff (attached file forms)) • Profile TIFF Profile S • Coding MH - Ricoh 3045 | User Instructions - Page 223
size and scanned area ❖ Exposure Glass Specifications ❖ ADF AAG019S Limitation ❒ There may be a difference in the size of the image when it is printed at the destination. ❒ If you place an original larger than A3, 11"×17" on the exposure glass, only an A3, 11"×17" area is scanned. Note ❒ Even - Ricoh 3045 | User Instructions - Page 224
exposure glass. Because the machine scans custom size documents in a standard size, part of the image may be truncated depending on the length of the document. For details about how to set custom size documents, see p.17 "Setting a Scan Area", Facsimile Reference . ❖ Metric Version - Ricoh 3045 | User Instructions - Page 225
Specifications Original Sizes Difficult to Detect The machine has difficulty detecting the size of the following kinds of originals. (When this happens, the receiving machine may not select print paper of the correct size.) • documents placed on the exposure glass of sizes other than those listed - Ricoh 3045 | User Instructions - Page 226
list contains the maximum value for each item. Note ❒ The maximum number of pages that can be stored or transmitted may decrease depending on the contents of documents. Item Standard Expansion memory (Optional) Memory (with optional group Number of digits for fax numbers 128 128 Number of - Ricoh 3045 | User Instructions - Page 227
, 212 Acceptable types of originals, 212 Accessing user tools (Facsimile Features), 144 Adding a destination, 21 Address Book, 110, 118 Adjust Scan Density, 145 Adjust Sound Volume, 145 Administrator settings, 155 Administrator Tools, 157 Administrator Tools list, 155 All, 28 Applications stored on - Ricoh 3045 | User Instructions - Page 228
, 3 Editing Address Book, 118 Editing fax cover sheets, 120 E-mail Settings, 148 E-mail transfer, 95 E-mail TX Results, 117 Enable H.323, 150 Enable SIP, 150 End Receiver, 163 Error Mail Notification, 203 Error Report, 201 Error Report (E-Mail), 203 Expansion memory, 208 Extra G3 interface unit, 208 - Ricoh 3045 | User Instructions - Page 229
, 102 Page Separation and Length Reduction, 101 Paper Tray, 147, 178 Parallel Memory Transmission, 78 Parameter Setting, 155 Partial Agreement, 176 Password, 135, 183 Pause/Redial key, 47 Personal Boxes, 40, 182, 184 Changing, 182 Deleting, 184 Printing, 191 Programming, 182 Polling ID, 193 Polling - Ricoh 3045 | User Instructions - Page 230
List, 26, 172, 181, 191 Print Memory Lock, 38 Print on 2 Sides, 35 Print per File No., 28 Print Personal Box File, 41 Print per User, 28 Print Reception Time, 148 Priority trays, 104 Priority TX, 8 Program / Change, 157, 158, 175 Program / Change / Delete Gateway, 150 Program / Change / Delete Scan - Ricoh 3045 | User Instructions - Page 231
Send Later, 3 SEP Code, 50 Server-generated error e-mail, 203 Setting a user for viewing received and stored documents, 197 Setting LAN-Fax Driver properties, 110 Setting print properties, 110 SID Code, 50 Simultaneous Broadcast, 80 SIP Settings, 150 SMTP, 23, 94 SMTP reception, 93 SMTP reception - Ricoh 3045 | User Instructions - Page 232
Name, 135 User Parameter List, 167 User Parameters, 167 User Tools/Counter key, 144, 157 Using administrator settings, 157 Using a program, 132 Using a Web browser, 140 Using DeskTopBinder, 139 Using the Document Server, 133 V Viewing fax information using a Web browser, 123 W Web Image Monitor - Ricoh 3045 | User Instructions - Page 233
MEMO 223 - Ricoh 3045 | User Instructions - Page 234
MEMO 224 EN USA B779-8511 - Ricoh 3045 | User Instructions - Page 235
Copyright © 2005 - Ricoh 3045 | User Instructions - Page 236
FAX Option Type 3045 Operating Instructions Facsimile Reference B7798511 Printed in Japan EN USA B779-8511
-
 1
1 -
 2
2 -
 3
3 -
 4
4 -
 5
5 -
 6
6 -
 7
7 -
8
-
9
-
10
-
11
-
12
-
13
-
14
-
15
-
16
-
17
-
18
-
19
-
20
-
21
-
22
-
23
-
24
-
25
-
26
-
27
-
28
-
29
-
30
-
31
-
32
-
33
-
34
-
35
-
36
-
37
-
38
-
39
-
40
-
41
-
42
-
43
-
44
-
45
-
46
-
47
-
48
-
49
-
50
-
51
-
52
-
53
-
54
-
55
-
56
-
57
-
58
-
59
-
60
-
61
-
62
-
63
-
64
-
65
-
66
-
67
-
68
-
69
-
70
-
71
-
72
-
73
-
74
-
75
-
76
-
77
-
78
-
79
-
80
-
81
-
82
-
83
-
84
-
85
-
86
-
87
-
88
-
89
-
90
-
91
-
92
-
93
-
94
-
95
-
96
-
97
-
98
-
99
-
100
-
101
-
102
-
103
-
104
-
105
-
106
-
107
-
108
-
109
-
110
-
111
-
112
-
113
-
114
-
115
-
116
-
117
-
118
-
119
-
120
-
121
-
122
-
123
-
124
-
125
-
126
-
127
-
128
-
129
-
130
-
131
-
132
-
133
-
134
-
135
-
136
-
137
-
138
-
139
-
140
-
141
-
142
-
143
-
144
-
145
-
146
-
147
-
148
-
149
-
150
-
151
-
152
-
153
-
154
-
155
-
156
-
157
-
158
-
159
-
160
-
161
-
162
-
163
-
164
-
165
-
166
-
167
-
168
-
169
-
170
-
171
-
172
-
173
-
174
-
175
-
176
-
177
-
178
-
179
-
180
-
181
-
182
-
183
-
184
-
185
-
186
-
187
-
188
-
189
-
190
-
191
-
192
-
193
-
194
-
195
-
196
-
197
-
198
-
199
-
200
-
201
-
202
-
203
-
204
-
205
-
206
-
207
-
208
-
209
-
210
-
211
-
212
-
213
-
214
-
215
-
216
-
217
-
218
-
219
-
220
-
221
-
222
-
223
-
224
-
225
-
226
-
227
-
228
-
229
-
230
-
231
-
232
-
233
-
234
-
235
-
236
 |
 |

FAX Option Type 3045
Operating Instructions
Facsimile Reference
<Advanced Features>
Read this manual carefully before you use this machine and keep it handy for future reference. For safe and correct use, be sure to read the
Safety Information in the “General Settings Guide” before using the machine.
Transmission Mode
Checking and Canceling Transmission Files
Communication Information
Other Transmission Features
Reception Features
Fax via Computer
Simplifying the Operation
Facsimile Features
Administrator Setting
Solving Operation Problems
Appendix
1
2
3
4
5
6
7
8
9
10
11