Ricoh AC205L User's Guide - Page 119
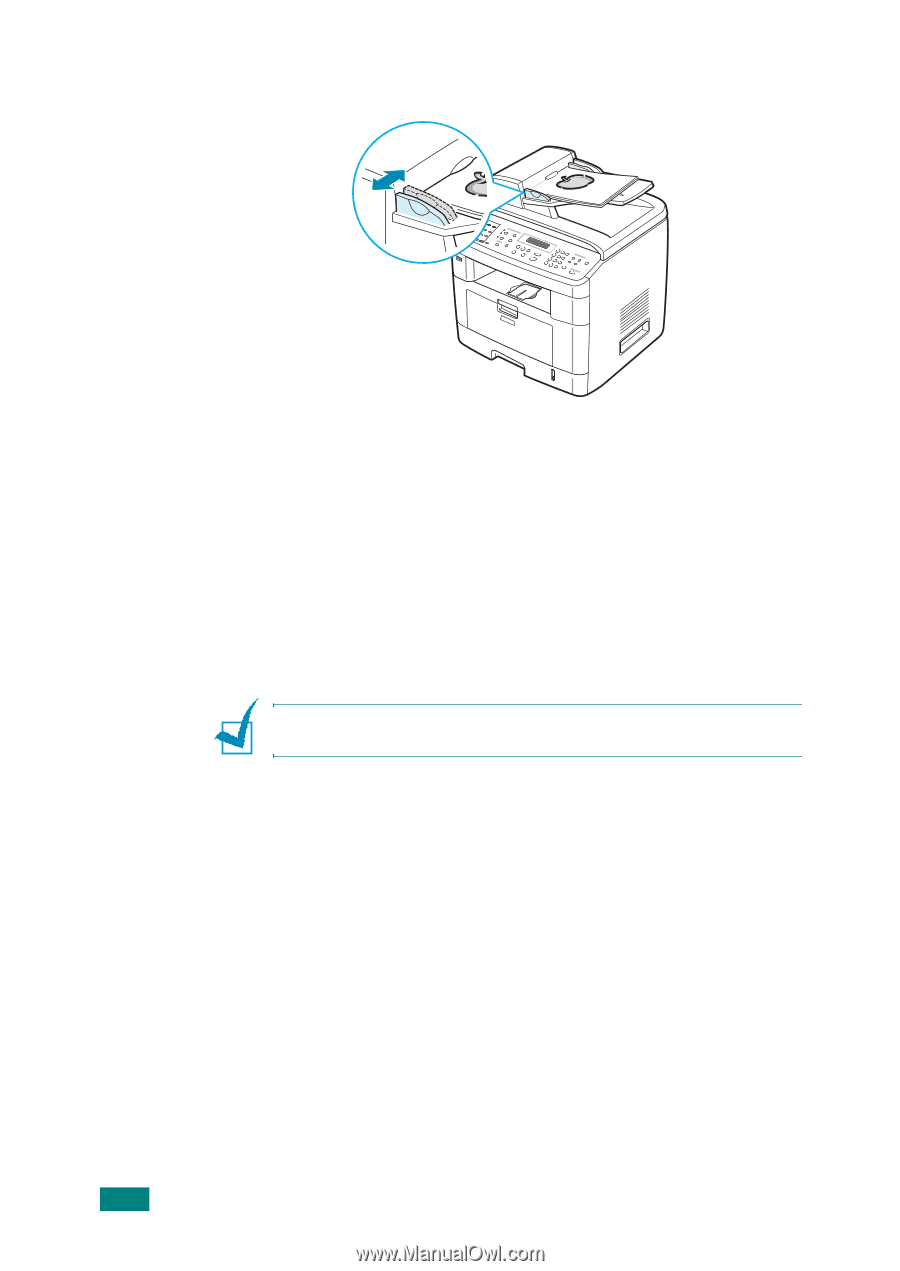
Dust on the ADF glass may cause black lines on the, printout. Always keep it clean., NOTE
 |
View all Ricoh AC205L manuals
Add to My Manuals
Save this manual to your list of manuals |
Page 119 highlights
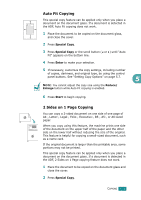
2 Adjust the document guides to the document size. 3 Customize the copy settings including number of copies, copy size, darkness, and original type, by using the control panel buttons. See "Setting Copy Options" on page 5.7. To clear the settings, use the Clear/Stop button. 4 If necessary, you can use special copy features, such as Collation and 2 or 4 Up-copying. 5 Press Start to begin copying. The display shows the copy processing. NOTE: Dust on the ADF glass may cause black lines on the printout. Always keep it clean. 5.6 COPYING
-
 1
1 -
2
-
3
-
4
-
5
-
6
-
7
-
8
-
9
-
10
-
11
-
12
-
13
-
14
-
15
-
16
-
17
-
18
-
19
-
20
-
21
-
22
-
23
-
24
-
25
-
26
-
27
-
28
-
29
-
30
-
31
-
32
-
33
-
34
-
35
-
36
-
37
-
38
-
39
-
40
-
41
-
42
-
43
-
44
-
45
-
46
-
47
-
48
-
49
-
50
-
51
-
52
-
53
-
54
-
55
-
56
-
57
-
58
-
59
-
60
-
61
-
62
-
63
-
64
-
65
-
66
-
67
-
68
-
69
-
70
-
71
-
72
-
73
-
74
-
75
-
76
-
77
-
78
-
79
-
80
-
81
-
82
-
83
-
84
-
85
-
86
-
87
-
88
-
89
-
90
-
91
-
92
-
93
-
94
-
95
-
96
-
97
-
98
-
99
-
100
-
101
-
102
-
103
-
104
-
105
-
106
-
107
-
108
-
109
-
110
-
111
-
112
-
113
-
 114
114 -
 115
115 -
 116
116 -
 117
117 -
 118
118 -
 119
119 -
 120
120 -
 121
121 -
 122
122 -
 123
123 -
 124
124 -
125
-
126
-
127
-
128
-
129
-
130
-
131
-
132
-
133
-
134
-
135
-
136
-
137
-
138
-
139
-
140
-
141
-
142
-
143
-
144
-
145
-
146
-
147
-
148
-
149
-
150
-
151
-
152
-
153
-
154
-
155
-
156
-
157
-
158
-
159
-
160
-
161
-
162
-
163
-
164
-
165
-
166
-
167
-
168
-
169
-
170
-
171
-
172
-
173
-
174
-
175
-
176
-
177
-
178
-
179
-
180
-
181
-
182
-
183
-
184
-
185
-
186
-
187
-
188
-
189
-
190
-
191
-
192
-
193
-
194
-
195
-
196
-
197
-
198
-
199
-
200
-
201
-
202
-
203
-
204
-
205
-
206
-
207
-
208
-
209
-
210
-
211
-
212
-
213
-
214
-
215
-
216
-
217
-
218
-
219
-
220
-
221
-
222
-
223
-
224
-
225
-
226
-
227
-
228
-
229
-
230
-
231
-
232
-
233
-
234
-
235
-
236
-
237
-
238
-
239
-
240
-
241
-
242
-
243
-
244
-
245
-
246
-
247
-
248
-
249
-
250
-
251
-
252
-
253
-
254
-
255
-
256
-
257
-
258
-
259
-
260
-
261
-
262
-
263
-
264
-
265
-
266
-
267
-
268
-
269
-
270
-
271
-
272
-
273
-
274
-
275
-
276
-
277
-
278
 |
 |
C
OPYING
5.6
2
Adjust the document guides to the document size.
3
Customize the copy settings including number of copies,
copy size, darkness, and original type, by using the control
panel buttons. See “Setting Copy Options” on page 5.7.
To clear the settings, use the
Clear/Stop
button.
4
If necessary, you can use special copy features, such as
Collation and 2 or 4 Up-copying.
5
Press
Start
to begin copying.
The display shows the copy processing.
N
OTE
: Dust on the ADF glass may cause black lines on the
printout. Always keep it clean.