Ricoh Aficio SP 5210SR Copy Reference - Page 36
Auto Start, Job Preset, Press the [Start] key.
 |
View all Ricoh Aficio SP 5210SR manuals
Add to My Manuals
Save this manual to your list of manuals |
Page 36 highlights
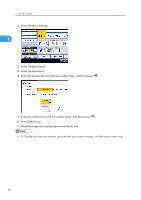
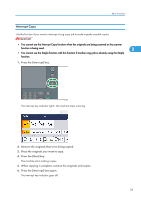
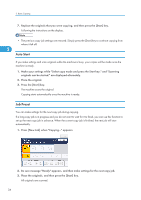
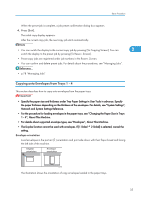
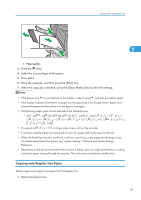
2. Basic Copying 7. Replace the originals that you were copying, and then press the [Start] key. Following the instructions on the display. • The previous copy job settings are restored. Simply press the [Start] key to continue copying from where it left off. 2 Auto Start If you make settings and scan originals while the machine is busy, your copies will be made once the machine is ready. 1. Make your settings while "Select copy mode and press the Start key." and "Scanning originals can be started." are displayed alternately. 2. Place the original. 3. Press the [Start] key. The machine scans the original. Copying starts automatically once the machine is ready. Job Preset You can make settings for the next copy job during copying. If a long copy job is in progress and you do not want to wait for it to finish, you can use this function to set up the next copy job in advance. When the current copy job is finished, the next job will start automatically. 1. Press [New Job] when "Copying..." appears. 2. Be sure message "Ready" appears, and then make settings for the next copy job. 3. Place the originals, and then press the [Start] key. All originals are scanned. 34
-
 1
1 -
2
-
3
-
4
-
5
-
6
-
7
-
8
-
9
-
10
-
11
-
12
-
13
-
14
-
15
-
16
-
17
-
18
-
19
-
20
-
21
-
22
-
23
-
24
-
25
-
26
-
27
-
28
-
29
-
30
-
 31
31 -
 32
32 -
 33
33 -
 34
34 -
 35
35 -
 36
36 -
 37
37 -
 38
38 -
 39
39 -
 40
40 -
 41
41 -
42
-
43
-
44
-
45
-
46
-
47
-
48
-
49
-
50
-
51
-
52
-
53
-
54
-
55
-
56
-
57
-
58
-
59
-
60
-
61
-
62
-
63
-
64
-
65
-
66
-
67
-
68
-
69
-
70
-
71
-
72
-
73
-
74
-
75
-
76
-
77
-
78
-
79
-
80
-
81
-
82
-
83
-
84
-
85
-
86
-
87
-
88
-
89
-
90
-
91
-
92
-
93
-
94
-
95
-
96
-
97
-
98
-
99
-
100
-
101
-
102
-
103
-
104
-
105
-
106
-
107
-
108
-
109
-
110
-
111
-
112
-
113
-
114
-
115
-
116
-
117
-
118
-
119
-
120
-
121
-
122
-
123
-
124
-
125
-
126
-
127
-
128
-
129
-
130
-
131
-
132
-
133
-
134
-
135
-
136
-
137
-
138
-
139
-
140
-
141
-
142
-
143
-
144
-
145
-
146
-
147
-
148
-
149
-
150
-
151
-
152
-
153
-
154
-
155
-
156
-
157
-
158
-
159
-
160
-
161
-
162
-
163
-
164
-
165
-
166
-
167
-
168
-
169
-
170
-
171
-
172
-
173
-
174
-
175
-
176
-
177
-
178
-
179
-
180
-
181
-
182
-
183
-
184
-
185
-
186
-
187
-
188
-
189
-
190
-
191
-
192
-
193
-
194
-
195
-
196
-
197
-
198
-
199
-
200
-
201
-
202
-
203
-
204
-
205
-
206
-
207
-
208
 |
 |