Ryobi P521 English Manual - Page 13
Splinter-free Cutting, Positioning The Base In The Splinter, Free Cutting Position, Optional Edge - jig saw
 |
View all Ryobi P521 manuals
Add to My Manuals
Save this manual to your list of manuals |
Page 13 highlights
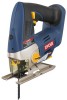
OPERATION SPLINTER-FREE CUTTING See Figure 8. The base of the jig saw has a narrow slot to permit splinterfree cutting. It is especially useful when cutting plywood. This feature should only be used when making straight cuts or circle cuts. It is not for bevel cutting or plunge cutting. NOTE: The non-orbital setting also helps reduce splintering when cutting plywood. POSITIONING THE BASE IN THE SPLINTERFREE CUTTING POSITION Remove battery pack. Using the 1/8 in. hex key provided, loosen base pivot screws and slide base forward. Always set the cutting angle at 0° for splinter-free cutting. To set cutting angle at 0°, align the 0° mark on the scale with the edge of the motor housing. NOTE: When setting angle at 0° for splinter-free cutting, the positive stop notches on the rear of the base are not used. Tighten base pivot screws securely. Remove hex key and return it to the storage area. Replace battery pack. OPTIONAL EDGE GUIDE See Figure 9. An optional edge guide is available for use with the saw. It can be used for making cross cuts and rip cuts. Remove battery pack. Insert the arm through the two slots in the base of the saw as shown. Adjust edge guide to the desired width and lock in place with the edge guide screw. Replace battery pack. HEX KEY HEX KEY STORAGE BASE BASE PIVOT SCREW Fig. 8 EDGE GUIDE SCREW BASE Fig. 9 13
-
 1
1 -
2
-
3
-
4
-
5
-
6
-
7
-
 8
8 -
 9
9 -
 10
10 -
 11
11 -
 12
12 -
 13
13 -
 14
14 -
 15
15 -
 16
16 -
 17
17 -
 18
18
 |
 |
