Samsung 920NW Service Manual
Samsung 920NW - SyncMaster - 19" LCD Monitor Manual
 |
UPC - 729507800905
View all Samsung 920NW manuals
Add to My Manuals
Save this manual to your list of manuals |
Samsung 920NW manual content summary:
- Samsung 920NW | Service Manual - Page 1
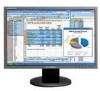
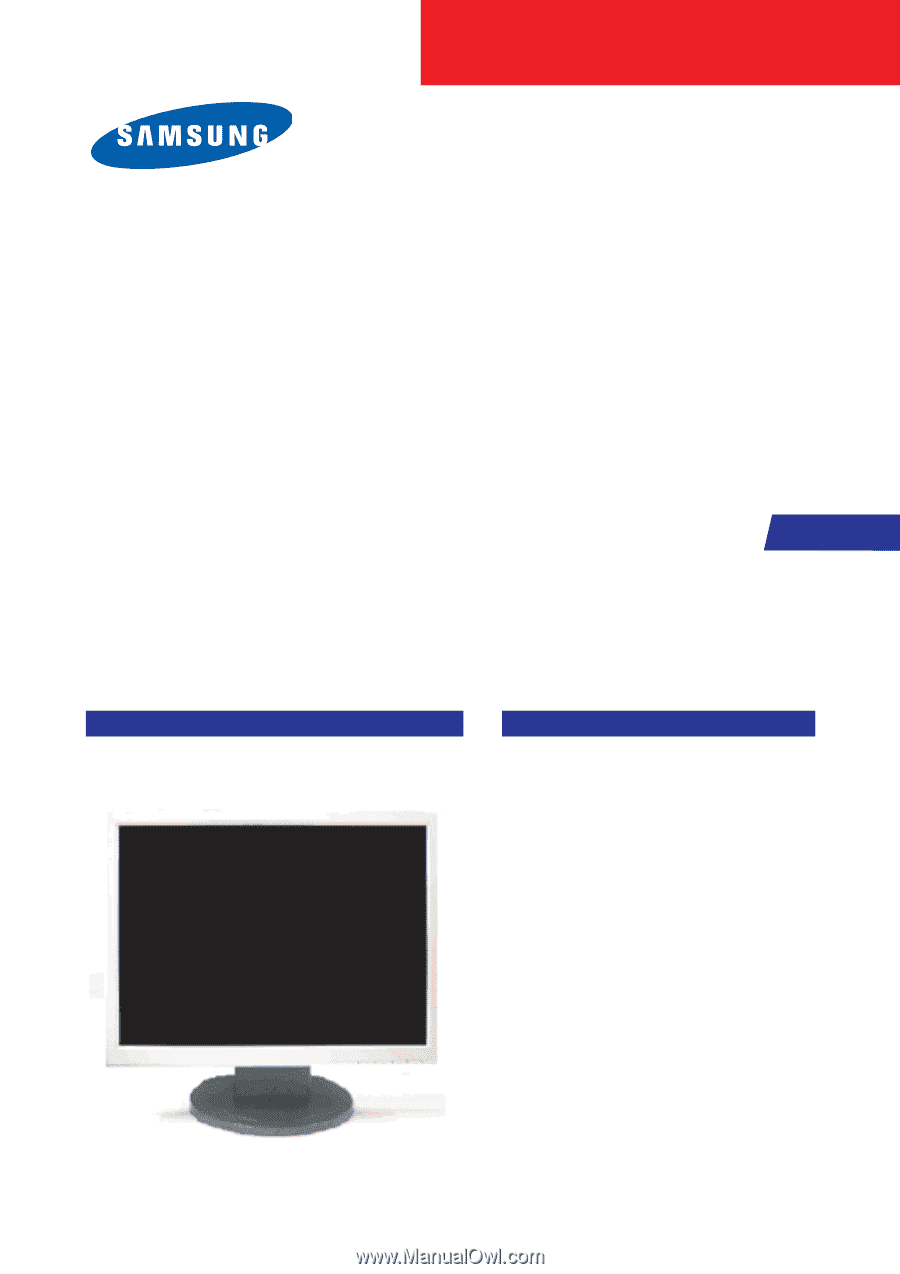
LCD-Monitor Model 920NW SERVICE Manual LCD Monitor Fashion Feature - 19" LCD Monitor (1440x 900 ) - Response Time (5ms) - Simple Stand - Silver / Black ColorVariation - Samsung 920NW | Service Manual - Page 2
of Samsung Electronics Co., Ltd. 920NW Service Manual First edition July 20067. Printed in Korea. ii Trademarks Samsung is the registered trademark of Samsung Electronics Co., Ltd. 920NW and MacMaster Cable Adapter are trademarks of Samsung Electronics Co., Ltd. Macintosh, Power Macintosh - Samsung 920NW | Service Manual - Page 3
Black Screen and backlight turn on ...4-6 4-7 White Screen ...4-7 4-8 Bad Screen ...4-8 5. Exploded View and Parts List ...5-1 6. Electrical Parts List ...6-1 7. Block Diagram ...7-1 7-1 Power tree ...7-1 7-2 Mainboard part ...7-2 7-3 IP Board Part(SMPS Part) ...7-2 7-4 IP BOARD part(Inverter Part - Samsung 920NW | Service Manual - Page 4
9. Schematic Diagrams ...9-1 9-1 INPUT ...9-1 9-2 DCINPUT ...9-2 9-3 SCALER ...9-3 9-4 POWER ...9-4 9-5 POWER ...9-5 9-6 KEYPAD ...9-6 10. Operating Instructions and Installation ...10-1 10-1 Front ...10-1 10-2 Rear ...10-2 10-3 Monitor Assembly ...10-3 10-4 Attaching a Base ...10-4 11. Disassembly - Samsung 920NW | Service Manual - Page 5
-This Service Manual is a property of Samsung Electronics Co., Ltd. Any unauthorized use of Manual can be punished under applicable International and/or domestic law. Samsung Electronics Co.,Ltd. 416, Maetan-3Dong, Yeongtong-Gu, Suwon City, Gyeonggi-Do, Korea, 443-742 Printed in Korea P/N : BN82URL - Samsung 920NW | Service Manual - Page 6
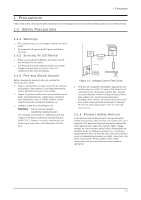
Precautions 1-1-1 Warnings 1. For continued safety, do not attempt to modify the circuit board. 2. Disconnect the AC power and DC power jack before servicing. 1-1-2 Servicing the LCD Monitor 1. When servicing the LCD Monitor, Disconnect the AC line cord from the AC outlet. 2. It is essential that - Samsung 920NW | Service Manual - Page 7
capacitor installed with the wrong polarity might explode. Before servicing units covered by this service manual, read and follow the Safety Precautions section of this manual hazard, be sure to remove the wrist strap before applying power to the monitor. 2. After removing an ESD-equipped assembly, - Samsung 920NW | Service Manual - Page 8
Installation Precautions 1. For safety reasons, more than two people are required for carrying the product. 2. Keep the power cord away from any heat emitting devices, as a melted covering shock. 5. Make sure to turn the power off and unplug the power cord from the outlet before repositioning - Samsung 920NW | Service Manual - Page 9
1 Precautions Memo 1-4 - Samsung 920NW | Service Manual - Page 10
2-1 Fashion Feature - 19" LCD Monitor (1440x 900 ) - Response Time (5ms) - Simple Stand - Silver / Black ColorVariation 2-2 Specifications Features Size Pixel Pinch Frequency Horizontal / Vertical Bandwidth (MHz) Resolution Color Signal Input Sync. Type Video Input Power Consumption Stand Swivel - Samsung 920NW | Service Manual - Page 11
2 Product Specifications 2-3 Option Specification Item Item Name CODE.NO GUIDE, QUICK SETUP BH68-00376L-04 Remark MNL User's(CD) BN59-00537A-00 CARS, WARRANTY BH68-70438A-10 D-Sub Cable N/A 2-2 - Samsung 920NW | Service Manual - Page 12
adjusting the monitor: Computer with Windows 95, Windows 98, Windows NT, Windows 2000, or Windows XP. MTI-2031 DDC MANAGER JIG 3-2 Automatic Color Adjustment To Analog video, In 16gray or any pattern using black and white and any mode.(16gray and XGA mode recommend) 1. Push the OSD Menu button to - Samsung 920NW | Service Manual - Page 13
Revision Number Video Input Definition 15 Max Horizontal Image Size (cm) 16 Max Vertical Image Size (cm) 17 Display Gamma 18 Power Management and Supported Feature(s) 19-22 (10 byte) Chroma Info 23 Established Timing I SAM 022B Used Notes1 Notes2 Notes3 1 3 Analog Signal 0.700,0.000 - Samsung 920NW | Service Manual - Page 14
51,00,2A,40, 30,70,13,00, 52,0E,11,00, 00,1E 38 4B 1E Secondary GTF - Not Supported 51 0E 5A-6B (18 byte) Detailed Timing / Descriptor Block 3 Monitor Name: SyncMaster 6C-7D (18 byte) Detailed Timing / Descriptor Block 4 7E Extension flag 7F Checksum Serial Number: Notes4 Remark: Notes1 - Samsung 920NW | Service Manual - Page 15
3 Alignments and Adjustments 3-5 How to execute DDC 1. Install Analog DVI EDID Tool Program 2. Click the Analog DVI EDID Tool icon. 3. Select mode The password is 1234. Select the manufacture is Venus and the - Samsung 920NW | Service Manual - Page 16
DDC ok. 3-5 How to execute MCU Code 1. Set the options. -. Manufacture: MSTAR -. Device Type: TSUM16_ROM128K_ext_flash -. Communication Port: DSUB15 (Analog) -. External Memory: PM25LV010E 2. Click 'Connect File' button, and select the MCU code. 3. Click 'Read File - Samsung 920NW | Service Manual - Page 17
3 Alignments and Adjustments 4. Click 'Auto Program' button. 5. If Program and Verify is OK, turn off the hard power and than turn on again. 3-6 - Samsung 920NW | Service Manual - Page 18
the problem happen in the digital circuit part. - If you check the H/V position, please use the crosshatch pattern. - This LCM support more than 30 timing modes, if the input timing mode is out of specification, the picture may appears abnormally. - If brightness uneven, repairs Inverter circuit - Samsung 920NW | Service Manual - Page 19
4 Troubleshooting 4-2 No Power & Power LED Off No power Check primary rectifier voltage Check circuit if short Check IC802, C805, T801 Check pin6 of IC802 voltage about 12V Check F801, P801, RT,801,D801 - Samsung 920NW | Service Manual - Page 20
is unstable Unstable power 4 Troubleshooting Check sampling Circuit Check the R pin voltage of IC803 about 2.5V Check R822, R823, R824 Check the C pin voltage of IC803 if 3V Change R822, - Samsung 920NW | Service Manual - Page 21
4 Troubleshooting 4-4 Backlight can't be turned on No backlight Yes LED lamp is OK Yes Is there IC501 voltage is high level voltage No No power supply to Yes Check the cable that from inverter I/F BD to P/I BD is ok No No U501, U502 fail Check power supply No Check I/F BD Replace U501, - Samsung 920NW | Service Manual - Page 22
4-5 Black Screen and backlight turn on Black Screen 4 Troubleshooting Check power supply: Pin1, 2 of CN102 Yes Check pin34, 51, 66, and 82 Of U105 Yes Check pin12, 68, 97 and 117 Of U103 Yes Check Reset (pin19) Of U103 Yes Check Crystal: Pin32, Pin33 Of U103 Yes Check CCFLEnable (pin20) of U103 No - Samsung 920NW | Service Manual - Page 23
4 Troubleshooting 4-6 White Screen White Screen LVDS Cable Yes Reinsert No Workmanship Change LVDS Yes Cable LVDS Cable NG No Check VLCD Is 5V? No Check Panel Enable Of U103 (pin75) is High? Yes No Check R134, R176, Q102, Q105 Check LVDS Yes Signals No Check the HW No Reset Of - Samsung 920NW | Service Manual - Page 24
Screen LVDS Cable Yes Reinsert No Change LVDS Yes Cable No Check Yes Crystal:Pin32, Pin33 of U103 Yes Check the No communication Of U103 and U104 Yes Check the pins of U103 and U104 4 Troubleshooting Workmanship LVDS Cable NG Check :X1, C147, C148 Check: SDO, SCZ, SCK, SDI, Reset - Samsung 920NW | Service Manual - Page 25
4 Troubleshooting Memo 4-8 - Samsung 920NW | Service Manual - Page 26
5 Exploded View and Parts List -You can search for updated part codes through ITSELF web site. URL : http://itself. sec. samsung.co.kr 5-1 Exploded View M0215 6 Exploded View & Parts List 7140200053 7140100097 5-1 - Samsung 920NW | Service Manual - Page 27
5 Exploded View & Parts List 5-1-1 LS19HANKSM/EDC Parts List Location.No M0215 7140200053 7140100097 CODE-NO BN07-00406A BN82-00152A BN82-00188B SPECIFICATION & DESCRIPTION LCD-PANEL;MT190AWO1 V2,Haydn,6bit FRC,42 A/S MATERIAL ASSY-BASE;LE1729 A/S MATERIAL ASSY-STAND;LE1961 Q'TY 1 1 1 SA/SNA - Samsung 920NW | Service Manual - Page 28
.sec.samsung.co.kr/ 6-1 LS19HANKSM/EDC Parts List Level Loc. No. Code No. Description & Specification LS19HANKSM/EDC 920NW SILVER, TCO99 0.1 M0215 BN07-00406A LCD-PANEL;MT190AWO1 V2,Haydn,6bit FRC,42 0.1 4530101001 BN81-00270A A/S-CABLE;D-SUB 15P MALE 6FT,ROHS,BLACK/ 0.1 7909714006 - Samsung 920NW | Service Manual - Page 29
6 Electrical Parts List Memo 6-2 - Samsung 920NW | Service Manual - Page 30
7 Block Diagram 7-1 Power tree 7 Block Diagrams 7-1 - Samsung 920NW | Service Manual - Page 31
7 Block Diagrams 7-2 Main Board part 7-3 IP Board Part (Power part) 7-2 - Samsung 920NW | Service Manual - Page 32
7-4 IP BOARD part(Inverter Part) Vin voltage (+14.2V) Brightness control signal ON/OFF DC to DC (+14.2V to 5.0V) CCFL PWM Control IC IC501 MosFET U501 MosFET U502 Transformer T501 Transformer T502 Voltage feedback Current feedback 7 Block Diagrams CCFL1 CCFL2 CCFL1 CCFL2 7-3 - Samsung 920NW | Service Manual - Page 33
7 Block Diagrams Memo 7-4 - Samsung 920NW | Service Manual - Page 34
8 Block Diagram 8 Wiring Diagram 8-1 - Samsung 920NW | Service Manual - Page 35
8 Wiring Diagram Memo 8-2 - Samsung 920NW | Service Manual - Page 36
9 Schematic Diagrams - This Document can not be used without Samsung s authorization. 9-1 INPUT 9 Schematic Diagrams 9-1 - Samsung 920NW | Service Manual - Page 37
9 Schematic Diagrams 9-2 DCINPUT 9-2 - Samsung 920NW | Service Manual - Page 38
9-3 SCALER 9 Schematic Diagrams 9-3 - Samsung 920NW | Service Manual - Page 39
9 Schematic Diagrams 9-4 POWER 9-4 - Samsung 920NW | Service Manual - Page 40
9-5 POWER 9 Schematic Diagrams 9-5 - Samsung 920NW | Service Manual - Page 41
9 Schematic Diagrams 9-6 KEYPAD 9-6 - Samsung 920NW | Service Manual - Page 42
is not on the screen, push the button to adjust brightness. 2,3. Adjust buttons Adjust items in the menu. 4. Enter button Activates a highlighted menu item. 5. Auto button Use this button for auto adjustment. 6. Power button / Power indicator Use this button for turn the monitor on and off. /This - Samsung 920NW | Service Manual - Page 43
Instructions and Installation 10-2 Rear 3 4 1 2 1. Power port Connect the power cord for your monitor to the power port on the back of the monitor. 2. D-sub 15-pin port Connect the signal cable to the 15-pin, D-sub connector on the back of your monitor. 3. Power on/off Switch(option) Use this button - Samsung 920NW | Service Manual - Page 44
10-3 Connecting the monitor 10 Operating Instructions and Installation 1. Connect the power cord for your monitor to the power port on the back of the monitor. Plug the power cord for the monitor into a nearby outlet. 2-1. Using the D-sub (Analog) connector on the video card. Connect the signal - Samsung 920NW | Service Manual - Page 45
10 Operating Instructions and Installation 10-4 Monitor Assembly 10-4 - Samsung 920NW | Service Manual - Page 46
Operating Instructions and Installation A. Monitor B. Mounting interface pad 1. Turn off your monitor and unplug its power cord. 2. Lay the LCD monitor face-down on a flat surface with a cushion beneath it to protect the screen. 3. Remove four screws and then remove the stand from the LCD monitor - Samsung 920NW | Service Manual - Page 47
10 Operating Instructions and Installation Memo 10-6 - Samsung 920NW | Service Manual - Page 48
1729 LCD Monitor ASSY, BASE BASE*1 RUBBER FOOT *6 SCREW.P.CROSS,T.T-4*8,Zn STAND_REAR*1 HINGE *1 SCREW M4*10 *3 ASSY STAND SCREW M4*10 *4 BACK COVER BKT-VESA *4 LENS*1 CONTROL BOARD*1 ASSY FRONT BEZEL STAND_FRONT *1 BEZEL*1 BUTTON,FUNCTION *1 CHASSIS *1 PCBA I/F BOARD *1 Power Board *1 SCREW - Samsung 920NW | Service Manual - Page 49
11 Disassembly and Reassembly Description 1. Remove 4 screw from the stand Picture Description 2. Remove the stand and front coler 11-2 - Samsung 920NW | Service Manual - Page 50
Description 3. Lift the back cover and use the jig to remove the shield lamp. 11 Disassembly and Reassembly Picture Description 4. Disconnect cables 5. Lift up the shield and disconnect LVDS cables 11-3 - Samsung 920NW | Service Manual - Page 51
11 Disassembly and Reassembly 설 명 사D진esc설ri명ption 6. Lift up the LCD panel Picture Description 11-2 Reassembly Reassembly procedures are in the reverse order of disassembly procedures. 11-4 - Samsung 920NW | Service Manual - Page 52
12 PCB Diagram 12-1 Main Board 12-1-1 Main Board Top Layer 12 PCB Diagram 12-1-2 Main Board Bottom Layer 12-1 - Samsung 920NW | Service Manual - Page 53
12 PCB Diagram Memo 12-2 - Samsung 920NW | Service Manual - Page 54
The IP has been designed so that it operates with a power consumption of less than 0.6W of. 1.2 The Scaler consumes power up to 37mA 1.3 The power to the panel is switched off 2. When the AD board is operating normally: 2.1 The maximum power consumption of the panel lamps is described below (It may - Samsung 920NW | Service Manual - Page 55
board Parts 1. Inverter: A conversion device that converts DC rated voltage/current to high ones necessary for the panel lamp. 2. DC/DC(Regulator): General term for DC to DC converting devices. The IP board receives 5V and outputs 1.8 or 3.3V that is supplied to the scaler (TSUM16AL-LF). 3. Power - Samsung 920NW | Service Manual - Page 56
13-1-3 IP Board Part(Power) Schematic Diagrams 13 Circuit Descriptions 13-3 - Samsung 920NW | Service Manual - Page 57
13 Circuit Descriptions 13-3 IP BOARD part(Inverter Part) Vin voltage (+14.2V) Brightness control signal ON/OFF DC to DC (+14.2V to 5.0V) CCFL PWM Control IC IC501 MosFET U501 MosFET U502 Transformer T501 Transformer T502 Voltage feedback Current feedback CCFL1 CCFL2 CCFL1 CCFL2 13-4 - Samsung 920NW | Service Manual - Page 58
768) -Auto Configuration(Auto adjustment) This is an algorithm to adjust monitor to optimum condition by pushing one key. -OSD(On Screen Display) Customers can easily control the screen settings using the OSD. -Dot Pitch The image on a monitor is composed of red, green and blue dots. The closer the - Samsung 920NW | Service Manual - Page 59
international standard VESA DDC for the Plug & Play function. -Resolution The number of horizontal and vertical dots used to compose the screen image is called 'resolution'. This number shows the accuracy of the display. High resolution is good for performing multiple tasks as more image information - Samsung 920NW | Service Manual - Page 60
14-2 Pin Assignments 14 Reference Infomation Sync Type Pin No. 1 2 3 4 5 6 7 8 9 10 11 12 13 14 15 15-Pin D-Sub Signal Cable Connector Separate Red Green Blue NC DDC Return (GND) GND-R GND-G GND-B NC Cable Detect NC Bi-Dr Data (SDA) H-Sync. V-Sync. DDC Clock (SCL) Sync-on-green Red Green + H/V - Samsung 920NW | Service Manual - Page 61
14 Reference Infomation 14-3 Timing Chart - This section of the service manual describes the timing that the computer industry recognizes as standard for computer-generated video signals. Table 1 Timing Chart No Name Timing ID 1 IBM 640*350/ - Samsung 920NW | Service Manual - Page 62
However, if the signal differs, the screen may go blank while the power LED is on. Refer to the video card manual and adjust the screen as follows. Horizontal Frequency The time to scan one line connecting the right edge to the left edge of the screen horizontally is called Horizontal Cycle and the - Samsung 920NW | Service Manual - Page 63
14 Reference Infomation 14-5 Panel Description Maker INL CPT VENDOR P/N 631102071830r 631102070680r PANEL_CODE PANEL_ABB STICKER_CODE Remarks LCD PANEL 17" MT170EN01 LCS PANEL 17" CLAA170EA07Q(CPT) 14-6
-
 1
1 -
 2
2 -
 3
3 -
 4
4 -
 5
5 -
 6
6 -
 7
7 -
8
-
9
-
10
-
11
-
12
-
13
-
14
-
15
-
16
-
17
-
18
-
19
-
20
-
21
-
22
-
23
-
24
-
25
-
26
-
27
-
28
-
29
-
30
-
31
-
32
-
33
-
34
-
35
-
36
-
37
-
38
-
39
-
40
-
41
-
42
-
43
-
44
-
45
-
46
-
47
-
48
-
49
-
50
-
51
-
52
-
53
-
54
-
55
-
56
-
57
-
58
-
59
-
60
-
61
-
62
-
63
 |
 |
SERVICE
Manual
LCD Monitor
Fashion Feature
LCD-Monitor
Model
920NW
- 19" LCD Monitor (1440x 900 )
- Response Time (5ms)
- Simple Stand
- Silver / Black ColorVariation