Samsung DV209AEW User Manual (user Manual) (ver.1.0) (English)
Samsung DV209AEW Manual
 |
View all Samsung DV209AEW manuals
Add to My Manuals
Save this manual to your list of manuals |
Samsung DV209AEW manual content summary:
- Samsung DV209AEW | User Manual (user Manual) (ver.1.0) (English) - Page 1
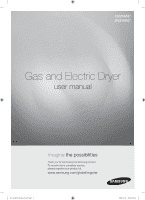
DV218AE* DV218AG* Gas and Electric Dryer user manual imagine the possibilities Thank you for purchasing this Samsung product. To receive more complete service, please register your product at www.samsung.com/global/register DV218AEW-02568A-01_EN.indd 1 2008-12-08 ¿ÀÀü 9:08:36 - Samsung DV209AEW | User Manual (user Manual) (ver.1.0) (English) - Page 2
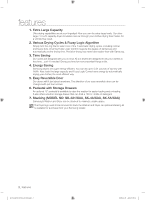
Stacking (MODEL NO: SK-3A1/XAA, SK-4A/XAA, SK-5A/XAA) Samsung's Washer and Dryer can be stacked to maximize usable space. The Dryer legs need to be removed to stack the Washer and Dryer. An optional stacking kit is available for purchase from your Samsung retailer. 2_ features DV218AEW-02568A-01_EN - Samsung DV209AEW | User Manual (user Manual) (ver.1.0) (English) - Page 3
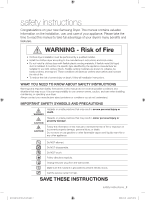
instructions Congratulations on your new Samsung Dryer. This manual contains valuable information on the installation, use, and care of your appliance. Please take the time to read this manual to take full advantage of your dryer's many benefits and features. WARNING - Risk of Fire • Clothes dryer - Samsung DV209AEW | User Manual (user Manual) (ver.1.0) (English) - Page 4
dried on a heat setting. Heated foam replace, or attempt to service any part of the appliance unless specifically recommended in the user-repair instructions dryer and exhaust duct should be cleaned periodically by qualified service personnel. SAVE THESE INSTRUCTIONS 4_ safety instructions DV218AEW - Samsung DV209AEW | User Manual (user Manual) (ver.1.0) (English) - Page 5
their temperature. Never remove these items from the dryer hot or interrupt the drying cycle until the items have run through the Cool Down cycle. Never pile or stack these items when they are hot. SAVE THESE INSTRUCTIONS safety instructions _5 DV218AEW-02568A-01_EN.indd 5 2008-12-08 ¿ÀÀü 9:08:36 - Samsung DV209AEW | User Manual (user Manual) (ver.1.0) (English) - Page 6
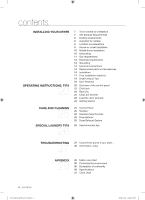
10 Exhausting 11 Gas requirements 12 Electrical requirements 12 Grounding 13 Electrical connections 14 Replacement parts and accessories 14 Installation 17 Final installation checklist 18 Dryer Exhaust Tips 19 Door Reversal 20 Overview of the control panel 22 Child lock 23 Rack Dry 24 Clean the - Samsung DV209AEW | User Manual (user Manual) (ver.1.0) (English) - Page 7
). See page 13. 3. GAS LINES (if a gas dryer) must meet national and local codes. 4. EXHAUST SYSTEM - must be rigid metal or flexible stiff-walled metal exhaust ducting. SEE EXHAUST REQUIREMENTS Door Control panel Adjustable legs DV218AEW-02568A-01_EN.indd 7 installing your dryer _7 2008-12-08 - Samsung DV209AEW | User Manual (user Manual) (ver.1.0) (English) - Page 8
not getting dry, then check ducting for obstructions. ELECTRIC AND GAS DRYER Weather Hood Type Recommended Use only for short-run installation No. of 90° elbows 4" (10 .16 cm) Rigid Metallic Flexible* 0 24.4 m (80 ft.) 12.4 m (41 ft.) 1 20.7 m (68 ft.) 11.2 m (37 ft.) 2 17.4 m (57 - Samsung DV209AEW | User Manual (user Manual) (ver.1.0) (English) - Page 9
exhaust out the bottom or the left, use the accessory exhaust kit. Instructions are included with the kit. It's important to make sure the room has enough fresh air. The Dryer must be located where there is no air-flow obstruction. On gas Dryers, adequate clearance as noted on the data plate must be - Samsung DV209AEW | User Manual (user Manual) (ver.1.0) (English) - Page 10
NON-METAL FLEXIBLE DUCT. If your existing ductwork is plastic, non-metal, or combustible, replace it with metal. Use only a metal exhaust duct that is non-flammable to ensure containment of exhaust air, heat, and lint. 10_ installing your dryer DV218AEW-02568A-01_EN.indd 10 2008-12-08 ¿ÀÀü 9:08:37 - Samsung DV209AEW | User Manual (user Manual) (ver.1.0) (English) - Page 11
pilot. Commonwealth of Massachusetts installation instructions Your Dryer must be installed by a licensed plumber or gas fitter. A "T" handle manual gas valve must be installed in the gas supply line to your dryer. If a flexible gas connector is used to install your Dryer, the connector must have - Samsung DV209AEW | User Manual (user Manual) (ver.1.0) (English) - Page 12
services for your Dryer. All gas current. Gas models Your Dryer has Dryer must be connected to a permanently grounded metal wiring system, or an equipment grounding conductor must be run with the circuit conductors and connected to the equipment grounding terminal. 12_ installing your dryer DV218AEW - Samsung DV209AEW | User Manual (user Manual) (ver.1.0) (English) - Page 13
operating or testing, follow all grounding instructions in the Grounding section. An individual branch (or separate) circuit serving only your Dryer is recommended. DO NOT USE AN EXTENSION CORD. Gas models - U.S. and Canada A 120 volt, 60 Hz AC approved electrical service, with a 15-amp fuse or - Samsung DV209AEW | User Manual (user Manual) (ver.1.0) (English) - Page 14
installing your dryer REPLACEMENT PARTS AND ACCESSORIES If your dryer requires replacement parts or accessories, contact the dealer from whom you purchased your dryer or the SAMSUNG customer care center at 1-800-SAMSUNG (726-7864). Tools and Parts Pliers Cutting knife Pipe wrench (gas only) Nut - Samsung DV209AEW | User Manual (user Manual) (ver.1.0) (English) - Page 15
the back of the unit in dryer cabinet. 5. Review Electrical Requirements section. BEFORE OPERATING OR TESTING, follow the grounding instructions in the Grounding section. U.S. MODELS: IMPORTANT - All U.S. models are produced for a 3-WIRE SYSTEM CONNECTION. The Dryer frame is grounded to the neutral - Samsung DV209AEW | User Manual (user Manual) (ver.1.0) (English) - Page 16
wire, the ground strap must be WARNING reconnected to the terminal block support to ground the Dryer frame to the neutral conductor. 4-WIRE system connections 1. Remove the center 6. Neutral wire (white or center wire) 16_ installing your dryer DV218AEW-02568A-01_EN.indd 16 2008-12-08 ¿ÀÀü 9:08:41 - Samsung DV209AEW | User Manual (user Manual) (ver.1.0) (English) - Page 17
or stiff-walled flexible metal vent material. Dryer is leveled and is sitting firmly on the floor. Gas models - gas is turned on with no gas leaks. Start your dryer to confirm that it runs, heats, and shuts off. DV218AEW-02568A-01_EN.indd 17 installing your dryer _17 2008-12-08 ¿ÀÀü 9:08:41 - Samsung DV209AEW | User Manual (user Manual) (ver.1.0) (English) - Page 18
slow drying by: 1. Restricting your Dryer with a poor exhaust system. 1 2 2. Using a plastic, thin foil, or non-metal flexible duct. 3. Unnecessarily using long ducts that have many elbows. 4. Allowing crushed or clogged ducts and vent. 3 4 18_ installing your dryer DV218AEW - Samsung DV209AEW | User Manual (user Manual) (ver.1.0) (English) - Page 19
01 installing your dryer DOOR REVERSAL 1. Unplug the power cord. 2. Remove two door hinge screws. 3. Lift on the Frame Front 10. Place the door on the other side and reattach it to the dryer. 11. Reattach the holder lever. 12. Reattach the screws in the remaing holes. The screw mentioned in STEP - Samsung DV209AEW | User Manual (user Manual) (ver.1.0) (English) - Page 20
designed to dry heat-sensitive items at a low drying temperature. Time Dry - Time Dry allows you Dryer door is opened or the Power key is pushed. If your Dryer is paused during a cycle, the indicator lights will blink until the Start/Pause button is pressed. 20_ operating Instructions, tips DV218AEW - Samsung DV209AEW | User Manual (user Manual) (ver.1.0) (English) - Page 21
For permanent press, synthetics, lightweight cottons, or items labeled Tumble Dry Medium. Low - For heat sensitive items labeled Tumble Dry Low or Tumble Dry Warm. Extra Low - Provides the lowest heated dry temperature possible. When using Manual Dry cycles, time can be adjusted by pressing the time - Samsung DV209AEW | User Manual (user Manual) (ver.1.0) (English) - Page 22
operating Instructions, tips CHILD LOCK A function to prevent children from playing with your dryer. Setting/Releasing If you want to set or release the Child Lock, press both the Time and Signal buttons simultaneously for 3 seconds. How to Set: 1. It can be set while your dryer is running. 2. Once - Samsung DV209AEW | User Manual (user Manual) (ver.1.0) (English) - Page 23
or Extra Low Low or Extra Low Air Fluff Foam rubber pillows Air Fluff Sneakers Air Fluff or Heat (Extra Low) Drying foam rubber, plastic, or rubber on a heat setting may cause damage to the item and WARNING lead to a fire hazard. DV218AEW-02568A-01_EN.indd 23 operating Instructions, tips _23 - Samsung DV209AEW | User Manual (user Manual) (ver.1.0) (English) - Page 24
out and "End" will appear in the display. • Pressing Power cancels the cycle and stops your Dryer. • The Drying, Cooling, and Wrinkle Prevent indicator lights will illuminate during those portions of the cycle. 24_ operating Instructions, tips DV218AEW-02568A-01_EN.indd 24 2008-12-08 ¿ÀÀü 9:08:47 - Samsung DV209AEW | User Manual (user Manual) (ver.1.0) (English) - Page 25
steel surfaces. Remove the cleaner residue and dry with a clean cloth. DRYER EXTERIOR Clean with a soft, damp DRYER EXHAUST SYSTEM Should be inspected and cleaned yearly to maintain optimum performance. The outside exhaust hood should be cleaned more frequently to ensure proper operation. DV218AEW - Samsung DV209AEW | User Manual (user Manual) (ver.1.0) (English) - Page 26
the item. • DO NOT dry kapok or foam pillows in the Dryer. Use the Air Fluff cycle. Plastics (shower curtains, outdoor furniture covers, etc.) • Use the Air Fluff cycle or the Time Dry cycle and the Low or Extra Low temperature settings depending on the care label instructions. THINGS TO AVOID - Samsung DV209AEW | User Manual (user Manual) (ver.1.0) (English) - Page 27
05 troubleshooting troubleshooting CHECK THESE POINTS IF YOUR DRYER... PROBLEM Doesn't run. Doesn't heat. Doesn't dry. Is noisy. Dries unevenly. Has an odor. Shuts off before load is dry SOLUTION • Be sure the door is latched shut. • Be sure the power cord is plugged into a live electrical - Samsung DV209AEW | User Manual (user Manual) (ver.1.0) (English) - Page 28
button is NOT being pressed continuously. Try restarting the cycle. If the problem continues call for service. oD Invalid Dry time Call for service. hE Invalid heating Temp when running Call for service. the dryer Et EEPROM is not communicating Try restarting the cycle. properly If the - Samsung DV209AEW | User Manual (user Manual) (ver.1.0) (English) - Page 29
Only Non-Chlorine (color-safe) Bleach (when needed) Tumble Dry Cycle Low Any Heat No Heat/Air Iron-Dry or Steam Temperatures High Medium Dryclean Dry Clean Do Not Dry Clean Line Dry/ Hang to Dry Drip Dry Dry Flat Normal Low Permanent Press/ Wrinkle Resistant/ Wrinkle Control Gentle/ Delicates - Samsung DV209AEW | User Manual (user Manual) (ver.1.0) (English) - Page 30
OF CONFORMITY This appliance complies with UL2158. SPECIFICATIONS TYPE DIMENSIONS WEIGHT HEATER RATING POWER CONSUMPTION Div A. Height B. Width NO HEAT HEATING FRONT LOADING DRYER Inches (cm) Div Inches (cm) 38" (96.5) C. Depth with door open 90° 49" (124.5) 27" (68.6) D. Depth 29.4" (74 - Samsung DV209AEW | User Manual (user Manual) (ver.1.0) (English) - Page 31
Cycle Normal Sensor Dry Heavy Duty Perm Press Manual Dry Delicates Time Dry Wrinkle Release Air Fluff Temp control High (Medium) High (No change) Medium Low (No change) Low (No change) High Medium - (No change) Default Sensor dry level Normal dry Normal dry Normal dry Normal dry - Time 44 - Samsung DV209AEW | User Manual (user Manual) (ver.1.0) (English) - Page 32
cover problems resulting from incorrect electric current, voltage or supply, light bulbs, house fuses, house wiring, cost of a service call for instructions, or fixing installation errors. SAMSUNG does not warrant uninterrupted or error-free operation of the product. 32_ warranty DV218AEW-02568A - Samsung DV209AEW | User Manual (user Manual) (ver.1.0) (English) - Page 33
from state to state. To obtain warranty service, please contact SAMSUNG at: SAMSUNG ELECTRONICS AMERICA, INC. - CONSUMER ELECTRONICS CUSTOMER SERVICE 400 Valley Road, Suite 201, Mt. Arlington, NJ 07856 1-800-SAMSUNG (1-800-726-7864) www.samsung.com DV218AEW-02568A-01_EN.indd 33 warranty _33 2008 - Samsung DV209AEW | User Manual (user Manual) (ver.1.0) (English) - Page 34
QUESTIONS OR COMMENTS? Country CALL U.S.A 1-800-SAMSUNG(726-7864) MEXICO 01-800-SAMSUNG(726-7864) DV218AEW-02568A-01_EN.indd 34 OR VISIT US ONLINE AT www.samsung.com/us www.samsung.com/mx Code No. DC68-02568A-01_EN 2008-12-08 ¿ÀÀü 9:08:48 - Samsung DV209AEW | User Manual (user Manual) (ver.1.0) (English) - Page 35
DV218AE* DV218AG* Secadora a gas y eléctrica Manual del usuario imagina las posibilidades Gracias por adquirir este producto Samsung. Para recibir un servicio más completo, registre su producto en www.samsung.com/global/register DV218AEW-02568A-01_MES.indd 1 2008-12-08 ¿ÀÀü 9:10:46 - Samsung DV209AEW | User Manual (user Manual) (ver.1.0) (English) - Page 36
/ XAA) La lavadora y la secadora de Samsung pueden apilarse para maximizar el espacio utilizable. Deben retirarse las patas de la secadora para apilar la lavadora y la secadora. Puede adquirir un kit de apilamiento opcional en su comercio minorista de productos Samsung. 2_ características DV218AEW - Samsung DV209AEW | User Manual (user Manual) (ver.1.0) (English) - Page 37
instrucciones de seguridad Felicitaciones por la compra de la nueva secadora Samsung. Este manual contiene información importante acerca de la instalación, el uso y obtener asistencia. GUARDE ESTAS INSTRUCCIONES instrucciones de seguridad _3 DV218AEW-02568A-01_MES.indd 3 2008-12-08 ¿ÀÀü 9:10:46 - Samsung DV209AEW | User Manual (user Manual) (ver.1.0) (English) - Page 38
estar a cargo de un instalador calificado, una agencia de reparaciones o el proveedor de gas. Lea todas las instrucciones antes de usar el electrodoméstico. Para reducir el riesgo de . GUARDE ESTAS INSTRUCCIONES 4_ instrucciones de seguridad DV218AEW-02568A-01_MES.indd 4 2008-12-08 ¿ÀÀü 9:10:46 - Samsung DV209AEW | User Manual (user Manual) (ver.1.0) (English) - Page 39
Debido a las constantes mejoras a los productos, Samsung se reserva el derecho de modificar las especificaciones sin gas pueden no ser detectadas únicamente por el olor. Los proveedores de gas recomiendan que compre e instale un detector de gas DV218AEW-02568A-01_MES.indd 5 2008-12-08 ¿ÀÀü 9:10 - Samsung DV209AEW | User Manual (user Manual) (ver.1.0) (English) - Page 40
ón en casas rodantes 10 Drenaje 11 Requisitos en cuanto al gas 12 Requisitos eléctricos 12 Conexión a tierra 13 Conexiones el MANUAL DE INSTRUCCIONES, SUGERENCIAS 20 20 Descripción general del panel de control 22 Seguro para niños 23 Rack Dry DV218AEW-02568A-01_MES.indd 6 2008-12-08 ¿ÀÀü 9:10:46 - Samsung DV209AEW | User Manual (user Manual) (ver.1.0) (English) - Page 41
a gas) deben cumplir con los códigos locales y nacionales. 4. El SISTEMA DE DRENAJE debe consistir en un conducto de drenaje de metal rígido o flexible con un recubrimiento de metal resistente. CONSULTE LA SECCIÓN REQUISITOS PARA EL DRENAJE. Puerta Panel de control Patas ajustables DV218AEW - Samsung DV209AEW | User Manual (user Manual) (ver.1.0) (English) - Page 42
(30,5 cm) de espacio libre como mínimo entre la parte inferior de la tapa y el suelo u otra obstrucción. los conductos no estén obstruidos. SECADORA ELÉCTRICA Y A GAS Tipo de tapa impermeable Recomendado Utilice sólo para una instalación de DV218AEW-02568A-01_MES.indd 8 2008-12-08 ¿ÀÀü 9:10:47 - Samsung DV209AEW | User Manual (user Manual) (ver.1.0) (English) - Page 43
que drene por la parte inferior o hacia la izquierda, utilice el kit de drenaje accesorio. El kit viene acompañado de mínima en la parte superior y en la parte inferior. Se acepta una puerta tipo persiana con un espacio libre equivalente. instalación de la secadora _9 DV218AEW-02568A-01_MES.indd - Samsung DV209AEW | User Manual (user Manual) (ver.1.0) (English) - Page 44
Seguridad de Casas Fabricadas, Título 24 CFR, Parte 32-80 [denominada anteriormente Norma Federal para la Construcción y sin obstrucciones. Llame al 1-800-SAMSUNG para obtener más información acerca de la compra del kit de anclaje al piso como accesorio DV218AEW-02568A-01_MES.indd 10 2008-12-08 ¿ÀÀü 9:10:47 - Samsung DV209AEW | User Manual (user Manual) (ver.1.0) (English) - Page 45
a cargo de un plomero o un gasista matriculado. Se deberá instalar una válvula de gas manual con una manija en forma de "T" en el conducto de suministro de gas de la secadora. Si se utiliza un conector de gas flexible para instalar la secadora, el conector debe tener una longitud máxima de 3' (36 - Samsung DV209AEW | User Manual (user Manual) (ver.1.0) (English) - Page 46
el tomacorriente adecuado. NUNCA CONECTE UN CABLE A TIERRA A TUBERÍAS DE PLOMERÍA, TUBERÍAS DE GAS O CAÑERÍAS DE AGUA CALIENTE DE PLÁSTICO. Modelos eléctricos La secadora tiene un conexión a tierra del equipo. 12_ instalación de la secadora DV218AEW-02568A-01_MES.indd 12 2008-12-08 ¿ÀÀü 9:10:47 - Samsung DV209AEW | User Manual (user Manual) (ver.1.0) (English) - Page 47
la secadora. NO UTILICE UN CABLE PROLONGADOR. Modelos a gas - EE.UU. y Canadá Se requiere un servicio éctricos - Sólo EE.UU. La mayor parte de las secadoras estadounidenses requieren un servicio el conectado por medio de un nuevo kit de cable de alimentación elé DV218AEW-02568A-01_MES.indd 13 instalación de la - Samsung DV209AEW | User Manual (user Manual) (ver.1.0) (English) - Page 48
centro de atención al cliente de SAMSUNG al 1-800-SAMSUNG (726-7864). Herramientas y piezas Pinzas Cúter Llave inglesa para tuberías (sólo de gas) Llave de tuercas Nivel Destornillador secadora vibre. 14_ instalación de la secadora DV218AEW-02568A-01_MES.indd 14 2008-12-08 ¿ÀÀü 9:10:49 - Samsung DV209AEW | User Manual (user Manual) (ver.1.0) (English) - Page 49
roscas. Abra el suministro de gas. Controle todas las conexiones de gas para detectar si presentan pérdidas usando una solución jabonosa. Si aparecen burbujas, ajuste las conexiones y vuelva a controlar. NO use la llama abierta para verificar si hay pérdidas de gas. DV218AEW-02568A-01_MES.indd 15 - Samsung DV209AEW | User Manual (user Manual) (ver.1.0) (English) - Page 50
3/4 pulgadas (1,9 cm) 4. Tornillo central de color plateado del bloque de terminales 5. Cable a tierra (verde/amarillo) 6. Cable neutro (cable blanco o central) 16_ instalación de la secadora DV218AEW-02568A-01_MES.indd 16 2008-12-08 ¿ÀÀü 9:10:50 - Samsung DV209AEW | User Manual (user Manual) (ver.1.0) (English) - Page 51
la ventilación. La secadora está nivelada y apoyada firmemente sobre el piso. Modelos a gas: el gas está abierto y no hay pérdidas de gas. Encienda la secadora para confirmar que funciona, calienta y se apaga. DV218AEW-02568A-01_MES.indd 17 instalación de la secadora _17 2008-12-08 ¿ÀÀü 9:10 - Samsung DV209AEW | User Manual (user Manual) (ver.1.0) (English) - Page 52
no es el metal. 3. utilizando conductos innecesariamente largos que tienen muchos codos. 3 4 4. permitiendo el uso de conductos y ventilaciones aplastados u obstruidos. 18_ instalación de la secadora DV218AEW-02568A-01_MES.indd 18 2008-12-08 ¿ÀÀü 9:10:51 - Samsung DV209AEW | User Manual (user Manual) (ver.1.0) (English) - Page 53
puerta. 12. Vuelva a colocar los tornillos en los orificios que quedaron. Es posible que no exista el tornillo que se mencionó en el PASO 4. ADVERTENCIA DV218AEW-02568A-01_MES.indd 19 instalación de la secadora _19 2008-12-08 ¿ÀÀü 9:10:53 - Samsung DV209AEW | User Manual (user Manual) (ver.1.0) (English) - Page 54
del ciclo deseado en minutos. Gire el disco Selector de ciclos a Time Dry (Secado con temporizador), a continuación, presione la flecha hacia arriba de Adjust la carga con aire a temperatura ambiente. 20_ manual de instrucciones, sugerencias DV218AEW-02568A-01_MES.indd 20 2008-12-08 ¿ÀÀü 9:10:54 - Samsung DV209AEW | User Manual (user Manual) (ver.1.0) (English) - Page 55
sensibles al calor rotuladas "Tumble Dry Low" (Secar en secadora a temperatura baja) o "Tumble Dry Warm" (Secar en secadora a temperatura cálida). Extra Low (Extrabaja): ofrece la menor temperatura de secado con calor posible. Cuando usa los ciclos Manual Dry (Secado manual), se puede ajustar el - Samsung DV209AEW | User Manual (user Manual) (ver.1.0) (English) - Page 56
los tiempos configurados automáticamente en los ciclos de Manual Dry (Secado manual) (ciclos Time Dry (Secado con temporizador), Delicates (Prendas delicadas), Wrinkle indicador del Seguro para niños. 22_ manual de instrucciones, sugerencias DV218AEW-02568A-01_MES.indd 22 2008-12-08 ¿ÀÀü 9:10:54 - Samsung DV209AEW | User Manual (user Manual) (ver.1.0) (English) - Page 57
02 manual de instrucciones, sugerencias RACK DRY (SECADO EN ESTANTE) Heat (Calor) (Extra Low (Extrabajo)) Secar artículos de goma espuma, plástico o goma con la opción de calor puede ocasionar ADVERTENCIA daños al artículo y generar un peligro de incendio. DV218AEW-02568A-01_MES.indd 23 manual - Samsung DV209AEW | User Manual (user Manual) (ver.1.0) (English) - Page 58
Encendido), se cancelará el ciclo y la secadora se detendrá. • Los indicadores de Drying (Secar), Cooling (Enfriar) y Wrinkle Prevent (Prevención de arrugas) se iluminarán durante tales fases del ciclo. 24_ manual de instrucciones, sugerencias DV218AEW-02568A-01_MES.indd 24 2008-12-08 ¿ÀÀü 9:10:55 - Samsung DV209AEW | User Manual (user Manual) (ver.1.0) (English) - Page 59
un óptimo desempeño, se lo debe inspeccionar y limpiar todos los años. La tapa de drenaje exterior debe limpiarse con más frecuencia para garantizar un funcionamiento adecuado. DV218AEW-02568A-01_MES.indd 25 cuidado y limpieza _25 2008-12-08 ¿ÀÀü 9:10:55 - Samsung DV209AEW | User Manual (user Manual) (ver.1.0) (English) - Page 60
(Secado a temperatura ambiente) o el ciclo Time Dry (Secado con temporizador) y la opción de temperatura Low (Baja) o Extra Low (Extrabaja) de acuerdo con las instrucciones de la vegetal o de cocina. 26_ sugerencias para prendas especiales DV218AEW-02568A-01_MES.indd 26 2008-12-08 ¿ÀÀü 9:10:55 - Samsung DV209AEW | User Manual (user Manual) (ver.1.0) (English) - Page 61
inmediato. • Es normal escuchar el ruido de la válvula de gas de la secadora o que el ciclo del dispositivo de calor se enciende de secado seleccionado. Esto es normal. Seleccione la opción More Dry (Más seco) si lo desea. • Si se seca un art DV218AEW-02568A-01_MES.indd 27 2008-12-08 ¿ÀÀü 9:10:55 - Samsung DV209AEW | User Manual (user Manual) (ver.1.0) (English) - Page 62
el ciclo. no válida Si el problema continúa, llame al servicio técnico. Para los códigos que no figuran más arriba, llame al 1-800-726-7864 (1-800-SAMSUNG). 28_ guía de solución de problemas DV218AEW-02568A-01_MES.indd 28 2008-12-08 ¿ÀÀü 9:10:55 - Samsung DV209AEW | User Manual (user Manual) (ver.1.0) (English) - Page 63
°F a 85 °F). (La temperatura del agua del lavado debe alcanzar un mínimo de 16 °C (60 °F) para que se active el detergente y se logre un lavado eficaz). DV218AEW-02568A-01_MES.indd 29 apéndice _29 2008-12-08 ¿ÀÀü 9:10:55 - Samsung DV209AEW | User Manual (user Manual) (ver.1.0) (English) - Page 64
.) 38" (96.5) 27" (68.6) C. Profundidad con la puerta abierta a 90° D. Profundidad 49" (124.5) 29.4" (74.6) 54.1kg (54.11kg.) 5300 W 268 W 5445 W 30_ apéndice DV218AEW-02568A-01_MES.indd 30 2008-12-08 ¿ÀÀü 9:10:55 - Samsung DV209AEW | User Manual (user Manual) (ver.1.0) (English) - Page 65
Press (Plancha permanente) Manual Dry (Secado manual) Delicates (Prendas delicadas) Time Dry (Secado con temporizador) Wrinkle Release (Quitar arrugas) Air Fluff (Secado a temperatura ambiente) Control de temp. High (Medium) (Alta (Media)) High (Alta) (sin cambios) Medium Low (Mediana baja) (sin - Samsung DV209AEW | User Manual (user Manual) (ver.1.0) (English) - Page 66
el manual de instrucciones, instrucciones de mantenimiento y ambientales que están cubiertas y recomendadas en el manual de o corregir errores en la instalación. SAMSUNG no garantiza el funcionamiento ininterrumpido o sin errores del producto. 32_ garantía DV218AEW-02568A-01_MES.indd 32 2008-12- - Samsung DV209AEW | User Manual (user Manual) (ver.1.0) (English) - Page 67
Para recibir servicio técnico de garantía, comuníquese con SAMSUNG a: SAMSUNG ELECTRONICS AMERICA, INC. - CONSUMER ELECTRONICS CUSTOMER SERVICE 400 Valley Road, Suite 201, Mt. Arlington, NJ 07856 1-800-SAMSUNG (1-800-726-7864) www.samsung.com DV218AEW-02568A-01_MES.indd 33 garantía _33 2008-12-08 - Samsung DV209AEW | User Manual (user Manual) (ver.1.0) (English) - Page 68
¿TIENE PREGUNTAS O COMENTARIOS? País LLAME AL U.S.A 1-800-SAMSUNG(726-7864) MEXICO 01-800-SAMSUNG(726-7864) O VISÍTENOS EN LÍNEA EN www.samsung.com/us www.samsung.com/mx Número de código DC68-02568A-01_MES DV218AEW-02568A-01_MES.indd 34 2008-12-08 ¿ÀÀü 9:10:56
-
 1
1 -
 2
2 -
 3
3 -
 4
4 -
 5
5 -
 6
6 -
 7
7 -
8
-
9
-
10
-
11
-
12
-
13
-
14
-
15
-
16
-
17
-
18
-
19
-
20
-
21
-
22
-
23
-
24
-
25
-
26
-
27
-
28
-
29
-
30
-
31
-
32
-
33
-
34
-
35
-
36
-
37
-
38
-
39
-
40
-
41
-
42
-
43
-
44
-
45
-
46
-
47
-
48
-
49
-
50
-
51
-
52
-
53
-
54
-
55
-
56
-
57
-
58
-
59
-
60
-
61
-
62
-
63
-
64
-
65
-
66
-
67
-
68
 |
 |
Gas and Electric Dryer
user manual
imagine
the possibilities
Thank you for purchasing this Samsung product.
To receive more complete service,
please register your product at
www.samsung.com/global/register
DV218AE*
DV218AG*
DV218AEW-02568A-01_EN.indd
1
2008-12-08
¿ÀÀü 9:08:36