Samsung LN-R1550P Quick Guide (easy Manual) (ver.1.0) (English) - Page 11
Picture Control, Using Automatic Picture Settings, Customizing the Picture, Adjusting the Color Tone
 |
View all Samsung LN-R1550P manuals
Add to My Manuals
Save this manual to your list of manuals |
Page 11 highlights
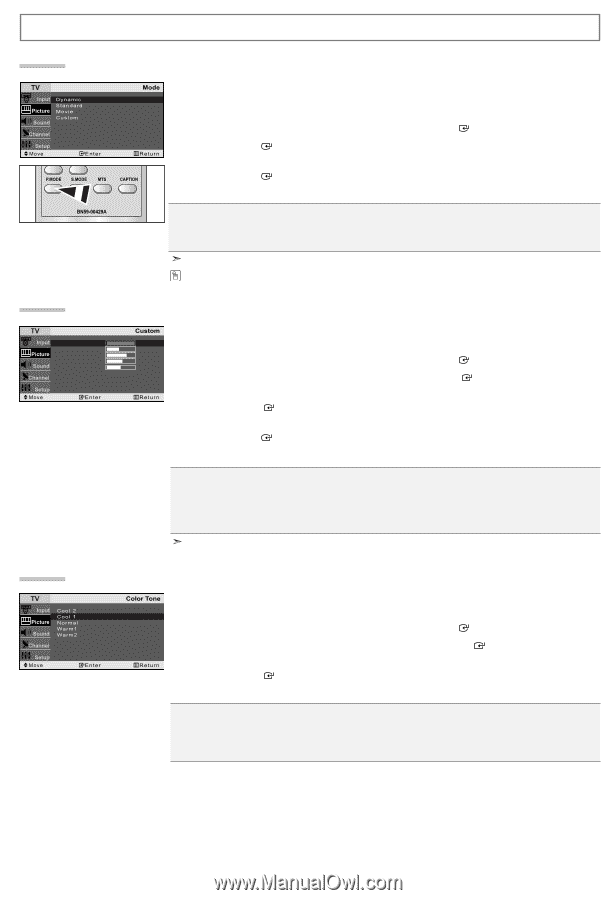
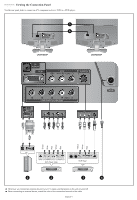
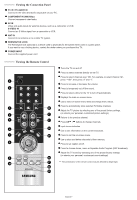
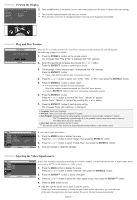
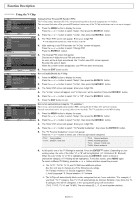
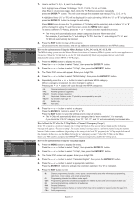
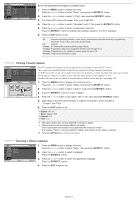
Picture Control Using Automatic Picture Settings Your TV has four automatic picture settings ("Dynamic", "Standard", "Movie", and "Custom") that are preset at the factory. 1. Press the MENU button to display the menu. Press the or button to select "Picture", then press the ENTER button. 2. Press the ENTER button to select "Mode". 3. Press the or button to select the desired picture effect. Press the ENTER button. 4. Press the EXIT button to exit. Dynamic: Selects the picture for high-definition in a bright room. Standard: Selects the picture for optimum display in a normal environment. Movie: Selects the picture for comfortable display in a dark room. Custom: Select to view your favorite display settings. The Picture mode must be adjusted separately for each input source. You can also press the P.MODE button on the remote control to select one of the picture settings. Customizing the Picture Contrast Brightness Sharpness Color Tint G 50 Your set has several settings which allow you to control picture quality. 100 45 1. Press the MENU button to display the menu. 75 55 Press the or button to select "Picture", then press the ENTER button. R 50 2. Press the or button to select "Custom", then press the ENTER button. 3. Press the or button to select a particular item. Press the ENTER button. 4. Press the or button to decrease or increase the value of a particular item. Press the ENTER button. 5. Press the EXIT button to exit. Contrast: Adjusts the lightness and darkness between objects and the background. Brightness: Adjusts the brightness of the whole screen. Sharpness: Adjusts the outline of objects to either sharpen them or make them more dull. Color: Adjusts the colors, making them lighter or darker. Tint: Adjusts the color of objects, making them more red or green for a more natural look. If you make any changes to these settings, the Picture Mode is automatically switched to "Custom". Adjusting the Color Tone You can Change the color of the entire screen according to your preference. 1. Press the MENU button to display the menu. Press the or button to select "Picture", then press the ENTER button. 2. Press the or button to select "Color Tone", then press the ENTER button. 3. Press the or button to select the desired color tone setting. Press the ENTER button. 4. Press the EXIT button to exit. Cool2: Makes the color temperature bluer than "Cool1" menu. Cool1: Makes whites bluish. Normal: Keeps whites white. Warm1: Makes whites reddish. Warm2: Makes the color temperature redder than "Warm1" menu. English-9
-
 1
1 -
2
-
3
-
4
-
5
-
 6
6 -
 7
7 -
 8
8 -
 9
9 -
 10
10 -
 11
11 -
 12
12 -
 13
13 -
 14
14 -
 15
15 -
 16
16 -
17
-
18
-
19
-
20
-
21
-
22
-
23
-
24
-
25
-
26
-
27
-
28
-
29
-
30
-
31
-
32
-
33
-
34
-
35
-
36
-
37
-
38
-
39
-
40
-
41
-
42
-
43
-
44
-
45
-
46
-
47
-
48
-
49
-
50
-
51
-
52
-
53
-
54
-
55
-
56
 |
 |