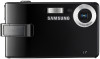
Samsung i7 User Manual
Samsung i7 Manual
 |
View all Samsung i7 manuals
Add to My Manuals
Save this manual to your list of manuals |
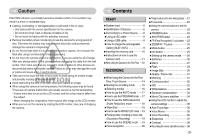
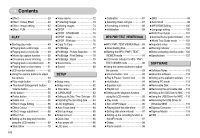
Samsung i7 manual content summary:
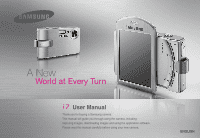
- Samsung i7 | User Manual - Page 1
User Manual Thank you for buying a Samsung camera. This manual will guide you through using the camera, including capturing images, downloading images and using the application software. Please read this manual carefully before using your new camera. ENGLISH - Samsung i7 | User Manual - Page 2
it on. (p.12) Getting to know your camera Thank you for buying a Samsung Digital Camera. ƃ Prior to using this camera, please read the user manual thoroughly. ƃ When you require After Sales service, please bring the camera and the cause of the camera malfunction (such as battery, Memory card etc - Samsung i7 | User Manual - Page 3
To do so may result in fire, injury, electric shock or severe damage to you or your camera. Internal inspection, maintenance and repairs should only be carried out by your dealer or Samsung Camera Service centre. ƈ Please do not use this product in close proximity to flammable or explosive gases, as - Samsung i7 | User Manual - Page 4
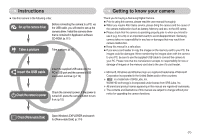
Instructions on how to use the memory card 11 ƃWhen Using the Camera for the First Time ō12 RECORDING ƃWhen Using the Camera for the First Time: Touch Screen 14 ƃStarting the recording mode ōō15 ƈSelecting modes 16 ƈHow to use the AUTO mode ōō17 the LCD monitor to adjust the camera settings - Samsung i7 | User Manual - Page 5
110 ƃSetting up the application software ō111 ƃStarting PC mode 113 ƃRemovable Disk 114 ƃRemoving the removable disk ō115 ƃSetting up the USB Driver for MAC ō116 ƃUsing the USB Driver for MAC ō116 ƃRemoving the USB Driver for Windows 98SE 116 ƃDigimax Converter 117 ƃDigimax Master 118 ƃFAQ - Samsung i7 | User Manual - Page 6
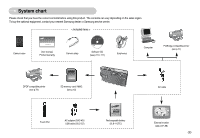
depending on the sales region. To buy the optional equipment, contact your nearest Samsung dealer or Samsung service centre. < Included items > Camera case User manual, Product warranty Camera strap Software CD (see p.110~111) Earphones Computer PictBridge compatible printer (see p.77) DPOF - Samsung i7 | User Manual - Page 7
Identification of features Front & Top Power button Shutter button Face Recognition (FR) / Lock button Flash Microphone Speaker Self-timer / AF lamp Lens ŝ6Ş ƈ Self-timer lamp Icon Status Description Blinking For the 2 seconds, the lamp blinks quickly at 0.25-second intervals before taking - Samsung i7 | User Manual - Page 8
Digital zoom) / Volume button LCD monitor (Touch Screen) Earphones jack Camera status lamp ƈ Camera Status Lamp Status Description Power on The lamp turns on and off when the camera inserted to a computer recognising the camera) Transmitting Data with a PC The lamp is off (LCD monitor turns - Samsung i7 | User Manual - Page 9
the camera. Be sure to charge the battery before using the camera. (When the camera is turned off the flash on every second shot.Using the camera for 5 minutes and then Powering it off LCD Off. Multimedia PMP Approx. 200 MIN Using the fully charged battery ſThese figures are measured under Samsung - Samsung i7 | User Manual - Page 10
cable usage. ƃ Use a USB cable (SUC-C2) with the correct specification. ƃ If the camera is connected to the PC through a USB hub : connect the camera directly to the PC. ƃ If the camera and other devices are connected to the PC at the same time : remove other device. ƃ If the USB cable is connected - Samsung i7 | User Manual - Page 11
the directions and do not insert by force. It may cause breakage of cable or camera. ƃ If the charging LED of the AC Charger does not turn on or . ƈ There are 4 indicators for battery condition that are displayed on the LCD monitor. Battery indicator Battery status Low battery Low battery Low - Samsung i7 | User Manual - Page 12
is perfectly normal. ƃ Do not use a memory card that is used in another digital camera. To use the memory card in this camera, format the memory card using this camera. ƃ Do not use a memory card formatted by another digital camera or memory card reader. ƃ If the memory card is subjected to any of - Samsung i7 | User Manual - Page 13
Instructions 15FPS 171 192 229 223 318 600 About 11' About 13' About 21' About 29' About 54' ſ The recording Camera for the First Time ƈ When the camera is turned on for the first time, a menu will be displayed to set date, time and language in the LCD monitor. This menu will not be displayed - Samsung i7 | User Manual - Page 14
When Using the Camera for the First Time ƃ Touch Screen Adjustment 1. Select the [CALIBRATION] menu. 2. Press the point with the suppied Toch Pen. SETUP CALIBRATION LANGUAGE ENGLISH DATE&TIME 07/02/01 SETUP / CALIBRATION Touch ſ When you calibrate the LCD monitor, press the Calibration point - Samsung i7 | User Manual - Page 15
When Using the Camera for the First Time: Touch Screen ƈ Touch Screen can be used for selecting the menu or confirming the selected menu. See the following instructions for using the Touch Screen. To select or set the menu exactly, using the supplied Touch Pen is recommended. ƃ Ex : Changing the - Samsung i7 | User Manual - Page 16
00013 00:00:00 ڽ MENU EFFECT : Optical / Digital Zoom bar / Digital Zoom rate (p.24) : Number of available shots remaining ) ۅ : Metering (p.31) ۅ : Continuous shot (p.32) : ISO(p.32) : Camera Shake Reduction (p.34) ۆ : White Balance (p.33) ۇ؆ LT : Exposure compensation - Samsung i7 | User Manual - Page 17
) button or Press the Recording mode icon and the menu will display as shown. SHOOTING Program ASR Movie SCENE SHOOTING Auto Program ASR SCENE Nightscene Portrait Children ƈ MP3, PMP, Text Viewer, Tour Guide mode Select a multi-media mode by rotating the LCD monitor. (p.91) Resume Open AUTO - Samsung i7 | User Manual - Page 18
user interaction. 1. Insert the battery (p.10) taking note of the correct polarity (+ / -). 2. Insert the memory card (p.10). As this camera 4. Press the power button to turn on the camera. (If the date / time that is displayed on the LCD monitor is incorrect, reset the date / time before - Samsung i7 | User Manual - Page 19
while the [Capturing!] message is displayed to achieve a better result. 6. As the ASR uses the camera's digital processor, images taken using the ASR may take a little longer for the camera to process. ƈ Wise Shot Two images are taken at a time. One is taken in the Fill-In Flash mode and the - Samsung i7 | User Manual - Page 20
will display on the LCD monitor) Standby 2. Point the camera towards the subject and [MOVIE CLIP mode] compose the image by using the LCD monitor. you can select 30 fps and 15 fps. ƈ Pausing while recording a movie clip (Successive Recording) This camera allows you to temporarily stop during - Samsung i7 | User Manual - Page 21
, Portrait, Children, Beach&Snow, Self shot, Cafe mode. 1. Press the FR (Face Recognition) button ( ) in the selectable modes. The FR icon will be displayed on the screen left top side. 2. The size and position of the auto focus frame is set at the face of the subject automatically. ŝ20Ş 3. Press - Samsung i7 | User Manual - Page 22
the camera recognises many people at the same time, it will focus on the nearest person. ƃ When Face detection begins, the Digital Zoom low lighting condition, the camera shake warning indicator ( ) may appear on the LCD monitor. In this case, use a tripod, support the camera on a solid surface - Samsung i7 | User Manual - Page 23
button halfway. When the green auto focus frame lights up, it means the camera is focused on the subject. Be careful not to press the SHUTTER button all 3. With the SHUTTER button still pressed down only halfway, move the camera to recompose your picture as desired, and then press the SHUTTER button - Samsung i7 | User Manual - Page 24
power off function. FR (Face Recognition) / Lock button ƈ This button is for quick and easy pictures of people. ƈ In MP3 and PMP mode, this button will lock the camera buttons. SHUTTER button ƃ Used for taking an image or recording voice in the RECORDING mode. ƃ In MOVIE CLIP mode : Pressing the - Samsung i7 | User Manual - Page 25
zoom setting i.e. the subject appears at its farthest from the camera. Pressing the ZOOM W button Pressing the ZOOM W button [TELE zoom] [Optical zoom 2X] [WIDE zoom] Digital zoom WIDE Optical zoom Digital zoom : When the digital zoom is in operation, pressing the ZOOM W button will reduce - Samsung i7 | User Manual - Page 26
digital zoom may take a little longer for the camera to process. Allow time for this to take place. ƃ You may notice a decrease in image quality when using the digital zoom. ƃ To view a clearer digital . ƃ Take care not to touch the lens as this may cause a camera malfunction. Mode button ƈ You can - Samsung i7 | User Manual - Page 27
White Balance Exposure Compensation LT LT Camera Shake Compensation ſIn ASR mode, the characteristics of each scene modes, some menus display but can't be selected. Self-timer ( ) with this menu. Select a desired selftimer icon on the LCD monitor. (p.6) ƃ Selecting the 2 SEC self-timer TIMER - Samsung i7 | User Manual - Page 28
ƈ You can take macro pictures. Select a desired macro icon on the LCD monitor. FOCUS [Auto Focus-AF icon] [Auto Macro ( )] [Macro ~ Infinity INFORMATION ƃ When the macro mode is selected, be particularly careful to avoid camera shake. ƃ When you take a picture within 30cm (Wide zoom) or 50cm ( - Samsung i7 | User Manual - Page 29
ƃ ƃ ƃ ū ƃ Flash ( ) ƈ You can select a proper flash mode in accordance with the enviroment. Select a desired flash icon on the LCD monitor. FLASH [Selecting the Auto flash] ƃ Flash range (Unit : m) ISO AUTO Normal WIDE TELE 0.8 ~ 3.8 0.8 ~ 2.8 Macro WIDE TELE 0.3 ~ 0.8 0.5 ~ 0.8 Auto - Samsung i7 | User Manual - Page 30
images in a place or situation where flash photography is prohibited. When you capture an image in a poorly lit condition, the camera shake warning indicator ( ) will display on the LCD monitor. Red-eye reduction When a shot with "red eye" is detected, this mode will reduce the red-eye effect - Samsung i7 | User Manual - Page 31
Flash ( ) ƃ Available flash mode, by recording mode ƃ ƃ ƃ ƃ ƃ ƃ ƃ ƃ ƃ ƃ ƃ (ƃ : Selectable) ƃ ƃ ƃ ƃ ƃ ƃ ƃ ƃ ƃ ƃ ƃ ƃ ƃ ƃ ƃ ƃ Image Size ƈ You can select the image size appropriate for your application. Still Image Movie Clip Image Size 3072x2304 3072x2048 3072x1728 - Samsung i7 | User Manual - Page 32
use. - Spot : Only the rectangular area in the centre of the LCD monitor will be metered for light. This is suitable when the subject in the . INFORMATION ƃ This file format complies with the DCF (Design rule for Camera File system). ƃ When the 800x592 image size is selected, you can select - Samsung i7 | User Manual - Page 33
. - AEB : Take three pictures in a series in different exposures: standard exposure (0.0EV), short shot : Two images are taken at a time. One is taken in the Fill-In Flash mode and best to use a tripod for the AEB shooting as the time to save each image file is longer and blurring caused by camera - Samsung i7 | User Manual - Page 34
under tungsten (standard light bulb) lighting. : Allows the user to set the white balance according to the shooting condition. the White Balance. 2. Place a sheet of white paper in front of the camera so that the LCD monitor shows only white, and then press the SHUTTER button. 3. Your custom - Samsung i7 | User Manual - Page 35
camera automatically adjusts the exposure according to the ambient lighting conditions. You can change the exposure value by using the ȜȞ icon. A negative exposure compensation value reduces the exposure. Note that a positive exposure compensation value increases the exposure and the LCD displayed. - Samsung i7 | User Manual - Page 36
Auto Focus Center AF Multi AF - [Center AF] : The rectangular area in the center of the LCD monitor will be focused - [Multi AF] : This camera selects a AF point from the 5 AF points. [Center AF] [Multi AF] ſ When the camera focuses on the subject, the auto focus frame turns too green. When the - Samsung i7 | User Manual - Page 37
shutter button once and voice is recorded for as long as the available recording time (max:10 hour) allows. The recording time will be displayed on the LCD monitor. Voice will still be recorded if the shutter button is released. - If you wish to stop recording, press the shutter button again. - File - Samsung i7 | User Manual - Page 38
on the LCD monitor before you best distance to record sound. ƃ If the camera power is turned off while the voice recording is paused, the voice recording is cancelled. Icon Menu Description Soft+ Soft The edges of the image are softened. This effect is suitable for editing images on your PC - Samsung i7 | User Manual - Page 39
normal. - Low : The difference between bright par of the image is low. Select [Voice Mute] menu in the Movie clip mode. ( ) icon will display on the LCD monitor. Press the Shutter button and a movie will record for as long as the memory capacity allows without voice. Standby [Movie clip mode] ŝ38 - Samsung i7 | User Manual - Page 40
Effect ƈ It is possible to add special effects to your images by using this icon. ƈ Still image mode : You can select the colour, special colour, image editing and Fun menu. ƈ Movie clip mode : You can select the colour menu. EFFECT MENU Color Effect Image Adjust Fun [Still image mode] - Samsung i7 | User Manual - Page 41
Effect : Colour Effect ƈ By using the camera's digital processor, it is possible to add special effects to your images Colour ƃ Press the Effect menu in an available recording mode (p.39) Color Effect Off Color - Samsung i7 | User Manual - Page 42
mode. (p.39) Color Effect Off Color Normal Custom Color Color Mask Color Effect/Color Mask Press the OK icon and the Mask mark will display on the LCD monitor OK +, - icon: Changing the Mask size Color Effect/Color Mask OK [Final image] Press the Shutter button and the mask added image is - Samsung i7 | User Manual - Page 43
an available recording mode (p.39). Image Adjust Off Saturation Select Saturation menu ( ) and a bar for changing the saturation will display. Image Adjust / Saturation Save Image Adjust Off Saturation Change the saturation by pressing the ȜȞ icon. Image Adjust / Saturation Save + direction - Samsung i7 | User Manual - Page 44
Off Composite Off Select ( ) FUN / Cartoon Off Select a desired frame by pressing the ȜȞ icon FUN / Cartoon 2 OK Pressing the OK icon Press the LCD monitor Set Changing the text box location: Pressing the ȜȞ icon ſ You can delete the capture image and take an image again. Select a deleted - Samsung i7 | User Manual - Page 45
on the stored image taken with Photo Frame menu. ƃ Press the Effect menu in an available recording mode (p.39). - The selected photo frame will display. Press the shutter button to take a picture. - Press the icon when you want to change the frame. - : Cancels the frame effect FUN Cartoon Off - Samsung i7 | User Manual - Page 46
can change the focus frame after selecting a Range menu. FUN / High Light 1 OK FUN / High Light 1 Select a desired range of preset focus frame on the LCD monitor. OK After changing the range Pressing the OK icon Final image Pressing the Shutter button Compose the image by using the - Samsung i7 | User Manual - Page 47
Effect : FUN Composite shooting ƈ You can combine 2 - 4 different shots in a still image. ƃ Press the Effect menu in an available recording mode (p.39) FUN Cartoon Off Photo Frame Off High Light Off Composite Off Fun / Composite Off Select a desired menu by pressing ȜȞ icon and press the OK icon. - Samsung i7 | User Manual - Page 48
press the Play mode or Mode button during the composite shots, each camera working mode is executed. The images captured before will be deleted. ƃ press the icon. 2. A previous image will be deleted and new frame will display. If there is an image taken before, press the icon again and a previous - Samsung i7 | User Manual - Page 49
Effect : FUN ƃ Changing a part of composite shot after taking the last shot 1. After taking the last shot, a cursor to select a frame will display. Press a desired frame on the LCD monitor to take an image again. 2. Press the icon. The image is deleted and you can take an image again 3. Press the - Samsung i7 | User Manual - Page 50
the camera, all the camera functions apply only to the memory card. ƈ If the memory card is not inserted in the camera, all the camera icon. [Movie clip mode] 2. The last image stored on the memory is displayed on the LCD monitor. 3. Select an image that you want to view by pressing the ȜȞ - Samsung i7 | User Manual - Page 51
clip (800X592, 640X480, 320X240). Capture: Shutter [Paused] ƈ On camera movie trimming : You can extract desired frames of movie clip during the the extracted file to stop. 5. Press the T button and a confirmation window will display. 6. Select a desired sub menu. [No] : The movie trimming will - Samsung i7 | User Manual - Page 52
the start point by pressing the REW (ȜȜ ) icon, the first frame of the movie clip will display. ƃ If you don't specify the ending point of the movie clip, the trimming confirmation window will display at the point of the last frame. ƃ Playing back a recorded voice 1. Select the recorded voice that - Samsung i7 | User Manual - Page 53
monitor Indicator ƈ The LCD monitor displays shooting information about the displayed image. ڹ ڽ ھ ڿ ISO : 100 ۂ AV : F3 10 ISO 11 Aperture value 12 Shutter speed 13 Flash 14 Image size 15 Recording date 16 Delete 17 Playing back the voice memo / voice recording - Samsung i7 | User Manual - Page 54
. Play mode button ƈ If you have turned on the camera by pressing the POWER button, you can press the PLAY PMP and Text Viewer mode, you can control the volume of multimedia files. ƃ Thumbnail display 1. While an image is displayed full screen, press the thumbnail button. 2. The thumbnail display - Samsung i7 | User Manual - Page 55
an enlarged view by checking the image enlargement indicator shown at the bottom left of the LCD monitor. (If the image is not an enlarged view, the indicator will not be displayed.) You can also check the area of enlargement. - Movie clips and WAV files can't be enlarged. - If an image is - Samsung i7 | User Manual - Page 56
Info button, information of displayed image will display on the LCD monitor. Info ( ) button Info ( ) button ISO : 100 AV : F3.5 TV :1/45 Flash :Off 3072x2304 2007/02/01 Info ( ) button Printer ( ) button ƈ You can print images with this button after connecting the camera to a PictBridge printer - Samsung i7 | User Manual - Page 57
Color Effect Image Adjust Fun Image Edit Resize Rotate Trimming Resize 5M 3M 1M Start Image ƃ Image Resize Types 5M 3M ƃ ƃ ƃ 3M P ƃ 2M W ƃ 1M P ƃ 1M W ƃ (ƃ : User Selectable) 1M User Image MP3 Skin ƃ ƃ ƃ ƃ ƃ ƃ ƃ ƃ ƃ ƃ ƃ User Image MP3 Skin User Image MP3 Skin - Samsung i7 | User Manual - Page 58
on the memory card but on the internal memory. ƃ If a new user image is saved, one of the two user image will be deleted in order. ƃ If the memory capacity is insufficient to store the resized image, a [Memory Full!] message will display on the LCD monitor and the resized image will not be stored - Samsung i7 | User Manual - Page 59
Rotate Trimming Ŧ1.1 Effect: Colour Colour ƈ By using the camera's digital processor, it is possible to add special effects to your images [Yes] : The trimmed image will save as a new file name, and display on the LCD monitor. ſ If there is insufficient memory space to save the trimmed image, the - Samsung i7 | User Manual - Page 60
Effect: Colour Custom colour ƈ You can change the R (Red), G (Green) and B (Blue) values of the image. Color Effect Color Custom Color Color Filter Color Mask Color Effect / Custom Color Save Colour Filter ƃ With this menu, You can change the colour information of the image (excluding Red, Blue, - Samsung i7 | User Manual - Page 61
& white colour. Color Effect Color Custom Color Color Filter Color Mask Color Effect / Color Mask Select ( ) and a mark for selecting part will display. Save +, - icon : Changing the mask size Color Effect / Color Mask Save Pressing the + icon : Moving the mask to the + position Color Effect - Samsung i7 | User Manual - Page 62
name. Image Adjust / Contrast Save Saturation control ƈ You can change the saturation of image. 1. Select ( ) and a bar for selecting the saturation will display. 2. Change the saturation by pressing the ȜȞ icon. 3. Press the SAVE icon and the image will be saved as a new file name. Image Adjust - Samsung i7 | User Manual - Page 63
to make the image as a cartoon. FUN Cartoon Photo Frame High Light Composite FUN / Cartoon 1 Select the cartoon menu ( ) OK A cartoon frame will display FUN / Cartoon 2 OK Select a desired frame by pressing the ȜȞ icon Pressing the OK icon Fun / Cartoon 2 You can change the location of the - Samsung i7 | User Manual - Page 64
saving the cartoon image, you can change the selected image. 1. Press the NewImage icon ang the selected image is deleted. (A window for selecting the other image will display) 2. Select a desired image. FUN / Cartoon 3 New Image Save 3. Press the ( ) icon to select the type and location of the - Samsung i7 | User Manual - Page 65
Effect: Fun Photo Frame ƈ You can add 9 types of frame-like borders to a still image you want to capture. ƈ Date & Time information will not be printed on the stored image taken with Photo Frame menu. FUN Cartoon Photo Frame High Light Composite FUN / Photo Frame 1 Save Select a desired frame by - Samsung i7 | User Manual - Page 66
the focus frame after selecting a Range menu. 1. Select a focus frame by pressing the ȜȞ icon and press the OK icon. 2. Select a desired range by pressing the LCD monitor. 3. Press the SAVE icon and the image is saved as a new file name. FUN / High Light 1 OK FUN / High Light 1 Pressing the OK - Samsung i7 | User Manual - Page 67
Play mode button, a capture mode is executed. ſ Selecting 2 composite shooting FUN / Composite 1 FUN / Composite 1 Pressing the OK icon OK Set ſ Touch the LCD monitor where you want to move the image. Pressing the Set icon FUN / Composite 1 Pressing the NewImage icon [Selecting the second - Samsung i7 | User Manual - Page 68
the Set icon Set New Image Save [Changing the position : Press the Screen] 2. Press the NewImage icon and a window for selecting the other image will display. FUN / Composite 2 Selecting an image: Press the screen Set 3. After pressing the Set icon, press the SAVE icon. The image - Samsung i7 | User Manual - Page 69
Select ( ) FUN / Sticker Select : Select a desired sticker Press the LCD monitor and the selected sticker is added. Save Save ſ You can add text or line with the Touch Pen FUN / Pen Tool Press the Ȟ icon Save Exit Press the SAVE icon and a confirmation window will display. Press the [Yes] - Samsung i7 | User Manual - Page 70
p.72 p.73 p.74 p.74 p.76 ƈ This menu is available while the camera is connected to a PictBridge supporting printer (direct connection to the camera, sold separately) with a USB cable. Menu tab Main menu Images Size Layout Type Sub menu One Pic All Pics Auto Postcard Card 4X6 L 2L Letter A4 A3 - Samsung i7 | User Manual - Page 71
ƈ Images can be displayed continuously at pre-set intervals. You can view the slide show by connecting the camera to an external monitor. ƃ Start : The slide shown can be started with the [Start] menu. - To pause the slide shown while playing it back, press the LCD - Samsung i7 | User Manual - Page 72
played back. - [Music 1, 2, 3] : A selected music is played back. - [My Music] : User selected music is played back. ƃ Setting play interval : Set the slide show play interval. - [1, 3, 5, 7, 10 sec] : the image is displayed during the set interval. Slide Show Show Start Effect Music Interval - Samsung i7 | User Manual - Page 73
show type: Selects a slide show type. Slide Show Playback Sound Setup 1 Setup 2 Slide Show Play Mode Play Mode One Play Repeat Play - [One Play] : The slide show is closed after one cycle. - [Repeat Play] : The slide show is repeated until cancelled. Voice memo ( ) ƈ You can add your voice to - Samsung i7 | User Manual - Page 74
Voice Memo Protect Delete DPOF Protect Select All 1. Select a desired sub menu. [Select] : Selection window for an image to be protected / released is displayed. - Select a protected image on the LCD monitor. - : Your changes will be saved and the menu will disappear. Playback / Protect Exit - Samsung i7 | User Manual - Page 75
confirmation window. No Press the [Yes] menu and all unprotected Yes images are deleted. If there aren't protected images, all the images are deleted and a [No Image!] message will display. 2. After deletion, the screen will be changed to the play mode screen. ŝ74Ş DPOF ƈ DPOF (Digital Print - Samsung i7 | User Manual - Page 76
you to embed print quantity information on a stored image. 1. Select the [Standard] menu. 2. Select a desired sub menu. [One Pic] : Selection window for an image to print is displayed. - ȜȞ : Select an image to print. - Ɗƌ : Select the number of prints. [All] : Configure number of prints for all - Samsung i7 | User Manual - Page 77
and press the OK icon. [One Pic] : Selection window to change the print size of an image is displayed. - ȜȞ : Select an message is displayed. After copying has been completed, the screen will return inserting the memory card into the camera. ƃ When you move images from displayed on the LCD monitor. - Samsung i7 | User Manual - Page 78
USB cable with [Connecting Computer] message. In this case, remove the cable and do the step 1, 2 again. ƈ Easy printing When you connect the camera to printer in the Play back mode, you can print a picture easily. - Pressing the printer ( ) icon : Currently displayed image will be printed with - Samsung i7 | User Manual - Page 79
and the PictBridge menu will display. 2. Select the [Images] menu. 3. Select a desired sub menu. - Select [One Pic] or [All Pics]. A screen where you can set the number options are not supported on all printers. If not supported, the menus are still displayed in the LCD, but are not selectable. - Samsung i7 | User Manual - Page 80
printer's default setting, refer to the user's guide that came with your printer. PICT BRIDGE Quality Auto Date Auto File Name Auto Reset Reset No Yes Sound menu ƈ In this mode, you can set up sound settings. You can use the setup menu in all camera - Samsung i7 | User Manual - Page 81
Low Medium High ƃ [Volume] sub menu : [Off], [Low], [Medium], [High] [ Start up sound ] ƈ You can select the sound that is activated whenever the camera is turned on. Sound Volume Medium Start Sound Off Shutter Sound Shutter Sound 1 Beep Sound Beep Sound 1 Start Sound Off Sound 1 Sound 2 Sound - Samsung i7 | User Manual - Page 82
this mode, you can set up basic settings. You can use the setup menu in all camera modes, except Voice Recording mode. The items indicated by are default settings. Menu tab Main menu File Sub menu Reset Series ENGLISH FRANÇAIS DEUTSCH ESPAÑOL ITALIANO Page p.82 LANGUAGE Date&Time Imprint - Samsung i7 | User Manual - Page 83
This function allows the user to select the file naming format. Setup1 File Series LANGUAGE English Date&Time Imprint Off File Reset Series [Reset] : After using memory card conform to the DCF (Design rule for Camera File systems) format. If you change the image file name, the image may not play - Samsung i7 | User Manual - Page 84
/ Time / Date type ] ƈ You can change the date and time that will be displayed on the captured images and set up the date type. - Date type : [yy/mm/dd], [mm/dd/yy], [dd/mm/yy], [Off] Setup1 File Series LANGUAGE English Date&Time Imprint Off Language ENGLISH FRANÇAIS DEUTSCH Setup1 File - Samsung i7 | User Manual - Page 85
Setup menu 1 [ Imprinting the recording date ] ƈ There is an option to include DATE / TIME on still images. [ LCD brightness ] ƈ You can adjust the LCD brightness. Setup1 File Series LANGUAGE English Date&Time Imprint Off Imprint Off Date Date&Time ƃ Sub menus [Off] [Date] : The DATE & TIME - Samsung i7 | User Manual - Page 86
menu 1 [ Start up image ] ƈ You can select the image that is first displayed on the LCD monitor whenever the camera is turned on. Setup1 LCD Normal AF Lamp On Start Image Off Setup1 / Start Image OK ƃ Start up image : [Off], [LOGO], [User Image] - Use a saved image for the start-up image with the - Samsung i7 | User Manual - Page 87
that the automatic power off function will not operate if the camera is in PC / Printer mode, slide show, playing back a voice recording / movie clip / MP3 / PMP / TEXT files and taking a composite shot. ƃ [LCD save] sub menu [Off] : The LCD monitor will not be turned off. [On] : If you select the - Samsung i7 | User Manual - Page 88
set and pre-view image will display. ƈ Connecting to an external monitor When the camera is connected to an external monitor in the play back mode, the image (movie or still image) will be visible on the external monitor and the LCD monitor of the camera turns off. Touch ſ When you calibrate the - Samsung i7 | User Manual - Page 89
- There will be a digital noise on the external monitor, but it is not a malfunction. - If the image is not in the centre of the screen, use the TV controls to centre it. - When the camera is connected to an external monitor, some parts of the image may not display. - When the camera is connected to - Samsung i7 | User Manual - Page 90
] : All settings will be restored to their defaults. MP3 / PMP / TEXT VIEWER Mode ƈ This camera has an embedded MP3, TEXT VIEWER & Portable Media Player program. doesn't display on the playlist. ƈ MP3, PMP, Text Viewer, World Tour Guide You can select a multi-media mode by rotating the LCD monitor. - Samsung i7 | User Manual - Page 91
. 1. Save the desired files on your PC. 2. Connect the camera to your PC with the USB cable and turn on the camera. 3. Open Window's EXPLORER and search for [Removable Disk]. 4. Make a folder under the Removable Disk. - MP3 Mode : [MP3] - PMP Mode : [PMP] - TEXT VIEWER mode : [TEXT] INFORMATION - Samsung i7 | User Manual - Page 92
] PMP LIST [SDC]-movie sample.sdc [TEXT VIEWER mode] TEXT LIST Samsung camera.txt Samsungcamera.txt 1. 01-Audio Track 01.mp3 A 00:02 / 04:55 192K CJ-movie sample.sdc 0:00:00 / 0:04:55 Who bent my camera? 1/2 ANSI 1.Samsungcamera.txt Thank you for buying a Samsung Camera. This manual will guide - Samsung i7 | User Manual - Page 93
correctly, download a free MP3 conversion program and convert it before using the MP3 file on the camera . ŝ92Ş LCD monitor indicator for MP3 / PMP / TEXT VIEWER mode ƈ The LCD monitor displays information about the MP3, multimedia and Text file. MP3 mode Lock (p.94) Equalizer (p.95) Volume (p.93 - Samsung i7 | User Manual - Page 94
LCD monitor indicator for MP3 / PMP / TEXT VIEWER mode Current page / Whole page Encoding Type (ANSI,Uni) Battery (p.10) Text mode Scroll icon Play list icon (p.95) Menu icon (p.95) 1/2 ANSI 1.Samsungcamera.txt Thank you for buying a Samsung Camera. This manual will guide you through using the - Samsung i7 | User Manual - Page 95
of the MP3 file. ƈ PMP mode You can search the Multimedia display. Hold button ƃ If you press the Hold button for over 1 second, the camera buttons are locked. - If the camera buttons are locked, the buttons can't be operated while playing back. But Power off, Video out, USB connection and LCD - Samsung i7 | User Manual - Page 96
LIST [SDC]-movie sample.sdc TEXT LIST Samsung camera.txt Setting up the playback function using the LCD monitor ƈ MP3 / PMP / TEXT VIEWER mode functions can be changed by using the LCD monitor. Press the MENU icon and the menu will display on the LCD monitor. Menu tab Main menu Play mode MP3 MP3 - Samsung i7 | User Manual - Page 97
function using the LCD monitor Menu tab Play Mode Play All Repeat One Repeat All Random [Play All] : plays a single track once. [Repeat One] : plays a single track skin of MP3 player. [Default 1, 2] : Default skin will be set. [User Skin 1, 2] : An image created by the [MP3 Skin] menu (p.56) - Samsung i7 | User Manual - Page 98
Show Play Interval 2 sec [Play] : Display the images once. [Repeat Play] : Display the images continuously. ſ When the playing back is complete, the slide show will stop. ſ To pause the slide show, press the LCD monitor. Slide Show Show Play Interval 2 sec One Play Repeat Play Setting slide - Samsung i7 | User Manual - Page 99
the LCD monitor Delete ƈ Files stored on the memory card will be deleted. In the MP3 mode, only MP3 files are deleted. In the PMP mode, -Audio Track 01.mp3 02-Audio Track 02.mp3 [All] : A window for confirming the deletion will display. Press the [Yes] icon and all files are deleted. Delete All? - Samsung i7 | User Manual - Page 100
the 3D (3 dimentional multi-sound) Sonund that has fine low and high pitched sound. Auto Scroll ƈ The playing text is scrolled automatically and displays on the LCD monitor. PMP MENU Seeking Normal SRS On SRS Off On TEXT VIEWER MENU Auto Scroll Off MP3 BGM On Language ENGLISH Auto Scroll Off - Samsung i7 | User Manual - Page 101
using the LCD monitor MP3 Windows 2000 or later and save it again. We recommend using 'Notepad' and it has to be saved as ANSI encoding type. - Some unique characters may not be displayed correctly on the camera. - Encode the text files as the standard type or some characters may not be displayed - Samsung i7 | User Manual - Page 102
and extract the file. 3. Connect and turn on the camera and computer. 4. Run the Window Explorer. Find the Removeable disk. 5. Make [TOUR] folder on the Removeable disk. Starting the world tour guide Multimedia PMP TextViewer Travel Guide Select the location. 6. Select a file you want and - Samsung i7 | User Manual - Page 103
. ƃ Formating the camera deletes all data on the memory (including protected images, Movies, Multi media files and Tour Information). Copy the files to a computer before formating the memory. ƃ If there is no related site information file on the memory, the site menu can be displayed but can't be - Samsung i7 | User Manual - Page 104
the camera. Doing so may result in failure or may permanently damage the unit. ƈ Extremes in temperature may cause problems. - If the camera is transferred or foreign substances on the surface of the lens. ƈ If the digital camera is not used for a long period, an electric discharge can occur. - Samsung i7 | User Manual - Page 105
camera condition. - Take a picture to test the camera and always carry a spare fully charged battery. - Samsung cannot be held responsible for camera There are several warnings that may appear on the LCD display Card Error! ϛMemory card error ƍ Turn off the camera power and turn it on again ƍ Insert - Samsung i7 | User Manual - Page 106
page within the limitation. DCF Full Error ҮViolation of DCF format ƍ Copy the images to a PC and format the memory. Before contacting a service centre ƈ Please check the following The camera doesn't switch on ϛThere is low battery capacity ƍ Insert charged battery ϛBattery is inserted incorrectly - Samsung i7 | User Manual - Page 107
is off ƍ Turn the camera on ϛThe operating system is not Windows 98SE, 2000, ME, XP, Vista / Mac OS 10.1 ~ 10.4. Alternatively the PC does not support USB ƍ Install Windows 98SE, 2000, ME, XP, Vista / Mac OS 10.1 ~ 10.4 to PC that supports USB ϛThe camera driver is not installed ƍ Install a [USB - Samsung i7 | User Manual - Page 108
4.5 - Digital Zoom :ϛStill Image mode : 1.0X ~ 5.0X ϛPlay mode : 1.0X ~ 12.0X (depends on image size) LCD Monitor 3.0" wide color TFT LCD (230,000 dots, Touch Screen) Focusing Wide max. 10 sec.) Date Imprinting Date&Time, Date, Off (user selectable) Shooting - Still Image : ŋAuto, Program, ASR, - Samsung i7 | User Manual - Page 109
(user selectable Samsung's standard conditions and may vary depending on shooting conditions and camera settings. Image Play Multi Media Interface - Type : Single image, Thumbnail, Slide show (Effect, B.G.M), Movie World Tour Guide, MP3, PMP, Text Viewer, Storage Device, Voice Recorder - Digital - Samsung i7 | User Manual - Page 110
skipping after one file played - Auto reload function (Remember last played frame) - Support Full Screen in Converting S/W Subtitle - Support SMI file (Using Digimax Converter S/W) ſ Text Specification File - TXT extension name, up to 99999 pages File format - Window : ANSI (Windows 98 or - Samsung i7 | User Manual - Page 111
the Samsung warranty. ŋBefore reading these instructions, you should have a basic knowledge of computers and O/S (Operating Systems). System Requirements For Windows PC with processor better than Pentium II 450MHz (Pentium 800MHz recommended) Windows 98SE/2000/ME/XP/Vista Minimum 128MB RAM (Over - Samsung i7 | User Manual - Page 112
the driver. ƃ You should allow 5 ~ 10 seconds for running the automatic setup program. If the frame does not show, run the [Windows Explorer] and select [Installer.exe] in the CD-ROM Drive root directory. ƃ PDF documents of user manual are included in the Software CD-ROM supplied with this camera - Samsung i7 | User Manual - Page 113
Setting up the application software 3. To play back the movie clip recorded with this camera on the computer, install the XviD codec. 4. Install the software by instructions on the monitor. ſ The XviD codec is distributed according to and under the terms and conditions of the GNU General Public - Samsung i7 | User Manual - Page 114
turned off in PC mode. ƈ Connecting the camera to a PC 1. Connect the PC to the camera with the USB cable. 2. Select the [Computer] menu. Select USB Computer Printer INFORMATION ƃ If you have installed the camera driver, The [Found New Hardware Wizard] may not open. ƃ On a Windows 98 SE system - Samsung i7 | User Manual - Page 115
hard disk and print them or use a photo editing software to edit them. 1. Connect the camera to your PC with the USB cable. 2. On your computer's desktop display, select [My Computer] and double click [Removable Disk ƍ DCIM ƍ 100SSCAM]. 3. Select an image and press the right mouse button. 4. A pop - Samsung i7 | User Manual - Page 116
blinking and is constantly on. 2. Unplug the USB cable. ƈ Windows 2000 / ME / XP / Vista (The illustrations may differ from those shown depending on the Windows O/S.) 1. Check whether the camera and PC are transferring a file. If the camera status lamp blinks, please wait until the lamp has finished - Samsung i7 | User Manual - Page 117
to the MAC. Removing the USB Driver for Windows 98SE ƈ To uninstall the USB driver, refer to the process shown below. 1. Connect the camera to your PC and turn them on. 2. Check whether the Removable Disk is on the [My Computer]. 3. Remove the [Samsung Digital Camera] on the Device manager. Using - Samsung i7 | User Manual - Page 118
played back on this camera. This software is only compatible with Windows. ƈ How to Screen size : You can set type of display. - Split by size : You can set the file size of output movie clip. 5. Connect the camera to the computer in the program one by one. ƃ Computer specification, installed code - Samsung i7 | User Manual - Page 119
Do not use the PMP mode while driving. It may create a traffic hazard. ƃ A file that does not support fast search on the Windows Media Player can't select images 1. Connect the camera to your PC. 2. A window for downloading images will display after connecting the camera to your PC. - To download - Samsung i7 | User Manual - Page 120
multi media information. ڽZoom bar : You can change preview size. ھFolder display window : You can see the folder location of the selected image. ڿImage display window : Images in the selected folder are displayed. ſ Refer to the [Help] menu in Digimax Master for further information. ŝ119Ş - Samsung i7 | User Manual - Page 121
: A selected image displays in this window. ڼPreview window : You can preview the changed image. ſ A still image edited with Digimax Master can't be played back on the camera. ſ Refer to the [Help] menu in Digimax Master for further information. ŝ120Ş ں - Movie clip edit functions are listed - Samsung i7 | User Manual - Page 122
(Click the right mouse button and 'Remove' menu will display). Re-boot your computer and connect the computer and the camera. In Windows 98SE, remove the camera driver and reboot the computer. And then connect the computer and the camera. Case 7 In some security programs (Norton Anti Virus, V3 - Samsung i7 | User Manual - Page 123
may not recognise the camera. In this case, restart the PC. ƃ If a PC connected with the camera stops responding while Windows is starting. ƍ In this case, disconnect the PC and the camera and Windows will start. If the problem happens continuously, set the Legacy USB Support to disable and re-start - Samsung i7 | User Manual - Page 124
user's authority to operate the equipment. ƈ Declaration of Conformity Trade Name : SAMSUNG TECHWIN Model No. : Samsung i7 Responsible Party : Samsung Opto-Electronics America, INC. Address : 40 Seaview Dr. Secaucus, NJ 07094 Telephone No. : 201-902-0347 This device complies with Part 15 - Samsung i7 | User Manual - Page 125
MEMO MEMO ŝ124Ş - Samsung i7 | User Manual - Page 126
(1) 310-537-1566 www.samsungcamerausa.com SAMSUNG FRANCE S.A.S. BP 51 TOUR MAINE MONTPARNASSE 33, AV .DU MAINE 75755, PARIS CEDEX 15, FRANCE HOTLINE PHOTO NUMÉRIQUE : for calls from UK only) UK Service Hotline : 01932455320 www.samsungcamera.co.uk SAMSUNG OPTO-ELECTRONICS GMBH AM KRONBERGER HANG
-
 1
1 -
 2
2 -
 3
3 -
 4
4 -
 5
5 -
 6
6 -
 7
7 -
8
-
9
-
10
-
11
-
12
-
13
-
14
-
15
-
16
-
17
-
18
-
19
-
20
-
21
-
22
-
23
-
24
-
25
-
26
-
27
-
28
-
29
-
30
-
31
-
32
-
33
-
34
-
35
-
36
-
37
-
38
-
39
-
40
-
41
-
42
-
43
-
44
-
45
-
46
-
47
-
48
-
49
-
50
-
51
-
52
-
53
-
54
-
55
-
56
-
57
-
58
-
59
-
60
-
61
-
62
-
63
-
64
-
65
-
66
-
67
-
68
-
69
-
70
-
71
-
72
-
73
-
74
-
75
-
76
-
77
-
78
-
79
-
80
-
81
-
82
-
83
-
84
-
85
-
86
-
87
-
88
-
89
-
90
-
91
-
92
-
93
-
94
-
95
-
96
-
97
-
98
-
99
-
100
-
101
-
102
-
103
-
104
-
105
-
106
-
107
-
108
-
109
-
110
-
111
-
112
-
113
-
114
-
115
-
116
-
117
-
118
-
119
-
120
-
121
-
122
-
123
-
124
-
125
-
126
 |
 |
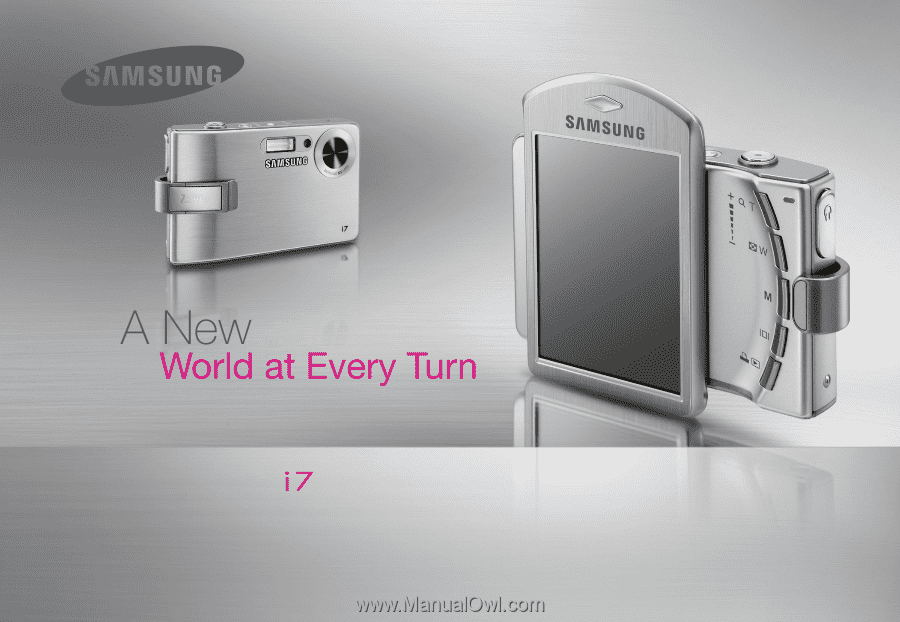
Thank you for buying a Samsung camera.
This manual will guide you through using the camera, including
capturing images, downloading images and using the application software.
Please read this manual carefully before using your new camera.
User Manual
ENGLISH