Sanyo EF60 Instruction Manual, PLC-EF60 - Page 16
Remote Control Transmitter, Remote Control Channel and I..., Set the Remote Control Channel - st l
 |
View all Sanyo EF60 manuals
Add to My Manuals
Save this manual to your list of manuals |
Page 16 highlights
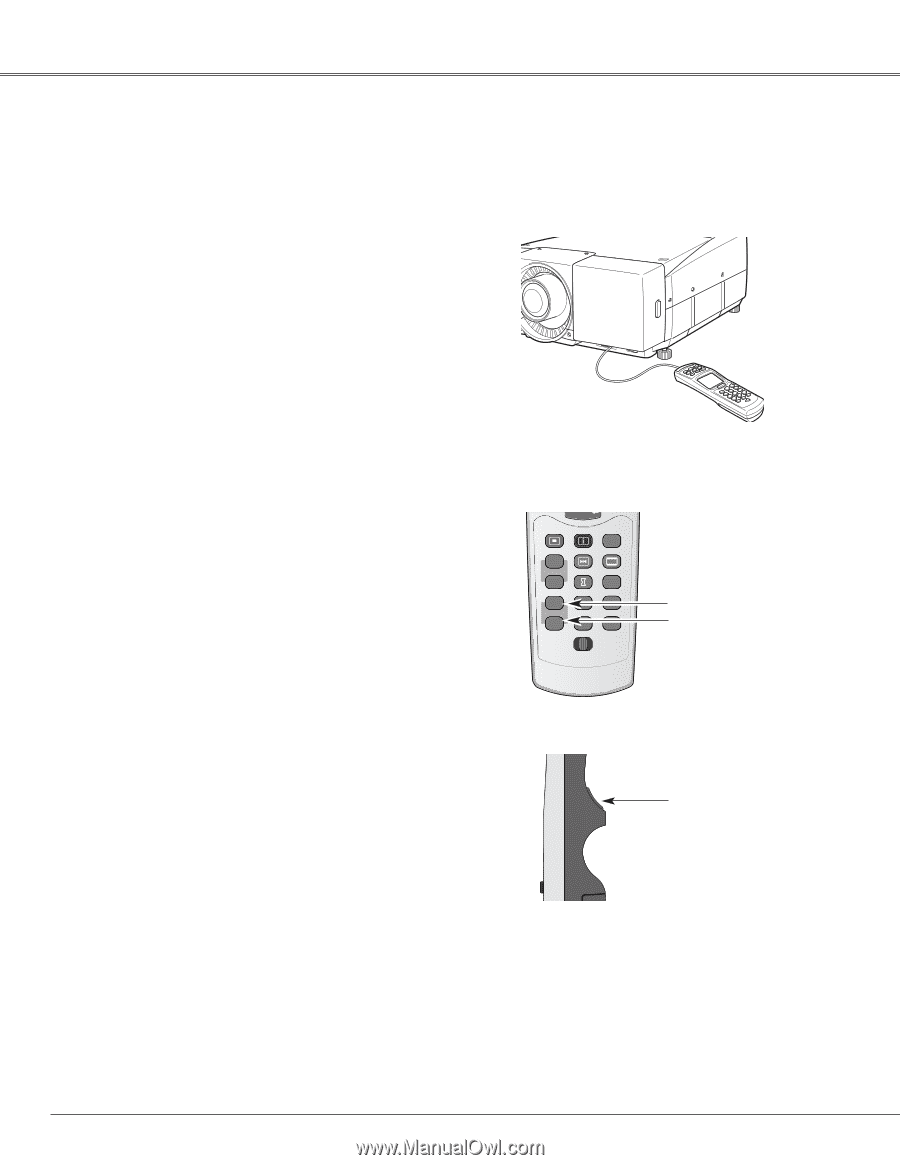
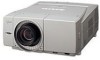
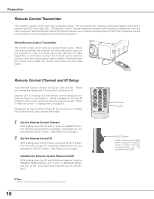
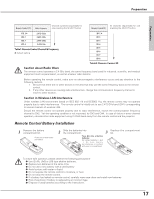
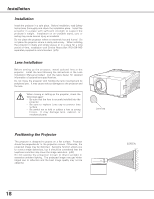
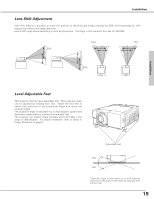
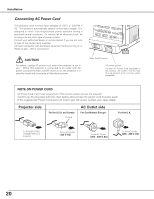
Preparation Remote Control Transmitter This wireless remote control uses radio frequency signal. You can switch four frequency channels prepared and select a remote control ID from eight IDs. The Remote Control Channel selection prevents radio frequency interference from the other equipment and the Remote Control ID selection allows you to operate several projectors with their respective remote controls without mutual interference among those projectors. Wired Remote Control Transmitter The remote control can be used as a wired remote control. When interference between the projector and other equipment occurs or the projector is used in a place where the operation of radio equipment is restricted, connect the remote control and the projector with the remote control cable provided. Connected with the remote control cable, the remote control does not emit radio signal. SHUTTER D.ZOOM ON-OFF KEYSTONE LENS SHIFT ZOOM FOCUS Remote Control Channel and ID Setup Initial Remote Control Channel and ID are CH1 and ID1. When you change the setting, set a Channel first, and then an ID. Channel and ID settings for the remote control should be the same as those for the projector. When changing the CH and ID settings to the remote control, do it to the projector as well. Refer to "Remote Control " in Setting menu on page 53. Should you be lost at which CH and ID are currently set, initialize the Channel and ID once, and set them again. SHUTTER D.ZOOM ON-OFF KEYSTONE 1 Set the Remote Control ChanLnENSeSlHIFT ZOOM FOCUS With holding down the CH button, press the SELECT button. The Remote Control Channel switches sequentially for one pressing the SELECT button. (See Table1 on next page.) 2 Set the Remote Control ID With holding down the ID button, press the SELECT button. The Remote Control ID switches sequentially for one pressing the SELECT button. (See TableCA2NCoELn next page.) MENU INFO AUTO PC FREEZE SCREEN Initialize the Remote Control ChVOLa. nnel and ID SOUND P-TIMER With holding down the CH and ID buMtUTtEons together, slide the REMOTE RESET/ON/ALL-OFF switcCHh to REMOTE RESET, and then to ON. The initial Channel and REMOTE ID ID are CH1 and ID1. (p15) ✔Note: Remote Control Channel and ID cannot be initialized separately. 16 CANCEL MENU INFO AUTO PC VOL. SOUND MUTE CH REMOTE ID FREEZE P-TIMER INPUT 4 INPUT 5 SCREEN INPUT 1 INPUT 2 INPUT 3 REMOTE RESET ON ALL OFF CH button ID button SELECT button While pressing the CH/ID button, press the SELECT button number of times corresponding to the remote control CH/ID.
-
 1
1 -
2
-
3
-
4
-
5
-
6
-
7
-
8
-
9
-
10
-
 11
11 -
 12
12 -
 13
13 -
 14
14 -
 15
15 -
 16
16 -
 17
17 -
 18
18 -
 19
19 -
 20
20 -
 21
21 -
22
-
23
-
24
-
25
-
26
-
27
-
28
-
29
-
30
-
31
-
32
-
33
-
34
-
35
-
36
-
37
-
38
-
39
-
40
-
41
-
42
-
43
-
44
-
45
-
46
-
47
-
48
-
49
-
50
-
51
-
52
-
53
-
54
-
55
-
56
-
57
-
58
-
59
-
60
-
61
-
62
-
63
-
64
-
65
-
66
-
67
-
68
-
69
-
70
-
71
-
72
-
73
-
74
-
75
-
76
-
77
-
78
-
79
-
80
-
81
-
82
-
83
-
84
 |
 |