Sanyo PLV Z3 Owners Manual - Page 47
Which hole to put the nozzle in?
 |
View all Sanyo PLV Z3 manuals
Add to My Manuals
Save this manual to your list of manuals |
Page 47 highlights
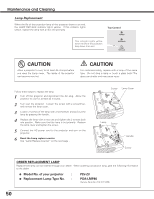
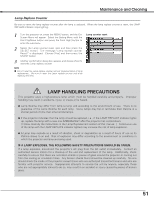
Maintenance and Cleaning Clean with using the cleaning function in the Setting menu 1 Press MENU button to display the On-Screen Menu and select the Setting menu by pressing the Point Up/Down button. Then press Point Right button to enter the sub-menu. 2 Press Point Up/Down button to select the Cleaning function then press SELECT button to select the item. 3 The image is blacked out temporary. 4 Turn over the projector then pull one of the hole covers upward gently. 5 Put the blower nozzle in the hole. 6 While watching the position of the dust on the screen, blow air into the projector by the blower. Pull one of the hole cover upward gently. The nozzle will be stopped by the stoppers when being put in the hole. Do not try to force the nozzle into further. The nozzle could be break and fall into inside of the projector. 7 When finishing, pull the blower out and put the hole cover back tightly. 8 Turn over the projector again, then press any button on the top control or on the remote control to cancel the Cleaning function. * Do not open the bottom cover except for when you clean the inside of the projector. Especially while operating the projector, the optical parts could damage. Which hole to put the nozzle in? When cleaning, wave the nozzle inside of the projector back and forth. (Do not try to force the nozzle to bend.) When you look at the screen ● When red spots (dust) are the most remarkable, put the nozzle in the R panel cleaning holes. ● When Green spots (dust) are the most remarkable, put the nozzle in the G panel cleaning holes. ● When Blue spots (dust) are the most remarkable, put the nozzle in the B panel cleaning holes. Use only supplied blower and nozzle. Do not use a commercially available air spry not to cause malfunction of internal parts with the cool air. We could not guarantee the malfunction of breakage by using unsupplied tools. When putting back the hole cover, starts from the outside hole to make the operation easier and prevent the hole cover from damaging. Inside Outside Put the hole covers back tightly after cleaning. 47
-
 1
1 -
2
-
3
-
4
-
5
-
6
-
7
-
8
-
9
-
10
-
11
-
12
-
13
-
14
-
15
-
16
-
17
-
18
-
19
-
20
-
21
-
22
-
23
-
24
-
25
-
26
-
27
-
28
-
29
-
30
-
31
-
32
-
33
-
34
-
35
-
36
-
37
-
38
-
39
-
40
-
41
-
 42
42 -
 43
43 -
 44
44 -
 45
45 -
 46
46 -
 47
47 -
 48
48 -
 49
49 -
 50
50 -
 51
51 -
 52
52 -
53
-
54
-
55
-
56
-
57
-
58
-
59
-
60
 |
 |
