Sharp CD180 QTCD180 Operation Manual
Sharp CD180 Manual
 |
View all Sharp CD180 manuals
Add to My Manuals
Save this manual to your list of manuals |
Sharp CD180 manual content summary:
- Sharp CD180 | QTCD180 Operation Manual - Page 1
QT-CD180 OPERATION MANUAL Thank you for purchasing this SHARP product. To obtain the best performance from this product, please read this manual carefully. It will guide you in operating your SHARP product. Quick Guide and used in accordance with the instructions, may cause harmful interference to - Sharp CD180 | QTCD180 Operation Manual - Page 2
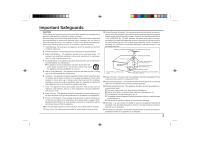
to the presence of important operating and maintenance (servicing) instructions in the literature accompanying the appliance. WARNING: the outer cover, as this may result in electric shock. Refer internal service to your local SHARP service facility. G Use the unit on a firm, level surface free from - Sharp CD180 | QTCD180 Operation Manual - Page 3
information with respect to proper grounding of the mast and supporting structure, grounding of the lead-in wire to an Servicing - The user should not attempt to service the appliance beyond that described in the operating instructions. All other servicing should be referred to qualified service - Sharp CD180 | QTCD180 Operation Manual - Page 4
Controls and Indicators 1234567 Accessory Notes: G The AC power cord is located in the battery compartment. 8 G Only the accessory in the drawing is included. 9 AC power cord x 1 (QACCU0001SJ00) 10 Operation with AC power 11 12 13 14 15 16 0 17 6 To AC INPUT AC 120 V, 60 Hz 01. - Sharp CD180 | QTCD180 Operation Manual - Page 5
Operation with batteries Listening to the Radio 2 3 1 5 6 4 1 Disconnect the AC power cord, and remove the battery compartment cover. 2 Insert 6 "D" size batteries (UM/SUM-1, R20, HP-2 or similar) into the battery compartment. G Insert the batteries according to the direction indicated on the - Sharp CD180 | QTCD180 Operation Manual - Page 6
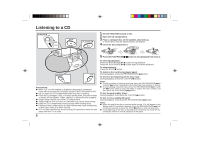
Listening to a CD 1 Set the FUNCTION switch to CD. 2 Open the CD compartment. 3 Place a compact disc on the spindle, label side up. 3" (8 cm) discs may be played without an adaptor. 4 Close the CD compartment. Precautions: G When "Cd" or track number is displayed, the power is connected. If you - Sharp CD180 | QTCD180 Operation Manual - Page 7
Listening to a Cassette Tape About a Cassette and a CD 1 Set the FUNCTION switch to TAPE. 2 Load a cassette into the cassette compartment with the side to be played facing toward you. 3 Press the PLAY 1 button. 4 To advance the tape, press the STOP/EJECT I 7 button, then press the F FWD 3 button. - Sharp CD180 | QTCD180 Operation Manual - Page 8
to a Cassette Tape Before recording: G When recording important selections, make a preliminary test to en- sure that the desired material is properly recorded. G SHARP is not liable for damage or loss of your recording arising from malfunction of this unit. G The ALC (Automatic Record Level Control - Sharp CD180 | QTCD180 Operation Manual - Page 9
by using a commercial tape head demagnetizer. Read the demagnetizer's instructions carefully before use. A B CD E A Laser pickup lens ) in the unit until normal playback is possible (about 1 hour). SHARP reserves the right to make design and specification changes for product improvement without - Sharp CD180 | QTCD180 Operation Manual - Page 10
Quick Guide / Guía rápida 1 Preparation for use / Preparación para su uso I Operation with AC power I Operation with batteries I Funccionamiento con corriente alterna I Funccionamiento con pilas 2 3 1 I Turning the - Sharp CD180 | QTCD180 Operation Manual - Page 11
Advanced CD Playback 3 Listening to a tape / Audictión de una cinta 1 2 3 4 Listening to the radio / Audictión de la radio 1 2 To stop playback Press the STOP/EJECT I 7 button. Para detener la reproducción Pulse el botón STOP/EJECT I 7. 5 Recording from a CD / Grabaciones de CD 1 2 3 4 - Sharp CD180 | QTCD180 Operation Manual - Page 12
on contract, negligence, strict liability or otherwise. In no event shall Sharp be liable, or in any way responsible, for any damages or Model Number & Description: QT-CD180 Portable CD Stereo System (Be sure to have this information available when you need service for your Product.) Warranty
-
 1
1 -
 2
2 -
 3
3 -
 4
4 -
 5
5 -
 6
6 -
 7
7 -
8
-
9
-
10
-
11
-
12
 |
 |
Thank you for purchasing this SHARP product.
To obtain the best performance from this product, please read
this manual carefully. It will guide you in operating your SHARP
product.
PORTABLE CD STEREO SYSTEM
MODEL
QT-CD180
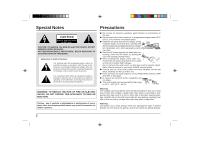
NOTE
This equipment has been tested and found to comply with the limits for
a Class B digital device, pursuant to Part 15 of the FCC Rules.
These limits are designed to provide reasonable protection against
harmful interference in a residential installation.
This equipment generates, uses, and can radiate radio frequency en-
ergy and, if not installed and used in accordance with the instructions,
may cause harmful interference to radio communications.
However, there is no guarantee that interference will not occur in a
particular installation. If this equipment does cause harmful interfer-
ence to radio or television reception, which can be determined by turn-
ing the equipment off and on, the user is encouraged to try to correct
the interference by one or more of the following measures:
●
Reorient or relocate the receiving antenna.
●
Increase the separation between the equipment and receiver.
●
Connect the equipment into an outlet on a circuit different from that
to which the receiver is connected.
●
Consult the dealer or an experienced radio/TV technician for help.
WARNING
FCC Regulations state that any unauthorized changes or modifications
to this equipment not expressly approved by the manufacturer could
void the user’s authority to operate this equipment.
NOTES
●
It is the intent of Sharp that this product be used in full compliance
with the copyright laws of the United States and that prior permis-
sion be obtained from copyright owners whenever necessary.
●
The letters in brackets contained in the model number indicate the
color of the product only. Operation and specifications are unaffected.
FOR YOUR RECORDS
For your assistance in reporting this unit in case of loss or theft, please record
below the model number and serial number which are located on the bottom of the
unit.
Please retain this information.
Model number
.................................................................................
Serial number
.................................................................................
Date of purchase
.................................................................................
Place of purchase
.................................................................................
OPERATION MANUAL
Quick Guide / Guía rápida
.............
Pages 10-11 / Página 10-11