Sharp R-209KK R-209K , R-220K , R-230K Operation Manual - Page 6
Unpacking And Installation Instructions, Grounding Instructions
 |
View all Sharp R-209KK manuals
Add to My Manuals
Save this manual to your list of manuals |
Page 6 highlights
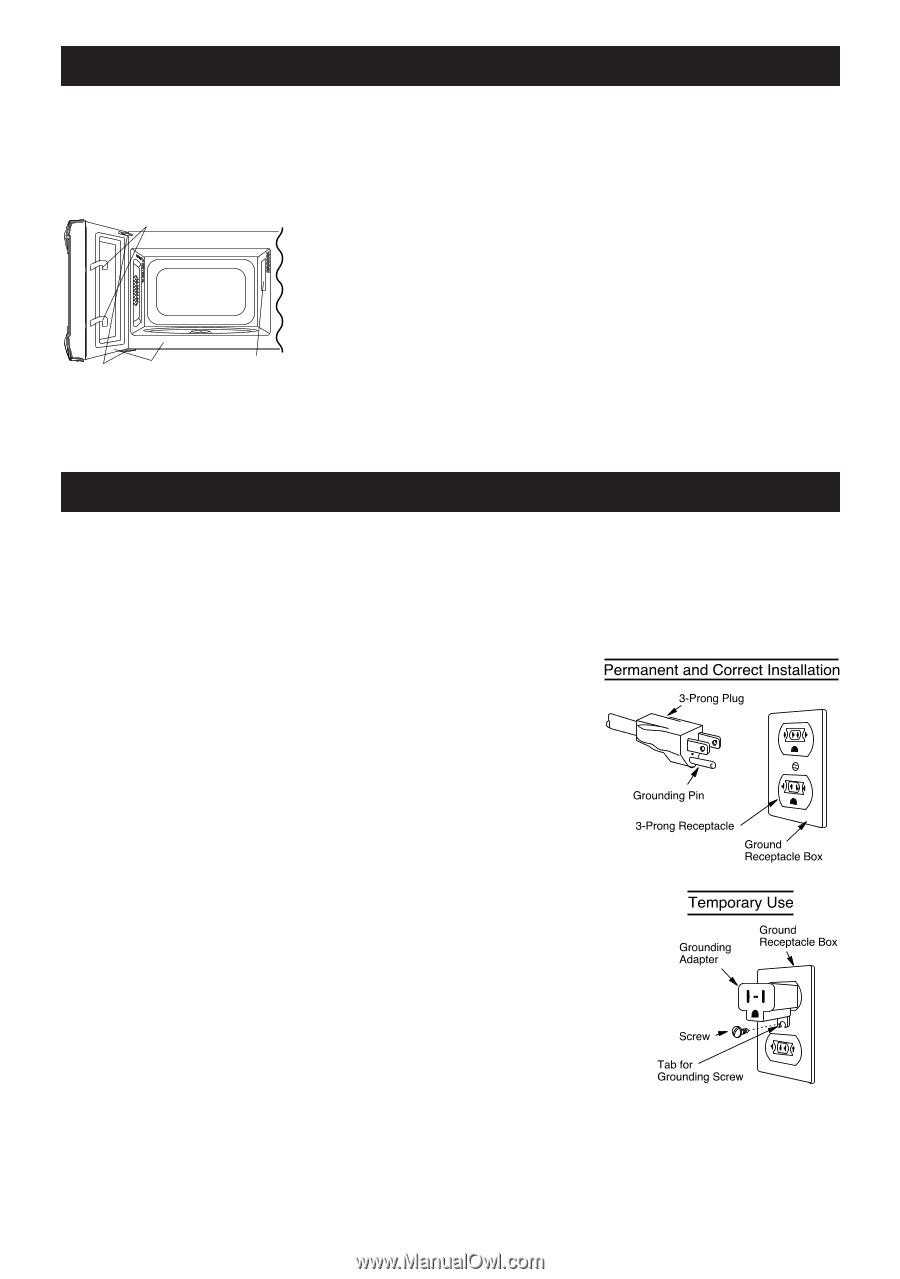
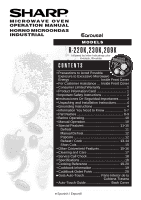
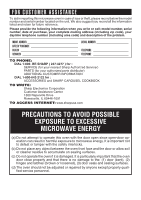
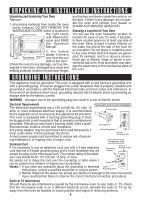
UNPACKING AND INSTALLATION INSTRUCTIONS Unpacking and Examining Your Oven Remove: 1. all packing materials from inside the oven cavity; however, DO NOT REMOVE THE WAVEGUIDE COVER, which is located on Safety door latches the right cavity wall. Read enclo- sures and SAVE the Operation Manual. 2. the feature Hinges sticker, if there is one, from the out- Door seals and sealing surfaces Waveguide cover side of the door. Check the oven for any damage, such as mis- aligned or bent door, damaged door seals and sealing surfaces, broken or loose door hinges and latches and dents inside the cavity or on the door. If there is any damage, do not operate the oven and contact your dealer or SHARP AUTHORIZED SERVICER. Choosing a Location for Your Oven You will use the oven frequently so plan its location for ease of use. It's wise, if possible, to have counter space on at least one side of the oven. Allow at least 2 inches (50mm) on the sides, top and at the rear of the oven for air circulation. Do not place or install the oven in any area where heat and steam are generated; for example, next to or above a conventional gas or electric range or above a conventional wall oven. Heat and steam may damage the electronics or the mechanical parts of the oven. GROUNDING INSTRUCTIONS This appliance must be grounded. This oven is equipped with a cord having a grounding wire with a grounding plug. It must be plugged into a wall receptacle that is properly installed and grounded in accordance with the National Electrical Code and local codes and ordinances. In the event of an electrical short circuit, grounding reduces risk of electric shock by providing an escape wire for the electric current. WARNING - Improper use of the grounding plug can result in a risk of electric shock. Electrical Requirements The electrical requirements are a 120 volt 60 Hz, AC only, 15 amp. or more protected electrical supply. It is recommended that a separate circuit serving only this appliance be provided. The oven is equipped with a 3-prong grounding plug. It must be plugged into a wall receptacle that is properly installed and grounded. Should you only have a 2-prong outlet, have a qualified electrician install a correct wall receptacle. A 3-prong adapter may be purchased and used temporarily if local codes allow. Follow package directions. A short power-supply cord is provided to reduce risk of becoming entangled in or tripping over a longer cord. Extension Cord If it is necessary to use an extension cord, use only a 3-wire extension cord that has a 3-blade grounding plug and a 3-slot receptacle that will accept the plug on the microwave oven. The marked rating of the extension cord should be AC 115-120 volt, 15 amp. or more. Be careful not to drape the cord over the countertop or table where it can be pulled on by children or tripped over accidentally. Notes:1. If you have any questions about the grounding or electrical instructions, consult a qualified electrician or service person. 2. Neither Sharp nor the dealer can accept any liability for damage to the oven or personal injury resulting from failure to observe the correct electrical connection procedures. Radio or TV Interference Should there be any interference caused by the microwave oven to your radio or TV, check that the microwave oven is on a different electrical circuit, relocate the radio or TV as far away from the oven as feasible or check position and signal of receiving antenna. 4
-
 1
1 -
 2
2 -
 3
3 -
 4
4 -
 5
5 -
 6
6 -
 7
7 -
 8
8 -
 9
9 -
 10
10 -
 11
11 -
 12
12 -
13
-
14
-
15
-
16
-
17
-
18
-
19
-
20
-
21
-
22
-
23
-
24
 |
 |