Sharp VL-Z7U Operation Manual - Page 98
Print Order
 |
UPC - 074000353190
View all Sharp VL-Z7U manuals
Add to My Manuals
Save this manual to your list of manuals |
Page 98 highlights
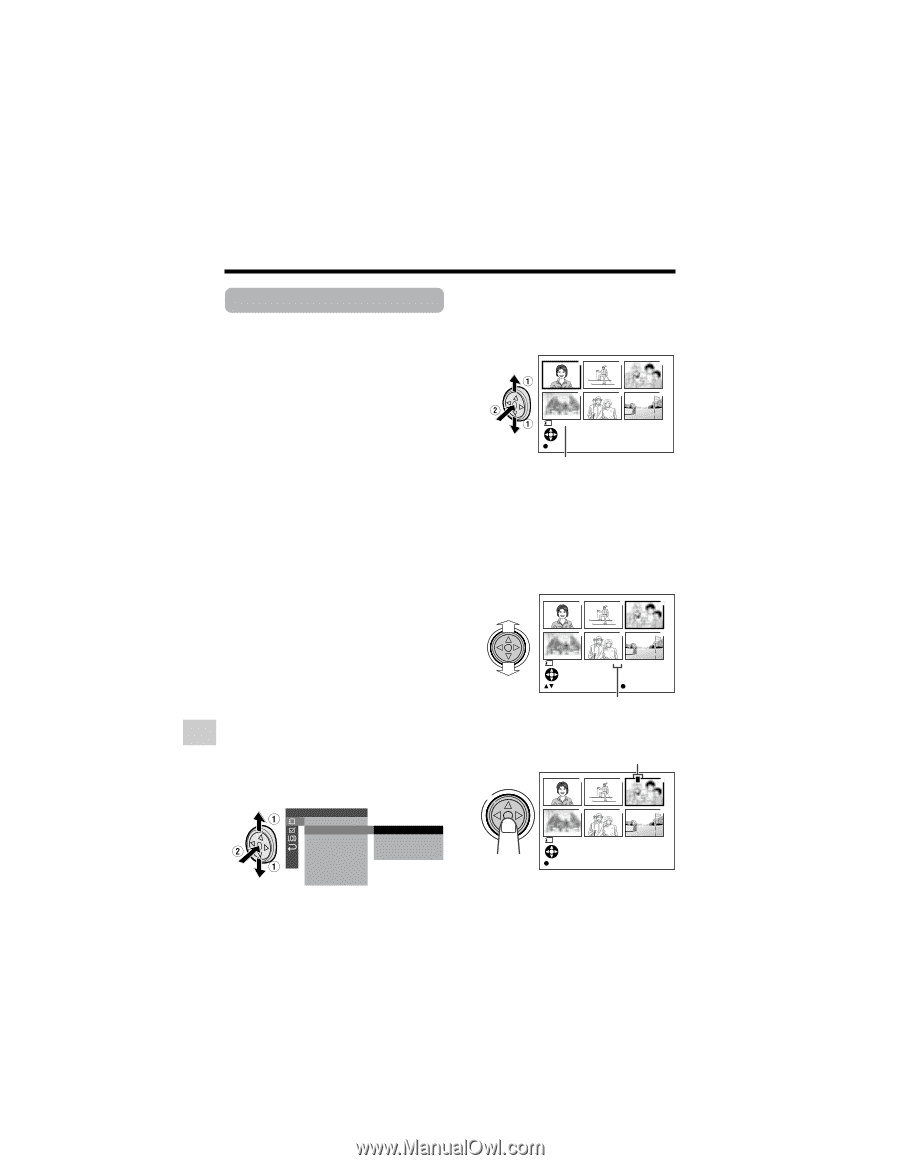
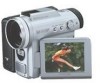
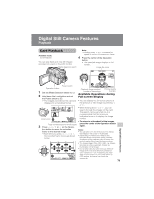
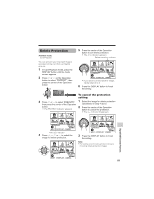
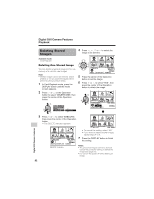
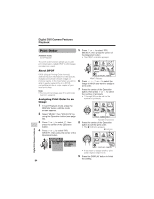
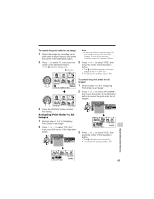
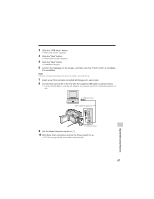
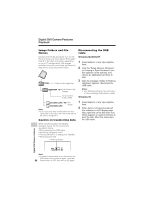
Digital Still Camera Features Playback Print Order Available mode: Card Playback 5 Press l or m to select "PRI. SELECT", then press the center of the Operation button. • The PRINT indicator appears. The print order function allows you to add print information called DPOF to still images recorded on a card. 1 2 3 4 5 6 About DPOF DPOF (Digital Printing Order Format) defines the print information for the specific images and number of each image on memory cards. In the near future you will be able to easily make prints on a DPOFcompatible printer or order copies at your local print shop. Note: • You can print an image even if no print order has been assigned. Assigning Print Order to an Image 1 In Card Playback mode, press the DISPLAY button until the mode screen appears. 2 Select "MENU", then "EXECUTE" by using the Operation button (see page 32). 3 Press l or m to select S, then press the center of the Operation button. 4 Press l or m to select "PRI. ORDER", then press the center of the Operation button. PLAYBACK SET SL I D E SHOW PR I . ORDE R PR I . SEL ECT RE TURN PR I . ALL PR I . NONE RE TURN 84 PR I NT 100-000 1 PAGE1 / 2 NORMA L SE T [ D I SPL AY] : CANCEL PRINT indicator 6 Press j, k, l or m to select the image to which you want to assign a print order. 7 Press the center of the Operation button, then press l or m to select the number of printouts. • 1 through 99 can be set for the number of printouts. 1 2 3 4 5 6 PR I NT 1 100-000 3 PAGE1 / 2 NORMA L P R I NT NUMB E R S E T Number of printouts 8 Press the center of the Operation button to set the print order. • The M indicator appears. M indicator 1 2P 3 4 5 6 PR I NT 100-000 3 PAGE1 / 2 NORMA L SE T [ D I SPL AY] : CANCEL • If you want to assign another print order, repeat steps 6 to 8. 9 Press the DISPLAY button to finish the setting. Digital Still Camera Features
-
 1
1 -
2
-
3
-
4
-
5
-
6
-
7
-
8
-
9
-
10
-
11
-
12
-
13
-
14
-
15
-
16
-
17
-
18
-
19
-
20
-
21
-
22
-
23
-
24
-
25
-
26
-
27
-
28
-
29
-
30
-
31
-
32
-
33
-
34
-
35
-
36
-
37
-
38
-
39
-
40
-
41
-
42
-
43
-
44
-
45
-
46
-
47
-
48
-
49
-
50
-
51
-
52
-
53
-
54
-
55
-
56
-
57
-
58
-
59
-
60
-
61
-
62
-
63
-
64
-
65
-
66
-
67
-
68
-
69
-
70
-
71
-
72
-
73
-
74
-
75
-
76
-
77
-
78
-
79
-
80
-
81
-
82
-
83
-
84
-
85
-
86
-
87
-
88
-
89
-
90
-
91
-
92
-
 93
93 -
 94
94 -
 95
95 -
 96
96 -
 97
97 -
 98
98 -
 99
99 -
 100
100 -
 101
101 -
 102
102 -
 103
103 -
104
-
105
-
106
-
107
-
108
-
109
-
110
-
111
-
112
-
113
-
114
-
115
-
116
-
117
-
118
-
119
-
120
-
121
-
122
-
123
-
124
-
125
-
126
-
127
-
128
-
129
-
130
-
131
-
132
-
133
-
134
-
135
-
136
-
137
-
138
-
139
-
140
 |
 |