Sharp XL-DV60 XL-DV60 Operation Manual - Page 16
System connections continued
 |
UPC - 074000366084
View all Sharp XL-DV60 manuals
Add to My Manuals
Save this manual to your list of manuals |
Page 16 highlights
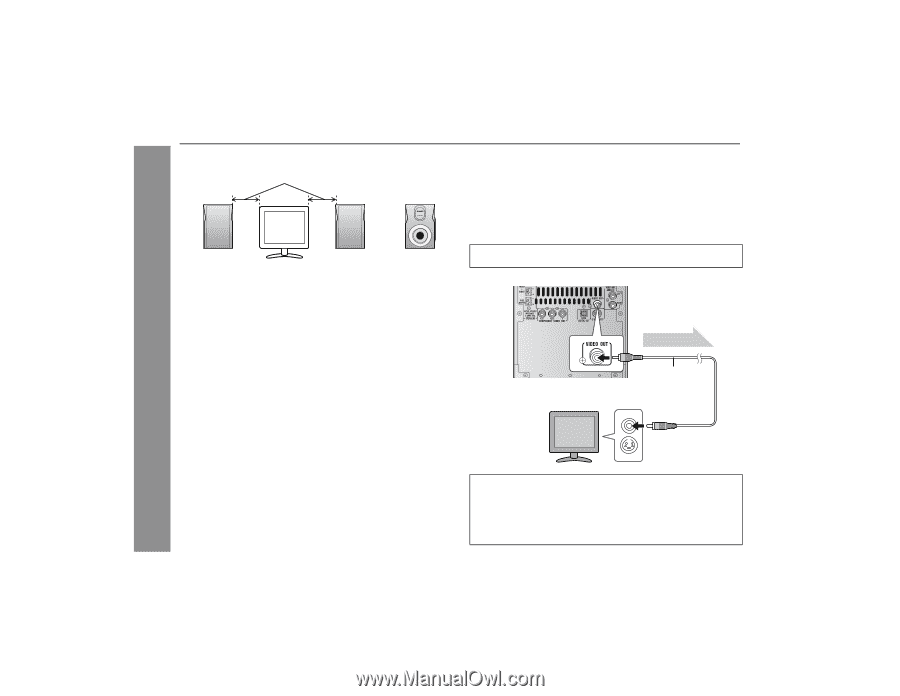
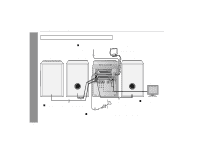
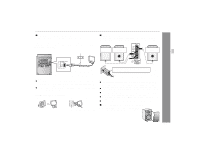
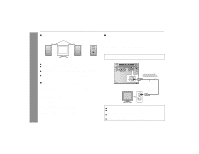
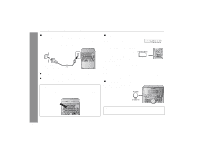
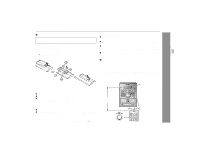
Preparation for Use XL-DV60 16 System connections (continued) " Placing the speaker system Same distance Front speaker (left) Front speaker (right) Subwoofer Notes: ! Place the TV halfway between the front speakers. ! The bass sound from the subwoofer is omni-directional, however, it is recommended to place it as close as left and right speakers. ! Place the subwoofer on a sturdy and stable surface as it tends to vibrate while reproducing bass sounds. ! Keep the free space of at least 4" (10 cm) along the right side of the subwoofer. " Magnetically shielded speakers The speakers are magnetically shielded. Therefore, they do not affect the display even if you use them near the TV. However, some color variation may occur, depending on the type of TV used. If color variation occurs... Turn off the TV (from the power switch). After 15 - 30 minutes, turn the TV on again. If the color variation is still present... Move the speakers further away from the TV. If any kind of magnet or an electromagnet is placed too close to the TV and the system, irregular colors may appear on the TV screen. " TV connection Three types of jacks (VIDEO OUT, S-VIDEO OUT and COMPONENT VIDEO OUT) are available for connection of a TV and this unit. Connect according to your TV. Connecting to a TV with a video input jack: You can enjoy DVD images by connecting your TV and this unit with the supplied video cable. Set the video mode to "Interlace" (default setting). For the procedure, refer to "Changing the video mode" on page 17. Video signal Video cable (supplied) TV To video input jack Notes: ! Change the TV input in accordance with the connected jack. ! Do not connect other equipment (VCR, etc.) between the TV and this unit. Pictures may be distorted. ! Refer to the operation manual of the equipment to be connect- ed. ! Insert the plugs fully to avoid fuzzy pictures or noise.
-
 1
1 -
2
-
3
-
4
-
5
-
6
-
7
-
8
-
9
-
10
-
 11
11 -
 12
12 -
 13
13 -
 14
14 -
 15
15 -
 16
16 -
 17
17 -
 18
18 -
 19
19 -
 20
20 -
 21
21 -
22
-
23
-
24
-
25
-
26
-
27
-
28
-
29
-
30
-
31
-
32
-
33
-
34
-
35
-
36
-
37
-
38
-
39
-
40
-
41
-
42
-
43
-
44
-
45
-
46
-
47
-
48
-
49
-
50
-
51
-
52
-
53
-
54
-
55
-
56
 |
 |