Singer 1 One Instruction Manual 9 - Page 24
Piping a Ruffle, To Adjust the Ruffler for Plaiting
 |
View all Singer 1 One manuals
Add to My Manuals
Save this manual to your list of manuals |
Page 24 highlights
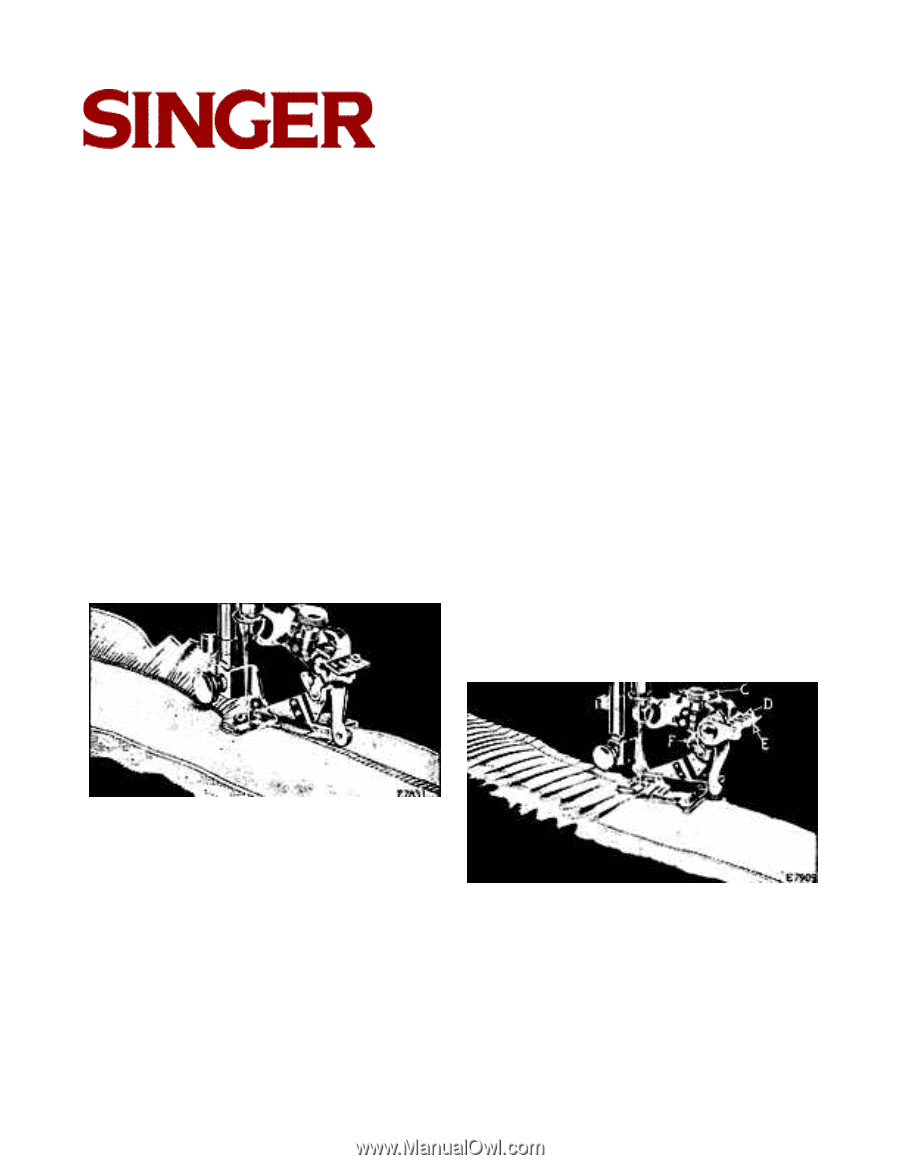
127-3 & 128-3 Piping a Ruffle To Adjust the Ruffler for Plaiting Insert the material to be ruffled between the two blue blades, following the line 2, in Fig. 26. This material must not be over 1 1/4 inches wide, as it is carried through the ruffler with the finished edge of the ruffle to the right of the attachment as shown In Fig. 30 The material for piping must measure about 1/4 inch wide when folded in the centre and is usually cut on the bias. Place the piping material in the ruffler, following the line 4, in Fig. 26, with the folded edge of the piping to the right. The material to which the piping and ruffling are to be sewn should be folded on the edge and inserted in the ruffler, following the line 5, in Fig. 26. Raise the adjusting lever (E, Fig. 31) and move it to the right so that the projection (D, Fig. 31) will enter the slot marked "6" in the adjusting lever when the lever is released. The ruffling blade will then move forward and back once at every six stitches. To adjust the ruffling blade to make a plait once at every twelve stitches, place the adjusting lever (E, Fig. 31) so that the projection (D) enters the slot marked "12" in the adjusting lever. Insert the material to be plaited between the two blue blades, following the line 2, (Fig. 26). The size or width of plaits is regulated by the adjusting screw (C, Fig. 31) and the adjusting finger (F, Fig. 31). To make a wider plait, move the adjusting finger (F) back or toward the needle and turn the adjusting screw (C) downwardly. To make a smaller plait, turn the adjusting screw (C) upwardly. The distance between plaits is regulated by the length of stitch. FIG. 30. Table of Contents FIG. 31. Previous Page | Next Page 24
-
 1
1 -
2
-
3
-
4
-
5
-
6
-
7
-
8
-
9
-
10
-
11
-
12
-
13
-
14
-
15
-
16
-
17
-
18
-
 19
19 -
 20
20 -
 21
21 -
 22
22 -
 23
23 -
 24
24 -
 25
25 -
 26
26
 |
 |