Singer 1 One Instruction Manual 9 - Page 6
Table of Contents
 |
View all Singer 1 One manuals
Add to My Manuals
Save this manual to your list of manuals |
Page 6 highlights
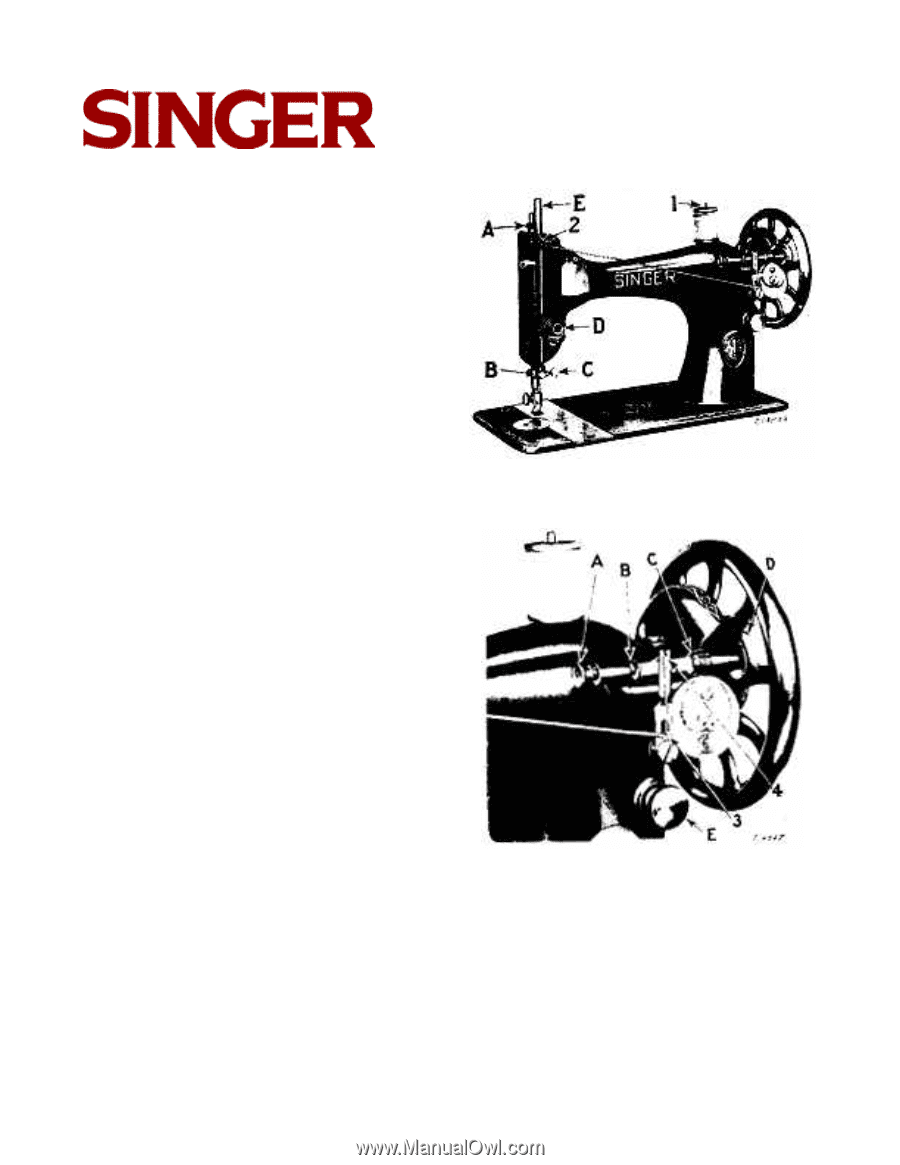
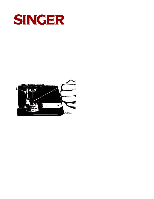
127-3 & 128-3 To Wind the Bobbin Release the balance wheel (D, Fig. 3) by turning the stop motion screw (E, Fig. 3) over toward you. Draw to the left the knob (A, Fig. 6, page 7) and place the bobbin between the cups (B and C, Fig. 6), then release the knob. Push the bobbin winder pulley (D, Fig. 6) against the hub of the balance wheel, and turn the balance wheel until the thread guide (4, Fig. 6) moves to the extreme right. Put the spool of thread on the spool pin (1, Fig. 5). Pass the end of the thread into the thread guide (2, Fig. 5) at the top of the face plate, then up into the lower eyelet (3, Fig. 6) of the bobbin winder thread guide, into the notch (4, Fig. 6). With the thumb and forefinger of the left hand press the bobbin lightly to the left and place the end of the thread between the bobbin and the cup (C, Fig. 6) at the right. Then operate the machine the same as for sewing. When the bobbin is filled, remove it from the bobbin winder, pull the bobbin winder away from the hub of the balance wheel and turn the stop motion screw over from you to connect the stitching mechanism. Fig. 5. MACHINE THREADED FOR WINDING THE BOBBIN Table of Contents FIG. 6 WINDING THE BOBBIN Previous Page | Next Page 6
-
 1
1 -
 2
2 -
 3
3 -
 4
4 -
 5
5 -
 6
6 -
 7
7 -
 8
8 -
 9
9 -
 10
10 -
 11
11 -
 12
12 -
13
-
14
-
15
-
16
-
17
-
18
-
19
-
20
-
21
-
22
-
23
-
24
-
25
-
26
 |
 |