Singer S18 I STUDIO Instruction Manual - Page 32
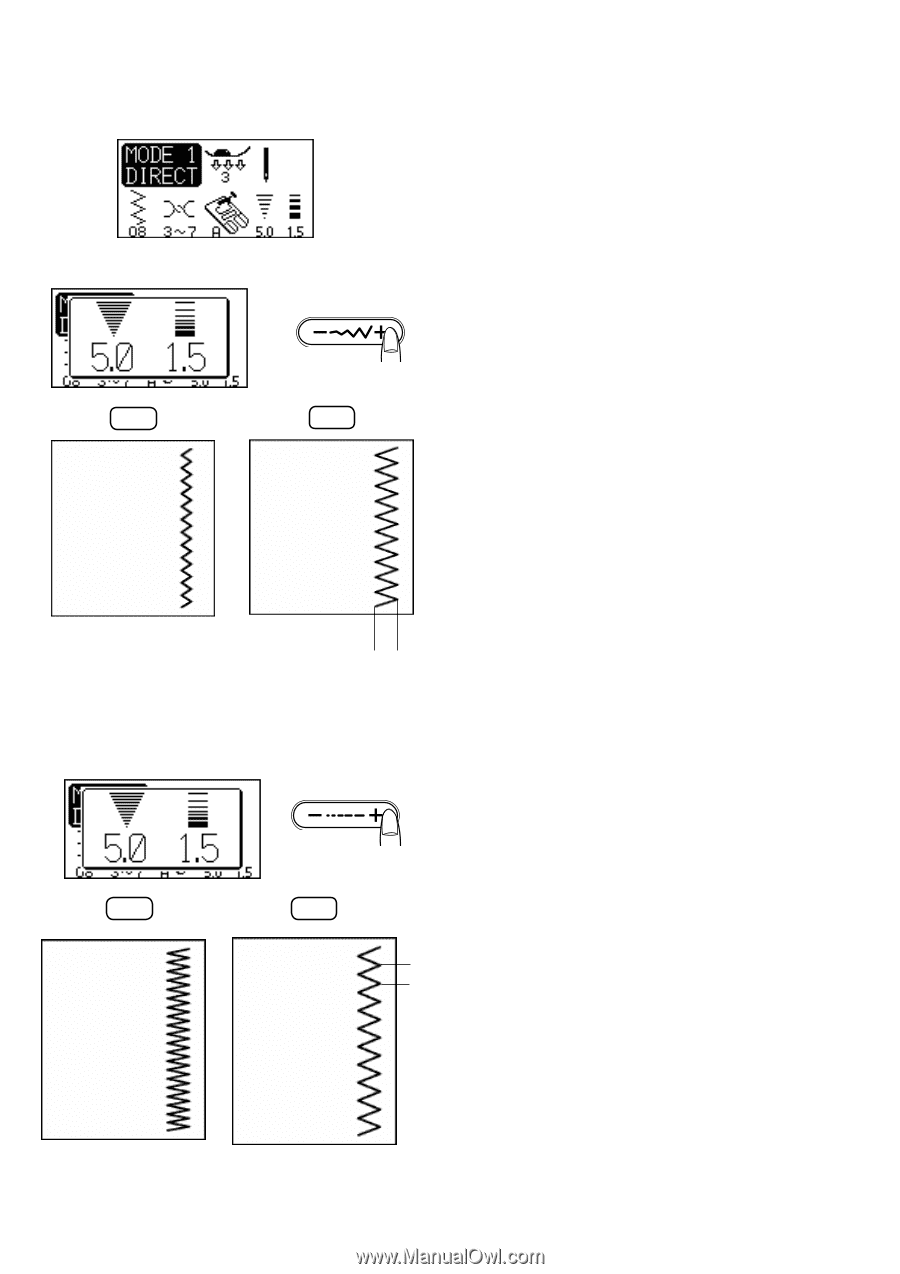
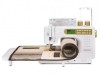
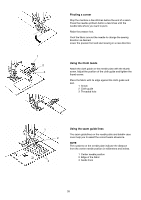
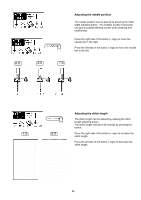
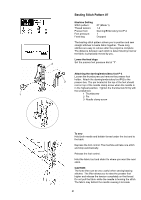
Zigzag Stitch Pattern 08, Adjusting the stitch width, Adjusting the stitch length
 |
View all Singer S18 I STUDIO manuals
Add to My Manuals
Save this manual to your list of manuals |
Page 32 highlights
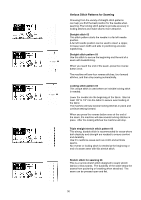
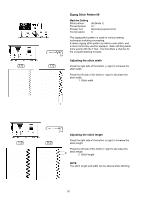
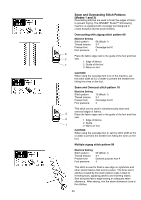
Zigzag Stitch Pattern 08 Machine Setting Stitch pattern: Thread tension: Presser foot: Foot pressure: 08 (Mode 1) 3-7 General purpose foot A 3 The zigzag stitch pattern is used for various sewing techniques including overcasting. A dense zigzag stitch pattern is called a satin stitch, and is most commonly used for appliqué. Satin stitching feeds more evenly with the F foot. The foot offers a channel for the compact stitching to travel. Adjusting the stitch width 2.0 7.0 Press the right side of the button (+ sign) to increase the stitch width. Press the left side of the button (- sign) to decrease the stitch width. 1 Stitch width 1 Adjusting the stitch length Press the right side of the button (+ sign) to increase the 1.0 5.0 stitch length. Press the left side of the button (- sign) to decrease the 2 stitch length. 2 Stitch length NOTE The stitch length and width can be altered while stitching. 32
-
 1
1 -
2
-
3
-
4
-
5
-
6
-
7
-
8
-
9
-
10
-
11
-
12
-
13
-
14
-
15
-
16
-
17
-
18
-
19
-
20
-
21
-
22
-
23
-
24
-
25
-
26
-
 27
27 -
 28
28 -
 29
29 -
 30
30 -
 31
31 -
 32
32 -
 33
33 -
 34
34 -
 35
35 -
 36
36 -
 37
37 -
38
-
39
-
40
-
41
-
42
-
43
-
44
-
45
-
46
-
47
-
48
-
49
-
50
-
51
-
52
-
53
-
54
-
55
-
56
-
57
-
58
-
59
-
60
-
61
-
62
-
63
-
64
-
65
-
66
-
67
-
68
-
69
-
70
-
71
-
72
-
73
-
74
-
75
 |
 |