Sony CCD-TRV308 Operating Instructions
Sony CCD-TRV308 - Hi8 Camcorder With 2.5"LCD Manual
 |
UPC - 027242600508
View all Sony CCD-TRV308 manuals
Add to My Manuals
Save this manual to your list of manuals |
Sony CCD-TRV308 manual content summary:
- Sony CCD-TRV308 | Operating Instructions - Page 1
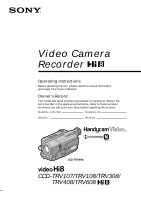
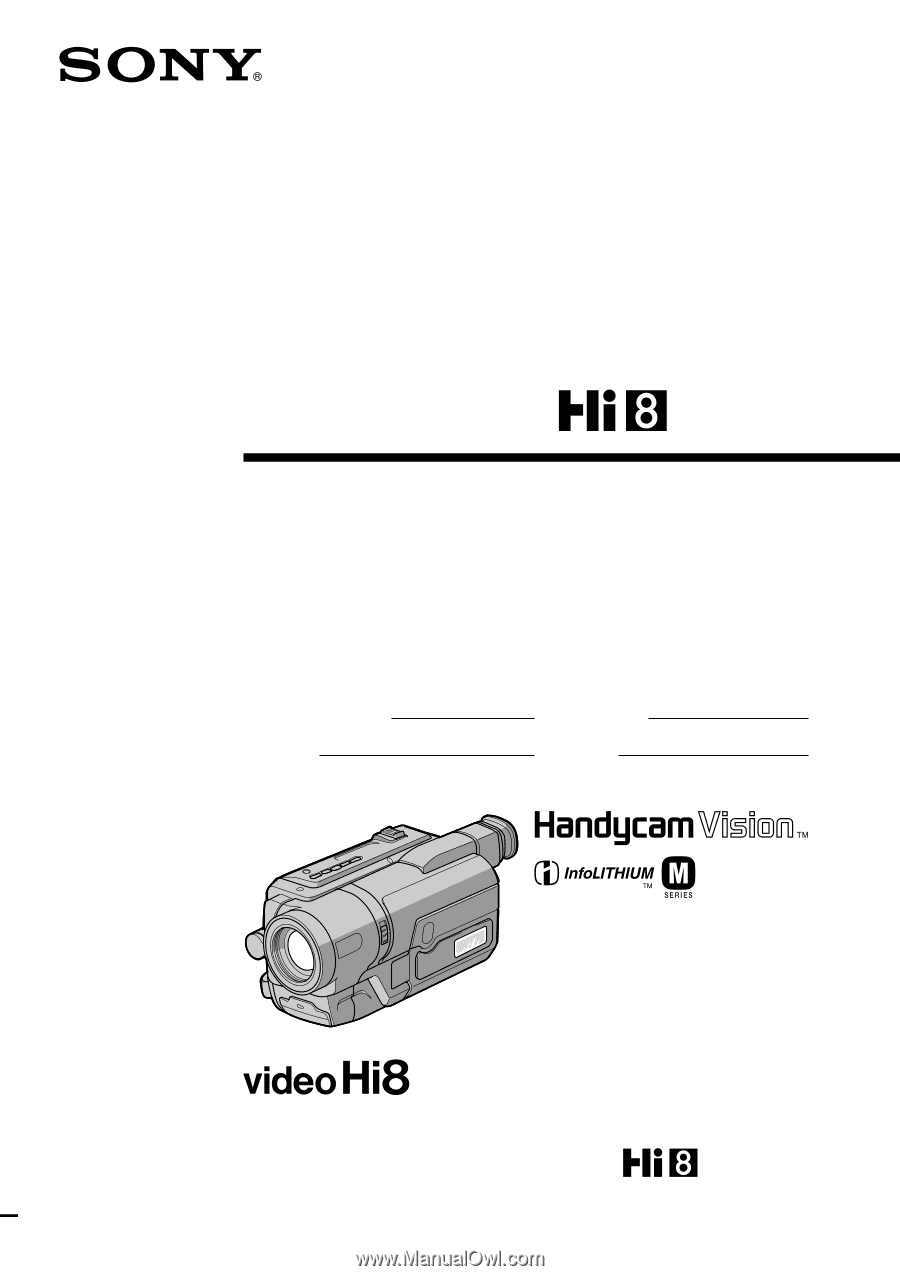
3-072-314-13 (1) Video Camera Recorder Operating Instructions Before operating the unit, please read this manual thoroughly, and retain it for future reference. Owner's Record The model and serial numbers are located on the bottom. Record the serial number in the space provided below. Refer to - Sony CCD-TRV308 | Operating Instructions - Page 2
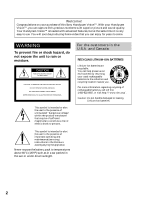
to persons. This symbol is intended to alert the user to the presence of important operating and maintenance (servicing) instructions in the literature accompanying the appliance. Never expose the battery pack to temperatures above 60°C (140°F) such as in a car parked in the sun or under direct - Sony CCD-TRV308 | Operating Instructions - Page 3
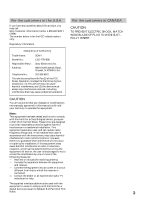
Name: SONY Model No.: CCD-TRV608 Responsible Party: Sony Electronics expressly approved in this manual could void your digital device, pursuant to Part 15 of the FCC Rules accordance with the instructions, may cause TV technician for help. The supplied interface cable must be used with the equipment - Sony CCD-TRV308 | Operating Instructions - Page 4
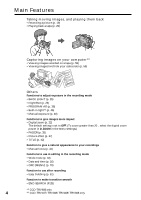
images on your computer*1) •Viewing images recorded on a tape (p. 59) •Viewing images live from your camcorder (p. 59) Others Functions to adjust exposure in the recording mode •BACK LIGHT (p. 25) •NightShot (p. 26) •PROGRAM AE (p. 38) • Built-in light*2) (p. 46) •Manual exposure (p. 40) Functions - Sony CCD-TRV308 | Operating Instructions - Page 5
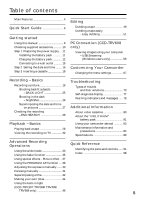
back a tape 29 Viewing the recording on TV 32 Troubleshooting Types of trouble and their solutions 73 Self-diagnosis display 77 Warning indicators and messages ...... 78 Additional Information About video cassettes 80 About the "InfoLITHIUM" battery pack 81 Using your camcorder abroad 83 - Sony CCD-TRV308 | Operating Instructions - Page 6
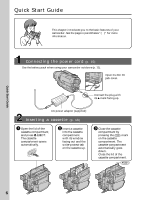
page in parentheses "( )" for more information. Connecting the power cord (p. 15) Use the battery pack when using your camcorder outdoors (p. 11). Open the DC IN jack cover. Connect the plug with its v mark facing up. AC power adaptor (supplied) Inserting a cassette (p. 18) 1 Open the lid of - Sony CCD-TRV308 | Operating Instructions - Page 7
RA Quick Start Guide Recording a picture (p. 19) 1 Remove the lens cap. 2 Set the POWER switch to CAMERA PL while pressing the POWER small green button. AYER OFF(CHG) CAME AYER OFF(CHG) 4 Press START/STOP. Your camcorder PL starts recording. To POWER stop recording, press START - Sony CCD-TRV308 | Operating Instructions - Page 8
Set the POWER switch to CAMERA. When you carry out an operation, you can hear a beep sound to indicate that the operation is being carried out. Types of differences CCD- TRV107 Digital Zoom 450× LCD Screen 6.2 cm (2.5 type) Built-in light z Remote sensor z SteadyShot - USB Streaming - Sony CCD-TRV308 | Operating Instructions - Page 9
Getting started Using this manual Note on TV color systems TV color systems differ from country to country. To view your recordings on a TV, you need an NTSC system-based TV. Precautions on camcorder care Lens and LCD screen/finder (on mounted models only) •The LCD screen and the finder are - Sony CCD-TRV308 | Operating Instructions - Page 10
following accessories are supplied with your camcorder. 1 2 3 4 5 6 7 8 9 1 Wireless Remote Commander (CCDTRV107/TRV408 only) (1) (p. 96) 2 AC-L10A/L10B/L10C AC power adaptor (1), Power cord (1) (p. 15) 3 NP-FM30 battery pack (1) (p. 11, 12) 4 Size AA (R6) battery for Remote Commander (CCD - Sony CCD-TRV308 | Operating Instructions - Page 11
Getting started Step 1 Preparing the power supply Installing the battery pack Slide the battery pack down until it clicks. To remove the battery pack Slide the battery pack out in the direction of the arrow while pressing V BATT down. V BATT release lever 11 - Sony CCD-TRV308 | Operating Instructions - Page 12
for details of the "InfoLITHIUM" battery pack. (1) Open the DC IN jack cover and connect the AC power adaptor supplied with your camcorder to the DC IN jack with the plug's v mark facing up. (2) Connect the power cord to the AC power adaptor. (3) Connect the power cord to a wall outlet. (4) Set the - Sony CCD-TRV308 | Operating Instructions - Page 13
1 Preparing the power supply Note Prevent metallic objects from coming into contact with the metal parts of the DC plug of the AC power adaptor. This may cause a short-circuit, damaging the AC power adaptor. Remaining battery time indicator The remaining battery time you record with the viewfinder - Sony CCD-TRV308 | Operating Instructions - Page 14
shorter if you use your camcorder in a cold environment. ** Approximate number of minutes when recording while you repeat recording start/ stop, zooming and turning the power on/off. The actual battery life may be shorter. Playing time CCD-TRV107/TRV108/TRV308/TRV408 Battery pack Playing time on - Sony CCD-TRV308 | Operating Instructions - Page 15
the power cord is not plugged into a wall outlet. •Place the AC power adaptor near a wall outlet. While using the AC power adaptor, if any trouble occurs with this unit, disconnect the plug from the wall outlet as soon as possible to cut off the power. Using a car battery Use Sony DC Adaptor/Charger - Sony CCD-TRV308 | Operating Instructions - Page 16
power switch to CAMERA unless you set the date and time settings. If you do not use your camcorder for about 6 months, the date and time settings may be released (bars may appear) because the built-in rechargeable battery in your camcorder AM 6 SETUP MENU CLOCK SET USB STREAM AUTO DATE 2002 JUL - Sony CCD-TRV308 | Operating Instructions - Page 17
camcorder for the first time, turn it on and set the date and time to your local time before you start recording (p. 16). The date is automatically recorded for 10 seconds after you start recording time. - you eject and insert the tape again. - you stop recording within 10 seconds. - you set AUTO DATE - Sony CCD-TRV308 | Operating Instructions - Page 18
a cassette When you want to record in the Hi8 system, use Hi8 video cassettes. (1) Prepare the power supply (p. 11). (2) Open the lid not be closed when you press any part of the cassette compartment other than the mark. •Do not pick up your camcorder by the lid of the cassette compartment - Sony CCD-TRV308 | Operating Instructions - Page 19
11 to 18). (3) Set the POWER switch to CAMERA while pressing the small green button. Your camcorder is set to the standby mode. (4) Open the LCD panel while pressing OPEN. The viewfinder automatically turns off. (5) Press START/STOP. Your camcorder starts recording. The REC indicator appears. The - Sony CCD-TRV308 | Operating Instructions - Page 20
off. This is to save battery power and to prevent battery and tape wear. To resume the standby mode for recording, set the POWER switch to OFF (CHG) once, then turn it to CAMERA, or press START/STOP without chainging the POWER switch again to start recording. If your camcorder is in the standby mode - Sony CCD-TRV308 | Operating Instructions - Page 21
recorded. Adjusting the brightness of the LCD screen (1) In CAMERA recording (1) Set the POWER switch to OFF (CHG). (2) Close the LCD panel. (3) Eject the cassette. (4) Attach the lens cap. After using your camcorder (CCD-TRV107/TRV308/TRV408/TRV608 only) Remove the battery pack from your camcorder - Sony CCD-TRV308 | Operating Instructions - Page 22
a picture Using the zoom feature Move the power zoom lever a little for a slower zoom. Move it further for a faster zoom. Using the zoom function sparingly results in better-looking recordings. "T" side: for telephoto (subject appears closer) "W" side: for wide-angle (subject appears farther - Sony CCD-TRV308 | Operating Instructions - Page 23
record pictures with the LCD panel closed, check the picture with the viewfinder. Adjust the viewfinder lens to your eyesight so that the indicators in the viewfinder come into sharp focus. Lift up the viewfinder and move the viewfinder lens adjustment lever. Viewfinder backlight (CCD-TRV107/TRV308 - Sony CCD-TRV308 | Operating Instructions - Page 24
indicators are not recorded on tape. Remaining battery time indicator Hi8 format indicator This appears while playing back or recording in Hi8 format. Recording mode indicator/Mirror mode indicator STBY/REC indicator 40min SP REC 0:00:01 Tape counter indicator Remaining tape indicator This appears - Sony CCD-TRV308 | Operating Instructions - Page 25
Recording - Basics Recording a picture Shooting backlit subjects - BACK LIGHT When you shoot a subject with the light source behind the subject or a subject with a light background, use the backlight function. Press BACK LIGHT in CAMERA mode. The . indicator appears on the screen. To cancel, press - Sony CCD-TRV308 | Operating Instructions - Page 26
record the environment of nocturnal animals for observation when you use this function. While your camcorder is in CAMERA mode recording, the picture may be recorded in incorrect or unnatural colors. •If focusing is difficult with the autofocus mode when using the NightShot function, focus manually - Sony CCD-TRV308 | Operating Instructions - Page 27
TIME When you purchase your camcorder, the clock setting is set to off. Set the date and time to your local time before using (p. 16). Note The date and time indicators recorded manually cannot be deleted. If you do not record the date and time in the picture Record the date and time in the - Sony CCD-TRV308 | Operating Instructions - Page 28
- END SEARCH You can use this button to record a picture from the last recorded scene successively. END SEARCH You can go to the end of the recorded section after you record. Press END SEARCH in CAMERA mode. The last 5 seconds of the recorded section are played back and returns to the standby - Sony CCD-TRV308 | Operating Instructions - Page 29
Install the power source and insert the recorded tape. (2) Set the POWER switch to camcorder is silent when the LCD panel is closed. You can control playback using the Remote Commander supplied with your camcorder. (CCD-TRV107/TRV408 only) AYER OFF(CHG) 4 REW 5 2 PL POWER PLAY RA CAME 3 CCD - Sony CCD-TRV308 | Operating Instructions - Page 30
Playing back a tape When monitoring on the LCD screen You can turn the LCD panel over and move it back to the camcorder body with the LCD screen function Press DISPLAY on your camcorder or the Remote Commander (CCD-TRV107/TRV408 only) supplied with your camcorder. The indicators appear on the - Sony CCD-TRV308 | Operating Instructions - Page 31
enters the stop mode. To resume playback, press N. If slow playback lasts for about 1 minute (CCD-TRV107/TRV408 only) Your camcorder automatically returns to normal speed. When you play back a tape recorded in the LP mode Noise may appear during playback pause mode, slow playback* or picture search - Sony CCD-TRV308 | Operating Instructions - Page 32
IN input on the VCR by using the A/V connecting cable supplied with your camcorder. Set the input selector on the VCR to LINE. To connect to a TV without Video/Audio input jacks Use an NTSC system RFU adaptor (optional). Refer to the operating instructions of your TV and the RFU adaptor. If your - Sony CCD-TRV308 | Operating Instructions - Page 33
picture (CINEMA) or a 16:9 wide picture to watch on the 16:9 wide-screen TV (16:9FULL). Refer to the operating instructions of your TV. CINEMA Black bands appear on the screen during recording in the CINEMA mode [a], playing back on a normal TV [b] or a wide-screen TV [c]. If you set the screen mode - Sony CCD-TRV308 | Operating Instructions - Page 34
wide mode In CAMERA mode, set 16:9WIDE to CINEMA or 16:9FULL in (p. 68). in the menu settings MENU To cancel the wide mode Set 16:9WIDE to OFF in the menu settings. If the wide mode is set to 16:9FULL (CCD-TRV308/TRV408/TRV608 only) The SteadyShot function does not work - Sony CCD-TRV308 | Operating Instructions - Page 35
Operations Using the fader function You can fade in or out to give your recording a professional appearance. FADER M.FADER (mosaic) STRIPE BOUNCE (Fade in only) MONOTONE When fading in, the picture gradually changes from black-and-white to color. When - Sony CCD-TRV308 | Operating Instructions - Page 36
until the desired fader indicator flashes. When fading out [b] In the recording mode, press FADER until the desired fader indicator flashes. The indicator stops flashing. After the fade in/out is carried out, your camcorder automatically returns to the normal mode. 1 FADER FADER To cancel the - Sony CCD-TRV308 | Operating Instructions - Page 37
STRETCH [f] : The picture expands horizontally. Advanced Recording Operations (1) In CAMERA mode, select P EFFECT in in the menu P EFFECT to OFF in the menu settings. When you set the POWER switch to OFF (CHG) Your camcorder automatically returns to the normal mode. MANUA L SET PROGRAM AE OFF - Sony CCD-TRV308 | Operating Instructions - Page 38
mode allows you to maintain atmosphere when you are recording sunsets, general night views, fireworks displays and neon signs. LANDSCAPE (Landscape) This mode is for when you are recording distant subjects such as mountains and prevents your camcorder from focusing on glass or metal mesh in windows - Sony CCD-TRV308 | Operating Instructions - Page 39
Recording Operations Using the PROGRAM AE function (1) In CAMERA mode, select PROGRAM AE in in the menu settings (p. 68). (2) Select the desired PROGRAM AE mode in the menu settings, then press the SEL/PUSH EXEC dial. 1 MANUAL & moon and landscape modes, your camcorder is set to focus only on - Sony CCD-TRV308 | Operating Instructions - Page 40
manually in the following cases: - The subject is backlit - Bright subject and dark background - To record dark pictures (e.g. night scenes) faithfully (1) In CAMERA you adjust the exposure manually, the backlight function does not work in CAMERA mode. Your camcorder automatically returns to the - Sony CCD-TRV308 | Operating Instructions - Page 41
Advanced Recording Operations Focusing manually You can gain better results by manually adjusting the focus in the following a subject in the background. •Shooting a stationary subject when using a tripod. (1) In CAMERA mode, press FOCUS. The 9 indicator appears on the screen. (2) Turn the SEL/PUSH - Sony CCD-TRV308 | Operating Instructions - Page 42
select the language, color, size, and position of titles. 42 (1) In CAMERA mode, press TITLE to display the title menu. (2) Turn the SEL/ dial again to complete the setting. (6) Press START/STOP to start recording. (7) When you want to stop recording the title, press TITLE. 1 T I TLE PRESET T I - Sony CCD-TRV308 | Operating Instructions - Page 43
screen. When you superimpose a title while you are recording The beep does not sound. While you are playing back You can superimpose a title. However, the title is not recorded on tape. You can record a title when you dub a tape connecting your camcorder to the VCR with the A/V connecting cable. 43 - Sony CCD-TRV308 | Operating Instructions - Page 44
Making your own titles You can make up to two titles and store them in your camcorder. Each title can have up to 20 characters. (1) In CAMERA or PLAYER mode, press TITLE. (2) Turn the SEL/PUSH EXEC dial to select , then press the dial. (3) Turn the SEL/PUSH EXEC dial to select - Sony CCD-TRV308 | Operating Instructions - Page 45
is in your camcorder The power automatically turns off. The characters you have entered remain stored in memory. Set the POWER switch to OFF (CHG) once, and turn it to CAMERA again, then is erased. To enter a space Select [Z& ?!], then select the blank part. Advanced Recording Operations 45 - Sony CCD-TRV308 | Operating Instructions - Page 46
- CCD-TRV107/TRV308/TRV408/TRV608 only You can use the built-in light to suit your shooting situation. The recommended distance between the subject and camcorder is about 1.5 m (5 feet). Press LIGHT repeatedly, until the indicator appears on the screen while your camcorder is in CAMERA mode - Sony CCD-TRV308 | Operating Instructions - Page 47
in use. •When you do not use your camcorder, turn the built-in light off and remove the battery pack to avoid turning on the built-in light Sony XB-3D halogen lamp (optional). The supplied halogen lamp is not commercially available. Purchase the Sony XB-3D halogen lamp. Remove the power - Sony CCD-TRV308 | Operating Instructions - Page 48
Using the built-in light CAUTION •When replacing the bulb, use only the Sony XB-3D halogen lamp (optional) to reduce the risk of fire. •To prevent possible burn hazard, disconnect the power source before replacing and do not touch the bulb until the bulb becomes cool enough to handle (for about 30 - Sony CCD-TRV308 | Operating Instructions - Page 49
Set the POWER switch to PLAYER. (4) Play back the recorded tape on your camcorder. (5) Start recording on the VCR. Refer to the operating instructions of your VCR for more information. S VIDEO OUT A / V OUT Yellow IN S VIDEO : Signal flow A/V connecting cable (supplied) Black VIDEO AUDIO 49 - Sony CCD-TRV308 | Operating Instructions - Page 50
When you have finished dubbing a tape Press x on both your camcorder and the VCR. To prevent deterioration of pictures when dubbing Set EDIT to ON in the menu settings before dubbing. You can edit on VCRs that support the following systems: 8 mm , Hi8 , Digital 8 , VHS , S-VHS , VHSC , S-VHSC - Sony CCD-TRV308 | Operating Instructions - Page 51
in page 49. You can edit on VCRs that support the following systems: 8 mm , Hi8 , Digital 8 , VHS , S-VHS , VHSC , S-VHSC , Betamax , ED Betamax , mini DV , or DV If your VCR has an S video jack Connect using an S video cable (optional) to obtain optimum quality screen images. With this - Sony CCD-TRV308 | Operating Instructions - Page 52
the VCR by wireless remote control. (1) Setting the modes to cancel recording pause on the VCR 1 Set the POWER switch to PLAYER on your camcorder. 2 Turn the power of the connected VCR on, then set the input selector to LINE. When you connect a video camera recorder, set its power switch to VTR/VCR - Sony CCD-TRV308 | Operating Instructions - Page 53
Dubbing a tape easily - Easy Dubbing (2) Setting the IR SETUP code 1 Turn the SEL/PUSH EXEC dial to select IR SETUP, then press the dial. 2 Turn the SEL/PUSH EXEC dial to select the IR SETUP code of your VCR, then press the dial. Check the code in "About the IR SETUP code" (p. 54). 1 EASY DUBBING - Sony CCD-TRV308 | Operating Instructions - Page 54
tape easily - Easy Dubbing About the IR SETUP code The IR SETUP code is stored in the memory of your camcorder. Be sure to set the correct code depending on your VCR. The default setting is Code number 3. Brand IR SETUP code Sony 94*, 101 Goldstar/LG 47 GO VIDEO 71 Hitachi 78, 8, 42 HQ - Sony CCD-TRV308 | Operating Instructions - Page 55
of your camcorder and face it towards the remote sensor of the VCR. Set the devices about 30 cm (12 in.) apart, and remove any obstacles between the devices. Infrared rays emitter Editing Remote sensor A/V connecting cable (supplied) (4) Confirming the VCR operation 1 Insert a recordable tape into - Sony CCD-TRV308 | Operating Instructions - Page 56
Dubbing a tape easily - Easy Dubbing Step 3: Selecting the title You can select title, color, size, and background color. CUSTOM1 and CUSTOM2 are custom titles stored in your camcorder as instructed in "Making your own titles" (p. 44). HELLO! (1) Press EASY DUBBING to display the menu. (2) Turn the - Sony CCD-TRV308 | Operating Instructions - Page 57
tape easily - Easy Dubbing Step 4: Selecting the dubbing mode You can choose either normal recording (NORMAL) or interval recording by setting the camcorder to automatically playback and standby sequentially. [a]: Recording (VCR) [b]: Waiting time (VCR) [c]: Playback time (camcorder) [a] 5 s - Sony CCD-TRV308 | Operating Instructions - Page 58
Dubbing a tape easily - Easy Dubbing Step 5: Performing Easy Dubbing Make sure that your camcorder and VCR are connected, and that the VCR is set to recording pause. When you use a video camera recorder, set its POWER switch to VTR/VCR. Set the POWER switch of your camcorder to PLAYER. (1) Turn the - Sony CCD-TRV308 | Operating Instructions - Page 59
PC Connection - PC Connection - Viewing images using your computer - USB Streaming (Windows users only) - CCD-TRV608 only If you connect your camcorder and computer by the supplied USB cable, you can view images live from your camcorder and images recorded on a tape on your computer. Furthermore, - Sony CCD-TRV308 | Operating Instructions - Page 60
are not mentioned in this manual. Installing the USB driver Before connecting your camcorder to your computer, install the USB driver to the computer. The USB driver is contained together with application software for viewing images on the CD-ROM supplied with your camcorder. Be sure to follow the - Sony CCD-TRV308 | Operating Instructions - Page 61
(6) Set the POWER switch to CAMERA or PLAYER. (7) Select USB STREAM to ON in in the menu settings (p. 71). (8) With the CD-ROM inserted, connect the USB jack on your camcorder to the USB connector on your computer using the supplied USB cable. Your computer recognises the camcorder, and the Windows - Sony CCD-TRV308 | Operating Instructions - Page 62
Viewing images using your computer - USB Streaming (Windows users only) 3 Connect the AC power adaptor, and set the POWER switch to CAMERA or PLAYER. 4 Open your computer's "Device Manager." Windows XP: Select "Start" t "Control Panel" t "System" t "Hardware" tab, and click the "Device Manager" - Sony CCD-TRV308 | Operating Instructions - Page 63
listed in "Installing the USB driver" on the page 60. Installing "PIXELA ImageMixer Ver.1.0 for Sony" Install "PIXELA ImageMixer Ver.1.0 for Sony" to your computer. "PIXELA ImageMixer Ver.1.0 for Sony" is contained on the CD-ROM supplied with your camcorder. You can view video images easily on your - Sony CCD-TRV308 | Operating Instructions - Page 64
recorded on a tape (1) Turn on your computer and allow Windows to load. (2) Connect one end of the USB cable to the USB jack on the camcorder and the other end to the USB connector on your computer using the supplied USB cable. To the USB connector Computer To the (USB) jack USB cable (supplied - Sony CCD-TRV308 | Operating Instructions - Page 65
PC Connection Viewing images using your computer - USB Streaming (Windows users only) Viewing images live from your camcorder (1) Follow the procedure (1) - (2) on page 64, and then connect the AC power adaptor to your camcorder and then to a wall outlet. (2) Set the POWER switch to CAMERA. (3) - Sony CCD-TRV308 | Operating Instructions - Page 66
the USB driver (p. 60). If any trouble occurs Close all running applications, then restart it. Carry out the following operations after quitting the application: - disconnect the USB cable - turn on/off the power Seeing the on-line help (operation manual) of "PIXELA ImageMixer Ver.1.0 for Sony - Sony CCD-TRV308 | Operating Instructions - Page 67
- Customizing Your Camcorder - Changing the menu settings To change the mode settings in the menu settings, select the menu items with the SEL/ PUSH EXEC dial. The default settings can be partially changed. First, select the icon, then the menu item and then the mode. (1) In CAMERA or PLAYER mode - Sony CCD-TRV308 | Operating Instructions - Page 68
: MANUAL SET CAMERA SET PLAYER SET LCD/VF SET TAPE SET SETUP MENU OTHERS Depending on your camcorder model The menu display may be different from that in this illustration. Selecting the mode setting of each item z is the default setting. Menu items differ according to the position of the POWER - Sony CCD-TRV308 | Operating Instructions - Page 69
settings, the indicator flashes. If you cancel the SteadyShot function* The SteadyShot off indicator appears. Your camcorder prevents excessive compensation for camera-shake. * CCD-TRV308/TRV408/TRV608 only Icon/item Mode Meaning POWER switch EDIT z OFF - PLAYER ON To minimize picture - Sony CCD-TRV308 | Operating Instructions - Page 70
CAMERA Notes on the LP mode •When you record a tape in the LP mode on your camcorder, we recommend playing back the tape on your camcorder. When you play back the tape on other camcorders or VCRs, noise may occur in images or sound. •When you record in the LP mode, we recommend using a Sony video - Sony CCD-TRV308 | Operating Instructions - Page 71
Korean. To make the demonstration appear. To cancel the demonstration mode. POWER switch CAMERA CAMERA PLAYER CAMERA PLAYER CAMERA PLAYER CAMERA CAMERA Notes on DEMO MODE •You cannot select DEMO MODE when a cassette is inserted in your camcorder. •DEMO MODE is set to STBY (Standby) at the factory - Sony CCD-TRV308 | Operating Instructions - Page 72
screen, and in the viewfinder To light up the recording lamp at the front of your camcorder when recording To turn the recording lamp off so that the subject is not aware of the recording POWER switch CAMERA PLAYER CAMERA PLAYER CAMERA PLAYER CAMERA CAMERA In more than 5 minutes after removing the - Sony CCD-TRV308 | Operating Instructions - Page 73
Troubleshooting - Troubleshooting - Types of trouble and their solutions If you run into any problem using your camcorder, use the following table to troubleshoot the problem. If the problem persists, disconnect the power source and contact your Sony dealer or local authorized Sony service facility - Sony CCD-TRV308 | Operating Instructions - Page 74
25) A horizontal black band appears when shooting a TV screen or computer screen.* • Set STEADYSHOT to OFF in the menu setting. (P. 68) * CCD-TRV308/TRV408/TRV608 only In the playback mode Symptom The tape does not move when a video control button is pressed. The playback button does not work - Sony CCD-TRV308 | Operating Instructions - Page 75
Cause and/or Corrective Actions • Your VCR and/or video camera recorder is not set correctly. c Make sure the input selector of the VCR is set to LINE. Also, make sure the power switch of the video camera is set to VTR/VCR. (p. 51) • The IR SETUP code or PAUSE MODE is not set correctly. c Select the - Sony CCD-TRV308 | Operating Instructions - Page 76
USB driver.*1) USB Streaming function does not work*1) The Remote Commander supplied with your camcorder does not work.*2) The date or time indicator does not appear, and the bars "--:--:--" appear. • Your camcorder was connected to your computer with the USB cable before installing the USB driver - Sony CCD-TRV308 | Operating Instructions - Page 77
operate your camcorder. c Disconnect the power cord of the AC power adaptor or remove the battery pack. After reconnecting the power source, operate your camcorder. • A malfunction that you cannot service has occurred. c Contact your Sony dealer or local authorized Sony service facility and inform - Sony CCD-TRV308 | Operating Instructions - Page 78
window, check the following: See the page in parentheses "( )" for more information. Warning indicators The video heads are dirty Slow flashing: - You need to clean the heads using the Sony V8-25CLD cleaning cassette (optional). (p. 85) The battery pack is dead or nearly dead Slow flashing: - The - Sony CCD-TRV308 | Operating Instructions - Page 79
BATTERY ONLY •Q NO TAPE*1) •Q TAPE END*1) • CLEANING CASSETTE*2) Set the date and time. (p. 16) Use an "InfoLITHIUM" battery pack. (p. 81) Insert a cassette tape. The tape has reached the end. The video and " CLEANING CASSETTE" message appear one after another on the screen. Troubleshooting 79 - Sony CCD-TRV308 | Operating Instructions - Page 80
out in the standard 8 mm system. However, if you record on a Hi8 video cassette in the LP mode, recording is carried out in the standard 8 mm system. If you play back a tape recorded on a different video recorder on your camcorder, the playback mode is automatically selected according to the - Sony CCD-TRV308 | Operating Instructions - Page 81
1. Fully charge the battery pack. 2. Discharge on your camcorder. 3. Remove the battery pack from your camcorder and store it in a dry, cool place. •To discharge the battery pack on your camcorder, leave your camcorder in CAMERA (standby) mode without a cassette inserted until the power goes off. 81 - Sony CCD-TRV308 | Operating Instructions - Page 82
it more and more, and as time passes. When the available battery time is shortened considerably, a probable cause is that the battery pack has reached the end of its life. Please buy a new battery pack. •The battery life varies according to storage and operating conditions, and environment for each - Sony CCD-TRV308 | Operating Instructions - Page 83
the AC power adaptor supplied with your camcorder within 100 V to 240 V AC, 50/60 Hz. When charging the battery pack, use a commercially available AC plug adaptor [a], if necessary, depending on the design of the wall outlet [b]. AC-L10A/L10B/L10C [a] [b] Your camcorder is an NTSC system based - Sony CCD-TRV308 | Operating Instructions - Page 84
it for about 1 hour with the cassette compartment open. Your camcorder can be used again if the % indicator does not appear when the power is turned on again. Note on moisture condensation Moisture may condense when you bring your camcorder from a cold place into a warm place (or vice versa) or - Sony CCD-TRV308 | Operating Instructions - Page 85
screen. Cleaning the video head To ensure normal recording and clear pictures, clean the video heads. The video head may be problem occurs, clean the video heads with the Sony V8-25CLD cleaning cassette (optional). Check the picture and if the above problem persists, repeat cleaning. Note on video - Sony CCD-TRV308 | Operating Instructions - Page 86
Camcorder operation •Operate your camcorder on 7.2 V (battery pack) or 8.4 V (AC power adaptor). •For DC or AC operation, use the accessories recommended in these operating instructions. •If any solid object or liquid get inside the casing, unplug your camcorder and have it checked by a Sony - Sony CCD-TRV308 | Operating Instructions - Page 87
used to sense the type and thickness of the tape and if the recording tab is in or out. Camcorder care •Remove the tape, and periodically turn on the power, operate the CAMERA and PLAYER sections and play back a tape for about 5 minutes when your camcorder is not to be used for a long time. •Clean - Sony CCD-TRV308 | Operating Instructions - Page 88
periodically perform the above. We recommend turning on and operating your camcorder at least once per month to keep your camcorder in an optimum state for a long time. Battery pack •Use only the specified charger or video equipment for the charging function. •To prevent an accidental short circuit - Sony CCD-TRV308 | Operating Instructions - Page 89
-TRV608: 123 200 (560 × 220) General Power requirements 7.2 V (battery pack) 8.4 V (AC power adaptor) Average power consumption (when using the battery pack) During camera recording using LCD CCD-TRV107/TRV108/TRV308/ TRV408: 2.6 W CCD-TRV608: 3.1 W Viewfinder 1.9 W Operating temperature 0 °C to 40 - Sony CCD-TRV308 | Operating Instructions - Page 90
Specifications Battery pack Maximum output voltage DC 8.4 V Output voltage DC 7.2 V Capacity 5.0 Wh (700 mAh) Operating temperature 0 °C to 40 °C (32 °F to 104 °F) Dimensions (approx.) 38.2 × 20.5 × 55.6 mm (1 9/ - Sony CCD-TRV308 | Operating Instructions - Page 91
- Quick Reference - Identifying the parts and controls Camcorder 1 7 2 8 3 9 4 5 q; 6 1 Eyecup 2 Viewfinder lens adjustment lever (p. 23) 3 V BATT release lever (p. 11) 4 USB connector (p. 61) (CCD-TRV608 only) 5 OPEN button (p. 19) qa 6 SEL/PUSH EXEC dial (p. 16, 67) 7 Power zoom lever (p. 22) - Sony CCD-TRV308 | Operating Instructions - Page 92
qs Video control buttons (p. 29, 31) x STOP (stop) m REW (rewind) N PLAY (playback)* M FF (fastforward) X PAUSE (pause) qd LIGHT button (p. 46) (CCD-TRV107/TRV308/TRV408/ TRV608 only) qf Recording lamp (p. 19) qg Infrared rays emitter (p. 26) * This button has a tactile dot. qj qk ql w; qh Remote - Sony CCD-TRV308 | Operating Instructions - Page 93
Identifying the parts and controls wa ws wd wf wg wh wa VOLUME +*/- buttons (p. 29) ws Speaker wd LCD screen (p. 19) wf EXPOSURE button (p. 40) wg TITLE button (p. - Sony CCD-TRV308 | Operating Instructions - Page 94
Identifying the parts and controls ef eg eh ef DATE button (p. 27) eg TIME button* (p. 27) eh COUNTER RESET button (p. 20) * This button has a tactile dot. 94 - Sony CCD-TRV308 | Operating Instructions - Page 95
the parts and controls ej r; ek el ej Z EJECT button (p. 18) ek Cassette compartment (p. 18) el Grip strap r; RESET button (p. 76) ra S VIDEO OUT jack (p. 32, 49, 51) Fastening the grip strap Fasten the grip strap firmly. ra rs rd rf rs Built-in light (p. 46) (CCD-TRV107/TRV308/TRV408 - Sony CCD-TRV308 | Operating Instructions - Page 96
Point toward the remote sensor to control the camcorder after turning on the camcorder. 2 Tape transport buttons (p. 31) 3 DISPLAY button (p. 30) 4 START/STOP button (p. 19) 5 Power zoom button (p. 22) To prepare the Remote Commander Insert 2 size AA (R6) batteries by matching the + and - Sony CCD-TRV308 | Operating Instructions - Page 97
(p. 78) ws Recording lamp (p. 19) This indicator appears in the viewfinder only. wd FULL charge indicator (p. 12) wf Tape counter indicator (p. 24)/ DATE or TIME indicator (p. 16, 27)/ Self-diagnosis display indicator (p. 77) *1) CCD-TRV308/TRV408/TRV608 only *2) CCD-TRV107/TRV308/TRV408/ TRV608 - Sony CCD-TRV308 | Operating Instructions - Page 98
mode 70 Recording time 13 Remaining battery time indicator 24 Remaining tape indicator ... 24 Remote Commander 96 Remote sensor 92 RESET 95 RFU adaptor 32 S Self-diagnosis display ......... 77 Shoulder strap 91 Skip scan 31 Slow playback 31 Standard 8 mm system ....... 80 SteadyShot 68 - Sony CCD-TRV308 | Operating Instructions - Page 99
- Sony CCD-TRV308 | Operating Instructions - Page 100
Sony Corporation Printed in Japan *307231413*
-
 1
1 -
 2
2 -
 3
3 -
 4
4 -
 5
5 -
 6
6 -
 7
7 -
8
-
9
-
10
-
11
-
12
-
13
-
14
-
15
-
16
-
17
-
18
-
19
-
20
-
21
-
22
-
23
-
24
-
25
-
26
-
27
-
28
-
29
-
30
-
31
-
32
-
33
-
34
-
35
-
36
-
37
-
38
-
39
-
40
-
41
-
42
-
43
-
44
-
45
-
46
-
47
-
48
-
49
-
50
-
51
-
52
-
53
-
54
-
55
-
56
-
57
-
58
-
59
-
60
-
61
-
62
-
63
-
64
-
65
-
66
-
67
-
68
-
69
-
70
-
71
-
72
-
73
-
74
-
75
-
76
-
77
-
78
-
79
-
80
-
81
-
82
-
83
-
84
-
85
-
86
-
87
-
88
-
89
-
90
-
91
-
92
-
93
-
94
-
95
-
96
-
97
-
98
-
99
-
100
 |
 |
©2002 Sony Corporation
Model No.
CCD-TRV
Model No.
AC-
Serial No.
Serial No.
Operating Instructions
Before operating the unit, please read this manual thoroughly,
and retain it for future reference.
Owner’s Record
The model and serial numbers are located on the bottom. Record the
serial number in the space provided below. Refer to these numbers
whenever you call upon your Sony dealer regarding this product.
3-072-314-
13
(1)
CCD-TRV608
CCD-TRV107/TRV108/TRV308/
TRV408/TRV608
Video Camera
Recorder