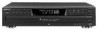
Sony CDP CE375 Operating Instructions - Page 7
Loading a CD - cd player
 |
UPC - 027242586376
View all Sony CDP CE375 manuals
Add to My Manuals
Save this manual to your list of manuals |
Page 7 highlights
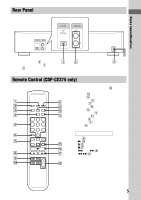
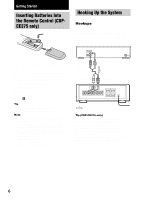
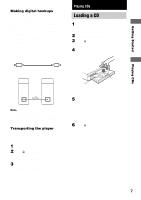
Getting Started Playing CDs Making digital hookups If you have a digital component such as a digital amplifier, D/A converter, DAT, or MD, connect the component via the DIGITAL OUT (OPTICAL) connector using the optical cable (not supplied). Take off the cap and plug in the optical cable. Note that you cannot use the following functions when making this connection: • Fading In or Out (see page 12) • Adjusting the output level using the ANALOG OUT LEVEL +/- buttons on the remote POC-15 Optical cable (not supplied) CD player DIGITAL OUT OPTICAL Digital component DIGITAL INPUT OPTICAL Note When you connect via the DIGITAL OUT (OPTICAL) connector, noise may occur when you play CD software other than music, such as a CDROM. Transporting the player Before transporting the player, follow the procedure below to return the internal mechanisms back to their original position. 1 Remove all the discs from the disc tray. 2 Press A OPEN/CLOSE to close the disc tray. "no dISC" appears in the display. 3 Wait for 10 seconds, then press POWER to turn off the player. Playing CDs Loading a CD 1 Turn on the amplifier and select the CD player position so that you can listen to the sound from this player. 2 Press POWER to turn on the player. 3 Press AOPEN/CLOSE. The disc compartment slides out. 4 Place a disc on the disc tray with the label side up. Disc number When you play a CD single, place it on the inner circle of the tray. 5 To place other discs, press DISC SKIP and place the discs in the order you want to play. Each time you press the button, the disc tray turns and you can place the discs in the empty disc compartments. The player plays the disc in front of you first. 6 Press AOPEN/CLOSE to close the disc compartment. 7
-
 1
1 -
 2
2 -
 3
3 -
 4
4 -
 5
5 -
 6
6 -
 7
7 -
 8
8 -
 9
9 -
 10
10 -
 11
11 -
 12
12 -
13
-
14
-
15
-
16
 |
 |
