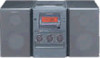
Sony CMT-M70 Primary User Manual - Page 15
Sound Adjustment, Adjusting the sound
 |
View all Sony CMT-M70 manuals
Add to My Manuals
Save this manual to your list of manuals |
Page 15 highlights
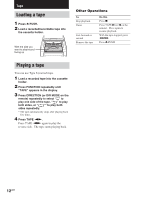
Tape Sound Adjustment 6 Set the starting time. Press ./> on the remote repeatedly to set the hour, then press ENTER on the remote. The minute indication begins flashing next. Press ./> on the remote repeatedly to set the minute, then press ENTER on the remote. "OFF TIME" appears, then the hour indication flashes again. 7 Set the stopping time by repeating step 6. The start time, the stopping time, "TUNER", and the preset station appear in turn, then the original display returns. 8 Press @/1 to turn off the system. When the recording starts, the volume level is automatically set to the minimum. Sound Adjustment Adjusting the sound Generating a more dynamic sound (Dynamic Sound Generator) Press DSG. Each time you press the button, the display changes cyclically as follows: DSG 2 t DSG OFF t DSG 1 To Check the settings Turn off the timer Do this Press TIMER SELECT on the remote repeatedly until "c REC" appears in the display. The preset items appear in turn. Press TIMER SELECT on the remote repeatedly until "c REC" disappears from the display. Tip Once you set the timer, the time settings will remain in the system's memory until you change them, even when you turn the system or the timer off. The settings that were last used will be in effect when you turn the timer on again. Notes • The system will turn on 15 seconds before the specified starting time. • If the system is turned on at the specified starting time, recording will not occur. • When you have set the Sleep Timer, the timer recording will not operate until the Sleep Timer Function is turned off. • You cannot operate the Daily Timer and the timer recording at the same time. 15GB
-
 1
1 -
2
-
3
-
4
-
5
-
6
-
7
-
8
-
9
-
 10
10 -
 11
11 -
 12
12 -
 13
13 -
 14
14 -
 15
15 -
 16
16 -
 17
17 -
 18
18 -
 19
19 -
 20
20 -
21
-
22
-
23
-
24
 |
 |
