Sony DPP-F700 Operating Instructions
Sony DPP-F700 - Digital Photo Printer/frame Manual
 |
UPC - 027242776197
View all Sony DPP-F700 manuals
Add to My Manuals
Save this manual to your list of manuals |
Sony DPP-F700 manual content summary:
- Sony DPP-F700 | Operating Instructions - Page 1
Compound)-free vegetable oil based ink. Printed in China Digital Photo Printer/Frame DPP-F700 4-155-700-15 (1) Overview Using as a photo frame Using as a printer Using various functions Printing in various ways Using with a computer svOperating Instructions Before operating this unit, please - Sony DPP-F700 | Operating Instructions - Page 2
this product, you may call: Sony Customer Information Services Center 1-800-222-SONY (7669) The number below is for the FCC related matters only. Regulatory Information Declaration of Conformity Trade Name: SONY Model No.: DPP-F700 Responsible Party: Sony Electronics Inc. Address: 16530 Via - Sony DPP-F700 | Operating Instructions - Page 3
feet). Attention The electromagnetic fields at the specific frequencies may influence the picture of this unit. Notice If static Sony Deutschland GmbH, Hedelfinger Strasse 61, 70327 Stuttgart, Germany. For any service or guarantee matters please refer to the addresses given in separate service - Sony DPP-F700 | Operating Instructions - Page 4
holder's claim for damages. When using photo images with this unit, pay special PRODUCT OR THE USE OF ANY PRODUCT. Sony shall assume no responsibility for any accidental The displayed image on the screen is not identical in picture quality and colors with the printed image because display methods or - Sony DPP-F700 | Operating Instructions - Page 5
it. Sony Corporation reserves the right to make any modification to this manual or the information contained herein at any time without notice. The software described herein may also be governed by the terms of a separate user license agreement. Any design data such as sample pictures - Sony DPP-F700 | Operating Instructions - Page 6
How to use as a photo frame .......... 10 How to use as a printer 11 You can even do printer Preparation 32 Setting this unit in the print position (flat position 32 Setting the ink ribbon 33 Inserting the print paper 51 Changing the settings of the auto power on/off function 51 Enjoy various - Sony DPP-F700 | Operating Instructions - Page 7
........ 80 Troubleshooting Error messages 84 If trouble occurs 87 If the paper jams 96 Cleaning 97 Miscellaneous About the Memory Cards 100 "Memory Stick" media 100 SD memory card 101 xD-Picture Card 101 CompactFlash card 101 Notes on using memory card ....... 102 Specifications 103 On - Sony DPP-F700 | Operating Instructions - Page 8
8 GB - Sony DPP-F700 | Operating Instructions - Page 9
Before you start Overview 9 GB - Sony DPP-F700 | Operating Instructions - Page 10
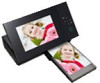
As a photo frame or as a printer, you can use your Digital Photo Printer/Frame in various ways. The Sony digital photo printer/frame DPP-F700 displays your digital camera pictures on its screen and prints your favorites, simply and without using a computer. How to use as a photo frame • Enjoy - Sony DPP-F700 | Operating Instructions - Page 11
How to use as a printer • Print a photo just as it looks (. page 36) • Print in various ways (. page 54) Print date Print with/without border Pages Per Sheet • Create a calendar of your favorites, a Layout print or an ID photo (. page 55) Calendar Layout print ID photo You can even do this - Sony DPP-F700 | Operating Instructions - Page 12
are included. • Digital photo printer/frame (1) • Cleaning cartridge (1) • Cleaning sheet (1) • CD-ROM (Windows Printer Driver Software Ver.1.0 and PMB (Picture Motion Browser) Ver.4.3) (1) • Stand (1) • Remote control (1) • AC Adaptor (1) • Power cord*1 (1) • Operating Instructions (this booklet - Sony DPP-F700 | Operating Instructions - Page 13
Identifying the parts For details, see the pages indicated in the parentheses. Front LCD screen Overview Sony logo (. page 23) Remote sensor Operation panel (. page 24) MENU button Direction (B/b/v/V) buttons, (enter) button BACK button PRINT button Continued 13 GB - Sony DPP-F700 | Operating Instructions - Page 14
Rear Stand (. page 21) VIEW MODE button (. page 26) 1 (on/standby) button/Standby indicator Paper outlet (. page 35) Ink ribbon compartment door "Memory Stick" (Standard/Duo)/SD Memory Card/MMC/xD-Picture Card slot (. page 25) CompactFlash card slot (. page 25) Access lamp USB B connector (. - Sony DPP-F700 | Operating Instructions - Page 15
Overview Remote control VIEW MODE buttons (.page 26) SLIDESHOW ( ) button (.page 26) CLOCK ( ) button (.page 26) MENU button Direction (B/b/v/V) buttons BACK button MARKING ( ) button (.page 48) SORT button (.page 49) ROTATE ( ) button (.page 51) PRINT button SINGLE button (.page 26) 1 (on/ - Sony DPP-F700 | Operating Instructions - Page 16
1 Display type 2 Image no./Total no. of images 3 Device information 4 Ink ribbon type Description The name of the view style is displayed. Single view • ") • (CompactFlash) • (SD Memory Card) • (xD-Picture Card) The type of installed ink ribbon is shown. • P (P size) • C (Cleaning cartridge) 16 GB - Sony DPP-F700 | Operating Instructions - Page 17
registered.) • DPOF (Shown if an image has a print job request set in DPOF (Digital Print Order Format).) Shown if an image is DCF compliant. If not, a file name date and time when the displayed image was shot is shown. Operating guide is shown. No. of prints set is shown. The print settings - Sony DPP-F700 | Operating Instructions - Page 18
18 GB - Sony DPP-F700 | Operating Instructions - Page 19
Let's get started (basic operations) Using as a photo frame Using as a printer 19 GB - Sony DPP-F700 | Operating Instructions - Page 20
Using as a photo frame Preparing the remote control The supplied lithium battery (CR2025) has may shorten, or the Remote control may not function properly. In this case, replace the battery with a Sony CR2025 lithium battery. Use of another battery may present a risk of fire or explosion. • Using a - Sony DPP-F700 | Operating Instructions - Page 21
stand straight into the screw hole on the rear panel. 2 Screw the stand into the screw hole firmly until the stand stops turning. Using as a photo frame Continued 21 GB - Sony DPP-F700 | Operating Instructions - Page 22
unit may fall over. • The Sony logo does not light up when this unit is placed vertically or turned off. • You can also rotate the image manually. (. page 51) • To print a picture, set this unit in the print position (flat position) (page 32). 22 GB Power cord To the wall outlet A socket outlet - Sony DPP-F700 | Operating Instructions - Page 23
this unit or remote control to turn on the power. The standby indicator turns to green from red. The Sony logo on the front panel lights up. Using as a photo frame Turning off the power Hold 1 (on/standby) on this unit or remote control until the power turns off. The standby indicator on this unit - Sony DPP-F700 | Operating Instructions - Page 24
About descriptions in this manual The operations described in this manual are based on remote control operation. When not operated for 10 seconds, the demo mode is displayed. If any other button than the power button is pressed, the screen returns to the initial display. First, press MENU during the - Sony DPP-F700 | Operating Instructions - Page 25
memory card if the access lamp does not flash. "Memory Stick"(Slot A) "Memory Stick Duo" (Slot B) Using as a photo frame SD memory Card (Slot A) Access lamp xD-Picture Card (Slot A) CompactFlash card Notes • When using a miniSD 1, microSD 2 or "Memory Stick Micro" media 3, be sure to insert - Sony DPP-F700 | Operating Instructions - Page 26
supported file formats, see page 103. When you insert a memory card When you insert a memory card, the images on it are automatically displayed. If you switch off the power while they are being displayed and then switch the power )/SD memory card/MMC/xD-Picture Card multi-purpose slot automatically - Sony DPP-F700 | Operating Instructions - Page 27
• If you do not operate this unit for a certain period of time, the style indicated by the cursor is automatically selected. 27 GB Using as a photo frame - Sony DPP-F700 | Operating Instructions - Page 28
Slideshow display This section describes slideshow styles. Display Style Description Images are displayed on a single screen, one after another. Slideshow Single view Displays multiple images at the same time. Multi image view Displays images, one after another, while showing the present - Sony DPP-F700 | Operating Instructions - Page 29
Clock and calendar display This section describes clock and calendar styles. Clock1 Clock2 Clock3 Clock4 Clock5 Using as a photo frame Clock6 Clock7 Clock8 Clock9 Clock10 Clock11 Calendar1 Calendar2 Calendar3 Lunar Calendar (when you select [Simplified Chinese] in [Language Setting]) - Sony DPP-F700 | Operating Instructions - Page 30
Single view mode (single image display) This section describes single view styles. Display Style Description Displays an entire image in the screen. You can switch the images to be displayed by pressing B/b. Entire image Fit to screen Entire image (with Exif) Fit to screen (with Exif) Displays - Sony DPP-F700 | Operating Instructions - Page 31
Using as a photo frame Index view This section describes index view styles. Display Style Index3 Tips • A thumbnail is a small-sized image for index use that is recorded in the pictures taken by a digital camera. • You can select the single view mode when you press when the image you want appears - Sony DPP-F700 | Operating Instructions - Page 32
Set an ink ribbon (see page 33). Set some print paper (see page 34). Turn this unit on (page 23). • For details of the remote control and AC power source, see "Using as a photo frame." (page 20) Setting this unit in the print position (flat position) To use this unit as a printer, do the following - Sony DPP-F700 | Operating Instructions - Page 33
Using as a printer Setting the ink ribbon 1 Pull and open the ink ribbon compartment door. 2 Insert the ink ribbon in the direction of the arrow until it clicks into place. Notes • Do not touch the ink ribbon or store the ink ribbon in a dusty location. Fingerprints or dust on the ink ribbon may - Sony DPP-F700 | Operating Instructions - Page 34
with the protective sheet facing up. Remove the protective sheet from the tray. • If there is no protective sheet, insert the print paper into the paper tray with its printing surface (the side with no imprint) facing up. • Do not touch the printing surface. Fingerprints or contamination on the - Sony DPP-F700 | Operating Instructions - Page 35
is fully open before printing. Leave enough room around this unit. The print paper emerges from the back a few times during printing. Keep 10 cm (3 13/32 inches) or more space at the rear of this unit. AC Adaptor To the wall outlet Power cord 10 cm or more (3 13/32inches) Movement of print - Sony DPP-F700 | Operating Instructions - Page 36
Basic printing This section explains how to display the images of a memory card or internal memory on this unit's LCD screen and print the selected images (direct printing). To print an image from the connected computer, see "Printing an image from your computer" (page 73). Printing in single view - Sony DPP-F700 | Operating Instructions - Page 37
printer 5 Press PRINT. Printing starts. The image displayed on the print preview screen is printed. Notes • You cannot print in clock and calendar display. • Never move or turn off this unit while it is printing; the ink ribbon may become stuck or paper jam may occur. In case you turn off the power - Sony DPP-F700 | Operating Instructions - Page 38
38 GB - Sony DPP-F700 | Operating Instructions - Page 39
Try using various functions (advanced operations) Using various functions 39 GB - Sony DPP-F700 | Operating Instructions - Page 40
Enjoying a slideshow 1 Press (Slideshow). Tips • When using the buttons on this unit, press VIEW MODE on the upper back of the LCD screen, press V to move the cursor to the display selection area and press B/b to select (Slideshow). • When the cursor is in the display selection area, move - Sony DPP-F700 | Operating Instructions - Page 41
Using various functions • The slideshow starts from the first image if you turn off this unit, or if you reset this unit. • When the screen is too bright, it may make you feel nauseous. Be careful that you do not make the brightness settings too bright when you use this unit. *: Factory default - Sony DPP-F700 | Operating Instructions - Page 42
Importing images from a memory card to the internal memory You can use this unit as a digital album, saving important images in the internal memory. Tips • When saving images to the internal memory, you can use [Image import size] in the menu - Sony DPP-F700 | Operating Instructions - Page 43
following while images are being imported to the internal memory. Doing so may damage this unit, memory card, or the data: - Turning off the power - Removing an memory card - Inserting another card Tips • You can change the thumbnail size using [ / ] in the image list. Using various functions 43 - Sony DPP-F700 | Operating Instructions - Page 44
Refresh mode Due to the characteristics of the device, images imported in the internal memory may generate a reading error after a long time or many data readings. Such images may not display correctly. This unit refreshes the internal memory automatically to prevent these errors, depending on the - Sony DPP-F700 | Operating Instructions - Page 45
Exporting an image from the internal memory to a memory card You can export the images in the internal memory to a memory card. 1 Press MENU when an image stored on the internal memory is displayed on the screen. 2 Press B/b to select the (Editing) tab. 3 Press v/V to select [Export] and then press - Sony DPP-F700 | Operating Instructions - Page 46
. Notes • Avoid doing the following while an image is being exported. Doing so may damage this unit, memory card, or the data: - Turning off the power - Removing an memory card - Inserting another card Tips • You can also use the MENU button on this unit. • You can change the thumbnail size using - Sony DPP-F700 | Operating Instructions - Page 47
Notes • Avoid doing the following while an image is being deleted. Doing so may damage this unit, memory card, or the data: - Turning off the power - Removing an memory card - Inserting another card • When the message [Cannot delete a protected file.] appears on the screen, the image file was set to - Sony DPP-F700 | Operating Instructions - Page 48
Registering a mark You can produce a slideshow only with images which have been selected beforehand and have been marked. You can easily check for images with marks using the index image display or single view mode (with Exif). 1 Press (Marking) when an image is displayed on the screen. Tips • If - Sony DPP-F700 | Operating Instructions - Page 49
• Only marks attached to images on the internal memory are saved. Marks attached to images on a memory card will be removed when you turn the power off or change playback devices. Tips • You can select a mark from among 3 types. • You can change the thumbnail size using [ / ] in the image list - Sony DPP-F700 | Operating Instructions - Page 50
To cancel the sort Press MENU while the sorted images are displayed, select [Exit sort (show all photos)] and press . To change the sort style Press BACK while the sorted images are displayed. Notes • Do not turn this unit off or remove the - Sony DPP-F700 | Operating Instructions - Page 51
. 1 Press MENU in single view mode. 2 Press B/b to select the tab. (Editing) 3 Press v/V to select [Rotate] and then press . Changing the settings of the auto power on/off function You can use the timer function to turn this unit on or off automatically when this unit is turned on. 1 Press MENU - Sony DPP-F700 | Operating Instructions - Page 52
press . [Advanced] 1Press B/b/v/V to select the time you want to use the auto power on/off function. You can set this function according to a day of the week by color of the selected time zone changes to blue after you press . The power supply of this unit will be turned on when the blue time zone - Sony DPP-F700 | Operating Instructions - Page 53
Enjoy various printing (advanced printing) Printing in various ways 53 GB - Sony DPP-F700 | Operating Instructions - Page 54
Changing print settings (Date Print,Borders,Pages Per Sheet) Date Print (Print date) Tips • When the print setting is set to [Date Print], [Pages Per Sheet] and [Borders], printing is only enabled when the image is displayed in single view mode (page 36). • This section describes only [Date Print], - Sony DPP-F700 | Operating Instructions - Page 55
) What is "CreativePrint"? You can edit images in a memory card or the internal memory and create a calendar, layout print or ID photo. 1 Press MENU. 2 Press B/b to select the tab. (Editing) 3 Press v/V to select [CreativePrint] and press . The CreativePrint menu is displayed. Tips • You can - Sony DPP-F700 | Operating Instructions - Page 56
press . The calendar setting window is displayed. 7 Press v/V to select . and press The image preview screen appears. 8 Press PRINT. Operate by following the instructions on the screen. Tips • You can save the created calendar data. See page 59. 2Press v/V to select the item that you want to - Sony DPP-F700 | Operating Instructions - Page 57
how to adjust an image, see page 59. 6 Press PRINT. Operate by following the instructions on the screen. Tips • You can save the layout. See page 59. Tips • You left of the photo. You can select either [cm] or [inch]. • To specify the height: Select the figure box at the right of the photo. • To - Sony DPP-F700 | Operating Instructions - Page 58
PRINT. Operate by following the instructions on the screen. Tips • You can save the created ID photo. See page 59. Notes • An ID photo print using this unit may not an identification card or passport. Please check the requirements for the photo to be used in the certificate before you submit the card - Sony DPP-F700 | Operating Instructions - Page 59
of the screen, and the adjusted image is displayed on the right. Items Description Brightness Press b to brighten the picture or B to darken it. Tint Press b to make the picture greenish or B to make it reddish. Saturation Press b to deepen the colors or B to lighten them. Sharpness Press - Sony DPP-F700 | Operating Instructions - Page 60
are printed in each split pane. • DPOF Print The images which are DPOF (Digital Print Order Format) preset for printing are displayed with the print mark ( ) in printing, refer to the manual of your digital camera. • Some types of digital cameras do not support the DPOF function, or this unit may not - Sony DPP-F700 | Operating Instructions - Page 61
settings of this unit Changing the settings You can change the following settings. • Slideshow Settings • Auto Power ON/OFF • Date/time Settings • General Settings (Listing Order, Sony logo ON/OFF etc,.) • Print Settings • Language Setting • Initialize Setting procedure 1 Press MENU. 2 Press B/b to - Sony DPP-F700 | Operating Instructions - Page 62
To reset to factory default settings 1 Press MENU and then B/b to select (Settings) tab. 2 Press v/V to select [Initialize] and press . 3 Press v/V to select [Initialize settings] and then press . All settings except for clock time and date are reset to the default settings. Tips You can also use - Sony DPP-F700 | Operating Instructions - Page 63
/OFF Date/time Settings General Settings Setting Description See "Changing the settings of the slideshow" (page 40). Sets the timer function which turns the power supply of this unit on or off, automatically. You can use this function with the following settings. (.page 51) Time Simple Setting - Sony DPP-F700 | Operating Instructions - Page 64
images to the internal memory without compressing them. There is no deterioration, but you can save fewer images. Sony logo ON/OFF ON*/OFF: You can set whether this unit's Sony logo lights or not. Sets the display language on the LCD screen. Japanese/English*/French/Spanish/German/Italian/Russian - Sony DPP-F700 | Operating Instructions - Page 65
left edges may be trimmed and printed depending on the image. Borderless* Prints an image without blank space around the image. Notes • When printing a standard 4:3 picture shot by a digital camera, the top and bottom edges of the image are cut and it is printed as - Sony DPP-F700 | Operating Instructions - Page 66
may be printed in more vivid, clear and beautiful pictures. It is especially effective for a darker image with low contrast. Notes • The original image data is not corrected. • When printing in PC mode, the Auto Fine Print7 setting with the printer driver has priority over the setting here. OFF - Sony DPP-F700 | Operating Instructions - Page 67
Connecting to a computer lets you do even more Using with a computer Using the internal memory of this unit Printing from a computer 67 GB - Sony DPP-F700 | Operating Instructions - Page 68
Recommended OS: Mac OS X (10.4 or later) Port: USB port Notes • If multiple USB devices are connected to a computer or if a hub is used, a problem may occur. In The printer driver is not guaranteed on Windows 2000 and cannot run on Windows ME or earlier or on Macintosh. *2 PMB does not support - Sony DPP-F700 | Operating Instructions - Page 69
more USB devices, including other printers, are connected to your computer, a problem may occur. In such a or printing. • This unit does not support standby, sleep, and hibernation modes and must first install the supplied printer driver. For the printer driver installation method, see page 73 - Sony DPP-F700 | Operating Instructions - Page 70
Connecting to a computer 1 Connect this unit to the AC power source. (.page 22) 2 Connect the computer and this page 71 • [Print] .page 73 The first time you select [Print], install the supplied printer driver before pressing the button. (page 73) Tips • If you disconnect this unit from your computer - Sony DPP-F700 | Operating Instructions - Page 71
cursor in this window and right click, and then click "New" "Folder". Name this new folder. In this manual, the folder name "sony" is used as an example. 4 Double click to open this "sony" folder. 5 Open the folder that contains the image files you want to copy, and then copy the image files - Sony DPP-F700 | Operating Instructions - Page 72
Disconnecting your computer Disconnect the USB cable or turn this unit off after disconnecting it from your computer. 1 Double-click (Disconnect) on the Task Tray of your computer. 2 Click (USB Mass Storage Device) t "Stop". 3 Click "OK" after checking the drive you want to remove. Tips • When using - Sony DPP-F700 | Operating Instructions - Page 73
supplied PMB (Picture Motion Browser) software to print an image. Please also refer to the operating instructions supplied with your computer for information on operating the computer. On the supplied CD-ROM The supplied CD-ROM contains the following software: • Printer driver for the DPP-F700: The - Sony DPP-F700 | Operating Instructions - Page 74
computer is restarted, the older version of printer driver will be deleted. If you install the new version of printer driver, you can use the new version of printer driver. 5 Click "Install." Installation starts. 6 When the "Sony DPP-F700 printer driver has been successfully installed." dialog is - Sony DPP-F700 | Operating Instructions - Page 75
Sony DPP-F700" is not yet set as the default printer. Set the printer you use for each application. • The supplied CD-ROM will be required when you uninstall or re-install the printer driver menu bar of the PMB, and select [About Picture Motion Browser]. The version information is displayed.) Compare - Sony DPP-F700 | Operating Instructions - Page 76
displayed. 4 Click "Install" and follow the instructions on the screen to proceed with installation. When you are prompted to 3Select "Sony Picture Utility" and click "Change/Remove." The software uninstallation process starts. Printing photos from a computer Printing from the PMB (Picture Motion - Sony DPP-F700 | Operating Instructions - Page 77
is selected in the following explanation. 5 Select the photos that you want to print and click (print). The Print dialog box is displayed. Items Printer Paper size Print Options Properties Description Select the printer you are using: "Sony DPP-F700" To change the size, click "Properties." Note - Sony DPP-F700 | Operating Instructions - Page 78
unit utilizes the Universal Printer Driver, a Microsoft common printer driver. In the dialog boxes, there are some items that are not used within this unit. 8 In the "Layout" tab, specify the paper orientation or other options. 9 Click "Advanced." The "Sony DPP-F700 Advanced Options" dialog box - Sony DPP-F700 | Operating Instructions - Page 79
source. Items Description Tray Selection Color Advanced From the "Paper Source" dropdown list box, select "Automatically Select." To print in colors, select "Color." To print in monochrome, select "Black & White." The "Sony DPP-F700 Advanced Options" dialog box is displayed (page 78). For details - Sony DPP-F700 | Operating Instructions - Page 80
to print an image from the DPPF700. Select "DPP-F700" as a printer in the print dialog box, and select the print paper size in the page setup if you select "ON" for "Borderless Print" in "Printer Features" of the "Sony DPP-F700 Advanced Options" dialog box. When you select the borderless print - Sony DPP-F700 | Operating Instructions - Page 81
application you use has Borders/Borderless setting, we suggest you select "ON" for "Borderless Print" in "Printer Features" of the "Sony DPP-F700 Advanced Options" dialog box as the printer driver setting. No. of prints setting Depending on the software application you are using, the No. of prints - Sony DPP-F700 | Operating Instructions - Page 82
82 GB - Sony DPP-F700 | Operating Instructions - Page 83
Troubleshooting Error messages If trouble occurs If the paper jams Cleaning 83 GB - Sony DPP-F700 | Operating Instructions - Page 84
below to solve the problem. Memory cards and internal memory inserted. Use a memory card that is supported by this unit. No images on file. cancel the protection on your digital camera or computer. Memory card SD Memory Card. / Write error on the xD-Picture Card. / Write error on the internal memory. - Sony DPP-F700 | Operating Instructions - Page 85
card format not supported. • In case of a memory card, use your digital camera or other ink ribbon into this unit. (.page 33) If "cleaning cartridge" is shown, set the cleaning cartridge. (.page 97) • Replace the current ink ribbon with a new ink ribbon. (.page 33) • Set an ink ribbon and print paper - Sony DPP-F700 | Operating Instructions - Page 86
P Size and press [PRINT]. • The print paper and ink ribbon do not match. Check the ink ribbon size actually loaded in this unit and set the print paper for the identical size. (.page 33, 34) Paper jam. Remove print paper. • Paper has jammed. See "If paper jams" (.page 96) and remove any jammed - Sony DPP-F700 | Operating Instructions - Page 87
If trouble occurs Before submitting this unit for repair, try using the following guidance to solve the problem. If the problem persists, consult with your Sony dealer or Sony service facilities. Power supply Symptom Check item The power cannot • Is the power plug inserted be turned on. - Sony DPP-F700 | Operating Instructions - Page 88
c If the mark shown on the left is displayed, the image file is supported by this unit, but the thumbnail data or image itself cannot be opened. the left is still shown even in single view mode, the image file is not supported by this unit and cannot be displayed or printed. • Are there more than - Sony DPP-F700 | Operating Instructions - Page 89
the Editing menu. c The standard aspect ratio of an image shot with a digital camera is 3:4. When you use a device other than this unit to edit information says [No Rotation], you can rotate the image manually. (.page 51) If trouble occurs Saving and deleting images Symptom Cannot save an image. - Sony DPP-F700 | Operating Instructions - Page 90
Symptom Cannot delete an image. An image was deleted accidentally. Check item Cause/Solutions • Is the memory card writeprotected? c Use the device you are using to cancel write-protection and try deleting again. • Is the write-protect switch of c Slide the write-protect switch to the the - Sony DPP-F700 | Operating Instructions - Page 91
item Cause/Solutions • Is the print paper properly set in the paper tray? c If print paper is not properly loaded, this unit may develop trouble. (.page 34) Check the following: • Insert the correct set of print paper and ink ribbon. • Load the print paper in the correct direction in the tray - Sony DPP-F700 | Operating Instructions - Page 92
picture /Time]. (.page 65) • Does the image support DCF? c The Date Print function of this unit supports an image that is compatible with the DCF standards it was shot with you cannot make a print without a date. the digital camera? The image cannot be printed fully in the print range. Borders - Sony DPP-F700 | Operating Instructions - Page 93
pictures. - c The print head or paper path may be soiled. Use the supplied cleaning cartridge and sheet to clean the head and path. (.page 97) The picture Please download the printer driver from the Customer support web site. Or contact your Sony dealer. If trouble occurs Continued 93 GB - Sony DPP-F700 | Operating Instructions - Page 94
shows trouble, do the following: 1. Turn off the 1 (on/standby) button of this unit. 2. Disconnect the power cable, wait for 5 to 10 seconds, and then connect the cable again. 3. Restart your computer. If these do not solve the problem, consult with your Sony dealer or service facilities - Sony DPP-F700 | Operating Instructions - Page 95
in the "Pages Per Sheet" in the "Layout" tab of the "Sony DPP- F700 Properties" dialog box does not match the actual No. of prints and stops, try to remove the ink ribbon. If this does not solve the problem, contact Sony service facilities or your Sony dealer. If trouble occurs 95 GB - Sony DPP-F700 | Operating Instructions - Page 96
2 Remove the ejected print paper from this unit. 3 Remove the paper tray and ink ribbon from this unit and check to ensure if there is no jammed print paper inside. Check to see if there is jammed paper. If any, remove it. Tips • If you cannot remove the jammed paper, contact your Sony dealer. 96 GB - Sony DPP-F700 | Operating Instructions - Page 97
quality. • Do not place the cleaning sheet on top of print paper and carry out cleaning, as this may cause a paper jam or other troubles. • If a cleaning does not improve printed picture quality, please carry out the cleaning process a couple of times. • You cannot clean this unit while it is - Sony DPP-F700 | Operating Instructions - Page 98
98 GB - Sony DPP-F700 | Operating Instructions - Page 99
Miscellaneous Additional information 99 GB - Sony DPP-F700 | Operating Instructions - Page 100
Sony using authentication and encryption. *6 This unit does not support 8 bit parallel data transfer. Notes on use • Do not insert more than one "Memory Stick" media at the same time, which may cause trouble " media, use the format function of your digital camera. If you format a "Memory Stick - Sony DPP-F700 | Operating Instructions - Page 101
are supported and we do not guarantee proper operations for all types of xDPicture Card. *5 This unit has been demonstrated as operable with an xD-Picture Card for all types of CompactFlash cards. *6 Use a CompactFlash card with a power specification of 3.3V or 3.3V/5V. You cannot use a type for 3V - Sony DPP-F700 | Operating Instructions - Page 102
Notes on using memory card • When using a card, make sure to check correct insertion direction of the card and correct insertion slot. • Inserting a memory card with unnecessary force may damage the memory card or this unit. • Do not remove a card or turn off this unit while this unit is reading or - Sony DPP-F700 | Operating Instructions - Page 103
Specifications x Digital photo printer/frame 45 sec. Ink ribbon/Print paper tRefer to supplied "About the Print Packs." LCD screen LCD panel: 7.0 inches, TFT active (Approx. 2,000 images*10 can be saved.) Power requirements DC IN jack, DC 24V Power consumption 100 W (maximum) On standby mode: less - Sony DPP-F700 | Operating Instructions - Page 104
the paper tray (Approx. 115g (4 oz), ink ribbon and AC Adaptor) Included accessories See "Checking included items" on page 12. x AC Adaptor AC-S2422 Power requirements Fine Print7] is set to [ON]. *3: Images shot on a Sony digital still camera with an effective pixel count of approximately 12,100,000 - Sony DPP-F700 | Operating Instructions - Page 105
and "®" are not mentioned in each case in this manual. • Other trademarks and trade names are those of their respective owners. Precautions On safety • Be careful not to set or drop any heavy objects on the power cord, or to damage the power cord in any way. Never operate this unit with a damaged - Sony DPP-F700 | Operating Instructions - Page 106
• Leave enough room around the printer so that the ventilation holes are Adaptor is damaged, consult your Sony dealer or Sony customer center. On moisture moisture condensation occurs, unplug the power cord of this unit and do not this unit, remove the ink ribbon, paper tray, stand, memory card - Sony DPP-F700 | Operating Instructions - Page 107
unit. Notes on disposal of this unit Data stored on the internal memory of this unit may not be deleted completely by [Format internal memory]. Sony recommends that you physically destroy this unit before disposal. 107 GB Additional information - Sony DPP-F700 | Operating Instructions - Page 108
AC power source photo 57 Image import size 64 Importing to the internal memory 42 Index image display 31 Index Print 60 Initial state 24 Initialize 64 Inserting a memory card 25 Inserting an ink ribbon 33 Inserting the print paper 34 Installing PMB (Picture Motion Browser) 75 Printer driver - Sony DPP-F700 | Operating Instructions - Page 109
41 Color effect 41 Display Mode 41 Effect 41 Interval 41 Shuffle 41 Sorting images 49 Specifications 103 Supplied accessories 12 System requirements Macintosh 68 Windows 68 T Tint 59 U Uninstalling PMB (Picture Motion Browser) 76 Printer driver 75 USB cable 70, 74 W Write-protect switch 100 X xD
-
 1
1 -
 2
2 -
 3
3 -
 4
4 -
 5
5 -
 6
6 -
 7
7 -
8
-
9
-
10
-
11
-
12
-
13
-
14
-
15
-
16
-
17
-
18
-
19
-
20
-
21
-
22
-
23
-
24
-
25
-
26
-
27
-
28
-
29
-
30
-
31
-
32
-
33
-
34
-
35
-
36
-
37
-
38
-
39
-
40
-
41
-
42
-
43
-
44
-
45
-
46
-
47
-
48
-
49
-
50
-
51
-
52
-
53
-
54
-
55
-
56
-
57
-
58
-
59
-
60
-
61
-
62
-
63
-
64
-
65
-
66
-
67
-
68
-
69
-
70
-
71
-
72
-
73
-
74
-
75
-
76
-
77
-
78
-
79
-
80
-
81
-
82
-
83
-
84
-
85
-
86
-
87
-
88
-
89
-
90
-
91
-
92
-
93
-
94
-
95
-
96
-
97
-
98
-
99
-
100
-
101
-
102
-
103
-
104
-
105
-
106
-
107
-
108
-
109
 |
 |

Printed in China
Printed using VOC (Volatile
Organic Compound)-free
vegetable oil based ink.
4-155-700-
15
(1)
Digital Photo
Printer/Frame
DPP-F700
© 2009
Sony Corporation
Overview
Using as a photo frame
Using as a printer
Using various functions
Printing in various ways
Using with a computer
Troubleshooting
Additional information
svOperating Instructions
Before operating this unit, please read “Read This First” and
“About the Print Packs” supplied and this manual, “Operating
Instructions,” thoroughly and retain them for future reference.
These models are not available in every country and region.
Owner’s Record
The model and serial numbers are located at the rear.
Record the serial number in the space provided below. Refer to
these numbers whenever you call upon your Sony dealer
regarding this product.
Model No. DPP-F700
Serial No. ________________________
Please read the supplied “Read This First”
and “About the Print Packs.”