Sony DPP-F700 Operating Instructions - Page 58
Editing an image, Image editing screen for, Calendar, Items, Description
 |
UPC - 027242776197
View all Sony DPP-F700 manuals
Add to My Manuals
Save this manual to your list of manuals |
Page 58 highlights
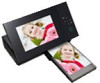
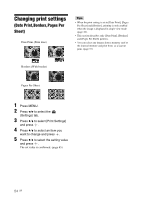
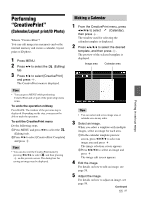
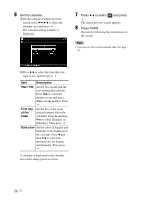
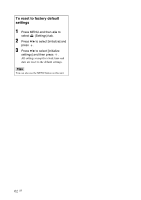
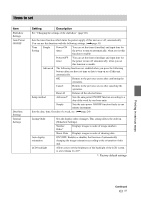
6 Select an image. For details on how to select an image, see step 3 on page 55. When you select image(s), the adjustment screen appears. 7 Edit the image. For details on how to edit an image, see page 58. 8 Adjust the image. For details on how to adjust an image, see page 59. 9 Press PRINT. Operate by following the instructions on the screen. Tips • You can save the created ID photo. See page 59. Notes • An ID photo print using this unit may not be acceptable to be used for an identification card or passport. Please check the requirements for the photo to be used in the certificate before you submit the card or passport. Editing an image You can edit an image on the image edit screen. Image editing screen for (Calendar) 1 Press v/V to select the desired editing items and press . Items Description Reduces or enlarges an image. Moves an image by B/b/v/ V. Pressing confirms the position. Rotates an image 90 degrees clockwise. Enters image quality adjustment mode. For details, see page 59. Changes an image from color to monochrome. 2 Press v/V to select [OK] and press . The image preview screen appears. 58 GB
-
 1
1 -
2
-
3
-
4
-
5
-
6
-
7
-
8
-
9
-
10
-
11
-
12
-
13
-
14
-
15
-
16
-
17
-
18
-
19
-
20
-
21
-
22
-
23
-
24
-
25
-
26
-
27
-
28
-
29
-
30
-
31
-
32
-
33
-
34
-
35
-
36
-
37
-
38
-
39
-
40
-
41
-
42
-
43
-
44
-
45
-
46
-
47
-
48
-
49
-
50
-
51
-
52
-
 53
53 -
 54
54 -
 55
55 -
 56
56 -
 57
57 -
 58
58 -
 59
59 -
 60
60 -
 61
61 -
 62
62 -
 63
63 -
64
-
65
-
66
-
67
-
68
-
69
-
70
-
71
-
72
-
73
-
74
-
75
-
76
-
77
-
78
-
79
-
80
-
81
-
82
-
83
-
84
-
85
-
86
-
87
-
88
-
89
-
90
-
91
-
92
-
93
-
94
-
95
-
96
-
97
-
98
-
99
-
100
-
101
-
102
-
103
-
104
-
105
-
106
-
107
-
108
-
109
 |
 |