Sony DPP-FP95 Operating Instructions
Sony DPP-FP95 Manual
 |
UPC - 027242735002
View all Sony DPP-FP95 manuals
Add to My Manuals
Save this manual to your list of manuals |
Sony DPP-FP95 manual content summary:
- Sony DPP-FP95 | Operating Instructions - Page 1
3-285-420-12 (1) Digital Photo Printer DPP-FP85/FP95 Operating Instructions Before operating this unit, please read "Read This First" and "About the Print Pack" supplied and this manual, "Operating Instructions," thoroughly and retain them for future reference. Owner's Record The model and serial - Sony DPP-FP95 | Operating Instructions - Page 2
the DPP-FP95 in the U.S.A. CAUTION You are cautioned that any changes or modifications not expressly approved in this manual could void your authority to operate this equipment. If you have any questions about this product, you may call: Sony Customer Information Services Center 1-800-222-SONY (7669 - Sony DPP-FP95 | Operating Instructions - Page 3
Sony service station. Duplication, edition, or printing of a CD, TV program, copyrighted materials such as pictures claim for damages. When using photo images with this printer, pay special attention not However, there may be some tiny black points and/or bright points (white, red, blue or green in - Sony DPP-FP95 | Operating Instructions - Page 4
. You may be referred to the supplied "Read This First" and "About the Print Packs" when there are detailed explanations in the leaflet. On the illustrations and screen shot used in this manual The illustrations and screen shots used in this manual are of the DPP-FP95 unless noted otherwise. 4 GB - Sony DPP-FP95 | Operating Instructions - Page 5
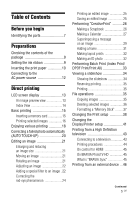
Setting the ink ribbon 9 Inserting the print paper 10 Connecting to the AC power source 12 Direct printing LCD screen prints 32 Making an ID photo 32 Performing Batch Print (Index Print/ DPOF Print/Print All 33 Viewing a slideshow 34 Showing the slideshow 34 Reserving printing 35 Printing - Sony DPP-FP95 | Operating Instructions - Page 6
Browser 56 Printing photos from the Picture Motion Browser 56 Registering a browsing folder ........ 60 Stopping printing 60 Printing from a commercially-available software application 61 Error messages If an error message appears ......... 62 Troubleshooting If trouble occurs 65 If paper jams - Sony DPP-FP95 | Operating Instructions - Page 7
2.5 type DPP-FP85 3.6 type DPP-FP95 E ENTER button F Direction (g/G/f/F) buttons G AUTO TOUCH-UP button (.page 20) H PRINT button/indicator I CANCEL button J "Memory Stick PRO" (Standard/ Duo) slot (.page 15) K SD Card/xD-Picture Card slot (.page 15) L CompactFlash card slot (.page 15) M Paper tray - Sony DPP-FP95 | Operating Instructions - Page 8
. (*In some regions, the DPPA-BT1 Bluetooth USB adaptor is not sold.) Notes • When you carry the printer, make sure to remove memory cards, external devices, the paper tray, AC adaptor, and other cables. Otherwise malfunctions may occur. • When using the DPP-FP95, set the LCD panel to its original - Sony DPP-FP95 | Operating Instructions - Page 9
with your printer. • Paper tray (1) • AC adaptor (1) • AC power cord*1 (1) • Cleaning cartridge (1)/Cleaning sheet (1) • CD-ROM (Windows Printer Driver Software Ver.1.0 and Picture Motion Browser Ver.3.0) (1) • Operating Instructions (this booklet) (1) • Read This First (1) • About the Print Packs - Sony DPP-FP95 | Operating Instructions - Page 10
(shown with arrows) and open the paper tray cover. Do not wind the ribbon in the directions shown here. • Do not disassemble the ink ribbon. • Do not pull out the ribbon from the ink ribbon. • Do not remove the ink ribbon while printing. • Avoid placing the ink ribbon in a location subject to high - Sony DPP-FP95 | Operating Instructions - Page 11
into the paper tray. - Do not print on used print paper. Printing an image twice on the same paper will not make the printed image thicker. - Use the print paper for this printer only. - Do not use print paper ejected without printing. Notes on storing the print paper • To store print paper in the - Sony DPP-FP95 | Operating Instructions - Page 12
• Leave enough room around the printer. The print paper emerges from the back a few times during printing. Keep 10 cm (13/32 inches) or more space at the rear of the printer. • Connect the AC adaptor to an easily accessible wall outlet close by. If trouble occurs while using the adaptor, immediately - Sony DPP-FP95 | Operating Instructions - Page 13
Print (Date/Time) "On." Indicates "Pattern 1" (Borders). Indicates "Pattern 2" (Borders). Indicates Pages Per Sheet 4 "On." Indicates Pages Per Sheet 9 "On." Indicates Pages Per Sheet 16 "On." B Number of selected images/Total number of images C Ink ribbon indication P: P size C: Cleaning cartridge - Sony DPP-FP95 | Operating Instructions - Page 14
tips F Shot or saved date (*month/day/ year) G Print quantity setting H Detailed information display Index View Displays a list of factory differ depending on the country or area you purchased the printer. When you start using the printer, please make setting for each item. You can change the - Sony DPP-FP95 | Operating Instructions - Page 15
Memory Stick," "Memory Stick Duo," CompactFlash card, SD Card or an xD-Picture Card) that contains the images for printing into the proper slot until firmly into place. For the types of memory cards you can use with the printer, please see pages 80 to 82. Access indicator With the label side facing - Sony DPP-FP95 | Operating Instructions - Page 16
turn off the printer while it is printing; the ink ribbon may become stuck or paper jam may occur. In case you turn off the power, keep the paper tray inserted and turn on the printer. After the paper is ejected, resume printing. • Do not remove the paper tray during printing. Otherwise, malfunction - Sony DPP-FP95 | Operating Instructions - Page 17
On built-in images If you press ENTER while nothing is connected to the printer, the images contained in the printer are displayed. You can print or adjust the built-in images. On selecting input The printer is not equipped with the input select switch. When you connect a memory card or an external - Sony DPP-FP95 | Operating Instructions - Page 18
Enjoying various printing Operation using the printer buttons AUTO TOUCH-UP Press MENU. AUTO TOUCH- Increases or reduces the size of an image. Moves an image. Rotates an image. Adjusts the picture quality of an image. Undoes the editing just done and resets the image to the status before - Sony DPP-FP95 | Operating Instructions - Page 19
Print ID Photo 3 Batch Print .page 33 You can enjoy batch print such as "Index Print," "DPOF Print," and "Print All." Index Print device. You can also perform a slideshow of the "CreativePrint" prints. 5 Print setup .page 38 6 Display/Printer setup .page 41 7 File operation .page 35 • Copying - Sony DPP-FP95 | Operating Instructions - Page 20
failed photo to enlarge the image. (The image will not be enlarged when printed.) To display the original image (before adjustments) again Press AUTO TOUCH to make red-eye adjustments manually (page 24). The automatic red-eye correction function of this printer uses the technology of FotoNation - Sony DPP-FP95 | Operating Instructions - Page 21
the image size: : up to 200% : down to 60% Note The picture quality of an enlarged image may deteriorate depending on its size. Moving an image an image. 3 Press ENTER. The image is fixed in its current position. 4 Press PRINT. Rotating an image 1 From the Edit menu (page 18), press g/G to select - Sony DPP-FP95 | Operating Instructions - Page 22
to print an image with a sparkling impression. • Partial Color: Makes the surroundings of the subject monochrome to emphasize the subject in the center. • Sepia: Changes the image to look like an old photograph with faded colors. • Monochrome: Changes the image into a black and white picture. 22 - Sony DPP-FP95 | Operating Instructions - Page 23
photo taken with a fish-eye lens. 3 Press ENTER. The filter takes effect. When you have selected "Cross Filter," "Painting," or "Single Color," the setting window is to specify the range of the selected color. Direct printing The image becomes monochrome while the specified color remains. 4Press - Sony DPP-FP95 | Operating Instructions - Page 24
subject shot by flash, you can adjust the image manually. Note If you perform additional editing, such as enlarging, by pressing the (zoom in) or (zoom out) buttons on the printer. Tip Make the size of the adjustment frame 2 to 7 times . 6 Press PRINT. To reset the adjustment Press CANCEL in step 5 instead of - Sony DPP-FP95 | Operating Instructions - Page 25
Picture Card" or "External Device," and press ENTER. Tip When you select "External Device," a dialog box for selecting a drive may be displayed. Follow the instructions , do not turn off the printer or remove a memory card or external device from the printer. The printer, memory card, USB card, or - Sony DPP-FP95 | Operating Instructions - Page 26
you can select may differ. To specify the template, make sure to set the appropriate ink ribbon and print paper in advance. Then select a template for the size set. To undo the operation midway Press CANCEL The window of the previous step is displayed. Depending on the step, you may not be able - Sony DPP-FP95 | Operating Instructions - Page 27
failed photo having problems such as being backlit, out-of-focus, or showing the red-eye phenomenon, when the button on the printer is PRINT. To save the image, see page 25. Making a Calendar 1 From the CreativePrint menu (page 19), press g/G/f/F to select "Calendar," then press ENTER. The window - Sony DPP-FP95 | Operating Instructions - Page 28
an image, see step 4 on page 26. When you select image(s), the window for adjusting the image is displayed. 4 Adjust the image. For how to g/G/f/F to select the calendar area and press ENTER. The calendar setting window is displayed. Item Settings/Procedures Date color Set the color of Sunday - Sony DPP-FP95 | Operating Instructions - Page 29
a stamp" on page 31. 6 Press PRINT. To save the image, see page 25. black ink pen on a sheet of white paper, shoot them with a digital camera, and save the image on a memory card. 1 From the CreativePrint menu (page 19), press g/G/f/F to select "Superimpose," then press ENTER. The window - Sony DPP-FP95 | Operating Instructions - Page 30
background image is displayed. 2Press f/F to select the desired message and press ENTER. The color selection window is displayed. 3Press g/G/f/F to select the desired color and then press ENTER. The window used for adjusting the message is displayed. For how to adjust an image, see step 5 on page - Sony DPP-FP95 | Operating Instructions - Page 31
Direct printing x Superimposing a stamp 1Press g/G to select (Stamp), then press ENTER. The window for selecting a stamp is displayed. 2Press g/G/f/F to select a desired stamp and press ENTER. The window used for adjusting the stamp is displayed. For how to adjust an image, see step 5 on page 27. - Sony DPP-FP95 | Operating Instructions - Page 32
CreativePrint menu (page 19), press g/G/f/F to select "Layout Print," then press ENTER. The Layout Print templates are displayed. Making an ID photo 1 From the CreativePrint menu (page 19), press g/G/f/F to select "ID Photo," then press ENTER. The window used for setting the height and width of an - Sony DPP-FP95 | Operating Instructions - Page 33
. (page 22) Displays the window to correct red-eye phenomenon. (page 24) Makes an image into monochrome pictures. (page 22) For other adjustment items, see step 5 on page 27. 7 Press g/G to select ENTER. and press 8 Press PRINT. Note An ID photo print using this printer may not be acceptable to - Sony DPP-FP95 | Operating Instructions - Page 34
Print," an error message will be displayed. 3 Press g/G to select "Yes" to start printing or "No" to cancel printing, and then press ENTER. When you select "Yes" printing then press ENTER. The window used to specify the way images are switched is displayed. Items Manual Procedures Press g/G to - Sony DPP-FP95 | Operating Instructions - Page 35
preview of the displayed image will appear. When an image is reserved to be printed, you can check the print preview by pressing g/G. Press PRINT again so that printing starts. After printing is completed, slideshow resumes. File operations Copying images You can copy memory card images to another - Sony DPP-FP95 | Operating Instructions - Page 36
a dialog box for selecting a drive may be displayed. Follow the instructions on the screen to select the destination drive. Note You cannot copy copying images, do not turn off the printer or remove the memory card or external device from the printer. The printer, memory card, or USB external device - Sony DPP-FP95 | Operating Instructions - Page 37
motion picture file or e-mail file will be also deleted. • You cannot delete a protected image with the protect indication ( ) or a DPOF preset indication ( ) displayed. To delete them, use your digital camera. For the details, see the operating instruction of the digital camera. Formatting - Sony DPP-FP95 | Operating Instructions - Page 38
be selected and changed are displayed in gray.) 2 Press f/F to select the desired setting item, and press ENTER. The setting window for the selected item is displayed. 3 Press f/F to select the desired setting and press ENTER. The setting is fixed. Tip To exit the Print setup menu, press MENU. 38 GB - Sony DPP-FP95 | Operating Instructions - Page 39
2," the top and bottom edges or right and left edges may be trimmed and printed depending on the image. Borderless* Prints an image without blank space around the image. Note When printing a standard 4:3 picture shot by a digital camera, the top and bottom edges of the image are cut and it is - Sony DPP-FP95 | Operating Instructions - Page 40
For the images shot by an Exif Print (Exif 2.21)-compliant digital camera, they are adjusted to their optimum picture quality. Notes • The original image data is not corrected. • When printing in PC mode, the Auto Fine Print5 setting with the printer driver has priority over the setting here. In - Sony DPP-FP95 | Operating Instructions - Page 41
Printer setup) and then press ENTER. The Display/Printer setup menu is displayed. 2 Press f/F to select the desired setting item, and press ENTER. The setting window press ENTER. The setting is fixed. Tips • To exit the Display/Printer setup menu, press MENU. • To reset the settings to their factory- - Sony DPP-FP95 | Operating Instructions - Page 42
to a television that supports HDMI device control, you can use various synchronized operations with the television. Off Operations of HDMI device control operations cannot be used. Printer information Version of the firmware and total print number will be displayed. display Language*2 You - Sony DPP-FP95 | Operating Instructions - Page 43
printer supports the HDMI (HighDefinition Multimedia Interface) output. By connecting the printer to a television equipped with an HDMI input, you can view higher precision photos on the television and perform printing you use. For details, see the manual supplied with your television. • If "CONTROL - Sony DPP-FP95 | Operating Instructions - Page 44
, the black lines appear top, bottom, right and left edges of the screen and the pictures displayed are rough. Using the television remote control unit for printing If your television supports the control for HDMI, you can use the remote control unit of your television to operate the printer. Notes - Sony DPP-FP95 | Operating Instructions - Page 45
each function. On BRAVIA PhotoTV HD The printer supports "BRAVIA PhotoTV HD," which reproduces pictures and colors with high fidelity. By coupling with "BRAVIA PhotoTV HD"-ready products, you can enjoy photos with full high definition picture quality. Dedicated descriptions of flowers and human - Sony DPP-FP95 | Operating Instructions - Page 46
device ready for printing with the Mass Storage-compliant printer. The settings and operations that are necessary before connection differ depending on the external device you use. For details, see the operating instructions of the external device. (In case of Sony Cyber-shot digital camera, for - Sony DPP-FP95 | Operating Instructions - Page 47
printer supports the following prints: • Single-image print • All images print • Index Print • DPOF Print • Borders/Borderless Print • Date Print To PictBridge/EXT INTERFACE connector Camera or other PictBridge-complaint device To USB connector Notes • If you replace an ink ribbon while the printer - Sony DPP-FP95 | Operating Instructions - Page 48
, the Sony DPPA-BT1 Bluetooth USB adaptor is not sold. Compatible profiles for Bluetooth communication The DPP-FP85/FP95 supports the following profiles: • BIP (Basic Imaging Profile) • OPP (Object Push Profile) For the profiles that your Bluetooth device supports, please refer to its manual. What - Sony DPP-FP95 | Operating Instructions - Page 49
you want to save an image to be transferred only. The Bluetooth saving mode window is displayed. Printing from a Bluetooth-compliant device To select the printer from a Bluetoothcompliant device, select "Sony DPP-FP85 ##"/ "Sony DPP-FP95 ##." ("##" stands for the two figures from the right of the - Sony DPP-FP95 | Operating Instructions - Page 50
in Bluetooth communications. • Sony cannot accept responsibilities for any failure to satisfy the protection requirements resulting from a non-recommended modification or use of the product. • For customer support information, please refer to the operating instructions of your printer. P Caution - Sony DPP-FP95 | Operating Instructions - Page 51
CD-ROM The supplied CD-ROM contains the following software: • Printer driver for the DPP-FP85/FP95: The software describes the printer's requirements and enables printing from the PC. • Picture Motion Browser: Sony's original software application that allows you to handle photographs and moving - Sony DPP-FP95 | Operating Instructions - Page 52
CD-ROM. • In Windows Vista, the AutoPlay window may appear. Even if this occurs, select "Setup.exe" and follow the instructions on the screen. When the window used for controlling the user account is displayed, select "Continue." 2 Click "Installing Printer Driver." The "InstallShield Wizard" dialog - Sony DPP-FP95 | Operating Instructions - Page 53
"Sony DPP-FP95" has been added to the "Printers" or "Printers and Faxes." 10 When the installation is complete, remove the CD-ROM from your PC and keep it for future use. To continue the process and install the Picture Motion Browser software, follow the procedures from step 2 on page 55. Printing - Sony DPP-FP95 | Operating Instructions - Page 54
from step 1 again. • After installation, the "Sony DPP-FP85" or "Sony DPP-FP95" is not yet set as the default printer. Set the printer you use for each application. • The supplied CD-ROM will be required when you uninstall or re-install the printer driver. Keep it for possible future use. • Before - Sony DPP-FP95 | Operating Instructions - Page 55
Picture Motion Browser. Notes • Please log on to Windows using a "Computer administrator" user account. • Be sure to close all running programs before installing the software. • The dialog boxes shown in this section are from Windows and follow the instructions on the screen to proceed with installation. - Sony DPP-FP95 | Operating Instructions - Page 56
Select "Sony Picture Utility" and click "Change/Remove." The software uninstallation process starts. Printing photos from the Picture Motion Browser You can use the Picture Motion Browser to print an image from your PC using P size print paper. 1 Start the Picture Motion Browser window using either - Sony DPP-FP95 | Operating Instructions - Page 57
windows are used as examples. Items Functions Printer Select the printer you are using: "Sony DPP-FP85" or "Sony DPP-FP95." Paper size To change the size, click "Properties." Note: In some regions, L size print paper is not sold. Properties Specifies paper size, orientation, picture quality - Sony DPP-FP95 | Operating Instructions - Page 58
options. 8 Click "Advanced." The "Sony DPP-FP85/FP95 Advanced Options" dialog box is displayed. Items Paper/ Output Functions • Paper Size: From the dropdown list box, select the paper size you actually use for printing: P size (post card size)/L size Note: L size print paper is not sold in some - Sony DPP-FP95 | Operating Instructions - Page 59
source. Items Functions Tray Selection Color Advanced From the "Paper Source" dropdown list box, select "Automatically Select." To print in colors, select "Color." To print in monochrome, select "Black & White." The "Sony DPP-FP85/FP95 Advanced Options" dialog box is displayed. (page 58) For - Sony DPP-FP95 | Operating Instructions - Page 60
will also be registered. • When the software is first started, a message prompting you to register "Pictures" will be displayed. • Depending on the number of images, it may take some tens of minutes to register images. Stopping printing 1 Double-click on the printer icon on the taskbar, and open the - Sony DPP-FP95 | Operating Instructions - Page 61
we suggest you select "ON" for "Borderless Print" in "Printer Features" of the "Sony DPP-FP85/FP95 Advanced Options" dialog box as the printer driver setting. Print quantity setting Depending on the software application you are using, the print quantity setting of the application may have priority - Sony DPP-FP95 | Operating Instructions - Page 62
this error occurs often, read the manual.) Meaning/Solutions c An error has occurred with the printer. Unplug the AC power cord of the printer, connect it again and then try operating again. If this occurs again, consult with your Sony dealer or Sony service facilities. Memory cards and external - Sony DPP-FP95 | Operating Instructions - Page 63
Meaning/Solutions c The ink ribbon is not inserted in the printer. Set the ink ribbon into the printer. (.page 9) If "cleaning cartridge" is displayed, set the cleaning cartridge. (.page 78) c Replace the current ink ribbon with a new ink ribbon. (.page 9) c Set an ink ribbon and print paper of the - Sony DPP-FP95 | Operating Instructions - Page 64
c There is no cleaning sheet in the paper tray. Insert the cleaning sheet into the paper tray and set the paper tray into the printer. c The print paper and ink ribbon do not match. Check the ink ribbon size actually loaded in the printer and set the print paper for the identical size. (.page 9, 10 - Sony DPP-FP95 | Operating Instructions - Page 65
Troubleshooting If trouble occurs If you run into any problems using the printer, use the following guidance to solve the problem. If the problem persists, consult your Sony dealer. Power Symptom The 1 (on/ standby) button cannot be turned on. Check • Is the AC power cord properly connected? - Sony DPP-FP95 | Operating Instructions - Page 66
be opened. Select the mark and press ENTER to display its image preview. If an image is displayed, you can print the image. If the same mark is displayed again, you cannot print it with the printer. • Are there more than 9 999 images saved in the memory card or an external device? c The - Sony DPP-FP95 | Operating Instructions - Page 67
Edit menu. c The standard aspect ratio of an image shot with a digital camera is 3:4. When you use a device other than the printer to edit or save an image, it is saved as a more horizontal print image and its top and bottom edges will be cut and displayed in black. Troubleshooting Continued 67 GB - Sony DPP-FP95 | Operating Instructions - Page 68
. Check Cause/Solutions • Is the print paper properly set in the paper tray? c If print paper is not properly loaded, the printer may develop trouble. (.page 9, 10) Check the following: • Insert the correct set of print paper and ink ribbon. • Load the print paper in the correct direction in the - Sony DPP-FP95 | Operating Instructions - Page 69
, a highly-compressed JPEG file may be also recorded. As the printer does not support the RAW file format, it may use the JPEG file to print an image. A RAW file can be printed from a PC. For details, see the operating instructions of the digital camera you are using. What is a RAW file? A RAW file - Sony DPP-FP95 | Operating Instructions - Page 70
c Because of the differences in the printer's internal processing and PC software processing, the printed images will be different. The date cannot be • Is "Date Print" set to "Date" c Press MENU button, and set "Date Print" printed. or "Date/Time"? in the Print setup menu to "Date" or "Date - Sony DPP-FP95 | Operating Instructions - Page 71
Print setup menu? be printed. The image is • Is the paper tray inserted printed at an angle. properly? There are white - lines or dots on the printed pictures. The picture Solutions c When you use a device other than the printer to edit or save an image, blank areas around an image are also - Sony DPP-FP95 | Operating Instructions - Page 72
"Memory Stick-ROM?" - • Is the write-protect switch of the memory card in the LOCK position? • Is it a "Memory StickROM"? - Cause/Solutions c Use your digital camera or external device to release the protection and then try saving again. c Slide the write-protect switch to the write enable position - Sony DPP-FP95 | Operating Instructions - Page 73
removed. - c Turn off the printer using the 1 (on/ standby) button and then turn it on again. After the motor sound stops, try to remove the ink ribbon. If this does not solve the problem, contact Sony service facilities or your Sony dealer. Connecting with a digital camera or other external - Sony DPP-FP95 | Operating Instructions - Page 74
device, or an external device images from the computer. c Please download the printer driver from the Customer support home page. Or contact your Sony dealer. c Follow the procedures in the operating instructions to install the driver (.page 52). If an error occurs, restart your computer and do the - Sony DPP-FP95 | Operating Instructions - Page 75
3. Restart your computer. If these do not solve the problem, consult with your Sony dealer or service facilities. An image is printed with borders even if I select "Borderless." • Are you using an application software other than Picture Motion Browser? c When using an application other than the - Sony DPP-FP95 | Operating Instructions - Page 76
Symptom Check An error stating - "Error was found while a document is output to the USB device." is displayed. Cause/Solutions c Disconnect the USB cable and then connect it again. 76 GB - Sony DPP-FP95 | Operating Instructions - Page 77
print paper from the printer. 3 Remove the paper tray and ink ribbon from the printer and check to ensure if there is no jammed print paper inside. Check to see if there is jammed paper. If any, remove it. Note If you cannot remove the jammed paper, contact your Sony dealer. 77 GB Troubleshooting - Sony DPP-FP95 | Operating Instructions - Page 78
If white lines or period-like dots are printed on the pictures, use the cleaning cartridge and cleaning sheet supplied to clean inside the printer. Before you start cleaning the printer, please remove any memory cards, USB memories, or USB cables from the printer. 1 Open the ink ribbon compartment - Sony DPP-FP95 | Operating Instructions - Page 79
the ink ribbon, paper tray, AC adaptor, the memory card, or an external device from the printer and put the printer and its peripherals in the original box with the protective packaging. If you no longer have the original box and packing parts, use similar packing material so that the printer will - Sony DPP-FP95 | Operating Instructions - Page 80
of other people or other materials may be copyrighted. Unauthorized video printing of such materials may infringe the provisions of the copyright law. The printer supports FAT32. The printer has been demonstrated as operable with a "Memory Stick" with a capacity of 8GB or less manufactured by Sony - Sony DPP-FP95 | Operating Instructions - Page 81
information on the Sony web site: http://www.memorystick.com/en/support/ support.html (Select the area where you use your printer, and then select "Digital Printer" from each area page.) • Do not insert more than one "Memory Stick" at the same time, which may cause trouble with the printer. • If you - Sony DPP-FP95 | Operating Instructions - Page 82
-Picture Card With the xD-Picture Card slot of the printer, you can use an xD-Picture Card*5. Not all the memory card operations are supported hand or a metal object. • Do not strike, bend or drop a card. • Do not disassemble or modify a card. • Do not expose a card to water. • Do not use or store - Sony DPP-FP95 | Operating Instructions - Page 83
9 999 files for a memory card/external device Ink ribbon/Print Paper See supplied "About the Print Packs." LCD screen LCD panel: DPP-FP85: 6.2 cm (2.5 type) TFT drive DPP-FP95: 9.0 cm (3.6 type) TFT drive Total number of dots: DPP-FP85: 115 200 (480 × 240) DPP-FP95: 230 400 (320 RGB × 240 - Sony DPP-FP95 | Operating Instructions - Page 84
tray is installed: Approx. 317 mm (121/2 inches) Mass DPP-FP85: Approx. 1.1 kg (2 lb 7 oz) DPP-FP95: Approx. 1.2 kg (2 lb 10 oz) (excluding the paper tray, ink ribbon, AC adaptor) Supplied accessories See page 9 of "Operating Instructions" (this booklet) x AC adaptor AC-S2422 Power requirements - Sony DPP-FP95 | Operating Instructions - Page 85
101.6 mm/ 4 inches (1 200 dots) 146.3 mm/5 7/8 inch (1 728 dots) Border print range Borderless print range Perforations The above illustrations are those when an image with a 2:3 aspect ratio is printed. The printing range differs for a border or a borderless print. Additional information 85 GB - Sony DPP-FP95 | Operating Instructions - Page 86
-use printer. The printer supports DPOF printing and can automatically print the preset number of copies of the DPOF preset images. Exif 2.21 (Exif Print) Exif (Exchangeable image file format for digital cameras) Print is a global standard for digital photo printing. A digital camera supporting Exif - Sony DPP-FP95 | Operating Instructions - Page 87
ID photo 32 Image data display 13 Image preview 13 Index Print 33 Index View by date 14, 42 by Filename 14, 42 Input indications 13 Inserting a memory card 15 Inserting an ink ribbon 9 Inserting the print paper 10 Installing Picture Motion Browser 55 Printer driver 52 L Language 42 Layout print 32 - Sony DPP-FP95 | Operating Instructions - Page 88
message 30 Stopping printing 60 Superimposing 29 Supplied accessories 9 Switching the screen display 15 System requirement 51 T Tint 22 Trimming Print 16 Troubleshooting 65 U Uninstalling Picture Motion Browser 56 Printer driver 54 USB memory 46 V Various printing 18 X xD-Picture Card Notes on - Sony DPP-FP95 | Operating Instructions - Page 89
- Sony DPP-FP95 | Operating Instructions - Page 90
- Sony DPP-FP95 | Operating Instructions - Page 91
- Sony DPP-FP95 | Operating Instructions - Page 92
Printed using VOC (Volatile Organic Compound)-free vegetable oil based ink. Sony Corporation Printed in China
-
 1
1 -
 2
2 -
 3
3 -
 4
4 -
 5
5 -
 6
6 -
 7
7 -
8
-
9
-
10
-
11
-
12
-
13
-
14
-
15
-
16
-
17
-
18
-
19
-
20
-
21
-
22
-
23
-
24
-
25
-
26
-
27
-
28
-
29
-
30
-
31
-
32
-
33
-
34
-
35
-
36
-
37
-
38
-
39
-
40
-
41
-
42
-
43
-
44
-
45
-
46
-
47
-
48
-
49
-
50
-
51
-
52
-
53
-
54
-
55
-
56
-
57
-
58
-
59
-
60
-
61
-
62
-
63
-
64
-
65
-
66
-
67
-
68
-
69
-
70
-
71
-
72
-
73
-
74
-
75
-
76
-
77
-
78
-
79
-
80
-
81
-
82
-
83
-
84
-
85
-
86
-
87
-
88
-
89
-
90
-
91
-
92
 |
 |

3-285-420-
12
(1)
Digital Photo
Printer
DPP-FP85/FP95
© 2008
Sony Corporation
Before you begin
Preparations
Direct printing
Printing from a PictBridge
digital camera
Printing from a Bluetooth-
compliant device
Printing from a PC
Error messages
Troubleshooting
Additional information
Operating Instructions
Before operating this unit, please read “Read This First” and
“About the Print Pack” supplied and this manual, “Operating
Instructions,” thoroughly and retain them for future reference.
Owner's Record
The model and serial numbers are located on the bottom of the
printer. Record the serial number in the space provided below.
Refer to these numbers whenever you call upon your Sony
dealer regarding this product.
Model No.:
Serial No. ________________________
Please read the supplied “Read This First”
and “About the Print Packs.”