Sony DPP-FP95 Operating Instructions - Page 33
Performing Batch Print (Index Print/DPOF Print/Print All), Index Print/DPOF Print/Print All - digital photo printer
 |
UPC - 027242735002
View all Sony DPP-FP95 manuals
Add to My Manuals
Save this manual to your list of manuals |
Page 33 highlights
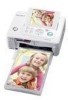
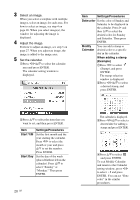
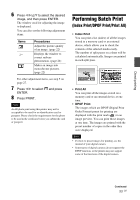
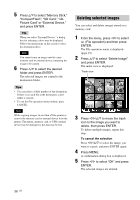
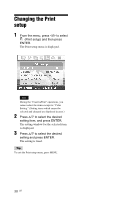
Direct printing 6 Press g/G/f/F to select the desired image, and then press ENTER. The window used for adjusting the image is displayed. You can also set the following adjustment items. Items Procedures Adjust the picture quality of an image. (page 22) Displays the window to correct red-eye phenomenon. (page 24) Makes an image into monochrome pictures. (page 22) For other adjustment items, see step 5 on page 27. 7 Press g/G to select ENTER. and press 8 Press PRINT. Note An ID photo print using this printer may not be acceptable to be used for an identification card or passport. Please check the requirements for the photo to be used in the certificate before you submit the card or passport. Performing Batch Print (Index Print/DPOF Print/Print All) • Index Print You can print a list (index) of all the images stored in a memory card or an external device, which allows you to check the contents of the selected media easily. The number of split panes on a sheet will be calculated automatically. Images are printed in each split pane. • Print All You can print all the images stored on a memory card or an external device at one time. • DPOF Print The images which are DPOF (Digital Print Order Format) preset for printing are displayed with the print mark ( ) in an image preview. You can print those images at one time. The images are printed with the preset number of copies in the order they were displayed. Notes • For how to preset images for printing, see the manual of your digital camera. • Some types of digital cameras do not support the DPOF function, or the printer may not support some of the functions of the digital camera. Continued 33 GB
-
 1
1 -
2
-
3
-
4
-
5
-
6
-
7
-
8
-
9
-
10
-
11
-
12
-
13
-
14
-
15
-
16
-
17
-
18
-
19
-
20
-
21
-
22
-
23
-
24
-
25
-
26
-
27
-
 28
28 -
 29
29 -
 30
30 -
 31
31 -
 32
32 -
 33
33 -
 34
34 -
 35
35 -
 36
36 -
 37
37 -
 38
38 -
39
-
40
-
41
-
42
-
43
-
44
-
45
-
46
-
47
-
48
-
49
-
50
-
51
-
52
-
53
-
54
-
55
-
56
-
57
-
58
-
59
-
60
-
61
-
62
-
63
-
64
-
65
-
66
-
67
-
68
-
69
-
70
-
71
-
72
-
73
-
74
-
75
-
76
-
77
-
78
-
79
-
80
-
81
-
82
-
83
-
84
-
85
-
86
-
87
-
88
-
89
-
90
-
91
-
92
 |
 |