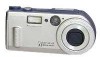
Sony DSC P1 Operating Instructions - Page 13
Select from [Y/M/D] year/month/day, [M/D/Y], Select [CANCEL]
 |
UPC - 027242581364
View all Sony DSC P1 manuals
Add to My Manuals
Save this manual to your list of manuals |
Page 13 highlights
Getting started 4 Select [CLOCK SET] with v/V on the control button, then press the center z. 5 Select the desired date display format with v/V on the control button, then press the center z. Select from [Y/M/D] (year/month/day), [M/D/Y] (month/day/year) or [D/M/Y] (day/month/year). 6 Select the year, month, day, hour or minute item you want to set with b/B on the control button. The item to be set is indicated with v/V. 7 Set the numeric value with v/V on the control button, then press the center z to enter it. After entering the number, v/V moves to the next item. If you selected [D/M/Y] in step 5, set the time on a 24-hour cycle. 8 Select [ENTER] with B on the control button, then press the center z at the desired moment to begin clock movement. The date and time are entered. To cancel the date and time setting Select [CANCEL] with v/V/b/B on the control button, then press the center z. Auto power-off function If you do not operate the camera for about three minutes during recording, the camera turns off automatically to prevent wearing down the battery. To use the camera again, slide the POWER switch to turn on the camera again. 13
-
 1
1 -
2
-
3
-
4
-
5
-
6
-
7
-
 8
8 -
 9
9 -
 10
10 -
 11
11 -
 12
12 -
 13
13 -
 14
14 -
 15
15 -
 16
16 -
 17
17 -
 18
18 -
19
-
20
-
21
-
22
-
23
-
24
-
25
-
26
-
27
-
28
-
29
-
30
-
31
-
32
-
33
-
34
-
35
-
36
-
37
-
38
-
39
-
40
-
41
-
42
-
43
-
44
-
45
-
46
-
47
-
48
-
49
-
50
-
51
-
52
-
53
-
54
-
55
-
56
-
57
-
58
-
59
-
60
-
61
-
62
-
63
-
64
-
65
-
66
-
67
-
68
-
69
-
70
-
71
-
72
 |
 |
