Sony DSLR-A700K Read This First - Page 3
Composition of the operating instructions, This manual, User's Guide/Troubleshooting separate volume - accessories
 |
View all Sony DSLR-A700K manuals
Add to My Manuals
Save this manual to your list of manuals |
Page 3 highlights
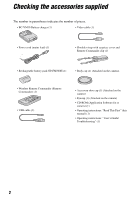
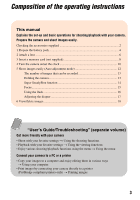
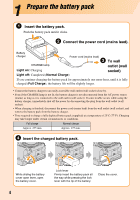
Composition of the operating instructions This manual Explains the set-up and basic operations for shooting/playback with your camera. Prepare the camera and shoot images easily. Checking the accessories supplied 2 1 Prepare the battery pack 4 2 Attach a lens ...6 3 Insert a memory card (not supplied 8 4 Turn the camera on/set the clock 10 5 Shoot images easily (Auto adjustment mode 12 The number of images that can be recorded 13 Holding the camera 13 Super SteadyShot function 14 Focus...15 Using the flash 16 Adjusting the diopter 17 6 View/delete images 18 "User's Guide/Troubleshooting" (separate volume) Get more friendly with your camera • Shoot with your favorite settings t Using the shooting functions • Playback with your favorite settings t Using the viewing functions • Enjoy various shooting/playback functions using the menu t Using the menu Connect your camera to a PC or a printer • Copy your images to a computer and enjoy editing them in various ways t Using your computer • Print images by connecting your camera directly to a printer (PictBridge compliant printers only) t Printing images 3
-
 1
1 -
 2
2 -
 3
3 -
 4
4 -
 5
5 -
 6
6 -
 7
7 -
 8
8 -
 9
9 -
10
-
11
-
12
-
13
-
14
-
15
-
16
-
17
-
18
-
19
 |
 |
