Sony DVX-100 Operating Instructions
Sony DVX-100 - 10 Disc Dvd Changer Manual
 |
View all Sony DVX-100 manuals
Add to My Manuals
Save this manual to your list of manuals |
Sony DVX-100 manual content summary:
- Sony DVX-100 | Operating Instructions - Page 1
3-234-623-11(2) DVD Changer DVX-100 DVD Changer Operating Instructions Mode d'emploi Bedienungsanleitung Wichtig! Bitte nehmen Sie sich etwas Zeit, um den Geräte-Pass vollständig auszufüllen. Dieser befindet sich auf der hinteren - Sony DVX-100 | Operating Instructions - Page 2
Thank you for purchasing this Sony DVD Changer. Before operating the unit, please read this manual thoroughly and retain it for future reference. For the customers in the USA CAUTION The use of optical instruments with this product will increase eye hazard. CAUTION Use of controls or adjustments or - Sony DVX-100 | Operating Instructions - Page 3
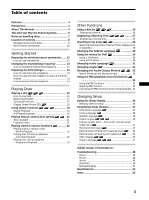
DVD changer 13 How to load discs into a magazine 13 How to install the disc magazine to start up the DVD changer 13 How to remove the disc magazine 14 Playing Discs Playing a disc 16 How to play back 16 Resuming Playback 17 Turning off this unit 17 Display Screen (Audio CD 18 Using - Sony DVX-100 | Operating Instructions - Page 4
cannot use this unit unless your car audio has an FM tuner. • 10 discs DVD/Video CD/Audio CD changer • CD-Extra (Audio)/Mixed CD (Audio)/CD-R (Digital Audio)/CD-RW (Digital Audio) compatibility • Support dts/Dolby digital through optical digital output terminal • FM modulator equipped for setting up - Sony DVX-100 | Operating Instructions - Page 5
by area restrictions. Region code X MODEL NO DC 12 VOLTS NEGATIVE GROUND 10-DISC DVD CHANGER 10 Audio CD An Audio CD containing audio data. The playing time is 74 minutes for a standard 12 centimetre (4 7/10 in.) CD. CD-Recordable (CD-R) for audio use With a CD-R for audio use, you can edit - Sony DVX-100 | Operating Instructions - Page 6
is adequate). - You can play Digital Audio CD-Rs and CD-RWs bearing these icons: - You CANNOT play (non-digital audio) CD-Rs and CD-RWs bearing these icons: Terms for discs • Title The longest section of a picture or music feature on a DVD, e.g., a movie for video software, or an album for audio - Sony DVX-100 | Operating Instructions - Page 7
ducts. • Do not leave discs in a car parked in direct sunlight. Notes on discs Do not use discs with sticky residue on the surface (e.g., second-hand or rental discs with sticky seals, ink, or peeling stickers). If you use such a disc, the sticky residue could cause the disc to stop spinning and - Sony DVX-100 | Operating Instructions - Page 8
Location of controls Wireless remote commander Light emitter 1 2 3 4 5 6 7 8 9 q; qa MENU TITLE SUBTITLE AUDIO ANGLE TIME REPEAT A B SEARCH PLAYMODE 1 4 7 CLEAR 23 56 89 RETURN 0 LIST ENTER DISC PREV SET UP SCAN PLAY STOP NEXT PAUSE qs qd qf qg qh qj qk ql w; wa ws wd 8 - Sony DVX-100 | Operating Instructions - Page 9
press M/m for slow playback. q; PREV/NEXT button 16, 17, 21 Press > to go to the next chapter, track, or scene. Press . to go back to the previous chapter, track or scene. • DVD/Video CD 21 Press X (PAUSE), then press > to play pictures frame by frame. qa SET UP button 36, 37, 38, 39, 41, 43 - Sony DVX-100 | Operating Instructions - Page 10
"You can't operate this command now" message appears on the monitor, you may be able to use the chapter search function (with such discs) by using the wireless remote commander. Caution for DVD/Video CD playback If you want to play a disc at various slow speeds (page 21), or frame-by-frame (page 21 - Sony DVX-100 | Operating Instructions - Page 11
11 - Sony DVX-100 | Operating Instructions - Page 12
any foreign object into the remote commander, particularly when replacing the batteries. • If you do not intend to use the remote commander for an extended period of time, remove the batteries to avoid possible damage from battery leakage and corrosion. • When the batteries wear out, dispose of them - Sony DVX-100 | Operating Instructions - Page 13
to the installation manual supplied with this unit). 2 Operate on the monitor connected to this DVD changer. 1 Turn on the monitor. 2 Switch the mode to video. Note Read the operation manuals supplied with your car stereo and monitor. Preparing the DVD changer How to load discs into a magazine With - Sony DVX-100 | Operating Instructions - Page 14
. Tip After you install the disc magazine in the unit, wait until the unit completes creating the disc list. When the unit completes the disc list in the magazine: - the sound of checking discs stops - the display on the wired remote commander turns off To start up the DVD changer, proceed with the - Sony DVX-100 | Operating Instructions - Page 15
15 - Sony DVX-100 | Operating Instructions - Page 16
how to play a DVD/Video CD/Audio CD. Playing a disc How to play back Make sure to complete the preparations below: - preparing the wireless remote commander (page 12) - changing the transmitting frequency (page 13) - loading discs into the disc magazine, then installing the magazine in the unit - Sony DVX-100 | Operating Instructions - Page 17
For details, see "Resuming playback." *2 DVD/Video CD Both the picture and sound stop during pause. Audio CD The sound stops and the elapsed time flashes on the screen. *3 DVD/Video CD - Each time you press M or m, the playback speed switches in steps of 2-, 4-, 8-, 16-, and 32 times. The steps of - Sony DVX-100 | Operating Instructions - Page 18
in the magazine The disc tray you currently selected: tray number black background yellow The Audio disc trays currently not selected: tray number green background blue The disc trays currently containingother-type discs (eg. DVDs or Video CDs): tray number white background blue - Sony DVX-100 | Operating Instructions - Page 19
be able to use the repeat function. Video CD/Audio CD You can repeat all the tracks of a disc (Disc repeat) or a single track (Track repeat). MENU TITLE SUBTITLE AUDIO ANGLE TIME REPEAT A B SEARCH PLAYMODE 1 4 7 CLEAR 23 56 89 RETURN 0 LIST ENTER DISC REPEAT CLEAR - Sony DVX-100 | Operating Instructions - Page 20
on the disc, you may not be able to use the repeat function. Audio CD You can repeat a part of a song, for example. To stop A-B repeat Press AyB again. • DVD/Video CD " A-B OFF" is displayed at the top of the screen for about 1 second. • Audio CD The indicator "A-B" retrurns in white, and REPEAT - Sony DVX-100 | Operating Instructions - Page 21
To return to normal playback Press N. Caution for DVD/Video CD playback If you want to play a disc at various slow speeds, or frame-byframe, use the controls of the wireless remote commander. You cannot perform these functions by using the wired remote commander. Frame by frame You can play freeze - Sony DVX-100 | Operating Instructions - Page 22
tracks of a disc in random order. Once all the tracks on the disc have been played, the next disc is selected. During an Audio CD playback, press This mode plays the first 10 seconds of each track in sequence. This is useful for locating a track. During an Audio CD playback, press PLAY MODE one - Sony DVX-100 | Operating Instructions - Page 23
Program - - Last Clear All Clear MENU TITLE SUBTITLE AUDIO ANGLE TIME REPEAT A B SEARCH PLAYMODE 1 4 7 CLEAR 23 56 89 RETURN 0 LIST ENTER DISC PREV SET UP SCAN PLAY STOP NEXT PAUSE PLAY MODE Number buttons CLEAR ENTER M/,/m/< PLAYN STOPx B:Play(Program Play) Direction:Move Cursor CLEAR - Sony DVX-100 | Operating Instructions - Page 24
Playing tracks in various functions 4 Press ENTER to input the number. "12" is displayed in the programme list. Track Program Last Clear *1 - - All Clear *2 12 B:Play(Program Play) Direction:Move Cursor CLEAR:Track No.Clear 0~9:Track No.Input ENTER:CFMD If you input a wrong track and want - Sony DVX-100 | Operating Instructions - Page 25
25 - Sony DVX-100 | Operating Instructions - Page 26
check the discs in the magazine. See "Preparing the DVD changer" (page 13-14). *2 You can also press PLAY on the wireless remote commander for start-up. Disc List 1. DVD 6. DVD 2. DVD 7. Video CD 3. Audio CD 8. Video CD 1 4. Audio CD 9. 5. 10. Disc type select DVD Video CD Audio CD - Sony DVX-100 | Operating Instructions - Page 27
DVD 2. DVD 3. Audio CD 4. Audio CD 5. 6. DVD 7. Video CD 8. Video CD 9. 10. DVD Disc type select Video CD Audio CD 2 Press ENTER. The disc you selected starts to play. To set the disc type for current playback 1 Press the cursor buttons (M/,/m/ - Sony DVX-100 | Operating Instructions - Page 28
). * You can also use the cursor buttons (B/b) to select a key item. Each time you press SEARCH, the item changes as follows: • Key items with DVD B Title number BChapter number B Elapsed time "hour" Elapsed time "second" b Elapsed time "minute" b • Key items with Video CD B Track number B Elapsed - Sony DVX-100 | Operating Instructions - Page 29
(with such discs) by using the wireless remote commander. • Depending on the disc, if "You can't operate this command now" appears in the display, you cannot use the search function (Title/Chapter/Track/elapsed time of playback). Changing the Subtitle Language Some DVDs have recorded subtitles - Sony DVX-100 | Operating Instructions - Page 30
on the DVD. • Read the instruction manual supplied with a DVD. To end or drop the DVD menu operation Press MENU. If the resume playback is activated*2, the disc plays from the point you displayed the DVD menu in step 1. *2 Some DVDs may not resume playback when you press MENU. In such a case, refer - Sony DVX-100 | Operating Instructions - Page 31
• You can also change the audio languages by using the DVD menu (see page 30) or the setup screen*3 (see page 38). *3 You can change to a specific audio language using a setup screen, only if the language is included in both the disc and the setup screen. MENU TITLE SUBTITLE AUDIO ANGLE TIME REPEAT - Sony DVX-100 | Operating Instructions - Page 32
4 7 CLEAR 23 56 89 RETURN 0 LIST ENTER DISC AUDIO ENTER Audio CD 1 During playback, press AUDIO. 2 Press AUDIO to is activated when you select it in step 2. You do not need to press ENTER. Video CD 1 During playback, press AUDIO. The current output method is displayed at the top of the - Sony DVX-100 | Operating Instructions - Page 33
Video CD, the PBC funcions are automatically activated and you can display the PBC menu. If you do not want to use the PBC functions, see "Stopping the PBC functions." MENU TITLE SUBTITLE AUDIO ANGLE TIME REPEAT A B SEARCH PLAYMODE 1 4 7 CLEAR 23 56 89 RETURN 0 LIST ENTER DISC PREV SET - Sony DVX-100 | Operating Instructions - Page 34
Using the PBC (playback control) functions Activating the PBC functions from normal playback 1 During normal playback of a Video CD, press STOP. Playback stops. "x" flashes for 1 second, and "Resume---" is displayed. Resuming playback (page 17) is activated. 2 Press STOP. "x" flashes for 1 second - Sony DVX-100 | Operating Instructions - Page 35
35 - Sony DVX-100 | Operating Instructions - Page 36
and adjustments need to be set when you first use the changer. Using the Setup Display Selecting items for setup 1 Press STOP to stop playback. 2 Press SET UP. The setup screen is displayed: the currently selected item is highlighted in yellow. Set Up DVD Menu Language Audio Language Subtitle - Sony DVX-100 | Operating Instructions - Page 37
you set the cursor to "Original," the DVD displays the original language of the disc. • The number of languages differs, depending on the DVD. Some discs contain only 1 language. • If you select a language that is not stored on a disc, the default language is displayed. • Read the instruction manual - Sony DVX-100 | Operating Instructions - Page 38
will be played. • Read the instruction manual supplied with the DVD. • You can also change the audio language by using the DVD menu or the setup screen. If you change the audio language by using the DVD menu or by pressing AUDIO, the change is temporary and the setup setting is not changed. 38 - Sony DVX-100 | Operating Instructions - Page 39
. • Read the instruction manual supplied with the DVD. • You can also change the subtitle language by using the DVD menu or the setup screen. If you change the subtitle language by using the DVD menu or by pressing the SUBTITLE button, the change is temporary and the setup setting is not changed - Sony DVX-100 | Operating Instructions - Page 40
the instruction manual supplied with the digital audio device you connected. To end or drop the setup change and resume playback 1 Press SET UP. The playback screen with the indicator "x" on appears. Resuming playback is still activated. 2 Press PLAY to start playback. • DVD/Video CD The disc plays - Sony DVX-100 | Operating Instructions - Page 41
the left and right. When using a wide monitor, select 16:9 Widescreen. If you play a 16:9wide-image DVD, the images are played at full size*1. *1 To play images at full size, set your monitor to "Full" or to the corresponding mode. For details, read the instruction manual supplied with your monitor - Sony DVX-100 | Operating Instructions - Page 42
Parental (initial setup) Playback of some DVDs can be limited according to a predetermined level, such as the age of the users. The Parental control function allows you to set a playback limitation level. When you use the unit for the first time, set a password and parental level as described - Sony DVX-100 | Operating Instructions - Page 43
restriction differ, depending on the disc. Sometimes playback is not allowed altogether, other times only the offensive scenes are skipped. For details, read the instruction manual supplied with the DVD. • If you try to play a DVD with a parental level setting which your parental setup restricts - Sony DVX-100 | Operating Instructions - Page 44
Then complete the following steps. To change your password, follow the instructions in "Changing your password" on page 44. 4 Press the cursor SET UP. The playback screen with the indicator "x" on appears. Resuming playback is still activated. 2 Press PLAY to start playback. • DVD/Video CD The disc - Sony DVX-100 | Operating Instructions - Page 45
reappears. To end or drop the setup change and resume playback 1 Press SET UP. The playback screen with the indicator "x" on appears. Resuming playback is still activated. 2 Press PLAY to start playback. • DVD/Video CD The disc plays from the beginning*6. *6 If the resume playback is still activated - Sony DVX-100 | Operating Instructions - Page 46
On Off To end or drop the setup change and resume playback 1 Press SET UP. The playback screen with the indicator "x" on appears. Resuming playback is still activated. 2 Press PLAY to start playback. • DVD/Video CD The disc plays from the beginning*. * If the resume playback is still activated, the - Sony DVX-100 | Operating Instructions - Page 47
English To end or drop the setup change and resume playback 1 Press SET UP. The playback screen with the indicator "x" on appears. Resuming playback is still activated. 2 Press PLAY to start playback. • DVD/Video CD The disc plays from the beginning*. * If the resume playback is still activated - Sony DVX-100 | Operating Instructions - Page 48
If you experience any of the following difficulties while using this unit, use this troubleshooting guide to help remedy the problem. Should any problem persist, consult your nearest Sony dealer. Power This unit does not turn on. , Check the connections. , If you find the connections in - Sony DVX-100 | Operating Instructions - Page 49
digital output setting (page 40). The sound loses its stereo effect when you play a Video CD or an Audio CD. , Change the audio output to "Stereo" (page 32). , Make sure this unit is connected correctly (Refer to the installation manual supplied with this unit). Operation The remote commander does - Sony DVX-100 | Operating Instructions - Page 50
from the multiple angles (page 31). , Changing the angles is prohibited on the DVD. This unit does not operate properly. , Static electricity, etc., may affect this unit's operation. Press OFF, and then press B/X* on the wired remote commander to start up the unit. * You can also press PLAY on the - Sony DVX-100 | Operating Instructions - Page 51
the screen, the command will become available. "This disc can't be played." "All discs can't be played." "Magazine is not loaded." "Magazine empty" •The region code is neither "the code printed on the rear of the unit" nor "ALL." , Use DVDs with the same region code printed on the back of the unit - Sony DVX-100 | Operating Instructions - Page 52
Operating temperature -10 ˚C to 55 ˚C (14 ˚F to 131 ˚F) Supplied accessories Wired remote commander (1) Wireless remote commander (1) Remote control sensor (1) Disc magazine (1) FM modulator (1) AA (R6) alkaline batteries (2) Index label (1) Parts for installation and connections (1 set) Design and - Sony DVX-100 | Operating Instructions - Page 53
language 29, 36, 39 T Title 6, 29 Title menu 30 Track 6, 19, 28 Transmitting frequency 13 Troubleshooting 48 TV colour system 5 U Usable discs 5 V, W, X, Y, Z Video CD 5 Wired remote commander 10, 14, 16, 17 Wireless remote commander 8, 9, 12, 16, 19, 20, 21, 22, 23, 28, 29, 30, 31, 32, 33 53 - Sony DVX-100 | Operating Instructions - Page 54
Félicitations ! Nous vous remercions d'avoir fait l'acquisition d'un changeur DVD Sony. Avant de le faire fonctionner, lisez attentivement ce mode d'emploi et conservez le pour toute référence ultérieure. Avertissement Pour les clients en Europe CLASS 1 - Sony DVX-100 | Operating Instructions - Page 55
8 Télécommande sans fil 8 Télécommande raccordée 10 Préparation Préparation de la télécommande sans installer le chargeur de disques de façon à démarrer le changeur DVD 13 Comment retirer le chargeur de disque 14 Lecture de disques Lecture d'un disque 16 Comment procéder à la lecture 16 - Sony DVX-100 | Operating Instructions - Page 56
d'un changeur DVD Sony. Voici les caractéristiques dont vous allez pouvoir profiter. Le DVX-100 est un système de changeur DVD composé d'une télécommande sans fil et d'une télécommande raccordée, d'un relais et d'un changeur DVD. Vous pouvez lire des DVD, des CD vidéo et des CD audio avec votre - Sony DVX-100 | Operating Instructions - Page 57
DC 12 VOLTS NEGATIVE GROUND 10-DISC DVD CHANGER 10 CD enregistrable (CD-R) à usage audio Avec un CD-R à usage audio, vous pouvez éditer des données audio. Sur un CD-R, vous pouvez écrire des données une seule et unique fois. CD réinscriptible (CD-RW) à usage audio Avec un CD-RW à usage audio, vous - Sony DVX-100 | Operating Instructions - Page 58
codage DTS Digital Surround™ doté d'un canal 5.1 externe doit être raccordé à la sortie numérique de ce changeur DVD. * "DTS", "DTS Digital Surround" et "DTS - Vous pouvez lire des CD-R et des CD-RW audio numériques portant ces icônes : - Vous NE pouvez PAS lire des CD-R et CD-RW (audio non numé - Sony DVX-100 | Operating Instructions - Page 59
Remarques sur la manipulation des disques Manipulation des disques • Pour que vos disques restent propres, tenez-les par la partie périphérique. Ne touchez pas la surface. • Ne collez pas de papier ou de bande adhésive sur le disque. S'il reste un résidu collant, de la colle etc., sur le disque, - Sony DVX-100 | Operating Instructions - Page 60
Emplacement des commandes Télécommande sans fil Faisceau infrarouge 1 2 3 4 5 6 7 8 9 q; qa MENU TITLE SUBTITLE AUDIO ANGLE TIME REPEAT A B SEARCH PLAYMODE 1 4 7 CLEAR 23 56 89 RETURN 0 LIST ENTER DISC PREV SET UP SCAN PLAY STOP NEXT PAUSE qs qd qf qg qh qj qk ql w; wa ws wd 8 - Sony DVX-100 | Operating Instructions - Page 61
Touche PREV/NEXT 16, 17, 21 Appuyez sur > pour passer au chapitre, à la plage ou à la scène suivant(e). Appuyez sur . pour revenir au chapitre, à la plage ou à la scène précédent(e). • DVD/CD vidéo 21 Appuyez sur X (PAUSE), puis sur > pour effectuer une lecture image par image. qa Touche SET UP 36 - Sony DVX-100 | Operating Instructions - Page 62
mettre l'appareil hors tension 10 3 Touche DISC (+/-) 16 (touche équivalente à la touche w; de la télécommande sans fil) 4 Touche SCAN/PREV/NEXT 16, 17, 18, 21 " s'affiche sur le moniteur. Avertissement concernant la lecture d'un DVD/CD vidéo Si vous souhaitez lire un disque à différentes vitesses - Sony DVX-100 | Operating Instructions - Page 63
11 - Sony DVX-100 | Operating Instructions - Page 64
Préparation Cette section décrit comment préparer la télécommande raccordée, la télécommande sans fil, l'appareil luimême et comment modifier la fréquence de transmission. Préparation de la télécommande sans fil Insertion des piles 1 Appuyez sur le couvercle du compartiment à pile et faites-le - Sony DVX-100 | Operating Instructions - Page 65
DVD Insertion de disques dans un chargeur Avec la flèche orientée vers le haut Plateau Onglet x Etiquette vers le bas Il y a 10 plateaux face du disque à lire vers le haut. Comment installer le chargeur de disques de façon à démarrer le changeur DVD 1 Appuyez sur OPEN et déverrouillez l'ouverture. - Sony DVX-100 | Operating Instructions - Page 66
DVD 3 Installation du chargeur de disques. Chargeur de disques Comment retirer le chargeur de disque Appuyez sur Z. 4 Refermez la porte. Conseil Après avoir install . Reportez-vous à la section "Lecture d'un disque" (page 16). B/X DISC OFF Attention Si vous appuyez sur la touche B/X de la télé - Sony DVX-100 | Operating Instructions - Page 67
15 - Sony DVX-100 | Operating Instructions - Page 68
lire un DVD/CD vidéo/CD audio. Lecture d'un disque Comment procéder à la lecture Veillez à effectuer les préparatifs suivants : - préparation de la télécommande sans fil (page 12) - modification de la fréquence de transmission (page 13) - insertion de disques dans un chargeur et installation du - Sony DVX-100 | Operating Instructions - Page 69
ENTER PREV SET UP SCAN PLAY STOP LIST DISC NEXT PAUSE DISC SCANm/M PLAYN NEXT> PAUSEX STOPx PREV. En de pause. CD audio Le son s'interrompt et la durée écoulée clignote sur l'écran. *3 DVD/CD vidéo - A chaque pression sur M ou m, la vitesse de lecture commute par pas de 2-, 4-, 8-, 16- et 32 - Sony DVX-100 | Operating Instructions - Page 70
CD audio. 1 45 678 10 6 2 DISC DISC TRACK TRACK 3 -00:00:18 02 A-B 7 SCAN 4 REPEAT LR SHUFFLE PROGRAM 5 1 Pendant la lecture d'un CD plateaux de disques contenant actuellement d'autres types de disques (ex. : DVD ou CD vidéo) : numéro du plateau blanc arrière plan bleu Les - Sony DVX-100 | Operating Instructions - Page 71
seule plage (Track repeat). MENU TITLE SUBTITLE AUDIO ANGLE TIME REPEAT A B SEARCH PLAYMODE 1 4 7 CLEAR 23 56 89 RETURN 0 LIST ENTER DISC REPEAT CLEAR - Sony DVX-100 | Operating Instructions - Page 72
de la durée de fonctionnement.*2 *2 Reportez-vous à la section "Ecran d'affichage (CD audio)" (page 18). Remarques • Le point de départ et de fin doivent se trouver dans le même titre (pour un DVD) ou la même plage (pour un CD vidéo/CD audio). Le segment ne peut pas couvrir deux ou plusieurs titres - Sony DVX-100 | Operating Instructions - Page 73
DVD et des CD vidéo à différentes vitesses au ralenti. Vous pouvez voir la scène comme une image. 4 7 CLEAR 56 89 RETURN 0 LIST ENTER DISC PREV SET lecture au ralenti vers l'avant. La lecture au ralenti commence d'abord à 1/16. 3 Appuyez une nouvelle fois sur M ou m pour sélectionner la vitesse - Sony DVX-100 | Operating Instructions - Page 74
ont été lues, le disque suivant est sélectionné. Pendant la lecture d'un CD audio, appuyez une ou plusieurs fois sur PLAY MODE pour sélectionner SHUFFLE. A 10 premières secondes de chaque plage dans l'ordre du CD. Il est particulièrement pratique pour localiser une plage. Pendant la lecture d'un CD - Sony DVX-100 | Operating Instructions - Page 75
Program - - Last Clear All Clear MENU TITLE SUBTITLE AUDIO ANGLE TIME REPEAT A B SEARCH PLAYMODE 1 4 7 CLEAR 23 56 89 RETURN 0 LIST ENTER DISC PREV SET UP SCAN PLAY STOP NEXT PAUSE PLAY MODE Touches numériques CLEAR ENTER M/,/m/< PLAYN STOPx B:Play(Program Play) Direction:Move Cursor - Sony DVX-100 | Operating Instructions - Page 76
Lecture de plages avec diverses fonctions 4 Appuyez sur ENTER pour saisir le numéro. L'indication "12" apparaît dans la liste programmée. Track Program Last Clear *1 - - All Clear *2 12 B:Play(Program Play) Direction:Move Cursor CLEAR:Track No.Clear 0~9:Track No.Input ENTER:CFMD Si vous - Sony DVX-100 | Operating Instructions - Page 77
25 - Sony DVX-100 | Operating Instructions - Page 78
également appuyer sur la touche PLAY de la télécommande sans fil pour commencer. Disc List 1. DVD 6. DVD 2. DVD 7. Video CD 3. Audio CD 8. Video CD 1 4. Audio CD 9. 5. 10. Disc type select DVD Video CD Audio CD 2 1 Numéro de plateau et types de disques Les plateaux sans type de - Sony DVX-100 | Operating Instructions - Page 79
liste des disques. Le plateau sélectionné est mis en évidence en jaune. Jaune Disc List 1. DVD 2. DVD 3. Audio CD 4. Audio CD 5. 6. DVD 7. Video CD 8. Video CD 9. 10. DVD Disc type select Video CD Audio CD 2 Appuyez sur ENTER. La lecture du disque sélectionné commence. Pour définir le type - Sony DVX-100 | Operating Instructions - Page 80
CD audio)*. Exemple : DISC TRACK 00:00:18 022 REPEAT LR 45 678 10 DISC TRACK A-B SCAN SHUFFLE PROGRAM Durée en cours * Pour plus détails, reportez-vous à la section "Ecran d'affichage (CD change dans l'ordre suivant : • Paramètres clé avec un DVD B Numéro de titre B Numéro de chapitre B Dur - Sony DVX-100 | Operating Instructions - Page 81
l'affichage des sous-titres ou modifier la langue des sous-titres sur de tels DVD. MENU TITLE SUBTITLE AUDIO ANGLE TIME REPEAT A B SEARCH PLAYMODE SUBTITLE 1 4 7 CLEAR 23 56 89 RETURN 0 ENTER LIST DISC ENTER M/m 1 Appuyez sur SUBTITLE, en cours de lecture. La langue des sous-titres appara - Sony DVX-100 | Operating Instructions - Page 82
MENU TITLE SUBTITLE AUDIO ANGLE TIME REPEAT A B SEARCH PLAYMODE TITLE MENU 1 4 7 CLEAR 23 56 89 RETURN 0 ENTER LIST DISC ENTER M/,/m/< Utilisation d'un menu de titres Certains DVD disposent d'un menu de titres. vous pouvez sélectionner et lire un titre à partir du menu.*1 *1 Les titres sont - Sony DVX-100 | Operating Instructions - Page 83
PLAYMODE ANGLE 1 4 7 CLEAR 23 56 89 RETURN 0 ENTER LIST DISC ENTER M/m 1 Pendant la lecture d'une scène enregistrée avec des DVD. • Le nombre total d'angles enregistrés varie selon le DVD et la scène. • Vous pouvez uniquement changer d'angle en lecture normale. Vous ne pouvez pas changer - Sony DVX-100 | Operating Instructions - Page 84
. MENU TITLE SUBTITLE AUDIO ANGLE TIME REPEAT A B SEARCH PLAYMODE 1 4 7 CLEAR 23 56 89 RETURN 0 LIST ENTER DISC AUDIO ENTER CD audio 1 En cours de lecture, appuyez sur AUDIO. 2 Appuyez sur AUDIO pour sélectionner le mode de sortie souhaité (Stéréo/Monaurale gauche/ Monaurale droite) lorsque - Sony DVX-100 | Operating Instructions - Page 85
CLEAR 23 56 89 RETURN 0 LIST ENTER DISC PREV SET UP SCAN PLAY STOP NEXT PAUSE MENU SEARCH 3 Resume. . . PBC 1 Lors de la lecture d'un CD vidéo, appuyez sur MENU. Le menu PBC s'affiche. 2 Tandis : pour entrer le numéro de paramètre, "10" 1 Appuyez sur 1. "-1"* apparaît dans la partie sup - Sony DVX-100 | Operating Instructions - Page 86
Utilisation des fonctions PBC (contrôle de lecture) Activation des fonctions PBC à partir de la lecture normale 1 Pendant la lecture normale d'un CD vidéo, appuyez sur STOP. La lecture s'arrête. L'indication "x" clignote pendant une seconde et l'indication "Resume---" apparaît. La reprise de la - Sony DVX-100 | Operating Instructions - Page 87
35 - Sony DVX-100 | Operating Instructions - Page 88
ètres pour la configuration 1 Appuyez sur STOP pour interrompre la lecture. 2 Appuyez sur SET UP. L'écran de configuration apparaît : le paramètre sélectionné est mis en évidence en jaune. Set Up DVD Menu Language Audio Language Subtitle Language Digital Output Display Parental OSD Message Player - Sony DVX-100 | Operating Instructions - Page 89
la modification de la configuration et reprendre la lecture 1 Appuyez sur SET UP. L'écran de lecture avec le témoin "x" allumé apparaît. La reprise de la lecture est toujours activée. 2 Appuyez sur PLAY pour commencer la lecture. • DVD/Video CD La lecture du disque commence dès le début*. * Si la - Sony DVX-100 | Operating Instructions - Page 90
la modification de la configuration et reprendre la lecture 1 Appuyez sur SET UP. L'écran de lecture avec le témoin "x" allumé apparaît. La reprise de la lecture est toujours activée. 2 Appuyez sur PLAY pour commencer la lecture. • DVD/CD vidéo La lecture du disque commence à partir du début*. * Si - Sony DVX-100 | Operating Instructions - Page 91
la modification de la configuration et reprendre la lecture 1 Appuyez sur SET UP. L'écran de lecture avec le témoin "x" allumé apparaît. La reprise de la lecture est toujours activée. 2 Appuyez sur PLAY pour commencer la lecture. • DVD/CD vidéo La lecture du disque commence dès le début*2. *2 Si la - Sony DVX-100 | Operating Instructions - Page 92
sortie audio de votre choix sous "Digital Output". Set Up DVD Menu Language Audio Language Subtitle Language Digital Output Display de la lecture est toujours activée. 2 Appuyez sur PLAY pour commencer la lecture. • DVD/CD vidéo La lecture du disque commence dès le début*2. *2 Si la reprise de la - Sony DVX-100 | Operating Instructions - Page 93
SET UP. L'écran de lecture avec le témoin "x" allumé apparaît. La reprise de la lecture est toujours activée. 2 Appuyez sur PLAY pour commencer la lecture. • DVD/CD • Si vous utilisez un moniteur normal pour lire une image DVD large 16:9, les images ne semblent pas normales • Lorsque vous utilisez un - Sony DVX-100 | Operating Instructions - Page 94
configuration Parental (configuration initiale) La lecture de certains DVD peut être limitée en fonction d'un niveau pr apparaît. Password Password has been changed This password is necessary when you change parental setting. Please remember this password. Please press "ENTER" key. 5 Appuyez sur - Sony DVX-100 | Operating Instructions - Page 95
est toujours activée. 2 Appuyez sur PLAY pour commencer la lecture. • DVD/CD vidéo La lecture du disque commence dès le début*5. *5 Si DVD. Si c'est le cas, suivez les instructions à l'écran. Exemple : écran d'invite Parental Level Setting You need to change player's parental level to play this disc - Sony DVX-100 | Operating Instructions - Page 96
Pour modifier votre mot de passe, suivez les instructions de la section "Modification du mot de passe" configuration et reprendre la lecture 1 Appuyez sur SET UP. L'écran de lecture avec le témoin 2 Appuyez sur PLAY pour commencer la lecture. • DVD/CD vidéo La lecture du disque commence dès le début - Sony DVX-100 | Operating Instructions - Page 97
annuler la modification de la configuration et reprendre la lecture 1 Appuyez sur SET UP. L'écran de lecture avec le témoin "x" allumé apparaît. lecture est toujours activée. 2 Appuyez sur PLAY pour commencer la lecture. • DVD/CD vidéo La lecture du disque commence dès le début*6. *6 Si la reprise - Sony DVX-100 | Operating Instructions - Page 98
de la lecture est toujours activée. 2 Appuyez sur PLAY pour commencer la lecture. • DVD/CD vidéo La lecture du disque commence à partir du début*. * Si la reprise de pouvez vérifier votre sélection sous "OSD message". Set Up DVD Menu Language Audio Language Subtitle Language Digital Output Display - Sony DVX-100 | Operating Instructions - Page 99
de la lecture est toujours activée. 2 Appuyez sur PLAY pour commencer la lecture. • DVD/CD vidéo La lecture du disque commence à partir du début*. * Si la reprise de pouvez vérifier la langue sous "Player Language". Set Up DVD Menu Language Audio Language Subtitle Language Digital Output Display - Sony DVX-100 | Operating Instructions - Page 100
cours de l'utilisation de cet appareil, utilisez ce guide de dépannage pour essayer de remédier au problème. Si le problème persiste, consultez votre revendeur Sony le plus proche. Alimentation L'appareil ne se met (page 41)), l'image ne remplit pas l'écran. , Le format est fixe sur votre DVD. 48 - Sony DVX-100 | Operating Instructions - Page 101
x de la télécommande avant de commencer la lecture. (page 17) , Lorsque vous lisez un DVD, un titre de menu ou un menu DVD apparaît automatiquement sur le moniteur. , Lorsque vous lisez un CD vidéo, un menu PBC apparaît automatiquement sur le moniteur. La lecture s'arrête automatiquement. , Le - Sony DVX-100 | Operating Instructions - Page 102
possible que vous ne puissiez pas désactiver les sous-titres. Les angles ne peuvent pas être modifiés lorsque vous lisez un DVD. , Un seul angle est enregistré sur le DVD. , Modifiez les angles sur une scène enregistrée avec plusieurs angles (page 31). , La modification des angles est interdite sur - Sony DVX-100 | Operating Instructions - Page 103
discs can't be played." (aucun disque ne peut être lu) "Magazine is not loaded." (le chargeur n'est pas inséré) "Magazine empty" (chargeur vide) Cause et/ou action corrective •La commande que vous avez exécutée n'est pas disponible pour le DVD correctement. •Le disque est sale. , Nettoyez le disque. - Sony DVX-100 | Operating Instructions - Page 104
DVD % W PEAK) Généralités Puissance de raccordement Batterie de voiture 12 V CC (masse négative) approx.) 2,5 kg (5 liv. 8 on.) Température de fonctionnement -10 °C à 55 °C (14 ° F à 131 ° F) Accessoires (2) Etiquette d'index (1) Eléments d'installation et de raccordement (1 jeu) La conception - Sony DVX-100 | Operating Instructions - Page 105
digital 40 DTS 6, 40 DVD 5 DVD Menu Language 37 E Ecran d'affichage (CD audio) 18 Ecran de configuration 36 Ecran de démarrage 16 Ecran d'invite 43 F TV 5 T, U, V, W, X, Y, Z Télécommande raccordée 10, 14, 16, 17 Télécommande sans fil 8, 9, 12, 16, 19, 20, 21, 22, 23, 28, 29, 30, 31, 32, - Sony DVX-100 | Operating Instructions - Page 106
Willkommen! Danke, daß Sie sich für diesen DVD-Wechsler von Sony entschieden haben. Lesen Sie diese Anleitung vor Inbetriebnahme des Geräts bitte genau durch, und bewahren Sie sie zum späteren Nachschlagen sorgfältig auf. - Sony DVX-100 | Operating Instructions - Page 107
13 Vorbereiten des DVD-Wechslers 13 Einlegen von CDs/DVDs in das Magazin 13 So installieren Sie vor dem Starten des DVD-Wechslers das CD/DVD-Magazin 13 Herausnehmen des CD/DVD-Magazins 14 Wiedergeben von CDs/DVDs Wiedergeben einer CD/DVD ....... 16 Wiedergabe 16 Fortsetzen der Wiedergabe - Sony DVX-100 | Operating Instructions - Page 108
DVX-100 ist ein DVD-Wechslersystem, das aus einer schnurlosen Fernbedienung und einer Kabelfernbedienung, einem Relaiskästchen und einem DVD-Wechsler besteht. Mit dem Gerät können Sie DVDs, Video-CDs und Audio-CDs Erschütterungen Sollten an Ihrem Gerät Probleme auftreten oder sollten Sie Fragen haben - Sony DVX-100 | Operating Instructions - Page 109
nur Audiodaten. Die Wiedergabedauer bei einer 12-cm-Standard-CD beträgt 74 Regionalcode X Minuten. CD-R (bespielbare CD) für Audiowiedergabe MODEL NO DC 12 VOLTS NEGATIVE GROUND 10-DISC DVD CHANGER 10 Bei einer CD-R für die Audiowiedergabe können Sie Audiodaten bearbeiten. Sie können eine - Sony DVX-100 | Operating Instructions - Page 110
muß ein externes DTS Digital Surround™-Decodersystem mit 5.1-Kanalunterstützung an den digitalen Ausgang dieses DVD-Wechslers angeschlossen werden Aufbau einer DVD Titel Aufbau einer Video-CD/ Audio-CD Kapitel Stück Index Datenträger • Index (Audio-CD)/Video-Index (Video-CD) Numerierte Stellen - Sony DVX-100 | Operating Instructions - Page 111
Hinweise zum Umgang mit CDs/DVDs Umgang mit CDs/DVDs • Fassen Sie CDs/DVDs nur am Rand an, damit sie nicht verschmutzen. Berühren Sie nicht die Oberfläche einer CD/DVD. • Kleben Sie weder Papier noch Klebeband auf CDs/DVDs. Falls sich Klebstoffrückstände o. ä. auf der CD/DVD befinden, entfernen Sie - Sony DVX-100 | Operating Instructions - Page 112
Funktion der Teile und Bedienelemente Schnurlose Fernbedienung Lichtsender 1 2 3 4 5 6 7 8 9 q; qa MENU TITLE SUBTITLE AUDIO ANGLE TIME REPEAT A B SEARCH PLAYMODE 1 4 7 CLEAR 23 56 89 RETURN 0 LIST ENTER DISC PREV SET UP SCAN PLAY STOP NEXT PAUSE qs qd qf qg qh qj qk ql w; wa ws wd 8 - Sony DVX-100 | Operating Instructions - Page 113
die Optionen oder Einstellungen ausgeführt. ql Taste LIST 26, 27 Mit LIST lassen Sie die Liste der im Magazin enthaltenen CDs/DVDs anzeigen. w; Taste DISC (+/-) 16 Wählen Sie mit DISC die gewünschte CD/DVD aus. wa Taste PLAY 16, 17, 21, 23, 24, 33, 34, 37, 38, 39, 40, 41, 43, 44, 45, 46, 47 Mit PLAY - Sony DVX-100 | Operating Instructions - Page 114
DISC (-/+) 16 (entspricht der Taste w; auf der schnurlosen Fernbedienung) 4 Taste SCAN/PREV/NEXT 16, 17, 18, 21 Mit > gelangen Sie zum nächsten Kapitel oder Stück oder zur nächsten Szene. Mit . gelangen Sie zurück zum vorherigen Kapitel oder Stück oder zur vorherigen Szene. • Bei der DVD-/Video-CD - Sony DVX-100 | Operating Instructions - Page 115
11 - Sony DVX-100 | Operating Instructions - Page 116
der Batterien so aus, wie mit den Markierungen im Batteriefach angegeben. 3 Bringen Sie die Batteriefachabdeckung wieder an. Hinweise • Halten Sie die Batterie nicht mit einer Metallpinzette. Dies könnte zu einem Kurzschluß führen. • Setzen Sie die Fernbedienung weder großer Hitze noch Feuchtigkeit - Sony DVX-100 | Operating Instructions - Page 117
und Monitor nach. Vorbereiten des DVDWechslers Einlegen von CDs/DVDs in das Magazin Mit dem Pfeil nach oben CD/DVD-Fach Lasche x Mit der beschrifteten Seite nach unten Im Magazin befinden sich 10 Fächer: Legen Sie nur eine CD/DVD in jedes Fach ein. Hinweis Zur Wiedergabe einer doppelseitig - Sony DVX-100 | Operating Instructions - Page 118
erscheint auf dem Monitor, und das Gerät startet automatisch die Wiedergabe der ersten CD/ DVD im Magazin. Erläuterungen dazu finden Sie unter „Wiedergeben einer CD/DVD" (Seite 16). B/X DISC OFF Achtung Wenn Sie B/X auf der Kabelfernbedienung (bzw. PLAY auf der schnurlosen Fernbedienung - Sony DVX-100 | Operating Instructions - Page 119
15 - Sony DVX-100 | Operating Instructions - Page 120
„Changing disc---" und dann „Reading disc---". Die ausgewählte CD/DVD wird wiedergegeben. Hinweis Mit der Kabelfernbedienung lassen sich nur bestimmte Funktionen ausführen. Siehe „Kabelfernbedienung" (Seite 10). Die weiteren Funktionen können Sie nur mit der schnurlosen Fernbedienung aufrufen. 16 - Sony DVX-100 | Operating Instructions - Page 121
ENTER PREV SET UP SCAN PLAY STOP LIST DISC NEXT PAUSE DISC SCANm/M PLAYN NEXT> PAUSEX STOPx PREV. Während der Wiedergabe auf dem Bildschirm. *3 DVD/Video-CD - Mit jedem Tastendruck auf M oder m wechselt die Wiedergabegeschwindigkeit (2-, 4-, 8-, 16- und 32fach). Diese Geschwindigkeitsangaben - Sony DVX-100 | Operating Instructions - Page 122
Wiedergeben einer CD/DVD Anzeigebildschirm (Audio-CD) Während der Wiedergabe einer Audio-CD erscheint folgender Bildschirm. 1 45 678 10 6 2 DISC DISC TRACK TRACK 3 -00:00:18 02 A-B 7 SCAN 4 REPEAT LR SHUFFLE PROGRAM 5 1 Bei der Wiedergabe einer Audio-CD Symbolanzeige: Vorgehen - Sony DVX-100 | Operating Instructions - Page 123
lassen. MENU TITLE SUBTITLE AUDIO ANGLE TIME REPEAT A B SEARCH PLAYMODE 1 4 7 CLEAR 23 56 89 RETURN 0 LIST REPEAT CLEAR ENTER DISC - Sony DVX-100 | Operating Instructions - Page 124
- und der Endpunkt müssen sich im selben Titel (bei DVD) bzw. Stück (bei Video-CD/Audio-CD) befinden. Die zu wiederholende Passage kann sich nicht auf mehrere Titel oder Stücke erstrecken. • Die Anzeige „A-B" für DVD/Video-CD wird nach etwa einer Sekunde ausgeblendet, dann erfolgt die Wiedergabe - Sony DVX-100 | Operating Instructions - Page 125
Bild für Bild weitergeschaltet. ENTER PREV SET UP SCAN PLAY STOP DISC NEXT PAUSE SCANm/M PLAYN NEXT> PAUSEX Zeitlupe startet zunächst mit 1/16 der Normalgeschwindigkeit. 3 Drücken Hinweis zur Wiedergabe von DVDs/Video-CDs Wenn Sie eine DVD/Video-CD in einer der Zeitlupengeschwindigkeiten - Sony DVX-100 | Operating Instructions - Page 126
CD in willkürlicher Reihenfolge wiedergegeben (Zufallswiedergabe). Wenn alle Stücke einer CD wiedergegeben wurden, wird die nächste CD haben. „SHUFFLE" leuchtet gelb. Mit diesem Modus werden die ersten 10 Sekunden der einzelnen Stücke nacheinander wiedergegeben. Diese Funktion ist nützlich, - Sony DVX-100 | Operating Instructions - Page 127
ein Programm zusammenzustellen und Stücke auf einer CD in der von Ihnen gewünschten Reihenfolge wiedergeben zu lassen. MENU TITLE SUBTITLE AUDIO ANGLE TIME REPEAT A B SEARCH PLAYMODE 1 4 7 CLEAR 23 56 89 RETURN 0 LIST ENTER DISC PREV SET UP SCAN PLAY STOP NEXT PAUSE PLAY MODE Zahlentasten - Sony DVX-100 | Operating Instructions - Page 128
Wiedergeben von Stücken mit unterschiedlichen Funktionen 4 Drücken Sie ENTER, um die Nummer zu bestätigen. „12" wird in der Programmliste angezeigt. Track Program Last Clear *1 - - All Clear *2 12 B:Play(Program Play) Direction:Move Cursor CLEAR:Track No.Clear 0~9:Track No.Input ENTER:CFMD - Sony DVX-100 | Operating Instructions - Page 129
25 - Sony DVX-100 | Operating Instructions - Page 130
Magazin eingelegten CDs/ DVDs anzeigen lassen und damit den Datenträgertyp (DVD/Video-CD/Audio-CD) überprüfen, eine CD/DVD auswählen oder den Datenträgertyp für die aktuelle Wiedergabe einstellen. 4 7 CLEAR 56 89 RETURN 0 LIST ENTER DISC RETURNO LIST ENTER PREV SCAN PLAY NEXT M/,/m/< SET - Sony DVX-100 | Operating Instructions - Page 131
mit den Cursortasten (M/,/m/ - Sony DVX-100 | Operating Instructions - Page 132
. Die Spieldauer wird im Anzeigebildschirm (AudioCD) angezeigt*. Beispiel: DISC TRACK 00:00:18 022 REPEAT LR 45 678 10 DISC TRACK A-B SCAN SHUFFLE PROGRAM Spieldauer * Einzelheiten dazu finden Sie unter „Anzeigebildschirm (Audio-CD)" (Seite 18). Mit jedem Tastendruck auf TIME wechselt die - Sony DVX-100 | Operating Instructions - Page 133
DVDs die Untertitel ein- oder ausschalten oder die Sprache für die Untertitel wechseln. MENU TITLE SUBTITLE AUDIO ANGLE TIME REPEAT A B SEARCH PLAYMODE SUBTITLE 1 4 7 CLEAR 23 56 89 RETURN 0 ENTER LIST DISC Liste der Untertitelsprachen, die auf der CD/DVD aufgezeichnet sind. Hinweis Wenn keine - Sony DVX-100 | Operating Instructions - Page 134
MENU TITLE SUBTITLE AUDIO ANGLE TIME REPEAT A B SEARCH PLAYMODE TITLE MENU 1 4 7 CLEAR 23 56 89 RETURN 0 LIST ENTER DISC Arbeiten mit dem Titelmenü ENTER M/,/m/< Einige DVDs enthalten ein Titelmenü. Sie können einen Titel aus dem Menü auswählen und wiedergeben.*1 *1 Titel sind die größten - Sony DVX-100 | Operating Instructions - Page 135
wechselt die Sprache für den Ton zwischen den verfügbaren Sprachen, die auf der DVD aufgezeichnet sind. 3 Drücken Sie ENTER*2 . *2 Auch wenn Sie ENTER nicht SEARCH PLAYMODE ANGLE 1 4 7 CLEAR 23 56 89 RETURN 0 ENTER LIST DISC ENTER M/m 1 Drücken Sie während der Wiedergabe einer Szene, die in - Sony DVX-100 | Operating Instructions - Page 136
SEARCH PLAYMODE 1 4 7 CLEAR 23 56 89 RETURN 0 LIST ENTER DISC AUDIO ENTER Audio-CD 1 Drücken Sie während der Wiedergabe AUDIO. 2 Wählen Sie Schritt 2 auswählen. Sie brauchen dazu ENTER nicht zu drücken. Video-CD 1 Drücken Sie während der Wiedergabe AUDIO. Die aktuelle Audioausgabe wird etwa - Sony DVX-100 | Operating Instructions - Page 137
Video-CD. Schlagen Sie bitte in den mit der Video-CD gelieferten Anweisungen nach. MENU TITLE SUBTITLE AUDIO ANGLE TIME REPEAT A B SEARCH PLAYMODE 1 4 7 CLEAR 23 56 89 RETURN 0 LIST ENTER DISC PREV SET Bildschirm angezeigt. Beispiel: Eingeben der Optionsnummer „10" 1 Drücken Sie 1. „-1"* - Sony DVX-100 | Operating Instructions - Page 138
Control - Wiedergabesteuerung) Aktivieren der PBC-Funktionen während der normalen Wiedergabe 1 Drücken Sie während der normalen Wiedergabe einer Video-CD die Taste STOP. Die Wiedergabe stoppt. „x" blinkt 1 Sekunde lang, und „Resume---" wird angezeigt. Die Fortsetzungsfunktion (Seite 17) wird - Sony DVX-100 | Operating Instructions - Page 139
35 - Sony DVX-100 | Operating Instructions - Page 140
Auswählen von Optionen für die Konfiguration 1 Mit STOP stoppen Sie die Wiedergabe. 2 Drücken Sie SET UP. Das Setup-Menü erscheint. Die ausgewählte Option ist gelb hervorgehoben. Set Up DVD Menu Language Audio Language Subtitle Language Digital Output Display Parental OSD Message Player Language - Sony DVX-100 | Operating Instructions - Page 141
ab und setzen die Wiedergabe fort 1 Drücken Sie SET UP. Der Wiedergabebildschirm mit der leuchtenden Anzeige „x" erscheint. Die Fortsetzungsfunktion ist noch aktiviert. 2 Starten Sie mit PLAY die Wiedergabe. • DVD/Video-CD Die CD/DVD wird von Anfang an wiedergegeben*. * Wenn die Fortsetzungsfunktion - Sony DVX-100 | Operating Instructions - Page 142
ab und setzen die Wiedergabe fort 1 Drücken Sie SET UP. Der Wiedergabebildschirm mit der leuchtenden Anzeige „x" erscheint. Die Fortsetzungsfunktion ist noch aktiviert. 2 Starten Sie mit PLAY die Wiedergabe. • DVD/Video-CD Die CD/DVD wird von Anfang an wiedergegeben*. * Wenn die Fortsetzungsfunktion - Sony DVX-100 | Operating Instructions - Page 143
und setzen die Wiedergabe fort 1 Drücken Sie SET UP. Der Wiedergabebildschirm mit der leuchtenden Anzeige „x" erscheint. Die Fortsetzungsfunktion ist noch aktiviert. 2 Starten Sie mit PLAY die Wiedergabe. • DVD/Video-CD Die CD/DVD wird von Anfang an wiedergegeben*2 . *2 Wenn die Fortsetzungsfunktion - Sony DVX-100 | Operating Instructions - Page 144
und setzen die Wiedergabe fort 1 Drücken Sie SET UP. Der Wiedergabebildschirm mit der leuchtenden Anzeige „x" erscheint. Die Fortsetzungsfunktion ist noch aktiviert. 2 Starten Sie mit PLAY die Wiedergabe. • DVD/Video-CD Die CD/DVD wird von Anfang an wiedergegeben*2. *2 Wenn die Fortsetzungsfunktion - Sony DVX-100 | Operating Instructions - Page 145
Format „4:3 Letter Box". Wenn Sie eine 16:9-Breitbild-DVD auf einem normalen Monitor wiedergeben, werden die SET UP. Der Wiedergabebildschirm mit der leuchtenden Anzeige „x" erscheint. Die Fortsetzungsfunktion ist noch aktiviert. 2 Starten Sie mit PLAY die Wiedergabe. • DVD/Video-CD Die CD/DVD - Sony DVX-100 | Operating Instructions - Page 146
Kindersicherung versehen, mit der verhindert werden kann, daß Kinder sich DVDs ansehen, die nicht für ihr Alter geeignet sind. Mit der . Password Password has been changed This password is necessary when you change parental setting. Please remember this password. Please press "ENTER" key. 5 Drücken - Sony DVX-100 | Operating Instructions - Page 147
und setzen die Wiedergabe fort 1 Drücken Sie SET UP. Der Wiedergabebildschirm mit der leuchtenden Anzeige „x" erscheint. Die Fortsetzungsfunktion ist noch aktiviert. 2 Starten Sie mit PLAY die Wiedergabe. • DVD/Video-CD Die CD/DVD wird von Anfang an wiedergegeben*5. *5 Wenn die Fortsetzungsfunktion - Sony DVX-100 | Operating Instructions - Page 148
und setzen die Wiedergabe fort 1 Drücken Sie SET UP. Der Wiedergabebildschirm mit der leuchtenden Anzeige „x" erscheint. Die Fortsetzungsfunktion ist noch aktiviert. 2 Starten Sie mit PLAY die Wiedergabe. • DVD/Video-CD Die CD/DVD wird von Anfang an wiedergegeben*4. *4 Wenn die Fortsetzungsfunktion - Sony DVX-100 | Operating Instructions - Page 149
und setzen die Wiedergabe fort 1 Drücken Sie SET UP. Der Wiedergabebildschirm mit der leuchtenden Anzeige „x" erscheint. Die Fortsetzungsfunktion ist noch aktiviert. 2 Starten Sie mit PLAY die Wiedergabe. • DVD/Video-CD Die CD/DVD wird von Anfang an wiedergegeben*6. *6 Wenn die Fortsetzungsfunktion - Sony DVX-100 | Operating Instructions - Page 150
ab und setzen die Wiedergabe fort 1 Drücken Sie SET UP. Der Wiedergabebildschirm mit der leuchtenden Anzeige „x" erscheint. Die Fortsetzungsfunktion ist noch aktiviert. 2 Starten Sie mit PLAY die Wiedergabe. • DVD/Video-CD Die CD/DVD wird von Anfang an wiedergegeben*. * Wenn die Fortsetzungsfunktion - Sony DVX-100 | Operating Instructions - Page 151
ab und setzen die Wiedergabe fort 1 Drücken Sie SET UP. Der Wiedergabebildschirm mit der leuchtenden Anzeige „x" erscheint. Die Fortsetzungsfunktion ist noch aktiviert. 2 Starten Sie mit PLAY die Wiedergabe. • DVD/Video-CD Die CD/DVD wird von Anfang an wiedergegeben*. * Wenn die Fortsetzungsfunktion - Sony DVX-100 | Operating Instructions - Page 152
Sollte die Störung bestehen bleiben, wenden Sie sich an Ihren Sony-Händler. Stromversorgung Das Gerät läßt sich nicht einschalten. , Ü anzeigen zu lassen. Das Bild ist gestört. , Reinigen Sie die CD/DVD. Sie haben zwar das Bildseitenverhältnis eingestellt, indem Sie die Konfiguration entsprechend - Sony DVX-100 | Operating Instructions - Page 153
Wiedergabe zurück. Der Ton ist gestört. , Reinigen Sie die CD/DVD. , Wählen Sie die richtige Einstellung für die digitale Ausgabe (Seite 40). Der Stereoeffekt geht bei der Wiedergabe einer Video-CD oder Audio-CD verloren. , Stellen Sie für den Audioausgang „Stereo" ein (Seite 32). , Vergewissern Sie - Sony DVX-100 | Operating Instructions - Page 154
Blickwinkel nur bei einer Szene ändern, die in mehreren Blickwinkeln vorhanden ist (Seite 31). , Ein Wechsel der Blickwinkel ist bei dieser DVD nicht gestattet. Das Gerät funktioniert nicht ordnungsgemäß. , Die Funktion des Geräts wird möglicherweise durch statische Aufladung usw. beeinträchtigt. Dr - Sony DVX-100 | Operating Instructions - Page 155
this command now." „This disc can't be played." „All discs can't be played." „Magazine is not loaded." „Magazine empty" Ursache und/oder Abhilfema Magazin nicht eingesetzt. , Setzen Sie das Magazin in dieses Gerät ein. •Im Magazin befinden sich keine CDs/DVDs. , Legen Sie eine CD/DVD ins Magazin - Sony DVX-100 | Operating Instructions - Page 156
Technische Daten DVD-Wechsler Laser Halbleiter-Laser Signalformat Für Kunden in Europa PAL Für Kunden in den ca. 2,5 kg Betriebstemperatur -10 ˚C bis 55 ˚C Mitgeliefertes Zubehör Kabelfernbedienung (1) Schnurlose Fernbedienung (1) Fernbedienungssensor (1) CD/DVD-Magazin (1) UKW-Modulator (1) R6 - Sony DVX-100 | Operating Instructions - Page 157
26 CD/DVD-Magazin 13, 14 CD-R (bespielbare CD) 5, 6 CD-RW (wiederbeschreibbare CD) 5, 6 D, E Digitale Ausgabe 36, 40 Display 41 Dolby Digital 40 DTS 6, 40 DVD 5 DVD-Menü 30 F Farbfernsehsystem 5 Fortsetzungsfunktion 17 G, H Geeignete Datenträger 5 I, J Index 6, 53 K Kabelfernbedienung 10, 14, 16, 17 - Sony DVX-100 | Operating Instructions - Page 158
54 - Sony DVX-100 | Operating Instructions - Page 159
55 - Sony DVX-100 | Operating Instructions - Page 160
Feld ein. Sie finden diese auf einem Aufkleber, der auf dem Gerätegehäuse angebracht ist. Nehmen Sie den ausgefüllten GerätePass anschließend unbedingt aus der im Fahrzeug aufzubewahren, um Missbrauch zu verhindern. Modellbezeichnung DVX-100 Seriennummer (SERIAL NO.) Sony Corporation Printed in Japan
-
 1
1 -
 2
2 -
 3
3 -
 4
4 -
 5
5 -
 6
6 -
 7
7 -
8
-
9
-
10
-
11
-
12
-
13
-
14
-
15
-
16
-
17
-
18
-
19
-
20
-
21
-
22
-
23
-
24
-
25
-
26
-
27
-
28
-
29
-
30
-
31
-
32
-
33
-
34
-
35
-
36
-
37
-
38
-
39
-
40
-
41
-
42
-
43
-
44
-
45
-
46
-
47
-
48
-
49
-
50
-
51
-
52
-
53
-
54
-
55
-
56
-
57
-
58
-
59
-
60
-
61
-
62
-
63
-
64
-
65
-
66
-
67
-
68
-
69
-
70
-
71
-
72
-
73
-
74
-
75
-
76
-
77
-
78
-
79
-
80
-
81
-
82
-
83
-
84
-
85
-
86
-
87
-
88
-
89
-
90
-
91
-
92
-
93
-
94
-
95
-
96
-
97
-
98
-
99
-
100
-
101
-
102
-
103
-
104
-
105
-
106
-
107
-
108
-
109
-
110
-
111
-
112
-
113
-
114
-
115
-
116
-
117
-
118
-
119
-
120
-
121
-
122
-
123
-
124
-
125
-
126
-
127
-
128
-
129
-
130
-
131
-
132
-
133
-
134
-
135
-
136
-
137
-
138
-
139
-
140
-
141
-
142
-
143
-
144
-
145
-
146
-
147
-
148
-
149
-
150
-
151
-
152
-
153
-
154
-
155
-
156
-
157
-
158
-
159
-
160
 |
 |

© 2001 Sony Corporation
DVD Changer
DVX-100
3-234-623-
11
(2)
Operating Instructions
Mode d’emploi
Bedienungsanleitung
DE
DVD Changer
DVX-100
For installation and connections, see the supplied installation/connections manual.
En ce qui concerne l’installation et les connexions, consulter le manuel d’installation/connexions fourni.
Zur Installation und zum Anschluß siehe die mitgelieferte Installations-/Anschlußanleitung.
Wichtig!
Bitte nehmen Sie sich etwas Zeit, um den Geräte-Pass vollständig
auszufüllen. Dieser befindet sich auf der hinteren Umschlagseite dieser
Bedienungsanleitung.
Owner’s Record
The model and serial numbers are located on the rear of the unit.
Record the serial number in the space provided below.
Refer to these numbers whenever you call upon your Sony dealer regarding this product.
Model No. DVX-100
Serial No.
GB
FR