Sony HCD-EP707 Operating Instructions (CMTEP707) - Page 7
Inserting two size AA (R6) batteries into the remote, Setting the clock - model
 |
View all Sony HCD-EP707 manuals
Add to My Manuals
Save this manual to your list of manuals |
Page 7 highlights
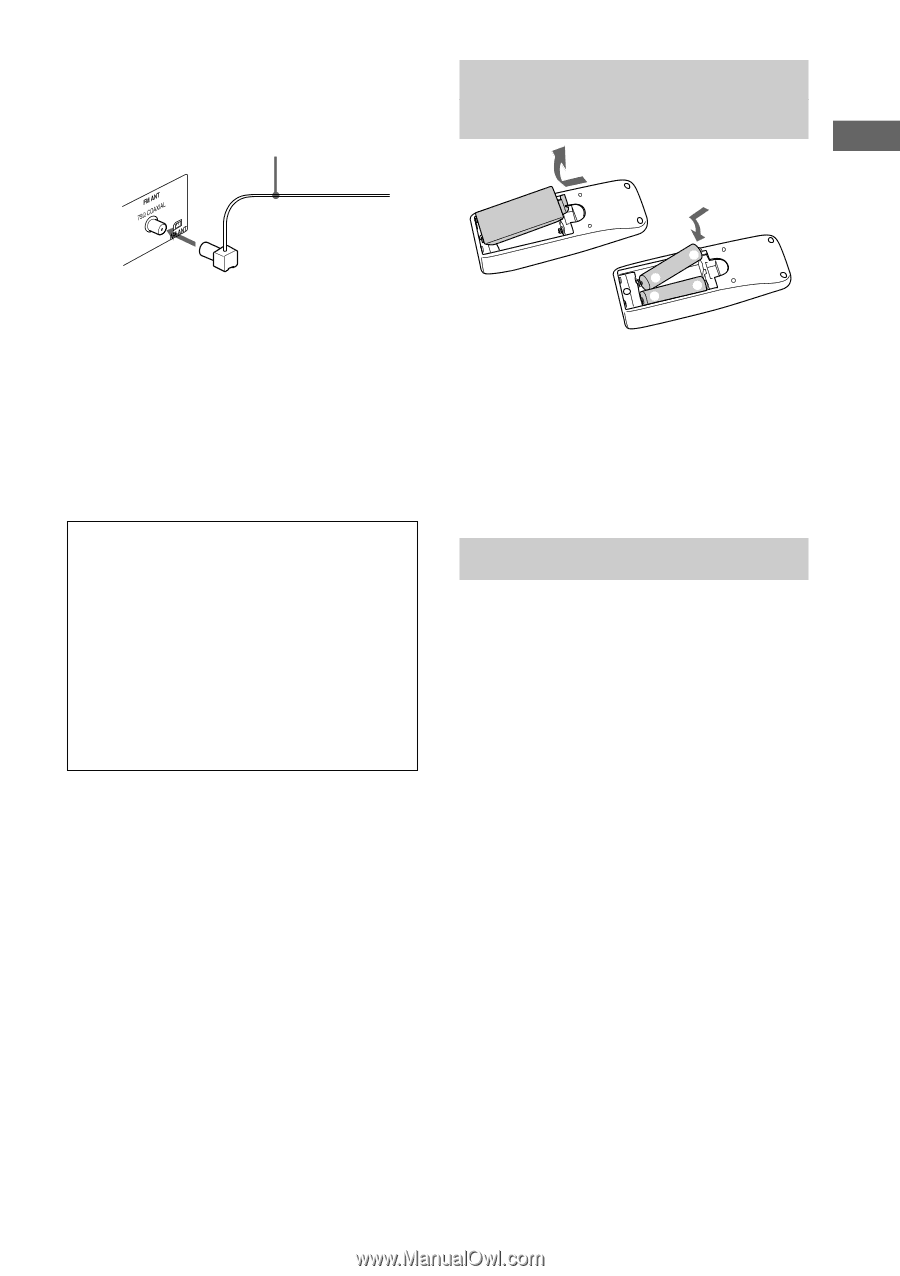
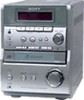
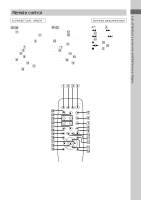
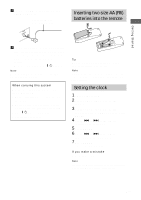
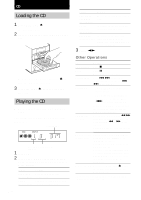
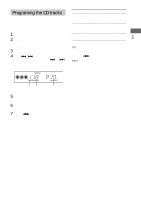
Getting Started 3 Connect the FM antenna (except for European model). Extend the FM lead antenna horizontally. Inserting two size AA (R6) batteries into the remote 4 Connect the power cord to a wall outlet. If the supplied adaptor on the plug does not fit your wall outlet, detach it from the plug (only for models equipped with the adaptor). To turn on the system, press [/ 1 (power). Note When carrying this system, make sure that all discs are removed from the system. When carrying this system Perform the following procedure to protect the CD mechanism. 1 Make sure that the disc is removed from the system. 2 Re-tie the strip that was attached to the CD tray when you purchased the system. 3 Press [/ 1 to turn off the system. 4 Unplug the power cord. e E E e Tip When the remote no longer operates the system, replace both batteries with new ones. Note If you do not use the remote for a long period of time, remove the batteries to avoid possible damage from battery leakage. Setting the clock 1 Turn on the system. 2 Press CLOCK/TIMER SET on the remote. 3 Press CLOCK/TIMER SET on the remote to select "SET CLK", then press ENTER. 4 Press . or > on the remote repeatedly to set the hour. 5 Press ENTER. 6 Press . or > on the remote repeatedly to set the minute. 7 Press ENTER. The clock starts working. If you make a mistake Perform from step 1. Note The clock settings are canceled when you disconnect the power cord or if a power failure occurs. 7GB
-
 1
1 -
 2
2 -
 3
3 -
 4
4 -
 5
5 -
 6
6 -
 7
7 -
 8
8 -
 9
9 -
 10
10 -
 11
11 -
 12
12 -
13
-
14
-
15
-
16
-
17
-
18
-
19
-
20
-
21
-
22
-
23
-
24
 |
 |