Sony KDE-37XS955 Instructions (SU-PW3M Wall-Mount Bracket) - Page 14
Connect the external equipment cables to the TV after installation, Connect external equipment
 |
View all Sony KDE-37XS955 manuals
Add to My Manuals
Save this manual to your list of manuals |
Page 14 highlights
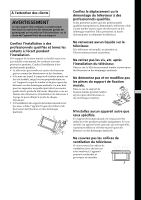
Connect the external equipment cables to the TV after installation For Customers, Sony Dealers 1 Tilt the TV upward. 1 Unplug the AC power cord. 2 Unfasten the two securing screws at the bottom of the Mounting Rack (page 12). 3 Hold the bottom left and right of the TV and gradually lift it upward. Notes • Do not hold the transparent part of the TV. • Do not let go of the TV while lifting it, otherwise the TV may hit the wall and cause damage. 4 Confirm the two support braces of the Plate Unit are locked into the bottom left and right hooks on either side of the Mounting Rack. 5 Insert the screws removed in the step 2 into the screw holes on the outer sides of the bottom left and right hooks of the Mounting Rack and tighten firmly to lock the support braces. Screw hole for fixing the support braces 2 Connect external equipment cables to the TV. 3 Restore the TV to the non-tilted position. 1 Unfasten the screws tighten at the outer sides of the bottom left and right hooks of the Mounting Rack in step 5 of procedure 1. 2 Hold the bottom left and right of the TV and pull it out toward you so that the support braces are unlocked from the bottom hooks on the Mounting Rack. Notes • Do not hold the transparent part of the TV. • Do not let go of the TV while lifting it, otherwise the TV may hit the wall and cause damage. 3 Grasp the protruding part of the support braces with your other hand and slide it upward so that the support braces and the TV are restored in the untilted position. 4 Tighten the securing screws. 5 Confirm that all the cables connected to the TV are not twisted or pinched, and then plug in the AC power cord. WARNING • Be sure two or more people do this work. • Be careful not to pinch your hands or fingers. Support braces 2 3 3 14 (US)
-
 1
1 -
2
-
3
-
4
-
5
-
6
-
7
-
8
-
 9
9 -
 10
10 -
 11
11 -
 12
12 -
 13
13 -
 14
14 -
 15
15 -
 16
16 -
 17
17 -
 18
18 -
 19
19 -
20
-
21
-
22
-
23
-
24
-
25
-
26
-
27
-
28
-
29
-
30
-
31
-
32
-
33
-
34
-
35
-
36
-
37
-
38
-
39
-
40
-
41
-
42
-
43
-
44
-
45
-
46
-
47
-
48
-
49
-
50
-
51
-
52
 |
 |
