Sony KLHW32 Operating Instructions - Page 55
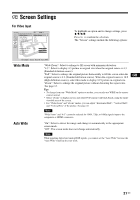
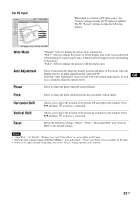
Wide Mode, Auto Adjustment, Phase, Pitch, Horizontal Shift, Vertical Shift, Reset
 |
UPC - 027242238787
View all Sony KLHW32 manuals
Add to My Manuals
Save this manual to your list of manuals |
Page 55 highlights
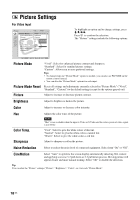
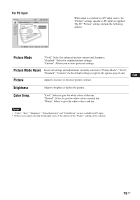
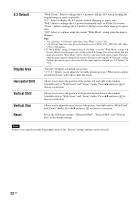
For PC Input When input is switched to PC input source, the "Screen" settings specific for PC input are applied. The PC "Screen" settings include the following options: : : Wide Mode : : "Normal": Select to display the picture in its original size. "Full 1": Select to enlarge the picture to fill the display area in the vertical direction while keeping its original aspect ratio. A black frame will appear on the surrounding of the picture. "Full 2": Select to enlarge the picture to fill the display area. Auto Adjustment Select to automatically adjust the display position and phase of the picture when the display receives an input signal from the connected PC. Note that "Auto Adjustment" may not work well with certain input signals. In such cases, manually adjust the options below. GB Phase Select to adjust the phase when the screen flickers. Pitch Select to adjust the pitch when the picture has unwanted vertical stripes. Horizontal Shift Vertical Shift Reset Allows you to move the position of the picture left and right in the window. Press B/b and press to choose a correction. Allows you to move the position of the picture up and down in the window. Press V/v and press to choose a correction. Resets the following settings; "Phase", "Pitch", "Horizontal Shift" and "Vertical Shift" to the default settings. Notes • "Auto Wide", "4:3 Default", "Display Area" and "Vertical Size" are not available for PC input. • When the input is digital signal via HDMI 1/HDMI 2, "Auto Adjustment", "Phase" and "Pitch" are not available for PC input. • If there is no signal currently being input, none of the "Screen" settings options can be selected. 23 GB
-
 1
1 -
2
-
3
-
4
-
5
-
6
-
7
-
8
-
9
-
10
-
11
-
12
-
13
-
14
-
15
-
16
-
17
-
18
-
19
-
20
-
21
-
22
-
23
-
24
-
25
-
26
-
27
-
28
-
29
-
30
-
31
-
32
-
33
-
34
-
35
-
36
-
37
-
38
-
39
-
40
-
41
-
42
-
43
-
44
-
45
-
46
-
47
-
48
-
49
-
 50
50 -
 51
51 -
 52
52 -
 53
53 -
 54
54 -
 55
55 -
 56
56 -
 57
57 -
 58
58 -
 59
59 -
 60
60 -
61
-
62
-
63
-
64
-
65
-
66
-
67
-
68
-
69
-
70
-
71
-
72
-
73
-
74
-
75
-
76
-
77
-
78
-
79
-
80
-
81
-
82
-
83
-
84
-
85
-
86
-
87
-
88
-
89
-
90
-
91
-
92
-
93
-
94
-
95
-
96
-
97
-
98
-
99
-
100
-
101
-
102
-
103
-
104
-
105
-
106
-
107
-
108
-
109
-
110
-
111
-
112
-
113
-
114
-
115
-
116
-
117
-
118
-
119
-
120
-
121
-
122
-
123
-
124
-
125
-
126
-
127
-
128
-
129
-
130
-
131
-
132
-
133
-
134
-
135
-
136
-
137
-
138
-
139
-
140
-
141
-
142
-
143
-
144
-
145
-
146
-
147
-
148
-
149
-
150
-
151
-
152
-
153
-
154
-
155
-
156
-
157
-
158
-
159
-
160
-
161
-
162
-
163
-
164
-
165
-
166
-
167
-
168
-
169
-
170
-
171
-
172
-
173
-
174
-
175
-
176
-
177
-
178
-
179
-
180
-
181
-
182
-
183
-
184
-
185
-
186
-
187
-
188
-
189
-
190
-
191
-
192
-
193
-
194
-
195
-
196
-
197
-
198
-
199
-
200
-
201
-
202
-
203
-
204
-
205
-
206
-
207
-
208
-
209
-
210
-
211
-
212
-
213
-
214
-
215
 |
 |
