Sony PCM-D50 Operating Instructions - Page 48
Troubleshooting - memory stick capacity
 |
UPC - 027242720831
View all Sony PCM-D50 manuals
Add to My Manuals
Save this manual to your list of manuals |
Page 48 highlights
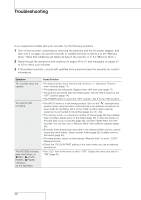
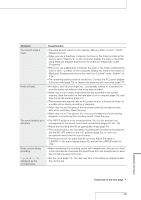
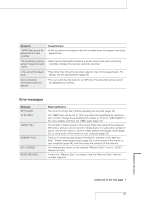
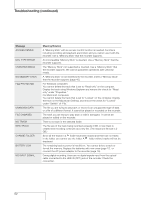
Troubleshooting If you experience trouble with your recorder, try the following solutions. 1 Turn off the recorder completely by removing the batteries and the AC power adapter, and then turn it on again. Or use the recorder to initialize the built-in memory or the "Memory Stick." (Note that initializing will delete all data in the memory or in the "Memory Stick.") 2 Read through the symptoms and solutions on pages 48 to 51 and messages on pages 51 to 53 to check your recorder. 3 If the problem persists, consult with qualified Sony personnel (see the warranty for contact information). Symptom The recorder does not operate. You cannot start recording. The ACCESS indicator, peak level lamps, or REC / PLAY/ ENTER / PAUSE indicators do not light/flash. Cause/Solution The batteries have been inserted with incorrect +/- directions. Reinsert them correctly (page 17). The batteries are exhausted. Replace them with new ones (page 17). The buttons are locked with the HOLD switch. Set the HOLD switch to the "OFF" position (page 14). The POWER switch is set to the "OFF" position. Set it to the "ON" position. The INPUT switch is in the wrong position. Set it to the "" (microphones) position when using the built-in microphones or an external microphone to input audio for recording. Set it to the "LINE" position when external equipment is connected for recording (pages 23, 28 - 30). The memory is full, or a maximum number of tracks (page 38) have already been recorded. Delete some of the tracks (page 35) or store the tracks on the hard disk of your computer (page 36), and then delete them from the recorder. You can also use a "Memory Stick" with sufficient capacity (page 46). 99 tracks have already been recorded in the selected folder and you cannot record any more tracks. Select another folder (page 23) or delete some of the tracks (page 35). The write-protect switch on the inserted "Memory Stick" is set to "LOCK." Release the lock. Check the "PLUG IN PWR" setting of the menu when you use an external microphone. The "LED" item in the menu is set to "OFF." Display the menu and set it to "ON" (page 41). 48
-
 1
1 -
2
-
3
-
4
-
5
-
6
-
7
-
8
-
9
-
10
-
11
-
12
-
13
-
14
-
15
-
16
-
17
-
18
-
19
-
20
-
21
-
22
-
23
-
24
-
25
-
26
-
27
-
28
-
29
-
30
-
31
-
32
-
33
-
34
-
35
-
36
-
37
-
38
-
39
-
40
-
41
-
42
-
 43
43 -
 44
44 -
 45
45 -
 46
46 -
 47
47 -
 48
48 -
 49
49 -
 50
50 -
 51
51 -
 52
52 -
 53
53 -
54
-
55
-
56
-
57
-
58
-
59
-
60
 |
 |