Sony RM-AX4000 Quick Start Guide - Page 1
Sony RM-AX4000 - Integrated Remote Commander Manual
 |
UPC - 027242677036
View all Sony RM-AX4000 manuals
Add to My Manuals
Save this manual to your list of manuals |
Page 1 highlights
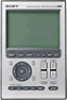
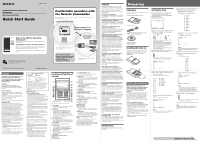
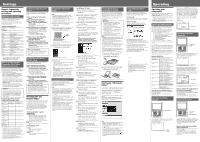
2-635-473-11(4) Integrated Remote Commander RM-AX4000 Operating Instructions Quick Start Guide Comfortable operation with the Remote Commander You can easily transfer a variety of settings from your PC to the Remote Commander using the AX Remote Editor software. Easy setup on your PC! AX Remote Editor Transfer setting files to the Remote Commander Refer to the PDF file "Operating Instructions" Refer to the PDF file "Operating Instructions" for more information and for troubleshooting. How to display the PDF file "Operating Instructions" The PDF file "Operating Instructions" will be installed when the AX Remote Editor software is installed. Click [Start] - [All Programs] - [Sony Remote AX] - [RM-AX4000 Operating Instructions] on your PC. You need Adobe Acrobat Reader 5.0 or later, or Adobe Reader software in your PC. Printed on 100% recycled paper using VOC (Volatile Organic Compound)-free vegetable oil based ink. Comfortable operation The Setup Wizard helps you make all the necessary settings! You can also set up the Remote Commander yourself, without using a PC. See the PDF file "Operating Instructions" for details. Use the Remote Commander to control all your components! © 2005 Sony Corporation Printed in Malaysia WARNING To prevent fire or shock hazard, do not expose the unit to rain or moisture. To avoid electrical shock, do not open the cabinet. Refer servicing to qualified personnel only. WARNING You are cautioned that any changes or modifications not expressly approved in this manual could void your authority to operate this equipment. Owner's Record The model number is located on the rear of the unit and the serial number is located in the battery compartment. Record the serial number in the space provided below. Refer to them whenever you call upon your Sony dealer regarding this product. Model No. RM-AX4000 Serial No. INFORMATION: This equipment has been tested and found to comply with the limits for a Class B digital device, pursuant to Part 15 of the FCC Rules. These limits are designed to provide reasonable protection against harmful interference in a residential installation. This equipment generates, uses, and can radiate radio frequency energy and, if not installed and used in accordance with the instructions, may cause harmful interference to radio communications. However, there is no guarantee that interference will not occur in a particular installation. If this equipment does cause harmful interference to radio or television reception, which can be determined by turning the equipment off and on, the user is encouraged to try to correct the interference by one or more of the following measures: - Reorient or relocate the receiving antenna. - Increase the separation between the equipment and receiver. - Connect the equipment to an outlet on a circuit different from that to which the receiver is connected. - Consult the dealer or an experienced radio/TV technician for help. If you have any questions about this product, you may call; Sony Electronics Support 1-866-922-7669 or http://www.sony.com/remotesupport Declaration of Conformity Trade Name: SONY Model No.: RM-AX4000 Responsible Party: Sony Electronics Inc. Address: 16450 W. Bernardo Dr, San Diego, CA 92127 USA Telephone No.: 858-942-2230 This device complies with Part 15 of the FCC Rules. Operation is subject to the following two conditions: (1) This device may not cause harmful interference, and (2) this device must accept any interference received, including interference that may cause undesired operation. Notice for users On the supplied software • Copyright laws prohibit reproducing the software or the manual accompanying it in whole or in part, or renting the software without the permission of the copyright holder. • In no event will SONY be liable for any financial damage, or loss of profits, including claims made by third parties, arising out of the use of the software supplied with this unit. • In the event a problem occurs with this software as a result of defective manufacturing, SONY will replace it. However, SONY bears no other responsibility. • The software provided with this unit cannot be used with equipment other than that which is so designated. • Please note that, due to continued efforts to improve quality, the software specifications may be changed without notice. • Operation of this unit with software other than that provided is not covered by the warranty. Program © 2005 Sony Corporation Documentation © 2005 Sony Corporation Microsoft, Windows and Windows Media are trademarks or registered trademarks of Microsoft Corporation in the United States and/or other countries. All other trademarks and registered trademarks are trademarks or registered trademarks of their respective holders. In this guide, ™ and ® marks are not specified. Adobe Reader is a trademark of Adobe Systems Incorporated. • Microsoft Windows XP Media Center Edition, Microsoft Windows XP Professional and Microsoft Windows XP Home Edition are mentioned as Windows XP in this guide. • Microsoft Windows 2000 Professional is mentioned as Windows 2000 in this guide. Location and function of controls 1 qs 2 3 4 5 6 7 8 9 0 X PRESS COMMANDER BACK COMPONENT SYNC-UP TIMER LIGHT OFF EPG MENU VOLUME CHANNEL EXIT OK TOOLS SYSTEM CONTROL 1 2 3 MUTING RECALL 4 MORE ALL OFF qa The CHANNEL + button has a tactile dot. qd qf qg qh qj qk ql w; wa ws wd 1 Clock display Displays the clock, the transmission mark, the battery mark and the timer mark. 2 Label keys Different keys appear depending on the selected display. The Label keys are used mainly to choose the XPRESS function/ component/System Control/Timer/setting items, etc. You can change the names of the XPRESS function, components, System Control key and Timer as the Label keys. 3 COMPONENT button The component names appear as the Label keys. When you press a component name, the operating display for that component appears. 4 BACK button Used to return to the previous display. 5 XPRESS button The XPRESS names appear as the Label keys. When you press an XPRESS name, the operating display for that XPRESS function appears, and its macro is performed. 6 MENU button Calls up the menu screen for components that have menu function. 7 EPG button 8 OK and Cursor Control buttons 9 EXIT button q; TOOLS button qa SYSTEM CONTROL buttons You can automatically carry out the entire program by pressing one button. qs Display title Shows the title of the LCD Display. If a page number such as "/1" appears, multiple pages are available. If you press the number, next page displays. qd Touch-keys The keys are used for setting the Remote Commander and operating each component appear on the LCD display. qf SYNC-UP button Used to synchronize with the status of a component . qg TIMER button Used to set the timer program on/off. qh COMMANDER OFF button Turns the power of the Remote Commander off. qj LIGHT button Used to brighten the backlight in the dark. Press the button once to turn on/off the light. qk CHANNEL +/- buttons Selects the channel. ql VOLUME +/- buttons Adjusts the volume. w; RECALL button wa ALL OFF button ws MUTING button Silences the sound. Press the button to silence, and again to return to the previous volume level. wd MORE button The System Control keys (SYSTEM5-8) are displayed as the Label keys. When you press a System Control key, its macro is performed. Note on the LCD display's power on/off To turn on the LCD display, press any button except the COMMANDER OFF button. To turn off the LCD display, press the COMMANDER OFF button. If you do not use the Remote Commander within 5 minutes, the LCD display automatically turns off. This interval can also be changed. Features The RM-AX4000 Remote Commander provides centralized control of all your AV components from a single remote control and saves the trouble of operating different AV components with different remote control devices. The following are its main features. Control up to 16 components With the Remote Commander, you can control up to 16 components, including your TV, VCR, DVD, CD, RCVR, etc. Centralized control of Sony AV components with this one Remote Commander The Remote Commander is preset at the factory to operate Sony brand components, so you can use it out of the box as a control center for your Sony AV components. Remote control signals for non-Sony components are also preset The Remote Commander also recognizes the preset codes for most major brands components, as well as Sony. Just select the corresponding codes to control all your AV components. XPRESS functions for executing a series of commands to operate several AV components, just by pressing one key. Groups of commands from different components can be set onto up to 8 XPRESS keys. For example, when you watch a DVD using a TV and amplifier/ receiver, you just press one key to on/off each component, select the correct inputs. Available keys for the XPRESS function appear on the LCD display. Also, XPRESS function can memorize the status of power on/off, input selector for each component, and send a signal to synchronize the status which you want without reference to the component's status. The AX Remote Editor software allows you to make advanced settings for the Remote Commander. Air-Slide executes an XPRESS function by "sliding your finger" across the LCD display You can also perform an XPRESS function by sliding your finger in a set pattern across the Remote Commander's LCD Display. This function is called an "Air-Slide", and 6 different patterns are available. The AX Remote Editor software allows you to make advanced settings for the Remote Commander. Clock display and Timer function Up to 8 Timer macros can be programmed to automatically turn on/off components and other controls (such as recording, stopping, etc.). Learning function lets you program other remote control signals you may need The Remote Commander's learning function can learn the remote control infrared signals of nonpreset components. The Remote Commander can learn remote control signals (infrared signals only) of other devices such as air conditioners, lights, etc. (some specific appliances or functions may not be available). System Control function executes a series of commands (a macro) by pressing one button/key The Remote Commander has special buttons/keys, which can be programmed to perform a series of commands (a macro) just by pressing one button/ key. You can program up to 8 System Control macros. KeyMacro function allows you to select a channel with a single key The Remote Commander allows you to program a macro for a key to operate an AV component. For example, you can create a macro that enters the numbers 1, 2, and 3, to select channel 123 just by pressing one key. The AX Remote Editor software allows you to make advanced settings for the Remote Commander. Easy-to-operate Touch-key LCD with blue back light The Remote Commander has a Touch-key LCD that changes keys and labels according to the selected component. The Remote Commander is easy to operate as only the keys necessary to operate the selected component are shown. The display backlight allows operation even in the dark. "AX Remote Editor" for easy Remote Commander setup The supplied software "AX Remote Editor" allows you to set up the Remote Commander on your PC and download the settings to the Remote Commander. Various advanced settings can also be made easily on your PC. Preparing Unpacking Check the contents of the package before using the Remote Commander. • Remote Commander RM-AX4000 (1) • USB mini cable (1) • CD-ROM for the AX Remote Editor software, PDF file Operating Instructions (1) • Quick Start Guide (1) • Preset code lists (1) • Warranty Card (1) Installing the batteries Slide and open the battery compartment lid and insert four size AA (R6) alkaline batteries (not supplied). Be sure to line up the + and - of the batteries with the + and - of the battery compartment. When to replace the batteries When replacing the batteries, do it quickly. Otherwise, the memory settings for the clock will be erased. The clock does not work while replacing the batteries. Alkaline batteries will last up to 5 months (a Sony TV turned On/Off up to approx. 300 times per day). If the Remote Commander does not operate properly, the batteries are getting weak and E appears on the LCD display. When the LCD display dims or the backlight for the touch keys grows dim, the batteries are getting weak; replace them. Notes on replacing the batteries • Do not attempt to recharge dry batteries. • Do not carry dry batteries together with coins or other metallic objects. This can generate heat if the positive and negative terminals of the batteries accidentally come into contact with metallic objects. • When you are not going to use the unit for a long time, remove the batteries to avoid damage from battery leakage and corrosion. • Do not use different types of batteries at the same time. • When you replace the batteries, replace them both with new ones. Setting the clock When you install batteries the first time, the Remote Commander enters clock setup mode. "DS_TIME" appears as the Display title. "STD_TIME" lights and "SET" and "DS_TIME" flash on the Label keys. STD_TIME: standard time DS_TIME: daylight savings time SU LEARN NG DS_TIME SET [STD_TIME] DS_TIME 1 Press "STD_TIME" or "DS_TIME" on the Label keys. or The current setting is shown inside the [ ], while the other flashes. If the summer time (daylight savings time) is used in your area, press the DS_TIME key. When the time change occurs (in spring and autumn), the Remote Commander will automatically adjust itself. If the summer time is not used in your area, press the STD_TIME key. 2 Press "SET" on the Label keys. SET A beep sounds, "SET" and "SU" flash, and "12:00 AM" lights on the Clock display. SU CLOCK LEARN AM NG SET STD_TIME 3 Set the day of the week by pressing the F or f button. The selected day of the week flashes. SU : Sunday MO : Monday TU : Tuesday WE : Wednesday TH : Thursday FR : Friday SA : Saturday Next, press the g button. The day of the week is set. "12" (hour) "AM" and "SET" flash. SU CLOCK LEARN AM NG SET STD_TIME Note If you press the G button, the day of the week is set and setting mode skips to step 5. Specifications See the PDF file "Operating Instructions" for the Specifications. 4 Set the hour and AM (or PM) by pressing the F or f button. The selected hour and AM (or PM) flash. Next, press the g button. The hour and AM (or PM) are set. "00" (minute) and "SET" flash. SU CLOCK LEARN AM NG SET STD_TIME Note If you press the G button, the hour and AM (or PM) are set and the setting mode returns to step 3. 5 Set the minute by pressing the F or f button. The selected minute flashes. If you want to finish the clock setting, go to step 6. SU LEARN NG CLOCK SET STD_TIME Notes • If you press the g button, the minute is set and the setting mode returns to step 3. • If you press the G button, the minute is set and the setting mode returns to step 4. 6 Press "SET" on the Label keys. SET The beep sounds, and the clock starts from the 0 second of the current minute. Note If you press the SET key in any step above, the clock starts from the 0 second of the current minute. Continue to reverse side
-
 1
1 -
 2
2
 |
 |