Sony RM-AX4000 Quick Start Guide - Page 2
Settings, Operating - driver
 |
UPC - 027242677036
View all Sony RM-AX4000 manuals
Add to My Manuals
Save this manual to your list of manuals |
Page 2 highlights
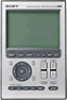
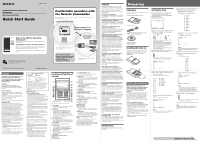
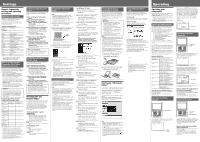
Settings Remote Commander settings and operating procedures About the factory setting The Remote Commander (RM-AX4000) is preset at the factory to operate most Sony brand AV components (see the table below). If you operate a non-Sony AV component, you need to set the component's preset code on the Remote Commander first. Default components list Displays on Remote Commander Component TV TV A-CBL D-SAT *1 Analog Cable box Digital Satellite DVD DVD player VCR Video Cassette Recorder DVR Digital Video Recorder CD CD player RCVR Receiver/Amplifier DVDVR DVR/DVD combo DVD-R D-CBL *1 DVD Recorder Digital Cable box DAV DVD/Receiver combo PJ Projector TAPE *2 Cassette deck MD MD deck LIGHT Light *1 If your component has the built-in DVR function, preset the "code No." of DVR. *2 Analog audio compact cassette deck How to set up the Remote Commander (On-PC Setup and On-Remote Setup) There are two ways to make settings for the Remote Commander, "On-PC Setup" with the aid of PC software and "On-Remote Setup" directly on the Remote Commander. • On-PC Setup (Recommended) "On-PC Setup" uses the supplied software for your PC, "AX Remote Editor," to set up the Remote Commander. By following the wizard, it allows you to easily make all the necessary settings for the Remote Commander (components' preset codes, etc.,). Furthermore, you can add and customize a range of settings which are not available with On-Remote Setup. • On-Remote Setup "On-Remote Setup" is a way of setting up directly with the Remote Commander. However, some advanced settings are not available with On-Remote setup (see the table below). IMPORTANT You cannot use both methods. Once you set up the Remote Commander by either On-PC Setup (recommended) or On-Remote Setup, you cannot make additional settings using the other method. You can only delete the entire setup and start over using the other setup method. Programmable items of On-PC Setup and On-Remote Setup Main setting items Using the AX Remote Editor Setting the preset a codes Learning the a remote control signals Editting the label a Setting the Timer a Programming the a Timer Setting System a Control function *1 Setting XPRESS a function *2 Setting Air- a Slide function *3 Unit settings a Using the Remote Commander a a a a a a × × a *1 System Control function is used to perform a programmed series of commands (a macro) on several AV components by pressing just one button. *2 An XPRESS function is also a macro function which executes a series of commands for controlling several AV components by pressing just one key. The difference is, the XPRESS display stays available for you to make additional settings. *3 An Air-Slide is a function which executes an XPRESS function by "sliding your finger" in a set pattern across the display. Setting procedure for On-PC Setup If you set up the Remote Commander using On-PC Setup (recommended), follow the procedures below. Step1: Installing the "AX Remote Editor". Step2: Installing the USB driver. Step3: Starting up "AX Remote Editor" and setting the Remote Commander. See the Help file of AX Remote Editor for setting details. Step4: Operating an AV component using the Remote Commander. After finishing the setting with AX Remote Editor, operate the AV component using the Remote Commander. • To operate the XPRESS function. • To operate components individually. Option1: You can also change the Unit Settings such as the backlight and beep. Option2: You can also change the settings of the buttons or keys on the Remote Commander with AX Remote Editor. See the Help of AX Remote Editor for setting with AX Remote Editor. When using On-PC Setup If you set up the Remote Commander using On-PC Setup, you do not need to read this PDF manual "Setting by the On-Remote Setup". Setting procedure for OnRemote Setup If you set the Remote Commander On-Remote Setup, follow the procedure below. Step1: Setting the preset codes. Step2: Operating AV components using the Remote Commander. After finishing the setting of the preset codes, you can use the Remote Commander to operate your AV components. • To operate the XPRESS function. • To operate components individually. Option1: You can also change the Unit Settings such as backlight and beep. Option2: You can also change the settings of the buttons or keys on the Remote Commander. When using On-Remote Setup If you set up the Remote Commander using On-Remote Setup, you do not need to install the AX Remote Editor and its driver, or connect the Remote Commander to your PC. You also do not need to read the PDF pages 16 to 20. Installing the "AX Remote Editor" By installing the "AX Remote Editor" software on the supplied CD-ROM onto your PC, you can set up the Remote Commander with your PC. "AX Remote Editor" makes setting up complex operations like a series of commands (a macro) easy, and also allows various other convenient functions that can only be set up on the PC. For details, see the Help menu provided in "AX Remote Editor." "AX Remote Editor" system requirements Operating systems: Windows XP Media Center Edition 2005/ Windows XP Media Center Edition 2004/ Windows XP Media Center Edition/ Windows XP Professional/Windows XP Home Edition/Windows 2000 Professional CPU: Pentium II, 300 MHz or more RAM: 64 MB or more (128 MB or more for Windows XP) Required hard disc capacity: 20 MB or more Display: High (16 bits) Color or higher, 1,024 × 768 dots or better* CD-ROM drive USB port * Does not operate with a display of under 1,024 × 768 dots. Installing the "AX Remote Editor" Follow the instructions below to install. Notes • Do not simply copy the "AX Remote Editor" folder in the supplied CD-ROM to a PC. You need to install it properly for it to work. • On Windows 2000, or Windows XP, logon with an authorized "Administrator" ID when installing "AX Remote Editor." 1 Close all software running on Windows. 2 Insert the supplied CD-ROM into the CD-ROM drive of the PC. After a moment, "RM-AX4000 Install CD Menu" appears. 3 Click [Install AX Remote Editor]. "AX Remote Editor 1.0 Setup" appears. 4 Click [Next]. Follow the on-screen instructions and proceed with the installation. When the installation is complete, "AX Remote Editor 1.0 Setup" automatically quits. Tip If the installation display is hidden behind other windows If "AX Remote Editor 1.0 Setup" disappears behind other displays while installing, press the [Tab] key several times while pressing down the [Alt] key to bring up "AX Remote Editor 1.0 Setup" again. Installing the USB driver You need to install the USB driver before connecting the supplied USB mini cable to your PC and the Remote Commander. Follow the instructions below to install. Notes • Without batteries in the Remote Commander, the USB connection cannot be detected by the PC even if the USB mini cable is connected. Make sure to install the batteries before installing the USB driver. If the USB driver installation is interrupted by mistake, install it again from the beginning. • Do not simply copy the USB driver in the supplied CD-ROM to the PC. You need to install it properly for it to work. • On Windows 2000 or Windows XP, logon with an authorized "Administrator" ID when installing the USB driver. • On Windows 2000 or Windows XP, you need to install the driver for each port to which the Remote Commander will be connected. • Depending on the PC, various messages other than those mentioned in this manual may appear during the USB driver installation. Just follow the on-screen instructions of these messages to install. For Windows XP users 1 Close all software running on Windows. 2 Insert the supplied CD-ROM into the CD-ROM drive of the PC. After a moment, "RM-AX4000 Install CD Menu" appears. 3 Click [Exit] to close "RM-AX4000 Install CD Menu." 4 Connect the PC and the Remote Commander using the supplied USB mini cable. The "Found New Hardware" message appears in the Notification Area in the lower right-hand of the display. After a moment, "Found New Hardware Wizard" appears. Tip If the following confirmation message appears, "Can Windows connect to Windows Update to search for software?", select [No, not this time] then click [Next]. 5 Select "Install the software automatically [Recommended]", then click [Next]. Installing of the USB driver starts. The "Completing the Found New Hardware Wizard" display appears when the installation is complete. 6 Click [Finish]. Installing of the USB driver finishes. For Windows 2000 users 1 Close all software running on Windows. 2 Insert the supplied CD-ROM into the CD-ROM drive of the PC. After a moment, "RM-AX4000 Install CD Menu" appears. 3 Click [Exit] to close "RM-AX4000 Install CD Menu." 4 Connect the PC and the Remote Commander using the supplied USB mini cable. The "Found New Hardware" message appears. After a moment, "Found New Hardware Wizard" appears. 5 Click [Next]. The "Install Hardware Device Drivers" display appears. 6 Select "Search for a suitable driver for my device [recommended]", then click [Next]. The "Locate Driver Files" display appears. 7 Mark only the check box of "CD- ROM drives", then click [Next]. The "Driver Files Search Results" display appears, and the found driver is displayed. 8 Click [Next]. Installing of the USB driver starts. The "Completing the Found New Hardware Wizard" display appears when the installation is complete. 9 Click [Finish]. Installing of the USB driver finishes. Connecting the Remote Commander to your PC You can now connect the Remote Commander (RM-AX4000) to your PC with the supplied USB mini cable. Connect whenever you want to verify correct operation of key and button commands for an XPRESS function, etc., or to exchange setup data between your PC and the Remote Commander. IMPORTANT • Do not keep the Remote Commander connected to the PC when the PC is in standby/hibernation, otherwise, a malfunction could occur. Be sure to disconnect the Remote Commander from the PC before standby/ hibernation begins. • Furthermore, do not connect the Remote Commander to the PC while it is in standby/hibernation. Wait until the PC comes out of standby/ hibernation before connecting. Notes • The Remote Commander uses the battery when connected to the PC. When you finish the setup, unplug from the USB connector. • Before connecting the Remote Commander to your PC, be sure to install the fresh batteries in the Remote Commander. • Do not disconnect the USB mini cable from your PC while your PC is communicating with the Remote Commander, as a malfunction may occur. • Only connect one Remote Commander to your PC at a time. Otherwise, you will not be able to download the settings correctly. 1 Connect the USB mini cable to the USB connector of the Remote Commander (RM-AX4000). 2 Connect the USB mini cable to the USB connector of your PC. Starting up "AX Remote Editor" On your PC, click the Windows "Start" button and point to "All Programs" "Sony Remote AX," - "AX Remote Editor" and click. "AX Remote Editor" starts up, and the last project appears. The first time AX Remote Editor starts up, the "New Project" wizard appears. Following the onscreen instructions, create a project. Tips • If you are using an operating system other than Windows XP, click the "Start" button of Windows and point to "Programs" - "Sony AX" - "AX Remote Editor" and click to start up "AX Remote Editor". • If " " (the shortcut icon of AX Remote Editor) is displayed on the desktop of Windows, double-click the icon to open it. (Depending on the setting, Windows XP may automatically delete icons from the desktop if they have not been used for a certain period of time. If " " is not displayed on the desktop, use the "Start" button.) Using "AX Remote Editor" - Help You can set up the Remote Commander by operating "AX Remote Editor," referring to the detailed instructions provided in Help. Starting Help Start up "AX Remote Editor," then click [Help] on the menu bar and select [AX Remote Editor help]. How to use Help Click one of the tabs: [Contents], [Index] or [Search], and check the information you need. To search by contents (Contents) You can find information relating to a specific subject by using the table of contents shown on the "Contents" tab. To search indexed information (Index) You can find information from a list of predetermined keywords shown on the "Index" tab. To search using key words (Search) You can submit a Keyword search on the "Search" tab by typing in your keyword(s). Tip To change the component name of a Label key Press and hold the Label key for the component name for more than 2 seconds. The Label key flashes and the Remote Commander enters the component name changing mode. See step 6 on page 67 for how to input characters. Operating Operating your components There are two ways to operate the components on the Remote Commander (RM-AX4000). • XPRESS operation: You can operate multiple AV components related to a specific task, such as "watching a TV, " or "watching a DVD," etc. This is called an "XPRESS function." • Single component operation: You can operate each AV component individually. What is the XPRESS function? An "XPRESS function" is an executable series of commands that operate several AV components, just by pressing one key. For example, you have to perform the following operations sequentially to watch a DVD using a TV, receiver/ amplifier, and DVD player. 1. Turn on the TV. 2. Set the input mode of the TV to VIDEO1. 3. Turn on the receiver/amplifier. 4. Set the input selector of the receiver/ amplifier to DVD. 5. Turn on the DVD player. 6. Start DVD playback. By setting the above commands as an XPRESS function, you can watch a DVD by simply pressing one key. Also, XPRESS function can memorize the status of power on/off, input selector for each component, and send a signal to synchronize the status which you want without reference to the component's status. Some XPRESS functions are preset at the factory to operate Sony brand components (see the table at right). However, depending on the factory preset code, they may not necessarily be effective. Default XPRESS list Displays on the Label keys TV A-CBL D-SAT DVD VCR DVR CD RCVR Programmed commands Turns on TV, and the display of XPRESS_TV appears. Turns on TV and Analog cable box, and the display of XPRESS_A-CBL appears. Turns on TV and Digital Satellite, and the display of XPRESS_D-SAT appears. Turns on TV and DVD player, and the display of XPRESS_DVD appears. Turns on TV and Video Cassette recorder, and the display of XPRESS_VCR appears. Turns on TV and Digital Video Recorder, and the display of XPRESS_DVR appears. Turns on CD player and Receiver (Amplifier), and the display of XPRESS_CD appears. Turns on Receiver (Amplifier), and the display of XPRESS_RCVR appears. How to set up an XPRESS function For On-PC Set up: See the Help menu provided in "AX Remote Editor." For On-Remote Setup: You cannot set up an XPRESS function. Operating the XPRESS function When you press an XPRESS name you want to operate, programmed commands for the key are performed and the display to operate the XPRESS function appears. This display is called, "XPRESS display." Keys on the XPRESS display are divided into two types-"Touch-keys" with preset labels and "Label keys" that can be customized. Touchkeys are used to execute an XPRESS function. Label keys are used to switch to the individual component displays that make up the XPRESS function. XPRESS display SU AM LEARN NG XPRESS_TV 12 3 45 6 7 8 9 DISPLAY MAIN/SUB 0 ENTER TV Touch-keys Label keys Operating components individually LEARN NG X PRESS COMMANDER BACK COMPONENT SYNC-UP TIMER LIGHT OFF EPG MENU VOLUME CHANNEL EXIT OK TOOLS SYSTEM CONTROL 1 2 3 MUTING RECALL 4 MORE ALL OFF COMPONENT button When you press the COMPONENT button on the Remote Commander, the component names appear at the bottom of the display. SU AM LEARN NG COMPONENT /1 TV A-CBL D-SAT DVD Component names When you press a component name you want to operate, the display to operate the component appears. This display is called "Component display." Keys on the Component display are divided into two types-"Touch-keys" with preset labels and "Label keys" that can be customized. Component display SU LEARN AM NG 12 3 TV /1 POWER 2PIC SWAP 45 6 7 8 9 DISPLAY MAIN/SUB 0 INPUT ENTER WIDE TV_TUNER ANT/SW Touch-keys Label keys See "Table of preset functions" for the functions of keys and buttons for each component. How to register the components to the Remote Commander You can register up to 16 components. For On-PC Setup: See the Help menu provided in "AX Remote Editor." For On-Remote Setup: See "Setting the preset codes" on the PDF file "Operating Instructions." To control the volume LEARN NG LEARN NG X PRESS COMMANDER BACK COMPONENT SYNC-UP TIMER LIGHT OFF EPG MENU VOLUME CHANNEL EXIT OK TOOLS SYSTEM CONTROL 1 2 3 MUTING RECALL 4 MORE ALL OFF XPRESS button When you press an XPRESS button on the Remote Commander, the XPRESS names appear at the bottom of the display. SU AM LEARN NG XPRESS /1 TV A-CBL D-SAT DVD XPRESS names X PRESS COMMANDER BACK COMPONENT SYNC-UP TIMER LIGHT OFF EPG MENU VOLUME CHANNEL EXIT OK TOOLS SYSTEM CONTROL 1 2 3 MUTING RECALL 4 MORE ALL OFF VOLUME +/- button MUTING button Press the VOLUME +/- buttons to control the volume, and the MUTING button to silence. When you select a visual component, the TV's volume will be controlled; when you select an audio component, the amplifier's volume will be controlled. How to set the volume control of visual components For On-PC Setup: See the Help menu provided in "AX Remote Editor." For On-Remote Setup: See "Controlling the volume of visual components connected to an audio component" on the PDF file "Operating Instructions."
-
 1
1 -
 2
2
 |
 |