Sony TRV318 Operating Instructions - Page 180
Writing a print mark – PRINT MARK
 |
UPC - 027242620841
View all Sony TRV318 manuals
Add to My Manuals
Save this manual to your list of manuals |
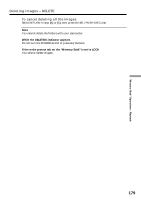
Page 180 highlights
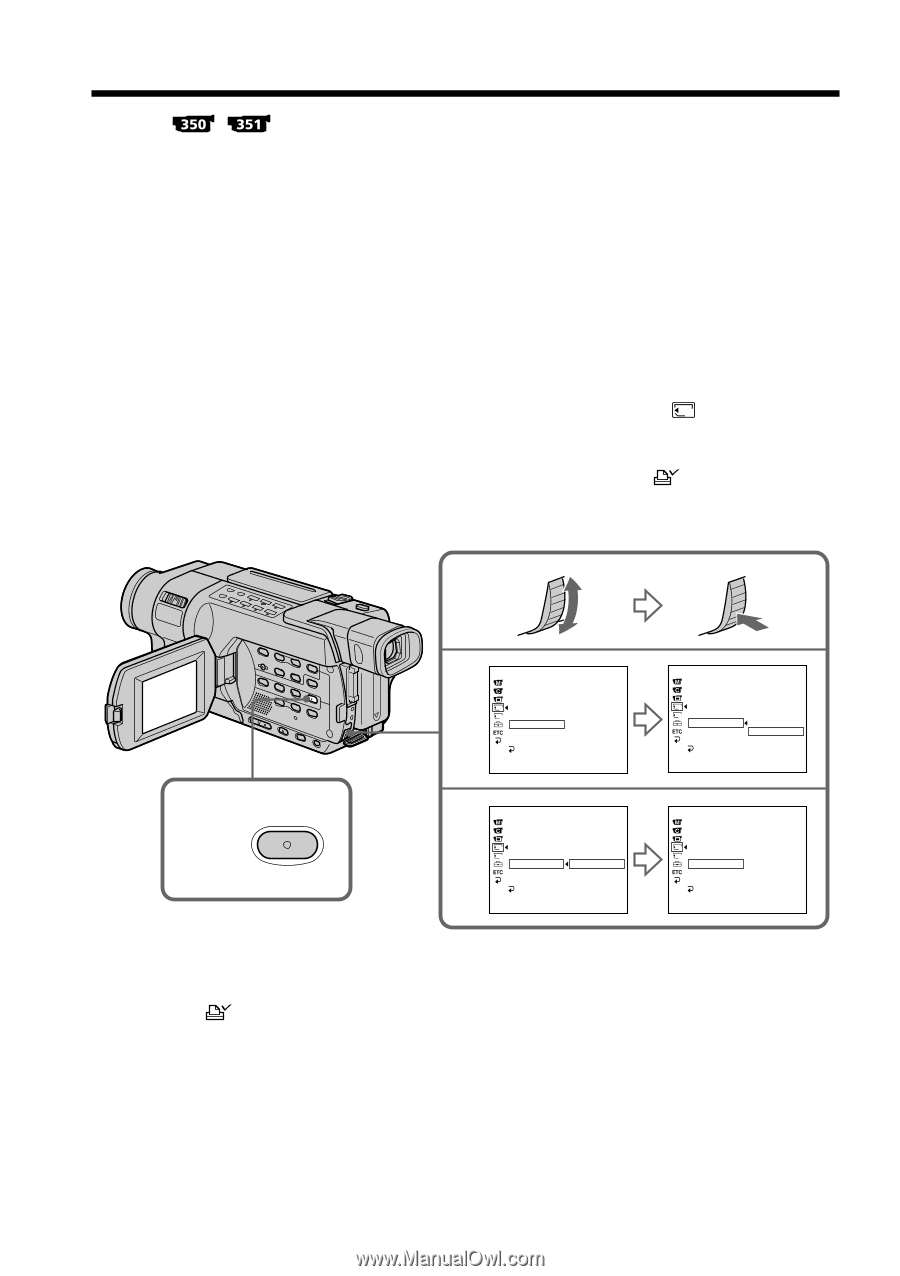
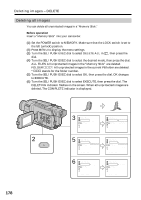
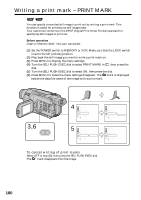
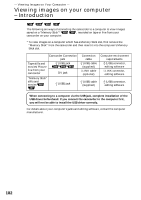
Writing a print mark - PRINT MARK You can specify a recorded still image to print out by writing a print mark. This function is useful for printing out still images later. Your camcorder conforms to the DPOF (Digital Print Order Format) standard for specifying still images to print out. Before operation Insert a "Memory Stick" into your camcorder. (1) Set the POWER switch to MEMORY or VCR. Make sure that the LOCK switch is set to the left (unlock) position. (2) Play back the still image you want to write a print mark on. (3) Press MENU to display the menu settings. (4) Turn the SEL/PUSH EXEC dial to select PRINT MARK in 1 , then press the dial. (5) Turn the SEL/PUSH EXEC dial to select ON, then press the dial. (6) Press MENU to make the menu settings disappear. The mark is displayed beside the data file name of the image with a print mark. 3,6 MENU 4 MEM SET 1 STILL SET MOVIE SET NEW FOLDER 1 REC FOLDER 2 FILE NO. PRINT MARK OFF PROTECT PB FOLDER RETURN [MENU] : END 21/40 5 MEM SET 1 STILL SET MOVIE SET NEW FOLDER 1 REC FOLDER 2 FILE NO. PRINT MARK ON PROTECT OFF PB FOLDER RETURN [MENU] : END 21/40 MEM SET 1 STILL SET MOVIE SET NEW FOLDER 1 REC FOLDER 2 FILE NO. PRINT MARK ON PROTECT OFF PB FOLDER RETURN [MENU] : END 21/40 MEM SET 1 STILL SET MOVIE SET NEW FOLDER 1 REC FOLDER 2 FILE NO. PRINT MARK ON PROTECT PB FOLDER RETURN [MENU] : END 21/40 To cancel writing of print marks Select OFF in step (5), then press the SEL/PUSH EXEC dial. The mark disappears from the image. 180
-
 1
1 -
2
-
3
-
4
-
5
-
6
-
7
-
8
-
9
-
10
-
11
-
12
-
13
-
14
-
15
-
16
-
17
-
18
-
19
-
20
-
21
-
22
-
23
-
24
-
25
-
26
-
27
-
28
-
29
-
30
-
31
-
32
-
33
-
34
-
35
-
36
-
37
-
38
-
39
-
40
-
41
-
42
-
43
-
44
-
45
-
46
-
47
-
48
-
49
-
50
-
51
-
52
-
53
-
54
-
55
-
56
-
57
-
58
-
59
-
60
-
61
-
62
-
63
-
64
-
65
-
66
-
67
-
68
-
69
-
70
-
71
-
72
-
73
-
74
-
75
-
76
-
77
-
78
-
79
-
80
-
81
-
82
-
83
-
84
-
85
-
86
-
87
-
88
-
89
-
90
-
91
-
92
-
93
-
94
-
95
-
96
-
97
-
98
-
99
-
100
-
101
-
102
-
103
-
104
-
105
-
106
-
107
-
108
-
109
-
110
-
111
-
112
-
113
-
114
-
115
-
116
-
117
-
118
-
119
-
120
-
121
-
122
-
123
-
124
-
125
-
126
-
127
-
128
-
129
-
130
-
131
-
132
-
133
-
134
-
135
-
136
-
137
-
138
-
139
-
140
-
141
-
142
-
143
-
144
-
145
-
146
-
147
-
148
-
149
-
150
-
151
-
152
-
153
-
154
-
155
-
156
-
157
-
158
-
159
-
160
-
161
-
162
-
163
-
164
-
165
-
166
-
167
-
168
-
169
-
170
-
171
-
172
-
173
-
174
-
 175
175 -
 176
176 -
 177
177 -
 178
178 -
 179
179 -
 180
180 -
 181
181 -
 182
182 -
 183
183 -
 184
184 -
 185
185 -
186
-
187
-
188
-
189
-
190
-
191
-
192
-
193
-
194
-
195
-
196
-
197
-
198
-
199
-
200
-
201
-
202
-
203
-
204
-
205
-
206
-
207
-
208
-
209
-
210
-
211
-
212
-
213
-
214
-
215
-
216
-
217
-
218
-
219
-
220
-
221
-
222
-
223
-
224
-
225
-
226
-
227
-
228
-
229
-
230
-
231
-
232
-
233
-
234
-
235
-
236
-
237
-
238
-
239
-
240
-
241
-
242
-
243
-
244
-
245
-
246
-
247
-
248
-
249
-
250
-
251
-
252
-
253
-
254
-
255
-
256
-
257
-
258
-
259
-
260
-
261
-
262
-
263
-
264
-
265
-
266
-
267
-
268
 |
 |