Sony TRV318 Operating Instructions - Page 81
Replacing the bulb, Using the built-in light
 |
UPC - 027242620841
View all Sony TRV318 manuals
Add to My Manuals
Save this manual to your list of manuals |
Page 81 highlights
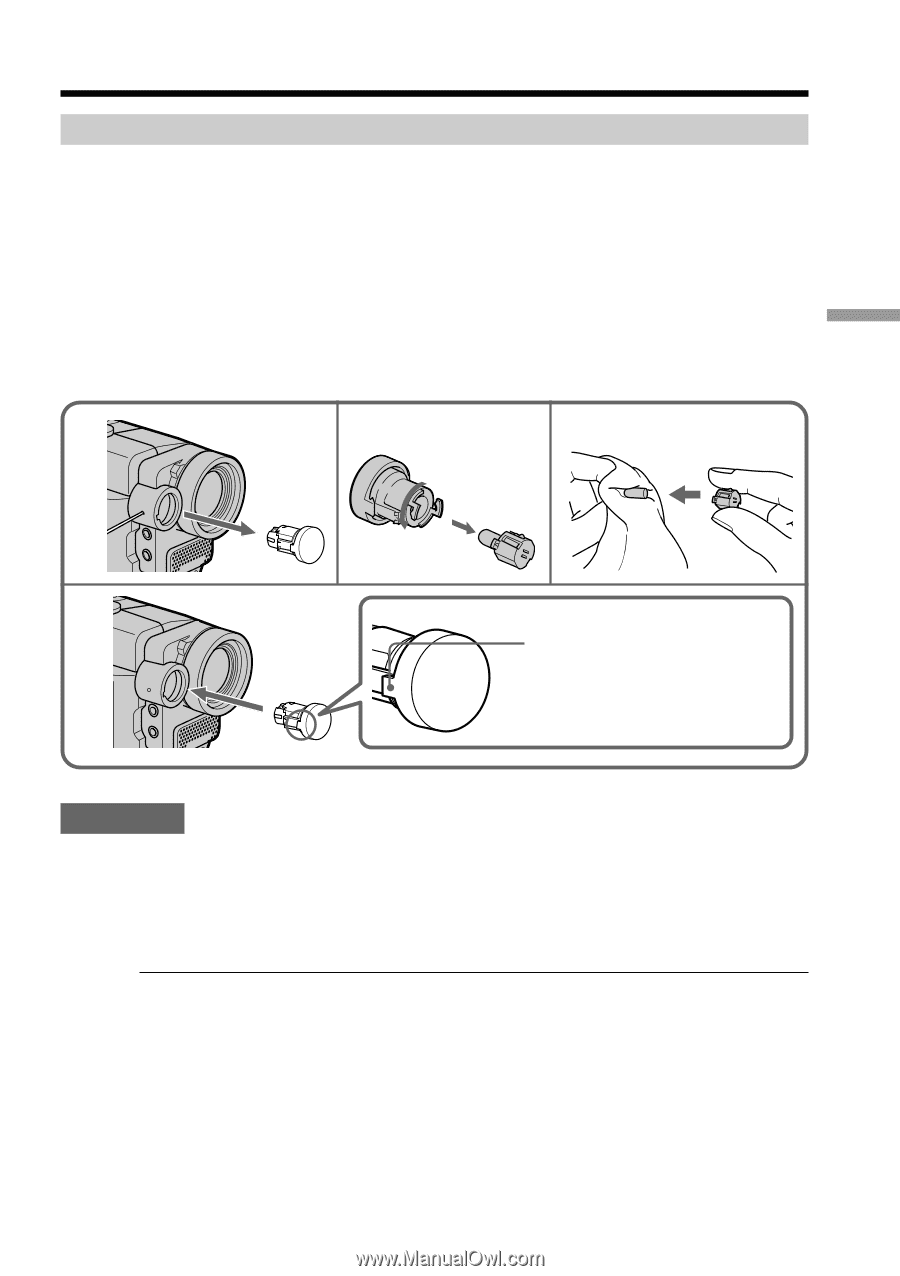
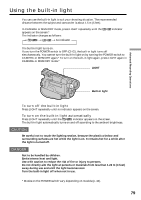
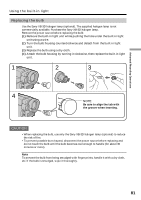
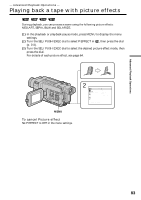
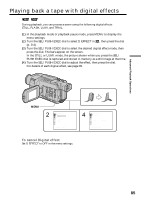
Advanced Recording Operations Using the built-in light Replacing the bulb Use the Sony XB-3D halogen lamp (optional). The supplied halogen lamp is not commercially available. Purchase the Sony XB-3D halogen lamp. Remove the power source before replacing the bulb. (1) Remove the built-in light unit while pushing the hole under the built-in light unit using a wire. (2) Turn the bulb housing counterclockwise and detach from the built-in light unit. (3) Replace the bulb using a dry cloth. (4) Attach the bulb housing by turning it clockwise, then replace the built-in light unit. 1 2 3 4 NOTE Be sure to align the tab with the groove when inserting. CAUTION •When replacing the bulb, use only the Sony XB-3D halogen lamp (optional) to reduce the risk of fire. •To prevent possible burn hazard, disconnect the power source before replacing and do not touch the bulb until the bulb becomes cool enough to handle (for about 30 minutes or more). Note To prevent the bulb from being smudged with finger prints, handle it with a dry cloth, etc. If the bulb is smudged, wipe it thoroughly. 81
-
 1
1 -
2
-
3
-
4
-
5
-
6
-
7
-
8
-
9
-
10
-
11
-
12
-
13
-
14
-
15
-
16
-
17
-
18
-
19
-
20
-
21
-
22
-
23
-
24
-
25
-
26
-
27
-
28
-
29
-
30
-
31
-
32
-
33
-
34
-
35
-
36
-
37
-
38
-
39
-
40
-
41
-
42
-
43
-
44
-
45
-
46
-
47
-
48
-
49
-
50
-
51
-
52
-
53
-
54
-
55
-
56
-
57
-
58
-
59
-
60
-
61
-
62
-
63
-
64
-
65
-
66
-
67
-
68
-
69
-
70
-
71
-
72
-
73
-
74
-
75
-
 76
76 -
 77
77 -
 78
78 -
 79
79 -
 80
80 -
 81
81 -
 82
82 -
 83
83 -
 84
84 -
 85
85 -
 86
86 -
87
-
88
-
89
-
90
-
91
-
92
-
93
-
94
-
95
-
96
-
97
-
98
-
99
-
100
-
101
-
102
-
103
-
104
-
105
-
106
-
107
-
108
-
109
-
110
-
111
-
112
-
113
-
114
-
115
-
116
-
117
-
118
-
119
-
120
-
121
-
122
-
123
-
124
-
125
-
126
-
127
-
128
-
129
-
130
-
131
-
132
-
133
-
134
-
135
-
136
-
137
-
138
-
139
-
140
-
141
-
142
-
143
-
144
-
145
-
146
-
147
-
148
-
149
-
150
-
151
-
152
-
153
-
154
-
155
-
156
-
157
-
158
-
159
-
160
-
161
-
162
-
163
-
164
-
165
-
166
-
167
-
168
-
169
-
170
-
171
-
172
-
173
-
174
-
175
-
176
-
177
-
178
-
179
-
180
-
181
-
182
-
183
-
184
-
185
-
186
-
187
-
188
-
189
-
190
-
191
-
192
-
193
-
194
-
195
-
196
-
197
-
198
-
199
-
200
-
201
-
202
-
203
-
204
-
205
-
206
-
207
-
208
-
209
-
210
-
211
-
212
-
213
-
214
-
215
-
216
-
217
-
218
-
219
-
220
-
221
-
222
-
223
-
224
-
225
-
226
-
227
-
228
-
229
-
230
-
231
-
232
-
233
-
234
-
235
-
236
-
237
-
238
-
239
-
240
-
241
-
242
-
243
-
244
-
245
-
246
-
247
-
248
-
249
-
250
-
251
-
252
-
253
-
254
-
255
-
256
-
257
-
258
-
259
-
260
-
261
-
262
-
263
-
264
-
265
-
266
-
267
-
268
 |
 |