Sony VGX-XL2A User Guide (Computer Component) - Page 174
Network and Internet Connections, Network Connections, Properties, Wireless Networks, Start
 |
View all Sony VGX-XL2A manuals
Add to My Manuals
Save this manual to your list of manuals |
Page 174 highlights
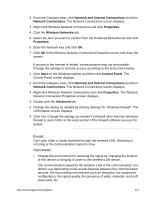
2 From the Category view, click Network and Internet Connections and then Network Connections. The Network Connections screen displays. 3 Right click Wireless Network Connections and click Properties. 4 Click the Wireless Networks tab. 5 Select the item you want to confirm from the Preferred Networks list and click Properties. 6 Enter the Network Key and click OK. 7 Click OK in the Wireless Network Connection Properties screen and close the screen. If access to the internet is limited, communication may not be possible. Change the settings to limit the access according to the instructions below. 1 Click Start on the Windows taskbar and then click Control Panel. The Control Panel screen displays. 2 From the Category view, click Network and Internet Connections and then Network Connections. The Network Connections screen displays. 3 Right click Wireless Network Connections and click Properties. The Wireless Network Connection Properties screen displays. 4 Double click the Advanced tab. 5 Change the setting as needed by clicking Settings for "Windows firewall". The confirmation screen displays. 6 Click Yes. Change the settings as needed if a firewall other than the Windows firewall is used. Refer to the Help section of the firewall software you use for details. Event: Can't play video or audio received through the wireless LAN. Stuttering is occuring or the communication speed is slow. Comment: • Change the environment for receiving the signal by changing the location of this device or bringing it closer to the wireless LAN device. The communication speed for the wireless LAN or the communication conditions vary depending on the actual distance between the communication devices, the surrounding environment such as obstacles, the equipment configuration, the signal quality, the presence of walls, materials, and software used, etc. VGX-XL2A Digital Living System 171
-
 1
1 -
2
-
3
-
4
-
5
-
6
-
7
-
8
-
9
-
10
-
11
-
12
-
13
-
14
-
15
-
16
-
17
-
18
-
19
-
20
-
21
-
22
-
23
-
24
-
25
-
26
-
27
-
28
-
29
-
30
-
31
-
32
-
33
-
34
-
35
-
36
-
37
-
38
-
39
-
40
-
41
-
42
-
43
-
44
-
45
-
46
-
47
-
48
-
49
-
50
-
51
-
52
-
53
-
54
-
55
-
56
-
57
-
58
-
59
-
60
-
61
-
62
-
63
-
64
-
65
-
66
-
67
-
68
-
69
-
70
-
71
-
72
-
73
-
74
-
75
-
76
-
77
-
78
-
79
-
80
-
81
-
82
-
83
-
84
-
85
-
86
-
87
-
88
-
89
-
90
-
91
-
92
-
93
-
94
-
95
-
96
-
97
-
98
-
99
-
100
-
101
-
102
-
103
-
104
-
105
-
106
-
107
-
108
-
109
-
110
-
111
-
112
-
113
-
114
-
115
-
116
-
117
-
118
-
119
-
120
-
121
-
122
-
123
-
124
-
125
-
126
-
127
-
128
-
129
-
130
-
131
-
132
-
133
-
134
-
135
-
136
-
137
-
138
-
139
-
140
-
141
-
142
-
143
-
144
-
145
-
146
-
147
-
148
-
149
-
150
-
151
-
152
-
153
-
154
-
155
-
156
-
157
-
158
-
159
-
160
-
161
-
162
-
163
-
164
-
165
-
166
-
167
-
168
-
 169
169 -
 170
170 -
 171
171 -
 172
172 -
 173
173 -
 174
174 -
 175
175 -
 176
176 -
 177
177 -
 178
178 -
 179
179 -
180
-
181
-
182
 |
 |
