Sony VPCL212FX VPCL1 Series Optical Disk Drive Replacement Instructions - Page 2
VPCL1 Series Optical Disk Drive, Replacement Instructions
 |
UPC - 027242820449
View all Sony VPCL212FX manuals
Add to My Manuals
Save this manual to your list of manuals |
Page 2 highlights
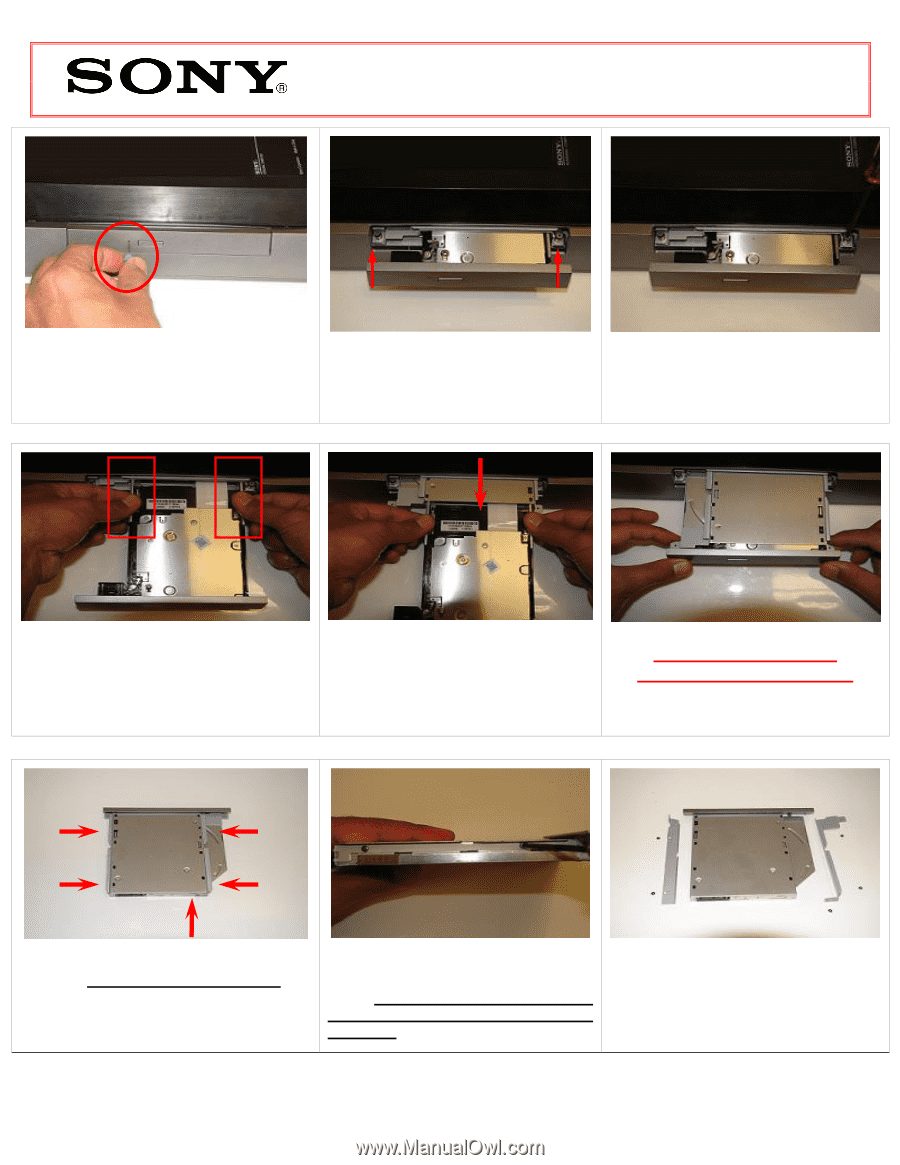
VPCL1 Series Optical Disk Drive Replacement Instructions Step 3. Locate ODD manual eject hole. Step 4. Identify the (2) screws securing Step 5. Using the included magnetic Manually eject the ODD using a paper clip the ODD to the computer. screwdriver, loosen the (4) screws to eject via eject hole. securing the ODD Assembly. Step 6. Pull ODD tray all the way out to Step 7. Once ODD is released from expose side brackets. Use these brackets to connector continue to slide ODD help release ODD from connector. assembly out. CLOSE ODD BEFORE COMPETELY REMOVING. Step 8. After the ODD is completely removed, identify the (5) side screws that mount the HDD brackets to the HDD. Step 9. Holding the edge of the HDD, remove each screw and set the screw aside. These screws will be used to mount the HDD brackets onto the new HDD. Step 10. All (5) screws and brackets should now be removed from old HDD. P/N 989200673 Rev. A 2/4
-
 1
1 -
 2
2 -
 3
3 -
 4
4
 |
 |